- File sharing over a network in Windows 10
- Unable to access shared folder on Windows 10 [Super Guide]
- What to do if shared folder is not accessible on Windows 10?
- 1. Check the availability of the folder sharing setup on your PC
- 2. Enable network discovery
- 3. Check your PC’s credentials
- 4. Enable all Network services
- 5. Run the Shared Folder Troubleshooter
- Как создать общую сетевую папку в Windows 10
- Выбор компьютера для расшаривания сетевой папки
- Как узнать какая у вас версия Windows
- Дополнительные параметры для выбора компьютера:
- Создание сетевой папки
- Подключение сетевого диска
- Ограничение доступа к части сетевой папки
- Создаем учетные записи пользователей на компьютере с сетевой папкой
- Создаем защищенную сетевую папку и открываем доступ пользователям
- Отменяем наследование правил защищенной сетевой папки в Win 10
File sharing over a network in Windows 10
In Windows 10, some features of file and folder sharing over a network have changed, including the removal of HomeGroup. Read on for answers to common questions about other changes to file and folder sharing in Windows 10.
To share a file or folder in File Explorer, do one of the following:
Right-click or press a file, select Give access to > Specific people.

Select a file, select the Share tab at the top of File Explorer, and then in the Share with section select Specific people.

If you select multiple files at once, you can share them all in the same way. It works for folders, too—share a folder, and all files in it will be shared.
To stop sharing in File Explorer, do one of the following:
Right-click or press a file or folder, then select Give access to > Remove access.

Select a file or folder, select the Share tab at the top of File Explorer, and then in the Share with section select Remove access.

File Explorer shows the «Remove access» option («Stop sharing» in older versions of Windows 10) for all files, even those that aren’t being shared over a network.
Open File Explorer, then type \\localhost into the address bar.
Note: When you’ve shared a file from a folder in your user profile and you go to \\localhost, you’ll see your user profile and all its files there. This doesn’t mean that all of your files are shared—just that you have access to all your own files.
If you open File Explorer, go to Network, and see an error message («Network discovery is turned off….»), you’ll need to turn on Network discovery to see devices on the network that are sharing files. To turn it on, select the Network discovery is turned off banner, then select Turn on network discovery and file sharing.

To troubleshoot problems with sharing files or folders, follow the steps below on all computers from which you’re trying to share.
Make sure the computers are on the same network. For example, if your computers connect to the internet through a wireless router, make sure they all connect through the same wireless router.
If you’re on a Wi-Fi network, set it to Private. To find out how, read Make a Wi-Fi network public or private in Windows 10.
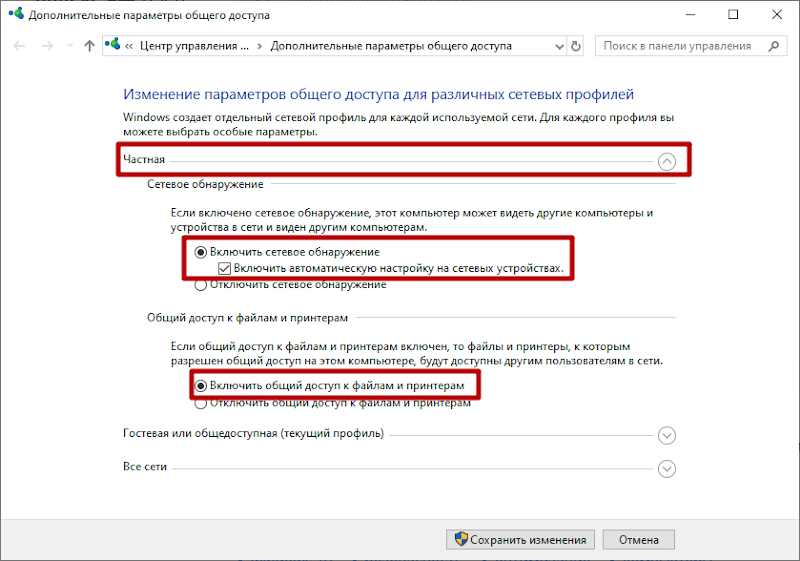
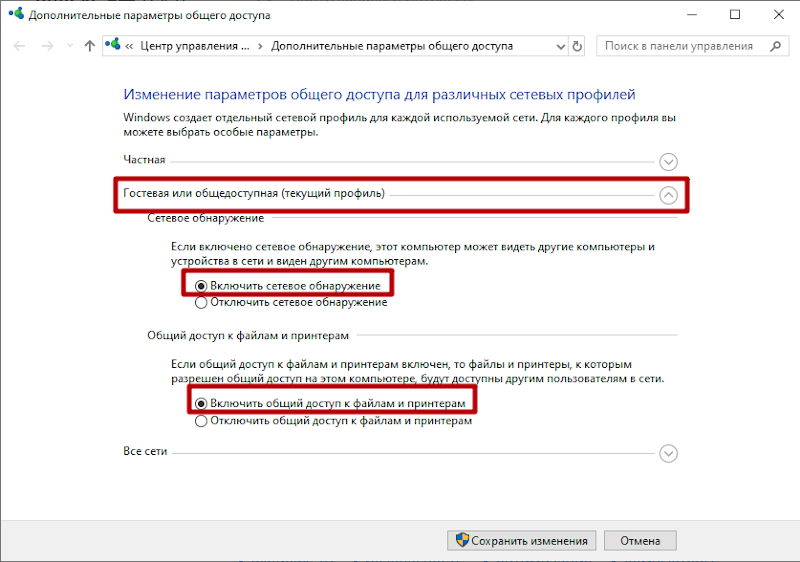
Turn on network discovery and file and printer sharing, and turn off password protected sharing.
Select the Start button, then select Settings > Network & Internet , and on the right side, select Sharing options.
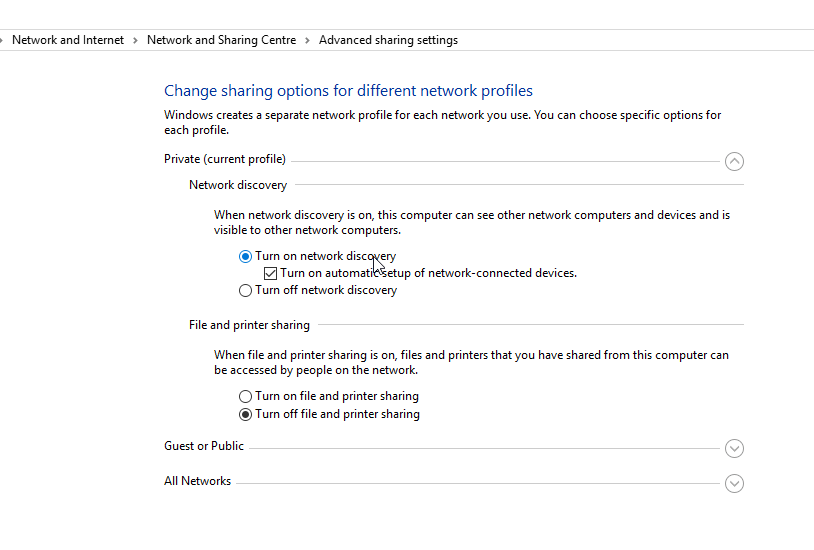
Under Private, select Turn on Network discovery and Turn on file and printer sharing.
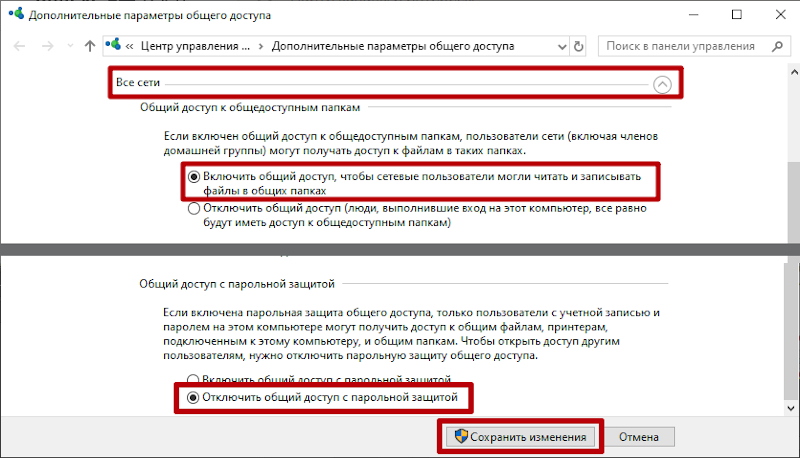
Under All Networks, select Turn off password protected sharing.
Make sharing services start automatically.
Press the Windows logo key + R.
In the Run dialog box, type services.msc, and then select OK.
Right-click each of the following services, select Properties, if they’re not running, select Start, and next to Startup type, select Automatic:
Unable to access shared folder on Windows 10 [Super Guide]


Many Windows 10 users reported that Windows is unable to access the shared folder on their PC. This can be an issue, and in today’s article we’re going to show you how to fix this problem.
What can I do if I’m unable to access shared folder on Windows 10? First thing that you should do in order to fix this problem is to enable folder sharing and network discovery. To do that, just check your network settings window. If the problem is still there, make sure that the required services are running and are set to start automatically.
What to do if shared folder is not accessible on Windows 10?
- Check the availability of the folder sharing setup on your PC
- Enable network discovery
- Check your PC’s credentials
- Enable all Network services
- Run the Shared Folder Troubleshooter
1. Check the availability of the folder sharing setup on your PC
If you are unable to access a shared folder on Windows 10, the first thing to do is to check your system, to ascertain if the File Sharing setup is available. Normally, this setup is built-in on Windows; thus, it is usually present.
To run this check, follow the guidelines below:
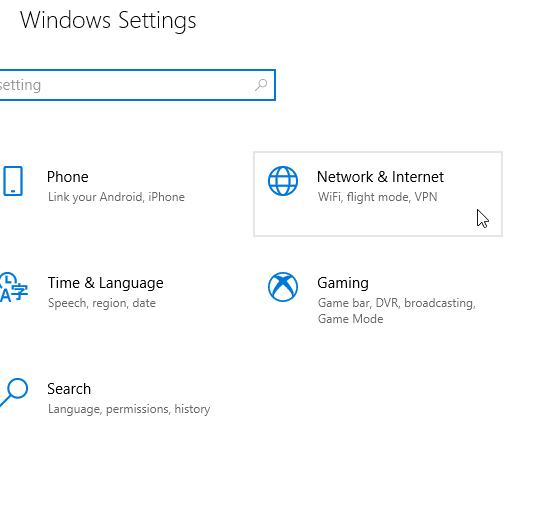
- Open the Start Menu and click on Settings.

- Select Network and Internet.
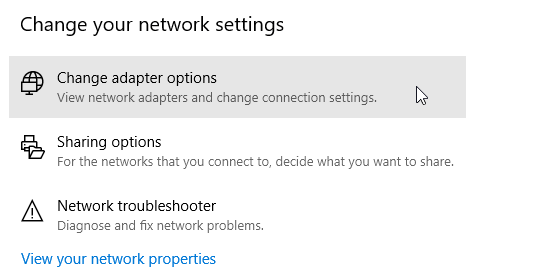
- Under Network and Internet, select Network and Sharing Center.
- Now click on Change adapter settings.
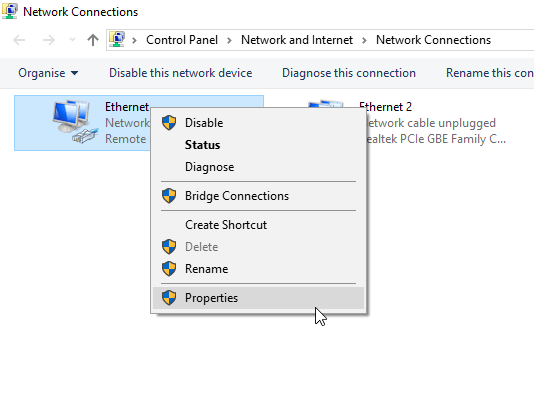
- Locate your network connection, right-click on it and select Properties.
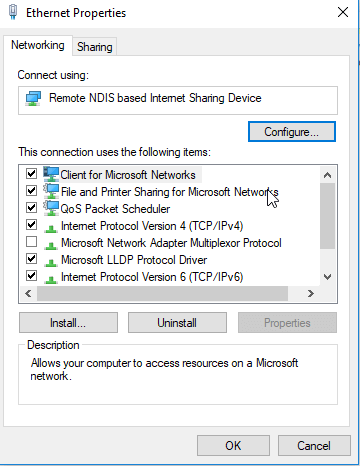
- Navigate to the This connection uses the following items area and then locate the File and Printer Sharing for Microsoft Networks.
- If the option is available, simply check the box next to it; otherwise, proceed.
- Click on the Install.
- Afterward, click OK.
- Exit the window and restart your PC.

If the problem persists, you can try the next fix.
2. Enable network discovery
In case you are experiencing the Windows 10 unable to access shared folder error, it is recommended you check if your PC‘s network is discoverable by other computers. To configure Network discovery on Windows 10, follow the simple steps below:
- Open the Settings app.
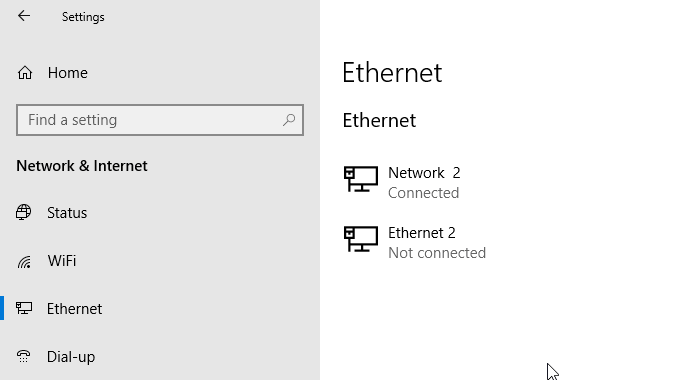
- Select Network and Internet.
- In the left panel, click either Wi-Fi or Ethernet (depending on your connection type).
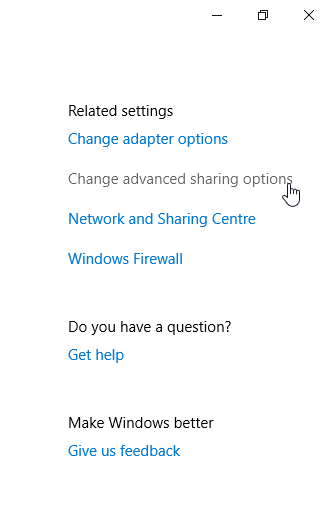
- Under the Related Settings menu, click on Change advanced sharing options.
- Under Advanced options, check if the Make this PC discoverable option is enabled ( On). If it is not enabled (Off), simply enable it by toggling the button to On.
- Then click on Save changes
If the problem persists after making your PC discoverable, there is obviously another factor in play. Thus, you can try the next solution.
3. Check your PC’s credentials
If you’re unable to access the shared folder on your PC, it’s possible that you have issues with credentials. However, you can fix that by doing the following:
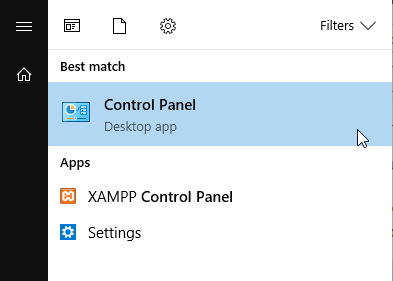
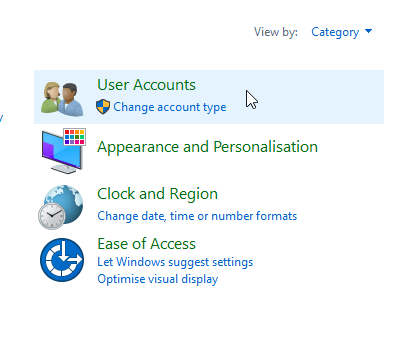
- Open the Start Menu and search for control panel.
- Select Control Panel.
- Navigate to User Accounts and click on it.
- Under User Accounts, locate and select Credential Manager.
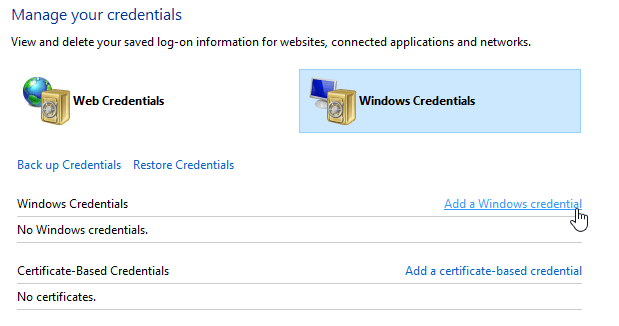
- Locate and click on Windows Credentials.
- Select Add a Windows credential.
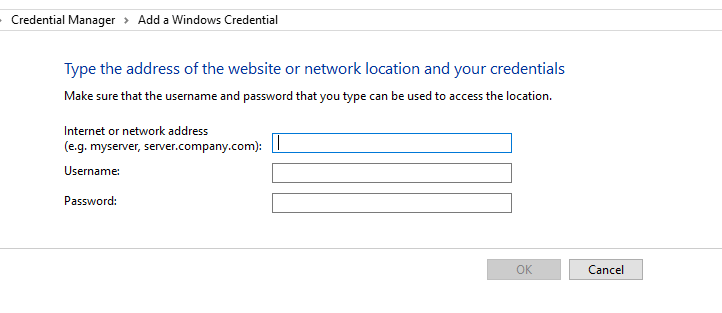
- Add other relevant details like Admin username, password and hosting PC‘s IP.
- Save changes by clicking OK.


If the problem persists after running this, you can try the next solution.
4. Enable all Network services
If you’re unable to access shared folder on your PC, ensure that you enable all relevant network services on your PC. Below is a list of relevant services that should be enabled and run automatically in order for file sharing to work:
- IPv6
- SSDP Discovery
- Publication
- Function Discovery Provider
- DNS Client
- Peer Networking Group
- Host
- Function Discovery Result
- UPnP Device Host
- Home Group Provider
- Home Group Listener.
If the problem persists, you can try the next solution.
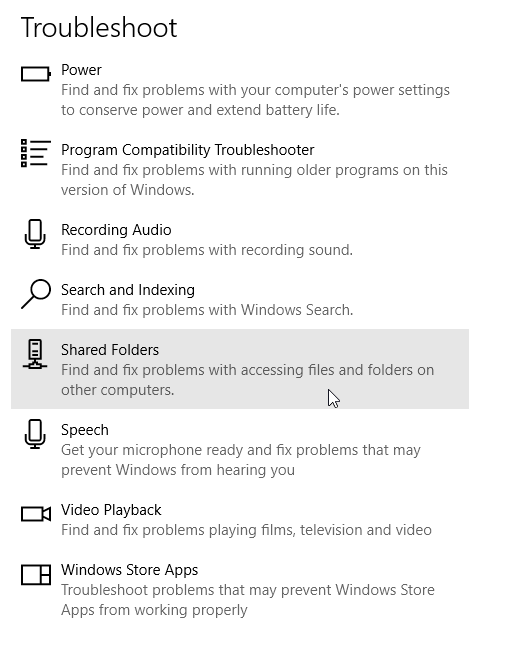
5. Run the Shared Folder Troubleshooter
There is a designated troubleshooter on Windows 10 that is specially designed for fixing errors such as this. If you’re still unable to access shared folders, running the troubleshooter might be helpful. You can do that by following these steps:
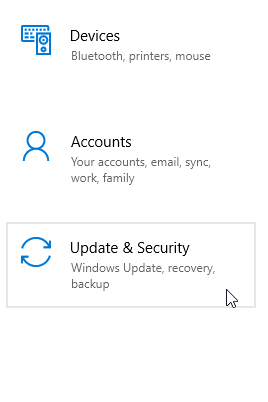
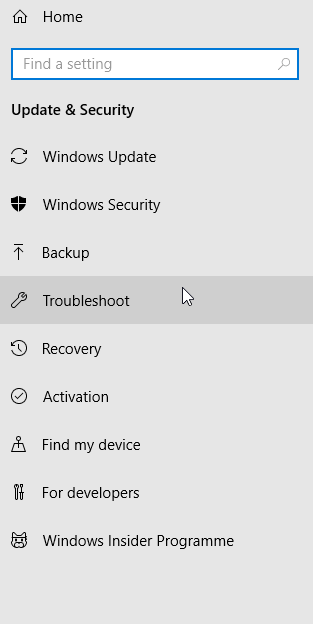
- Go to Settings. Locate and click on Update & Security.
- Select Troubleshoot > Shared Folders.
- Follow the on-screen instructions to finish up the process.
- Exit program and restart PC.
There you go, these are a couple of solutions that might help you fix Windows 10 unable to access shared folder. Feel free to let us know in the comments section if these solutions helped you fix the problem.
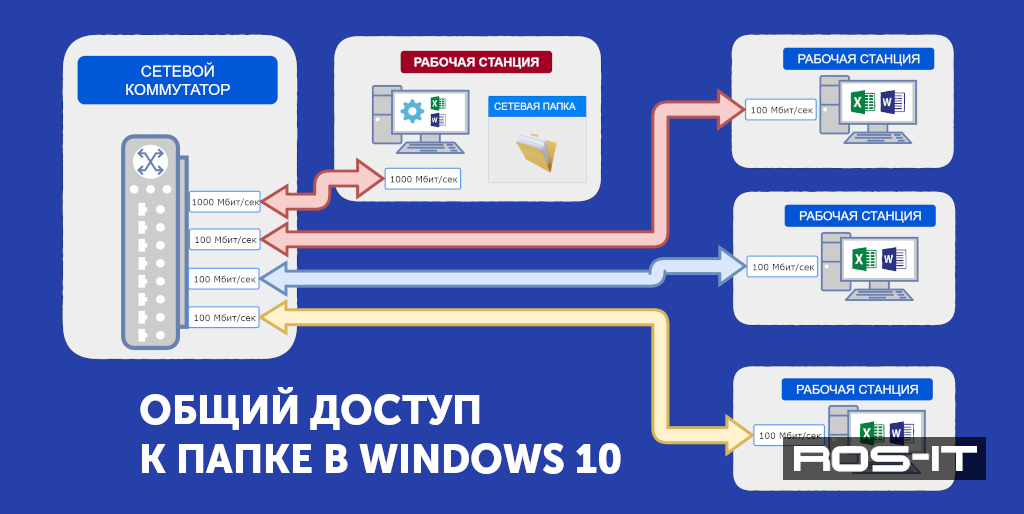
Как создать общую сетевую папку в Windows 10
- Обслуживание компьютеров в офисе / Локальные сети в офисе
- 25499
- 0
Выбор компьютера для расшаривания сетевой папки
Сперва следует решить на каком компьютере стоит делать сетевую папку. Если вы планируете открыть доступ для 20 или менее компьютеров, то можете переходить к следующему шагу.
Если в вашей сети больше 20 компьютеров, то вам стоит поискать может у вас есть Professional версия.
Поясню, MS Windows Home edition позволяет предоставлять доступ к сетевой папке не больше 20 компьютерам (пользователям). Для большего количества требуется версия Professional или Server.
Как узнать какая у вас версия Windows
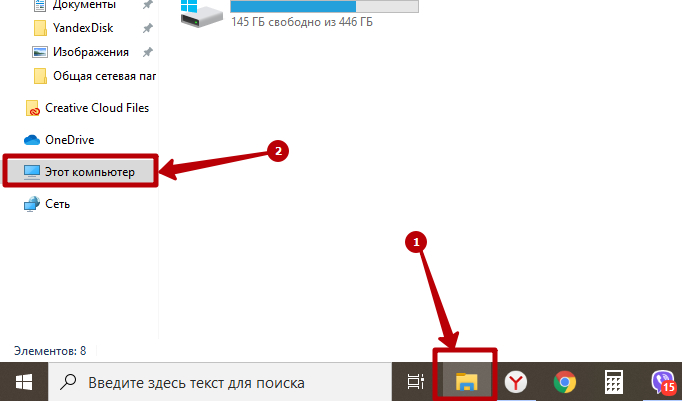
- Заходим в любую папку.
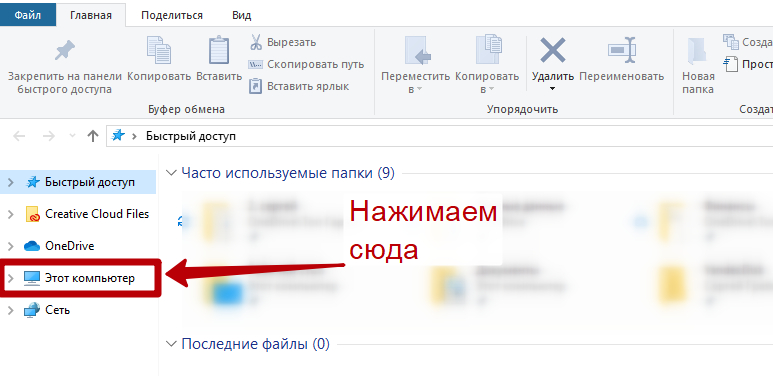
- Нажимаем на значок «мой компьютер» в области навигации (слева).
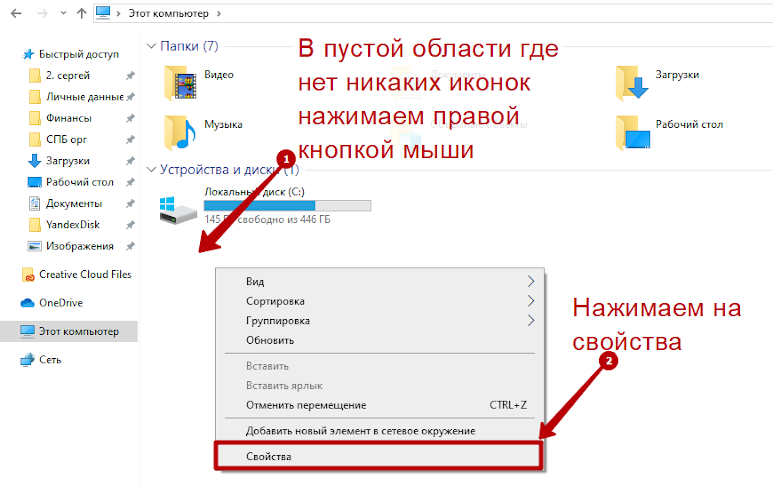
- В основной области в месте, где нет никаких иконок нажимаем правой кнопкой мыши и в раскрывшемся меню выбираем пункт «Свойства».
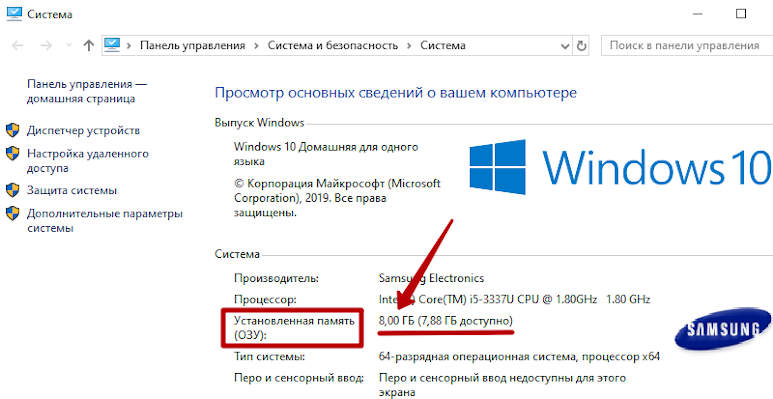
- В открывшемся окне будет написано полное название и версия вашей операционной системы.
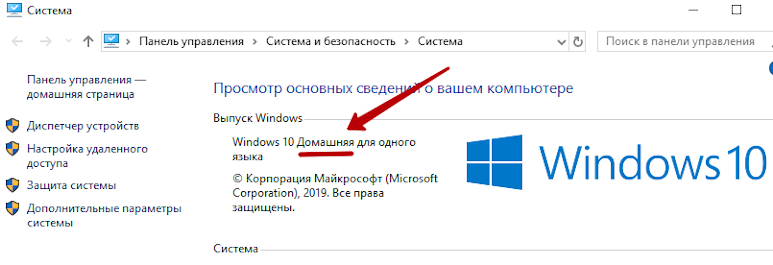
Проверяем все компьютеры и если есть компьютер с версией Professional, то делаем сетевую папку на нем.
Дополнительные параметры для выбора компьютера:
- Это должен быть компьютер с самым большим объёмом оперативной памяти. Как ее проверить? Выполняем все пункты из раздела как узнать какая у вас версия Windows, но в открывшемся окне смотрим чуть ниже пункт «Установленная память (ОЗУ)»
Создание сетевой папки
Если у вас на компьютере есть два жёстких диска (ну или 2 локальных диска, например «диск C:» и «диск D:») то лучше использовать не тот на котором установлен Windows, и на котором больше свободного места. Не забудьте оценить сколько гигабайт памяти вам понадобится для работы в течение следующего года и позаботиться о том, чтобы на выбранном диске её было достаточно.
- На выбранном диске создаем обычную папку, ее можно назвать «Сетевая папка», «Сервер» или как вам вздумается.
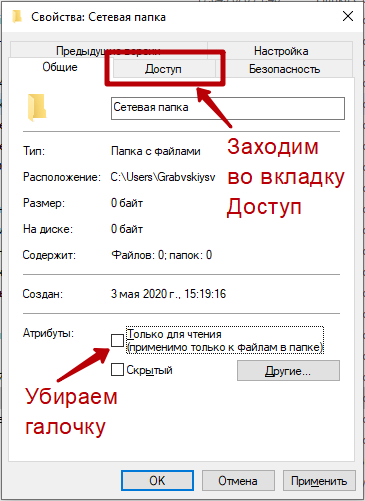
- Нажимаем на ней правой кнопкой мыши и заходим в «Свойства».
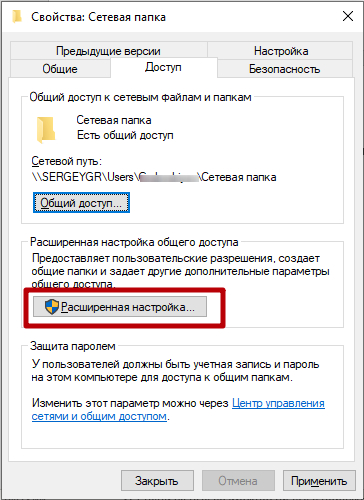
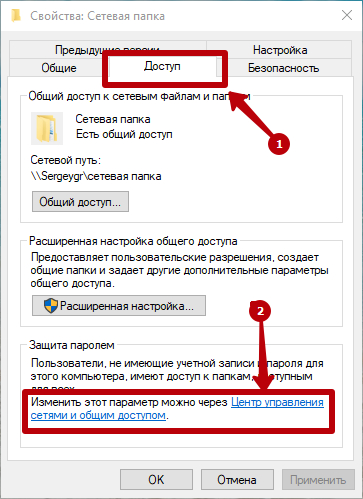
- В открывшемся окне убираем галочку на пункте «Только для чтения» и переходим во вкладку «Доступ». Далее нажимаем на расширенная настройка.

Сетевая папка отрыта! Но как в нее попасть!?
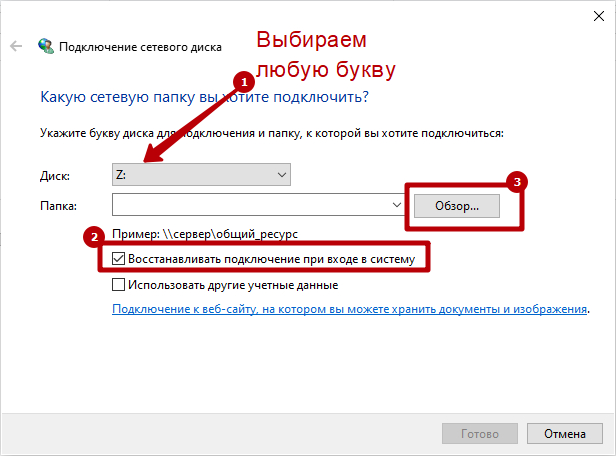
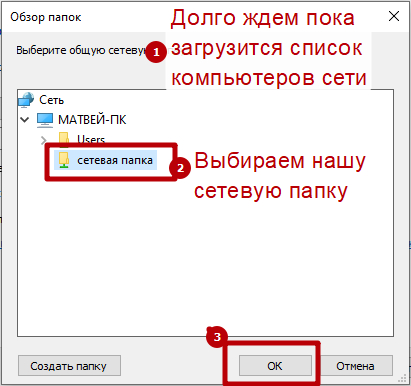
Подключение сетевого диска
В сетевую папку вы можете попасть, перейдя в любую папку, далее в левом боковом меню найти иконку сеть, нажать на нее из появившегося списка компьютеров найти компьютер на котором находится наша сетевая папка, открыть его, и перейти в сетевую папку. Можно даже сделать ярлык этой сетевой папки на рабочем столе. Но работать она будет не очень стабильно.
Для стабильной работы сетевой папки рекомендую на всех компьютера, где должен быть доступ к ней, подключить сетевой диск от этой папки. Это обеспечит более надежное соединение.
- Заходим в мой компьютер.
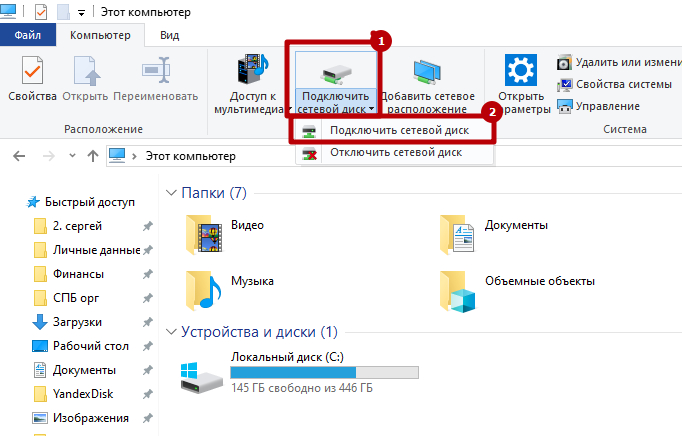
Сетевой диск готов!
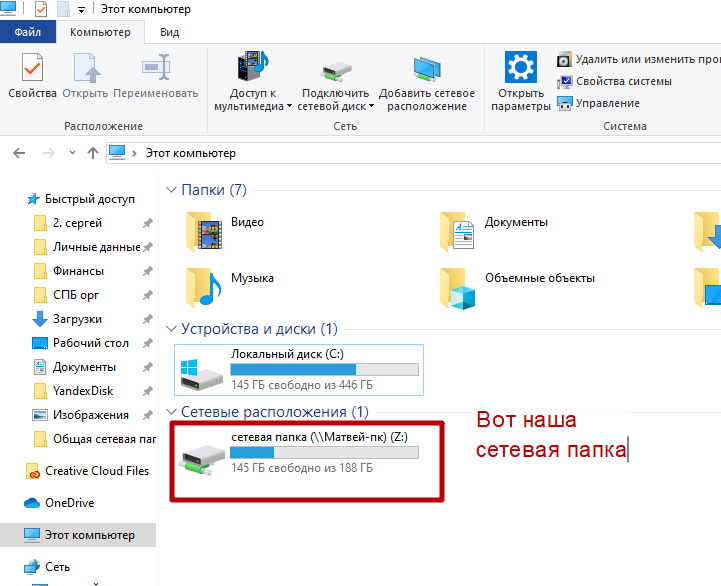
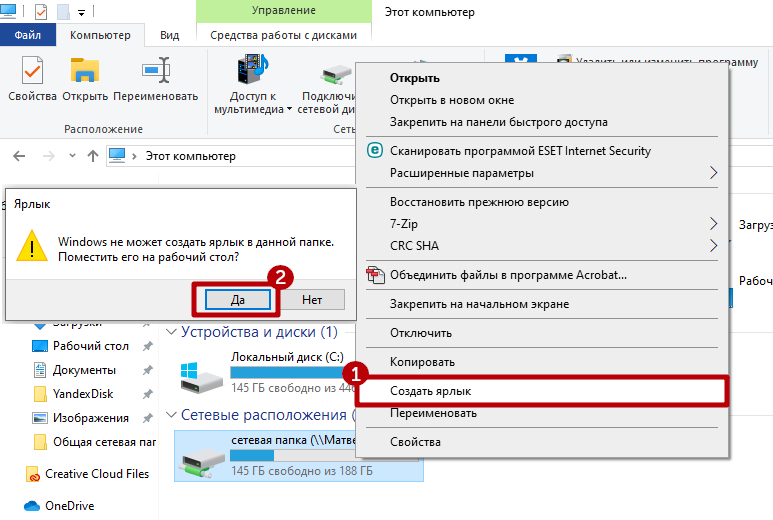
Теперь вы найдете ярлык сетевой папки на рабочем столе.
Процедуру повторяем на всех компьютерах, у которых должен быть доступ к папке.
Если кто-то подключит свой компьютер к вашей сети, он будет иметь доступ к этой сетевой папке. Для этого ему надо будет воткнуть провод в ваш сетевой коммутатор.
Ограничение доступа к части сетевой папки
Поясню. На каждом компьютере есть учетная запись. Вы можете сделать так, чтобы некоторые папки внутри сетевой папки были открыты для доступа только с определенных компьютеров (а точнее с конкретных учетных записей пользователей). Если кто-то подключится к вашей локальной сети, он не сможет в нее попасть. Или сотрудник (компьютер) которому вы не дали доступ к этой папке, тоже не сможет в нее попасть.
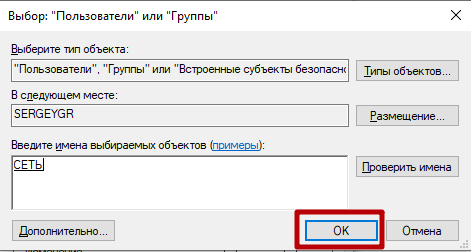
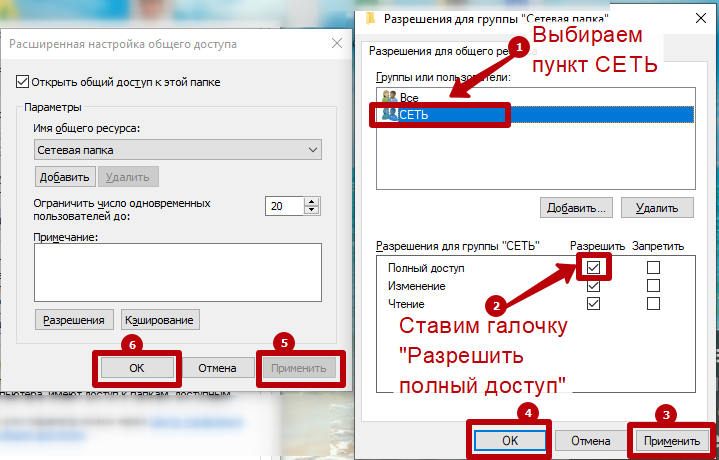
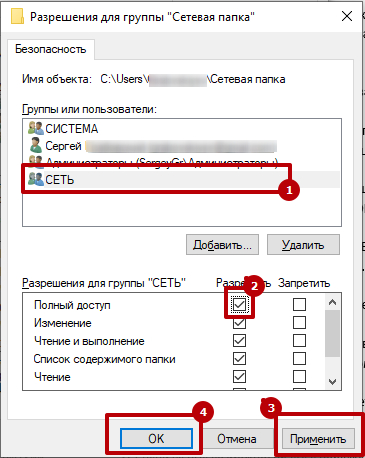
Принцип такой-же, как и при создании обычной сетевой папки. В случае с открытой сетевой папкой мы открываем доступ для группы СЕТЬ, в которую входят все компьютеры. В данном случае мы открываем доступ только для конкретных пользователей. Начнем.
Создаем учетные записи пользователей на компьютере с сетевой папкой
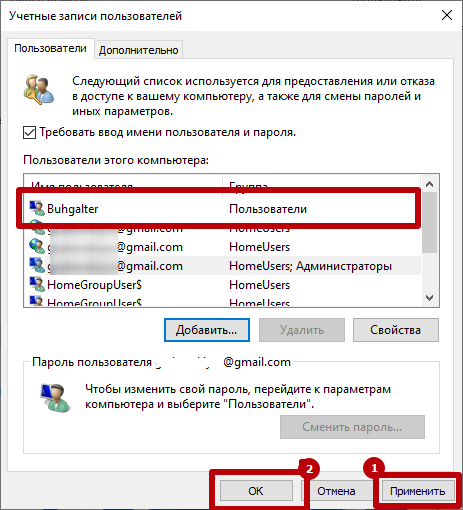
Первое что нам надо сделать, это переписать на листок бумаги имена учетных записей и пароли с компьютеров, которым мы хотим дать доступ к защищенной папке.
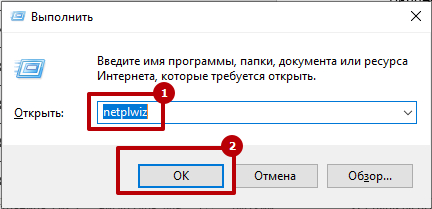
- Включаем компьютер, на котором должен быть доступ к этой папке. Нажимаете на клавиатуре комбинацию Win+R, вбиваете команду кnetplwiz и нажимаете на «ОК».
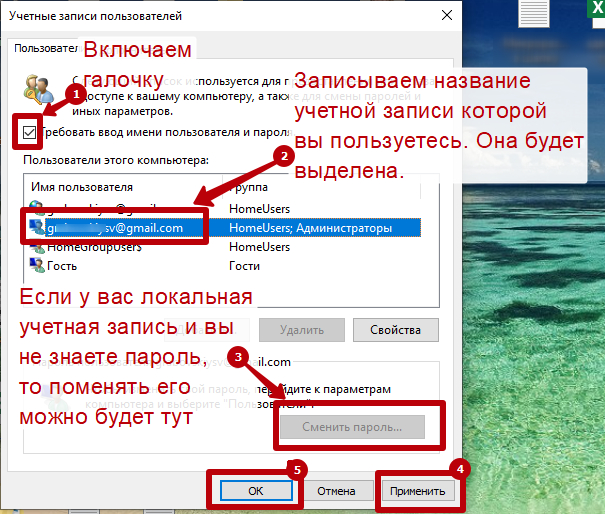
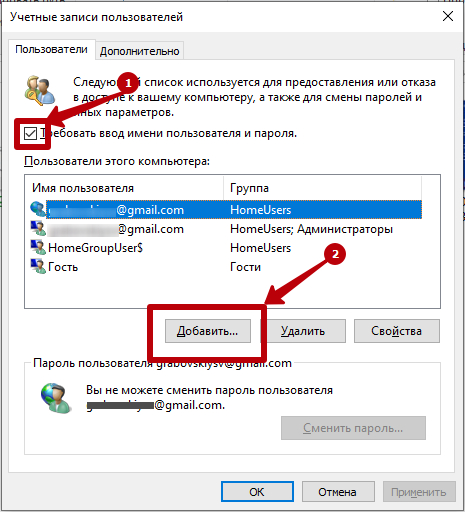
Пароль обязательно надо проверить, выйдя из системы и войдя при помощи этого пароля.
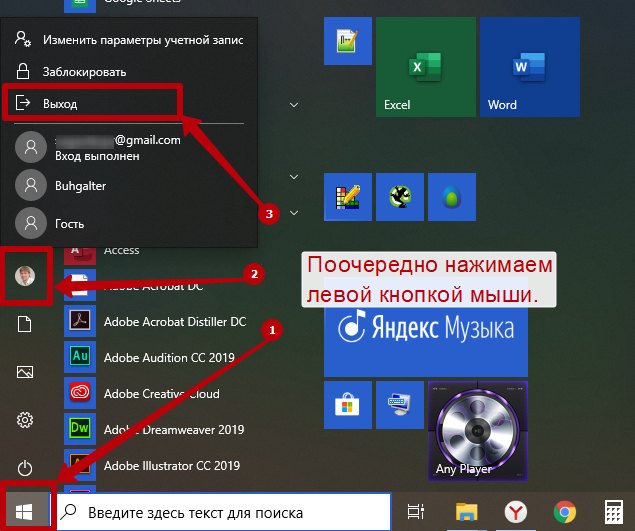
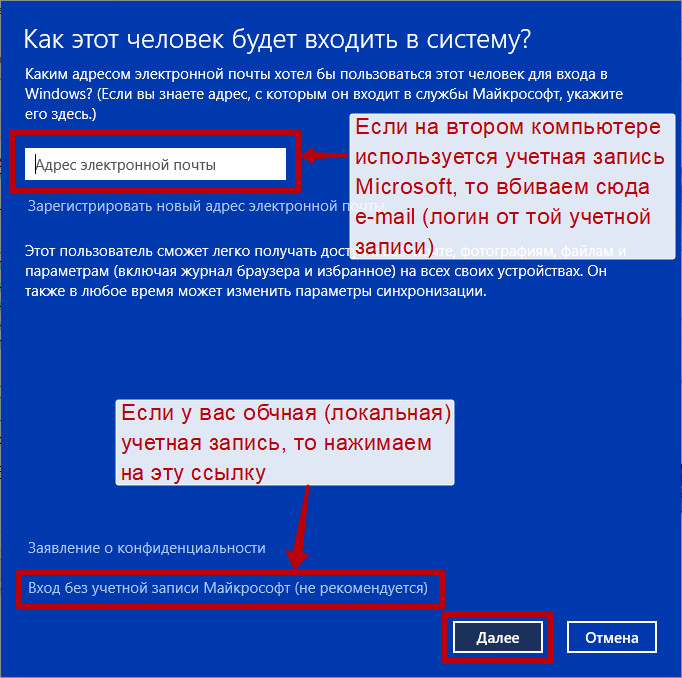
Если на этом шаге вы добавили учетную запись Microsoft (в качестве пользователя у вас e-mail) , то вам обязательно необходимо произвести вход в эту учетную запись на этом компьютере, иначе у этого пользователя (на другом компьютере, которому вы открываете доступ) не появится прав зайти в секретную сетевую папку.
Создаем защищенную сетевую папку и открываем доступ пользователям
- В сетевой папке создаем обычную папку . В нашем случае назовем ее «Финансы».
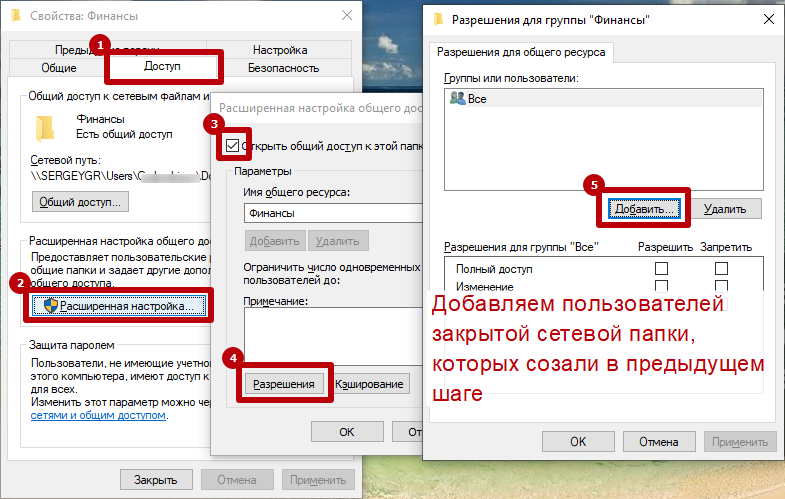
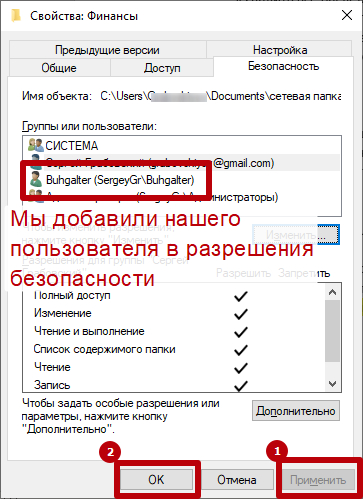
- После того как мы создали всех необходимых пользователей на компьютере с секретной сетевой папкой, надо раздать этим пользователям права на посещение и редактирование секретной папки. Переходим к нашей папке, в моем случае это «Финансы». Нажимаем на ней правой кнопкой мыши и выбираем пункт «Свойства» .
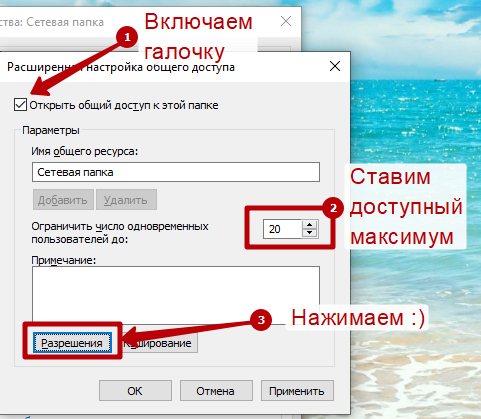
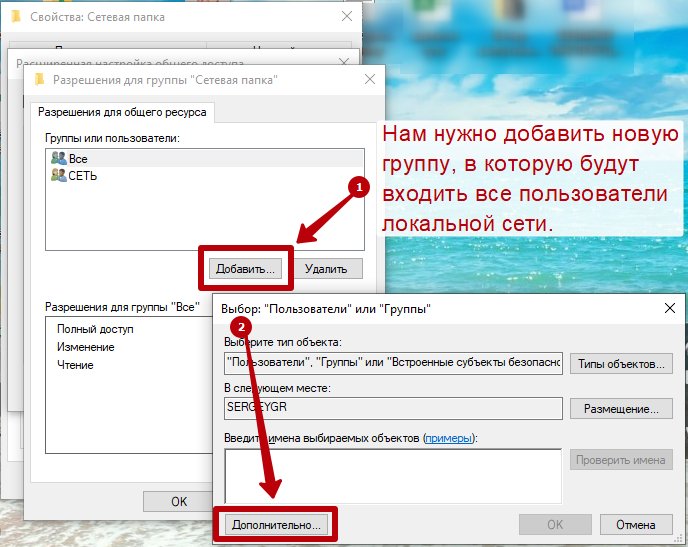
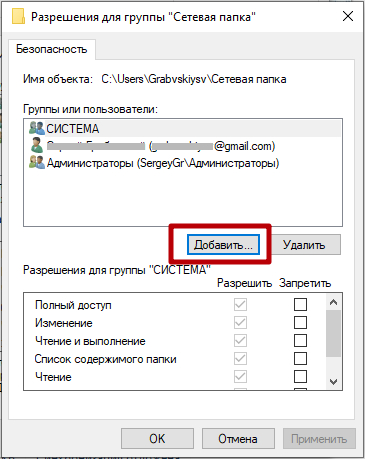
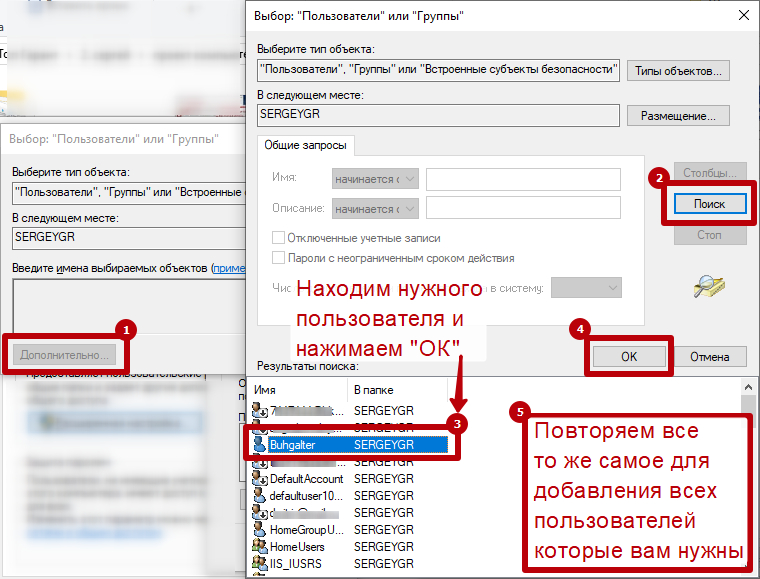
- Переходим во вкладку доступ, нажимаем на кнопку расширенная настройка. В открывшемся окне включаем галочку «Открыть общий доступ к этой папке» и нажимаем на кнопку «Разрешения». В окне «Разрешения для группы…» нажимаем на кнопку добавить.

Отменяем наследование правил защищенной сетевой папки в Win 10
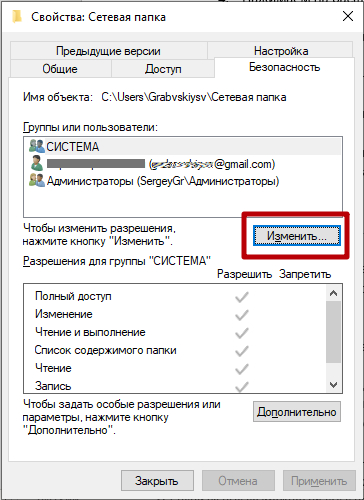
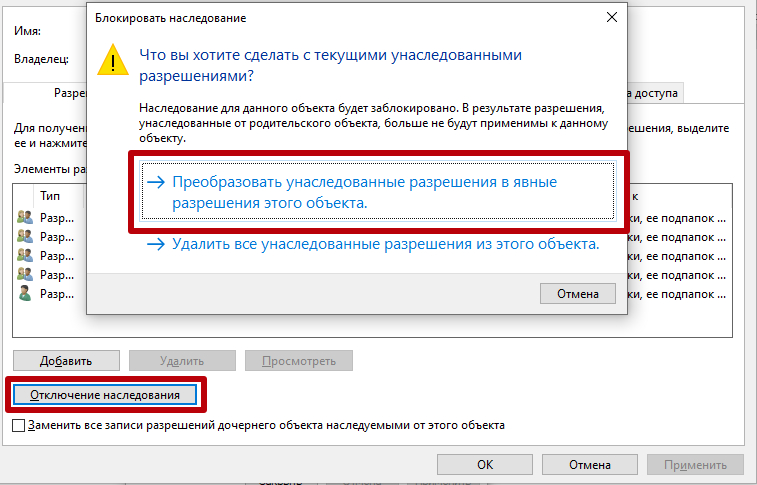
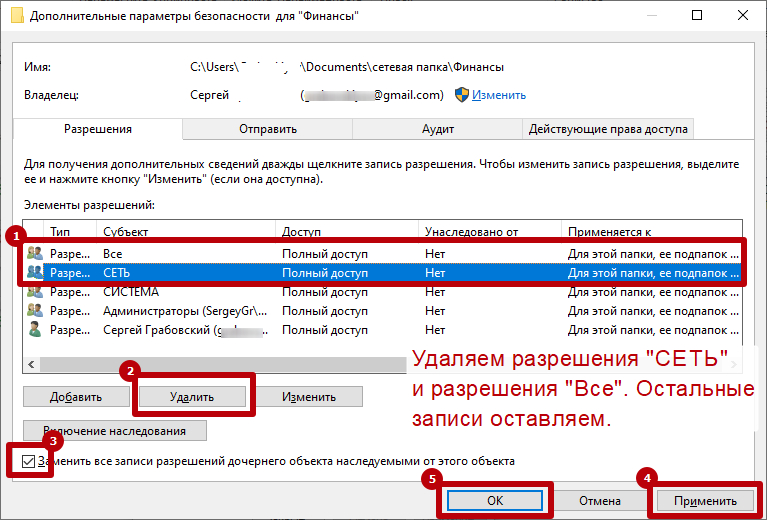
Мы открыли доступ для нашей новой паки конкретным пользователям, но наша папка финансы находится внутри сетевой папки, в которой мы дали разрешение всем пользователям сети (группой «СЕТЬ») на чтение и редактирование вложенных в нее папок и файлов. Таким образом наша папка «Финансы» наследует все правила от папки «Сетевая папка». Надо отключить это наследование.
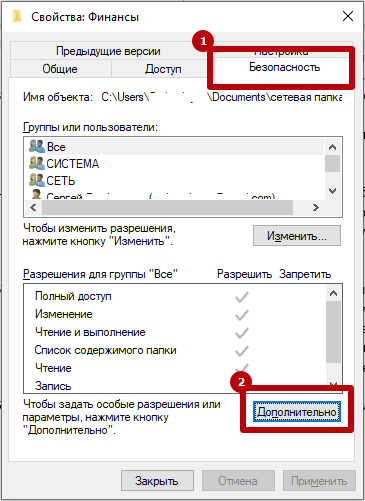
- В окне свойства нашей сетевой папки переходим во вкладку Безопасность. Нажимаем на кнопку дополнительно.
Защищенная сетевая папка готова! Вы можете попасть в нее войдя в подключенный сетевой диск нашей обычной сетевой папки, или подключить отдельный сетевой диск для более быстрого доступа.


