- Viewing and Editing Memory in WinDbg
- Debugger Command Window
- Opening a Memory Window
- Using a Memory Window
- Memory Options Dialog Box
- Additional Information
- How to get full PC memory specs (speed, size, type, part number, form factor) on Windows 10
- How to determine RAM details using Command Prompt
- Check memory manufacturer
- Check memory part number
- Our Pick
- Corsair Vengeance LPX DDR4 16GB Kit
- Check memory serial number
- Check memory capacity
- Determine capacity per memory module
- Determine total system memory capacity
- Check memory speed
- Check memory type
- Supported memory types
- Check memory form factor
- Supported memory form factors
- Check all memory details
- More Windows 10 resources
- The Dell XPS 15 is our choice for best 15-inch laptop
- Halo: MCC’s live service elements make it better, not worse
- Microsoft’s Surface Duo is not ‘failing up’
- These are the best PC sticks when you’re on the move
Viewing and Editing Memory in WinDbg
In WinDbg, you can view and edit memory by entering commands or by using a Memory window.
Debugger Command Window
You can view memory by entering one of the Display Memory commands in the Debugger Command window. You can edit memory by entering one of the Enter Values commands in the Debugger Command window. For more information, see Accessing Memory by Virtual Address and Accessing Memory by Physical Address.
Opening a Memory Window
To open a Memory window, choose Memory from the View menu. (You can also press ALT+5 or select the Memory button ( ) on the toolbar. ALT+SHIFT+5 closes the active Memory window.)
The following screen shot shows an example of a Memory window.
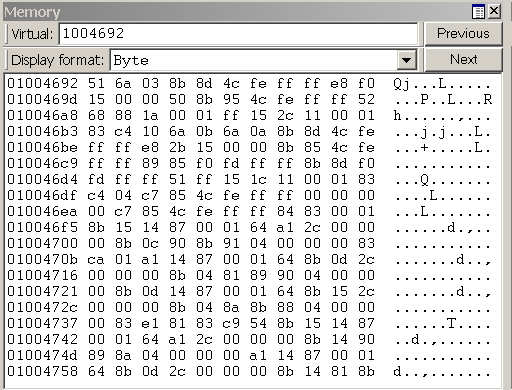
Using a Memory Window
The Memory window displays data in several columns. The column on the left side of the window shows the beginning address of each line. The remaining columns display the requested information, from left to right. If you select Bytes in the Display format menu, the ASCII characters that correspond to these bytes are displayed in the right side of the window.
NoteВ В By default, the Memory window displays virtual memory. This type of memory is the only type of memory that is available in user mode. In kernel mode, you can use the Memory Options dialog box to display physical memory and other data spaces. The Memory Options dialog box is described later in this topic.
In the Memory window, you can do the following:
To write to memory, select inside the Memory window and type new data. You can edit only hexadecimal data—you cannot directly edit ASCII and Unicode characters. Changes take effect as soon as you type new information.
To see other sections of memory, use the Previous and Next buttons on the Memory window toolbar, or press the PAGE UP or PAGE DOWN keys. These buttons and keys display the immediately preceding or following sections of memory. If you request an invalid page, an error message appears.
To navigate within the window, use the RIGHT ARROW, LEFT ARROW, UP ARROW, and DOWN ARROW keys. If you use these keys to move off of the page, a new page is displayed. Before you use these keys, you should resize the Memory window so that it does not have scroll bars. This sizing enables you to distinguish between the actual page edge and the window cutoff.
To change the memory location that is being viewed, enter a new address into the address box at the top of the Memory window. Note that the Memory window refreshes its display while you enter an address, so you could get error messages before you have completed typing the address. NoteВ В The address that you enter into the box is interpreted in the current radix. If the current radix is not 16, you should prefix a hexadecimal address with 0x. To change the default radix, use the n (Set Number Base) command in the Debugger Command window. The display within the Memory window itself is not affected by the current radix.
To change the data type that the window uses to display memory, use the Display format menu in the Memory window toolbar. Supported data types include short words, double words, and quad-words; short, long, and quad integers and unsigned integers; 10-byte, 16-byte, 32-byte, and 64-byte real numbers; ASCII characters; Unicode characters; and hexadecimal bytes. The display of hexadecimal bytes includes ASCII characters as well.
The Memory window has a toolbar that contains two buttons, a menu, and a box and has a shortcut menu with additional commands. To access the menu, select and hold (or right-click) the title bar or select the icon near the upper-right corner of the window (). The toolbar and shortcut menu contain the following choices:
(Toolbar only) The address box enables you to specify a new address or offset. The exact meaning of this box depends on the memory type you are viewing. For example, if you are viewing virtual memory, the box enables you to specify a new virtual address or offset.
(Toolbar only) Display format enables you to select a new display format.
(Toolbar and menu) Previous (on the toolbar) and Previous page (on the shortcut menu) cause the previous section of memory to be displayed.
(Toolbar and menu) Next (on the toolbar) and Next page (on the shortcut menu) cause the next section of memory to be displayed.
(Menu only) Toolbar turns the toolbar on and off.
(Menu only) Auto-fit columns ensures that the number of columns displayed in the Memory window fits the width of the Memory window.
(Menu only) Dock or Undock causes the window to enter or leave the docked state.
(Menu only) Move to new dock closes the Memory window and opens it in a new dock.
(Menu only) Set as tab-dock target for window type sets the selected Memory window as the tab-dock target for other Memory windows. All Memory windows that are opened after one is chosen as the tab-dock target are automatically grouped with that window in a tabbed collection.
(Menu only) Always floating causes the window to remain undocked even if it is dragged to a docking location.
(Menu only) Move with frame causes the window to move when the WinDbg frame is moved, even if the window is undocked. For more information about docked, tabbed, and floating windows, see Positioning the Windows.
(Menu only) Properties opens the Memory Options dialog box, which is described in the following section within this topic.
(Menu only) Help opens this topic in the Debugging Tools for Windows documentation.
(Menu only) Close closes this window.
Memory Options Dialog Box
When you select Properties on the shortcut menu, the Memory Options dialog box appears.
In kernel mode, there are six memory types available as tabs in this dialog box: Virtual Memory, Physical Memory, Bus Data, Control Data, I/O (I/O port information), and MSR (model-specific register information). Select the tab that corresponds to the information that you want to access.
In user mode, only the Virtual Memory tab is available.
Each tab enables you to specify the memory that you want to display:
In the Virtual Memory tab, in the Offset box, specify the address or offset of the beginning of the memory range that you want to view.
In the Physical Memory tab, in the Offset box, specify the physical address of the beginning of the memory range that you want to view. The Memory window can display only described, cacheable physical memory. If you want to display physical memory that has other attributes, use the d* (Display Memory) command or the !d\* extension.
In the Bus Data tab, in the Bus Data Type menu, specify the bus data type. Then, use the Bus number, Slot number, and Offset boxes to specify the bus data that you want to view.
In the Control Data tab, use the Processor and Offset text boxes to specify the control data that you want to view.
In the I/O tab, in the Interface Type menu, specify the I/O interface type. Use the Bus number, Address space, and Offset boxes to specify the data that you want to view.
In the MSR tab, in the MSR box, specify the model-specific register that you want to view.
Each tab also includes a Display format menu. This menu has the same effect as the Display format menu in the Memory window.
Select OK in the Memory Options dialog box to cause your changes to take effect.
Additional Information
For more information about memory manipulation and a description of other memory-related commands, see Reading and Writing Memory.
How to get full PC memory specs (speed, size, type, part number, form factor) on Windows 10
 Source: Windows Central
On Windows 10, knowing the memory’s technical specs — RAM (Random Access Memory) — installed on a device can be useful in many scenarios. For instance, if you are dealing with problems, information such as the manufacturer name, part number, and serial number can help you with tech support to troubleshoot the issue.
If your computer is getting slow due to memory demanding apps or games, adding more memory can improve the performance. And understanding the RAM specs can help you determine the correct size, speed, and brand to purchase a compatible upgrade kit.
Or when tweaking the memory settings inside the Basic Input/Output System (BIOS) or Unified Extensible Firmware Interface (UEFI), the ability to view the memory module’s information will also help you to know if the configuration has been applied correctly.
Regardless of the reason, Windows 10 can provide all the information you need using Command Prompt without the need to open the case or install third-party tools.
In this Windows 10 guide, we will walk you through the steps to learn the technical specifications about the RAM installed on your computer, including part number, manufacturer, serial number, speed, capacity, form factor, memory type, etc.
Quick note: While you can query many details about the RAM configuration on your computer with Command Prompt, some information may not be available depending on the system’s hardware.
How to determine RAM details using Command Prompt
If you suspect that Task Manager is showing inaccurate RAM information, or you want to find out even more details, such as serial number, part number, manufacturer, and more about each memory module, then you can use these commands.
Check memory manufacturer
To determine the brand of the memory modules installed on the device, use these steps:
- Open Start.
- Type Command Prompt, right-click the top result and select the Run as administrator option.
Type the following command to determine the memory manufacturer name and press Enter:
wmic memorychip get devicelocator, manufacturer
 Source: Windows Central
Check memory part number
To find out the part number of each memory module, use these steps:
- Open Start.
- Type Command Prompt, right-click the top result and select the Run as administrator option.
Type the following command to find the memory part number and press Enter:
wmic memorychip get devicelocator, partnumber
Source: Windows Central
If your computer is slowing you down, a memory upgrade is perhaps one of the best ways to improve the overall performance. If you are not sure which memory upgrade kit to order, our pick is the Corsair Vengeance LPX DDR4 16GB Kit. It has reliable performance, quality components, and, more importantly, price.
Our Pick

Corsair Vengeance LPX DDR4 16GB Kit
Since most modern processors from AMD and Intel can operate stably at 3200MHz, this Corsair kit with two 8GB modules is an ideal choice for your PC build.
Check memory serial number
To determine the serial number of each memory module, use these steps:
- Open Start.
- Type Command Prompt, right-click the top result and select the Run as administrator option.
Type the following command to retrieve the serial number for each memory stick and press Enter:
wmic memorychip get devicelocator, serialnumber
Source: Windows Central
Quick tip: In the command, you can also replace «devicelocator» with «banklabel» to list the serial number showing the bank’s physical label where the memory is located on the motherboard. For example, wmic memorychip get banklabel, serialnumber
Check memory capacity
Using the Command Prompt, you can find out the total capacity per module and the entire system.
Determine capacity per memory module
To determine each memory module capacity, use these steps:
- Open Start.
- Type Command Prompt, right-click the top result and select the Run as administrator option.
Type the following command to find out the memory capacity and press Enter:
wmic memorychip get devicelocator, capacity
Source: Windows Central
Confirm the size of each RAM module installed on the device under the «Capacity» column.
Quick tip: The capacity information is displayed in bytes, but you can divide the number by 1073741824 (1 gigabyte in bytes) to convert the information into gigabytes.
Determine total system memory capacity
You can also quickly find out the total amount of memory installed on the device using these steps:
- Open Start.
- Type Command Prompt, right-click the top result and select the Run as administrator option.
Type the following command to determine the total physical memory and press Enter:
systeminfo | findstr /C:»Total Physical Memory»
Source: Windows Central
Check memory speed
To confirm the operating memory speed, use these steps:
- Open Start.
- Type Command Prompt, right-click the top result and select the Run as administrator option.
Type the following command to determine the memory speed and press Enter:
wmic memorychip get devicelocator, speed
Source: Windows Central
Check memory type
To check the system memory type on Windows 10, use these steps:
- Open Start.
- Type Command Prompt, right-click the top result and select the Run as administrator option.
Type the following command to determine the memory type and press Enter:
wmic memorychip get devicelocator, memorytype
Source: Windows Central
Supported memory types
Here’s a list with the memory types that the command can identify:
- 0: Unknown.
- 1: Other.
- 2: DRAM.
- 3: Synchronous DRAM.
- 4: Cache DRAM.
- 5: EDO.
- 6: EDRAM.
- 7: VRAM.
- 8: SRAM.
- 9: RAM.
- 10: ROM.
- 11: Flash.
- 12: EEPROM.
- 13: FEPROM.
- 14: EPROM.
- 15: CDRAM.
- 16: 3DRAM.
- 17: SDRAM.
- 18: SGRAM.
- 19: RDRAM.
- 20: DDR.
- 21: DDR2.
- 22: DDR2 FB-DIMM.
- 24: DDR3.
- 25: FBD2.
Check memory form factor
To determine whether the modules are DIMM or SODIMM, use these steps:
- Open Start.
- Type Command Prompt, right-click the top result and select the Run as administrator option.
Type the following command to determine the memory form factor and press Enter:
wmic memorychip get devicelocator, formfactor
Source: Windows Central
Under the FormFactor column, confirm the form factor information.
Quick note: If the output is 8, the device uses DIMM modules (typically available on desktops). Otherwise, if the command output the number 12, the computer uses SODIMM modules (typically available on laptops).
Supported memory form factors
Here’s a list with the form factors that the command can identify:
- 0: Unknown.
- 1: Other.
- 2: SIP.
- 3: DIP.
- 4: ZIP.
- 5: SOJ
- 6: Proprietary.
- 7: SIMM.
- 8: DIMM.
- 9: TSOP.
- 10: PGA.
- 11: RIMM.
- 12: SODIMM.
- 13: SRIMM.
- 14: SMD.
- 15: SSMP.
- 16: QFP.
- 17: TQFP.
- 18: SOIC.
- 19: LCC.
- 20: PLCC.
- 21: BGA.
- 22: FPBGA.
- 23: LGA.
- 24: FB-DIMM.
Check all memory details
The above commands can help you to find the most useful information about the modules. However, there is another command you can use to query all the available details.
To list all the memory details, then use these steps:
- Open Start.
- Type Command Prompt, right-click the top result and select the Run as administrator option.
Type the following command to view all the memory details and press Enter:
wmic memorychip list full
 Source: Windows Central
(Optional) Type the following command to view only the specific details and press Enter:
wmic memorychip get devicelocator, manufacturer, partnumber, serialnumber, capacity, speed, memorytype, formfactor
Source: Windows Central
Once you complete the steps, you will have many details about the RAM modules installed on the device.
Usually, these details will come in handy when troubleshooting issues, tweaking hardware configuration (for example, overclocking), or planning to upgrade the memory to improve the system performance.
More Windows 10 resources
For more helpful articles, coverage, and answers to common questions about Windows 10, visit the following resources:
We may earn a commission for purchases using our links. Learn more.
![]()
The Dell XPS 15 is our choice for best 15-inch laptop
For a lot of people, a 15-inch laptop is a perfect size that offers enough screen for multitasking, and in a lot of cases, some extra performance from powerful hardware. We’ve rounded up the best of the best at this size.
![]()
Halo: MCC’s live service elements make it better, not worse
Halo: The Master Chief Collection is more popular than ever, but some fans don’t agree with the live service approach 343 Industries has taken with it. Here’s why those elements are, at the end of the day, great for the game and for Halo overall.
![]()
Microsoft’s Surface Duo is not ‘failing up’
Microsoft announced this week that it was expanding Surface Duo availability to nine new commercial markets. While Surface Duo is undoubtedly a work in progress, this is not a sign of a disaster. It’s also doesn’t mean that Surface Duo is selling a ton either. Instead, the reason for the expansion is a lot more straightforward.
![]()
These are the best PC sticks when you’re on the move
Instant computer — just add a screen. That’s the general idea behind the ultra-portable PC, but it can be hard to know which one you want. Relax, we have you covered!


