- ACS USB Smart Card Reader Drivers v.4.3.1.0 Windows XP / Vista 7 / 8 / 10 32-64 bits
- Подробнее о пакете драйверов:
- ACS USB Smart Card Reader Drivers. Характеристики драйвера
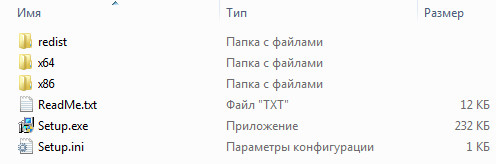
- Скриншот файлов архива
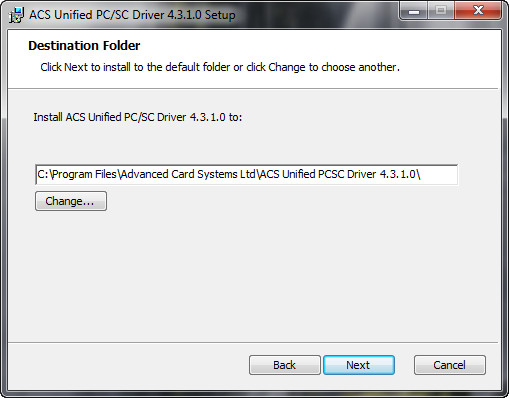
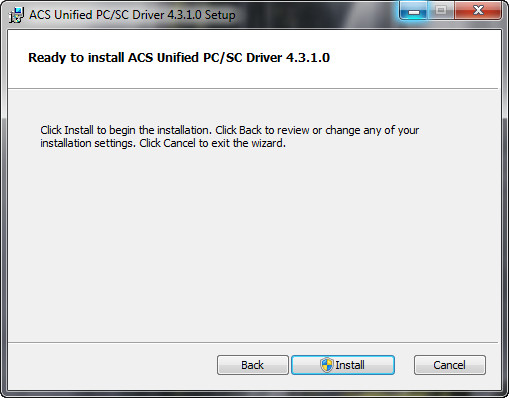
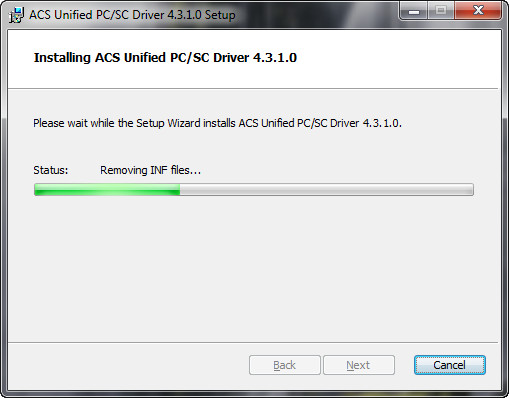
- Скриншоты с установкой ACS USB Smart Card Reader Drivers
- Файлы для скачивания (информация)
- Smart Card Minidrivers
- Windows Inbox Smart Card Minidriver
- Electrical Profile for GIDS cards with the Microsoft Generic Profile
- GIDS Application Metadata
- File Control Information (DF FCI)
- File Management Data (DF FMD)
- File Control Parameters (DF FCP)
- PIN Creation
- Pin Unblock Key (PUK) Creation
- ACL Creation
- Create EF for Admin Key
- Inject Admin Key
- Set Operational State
- Data objects on a GIDS card after the filesystem is created
- INF Sample to re-brand inbox class minidriver
ACS USB Smart Card Reader Drivers v.4.3.1.0 Windows XP / Vista 7 / 8 / 10 32-64 bits

Подробнее о пакете драйверов:
ACS USB Smart Card Reader Drivers. Характеристики драйвера
Драйвер версии 4.3.1.0 для считывателей смарткарт от компании Advanced Card Systems Ltd. Предназначен для установки на Windows XP, Windows Vista, Windows 7, Windows 8, Windows 8.1, Windows 10 32-64 бита.
Для автоматической установки необходимо распаковать архив и запустит файл — Setup.exe .
- CTM Fw110
- CTM Fw110 Virtual
- CTM64 Fw112
- CTM64 Fw112 Virtual
- ACR122U/T
- ACR122U-SAM
- ACR128 Bus
- ACR128 Icc
- ACR128 Pcc
- ACR128 Sam
- ACR1281U-C1 Bus
- ACR1281U-C1 Icc
- ACR1281U-C1 Pcc
- ACR1281U-C1 Sam
- ACR1281U-C7 Pcc
- ACR1281U-C7 Sam
- qPBOC PICC
- qPBOC Dual Pcc
- qPBOC Dual Icc
- BSI Dual
- BSI Dual Icc
- ACR1281U-C4
- ACR1281 2SAM Bus
- ACR1281 2SAM SamA
- ACR1281 2SAM Pcc
- ACR1281 2SAM SamB
- new qPBOC
- ACR1281U-K PICC Reader
- ACR1281U-K Dual Reader Bus
- ACR1281U-K Dual Reader Icc
- ACR1281U-K Dual Reader Pcc
- ACR1281U-K 1S Bus
- ACR1281U-K 1S Icc
- ACR1281U-K 1S Pcc
- ACR1281U-K 1S Sam
- ACR1281U-K 4S Bus
- ACR1281U-K 4S Icc
- ACR1281U-K 4S Pcc
- ACR1281U-K 4S Sam
- ACR1283L PICC
- ACR1283L 4SAM Bus
- ACR1283L 4SAM Pcc
- ACR1283L 4SAM Sam
- ACR1283L Bootloader
- ACR1222U-C3 Bus
- ACR1222U-C3 Icc
- ACR1222U-C3 Pcc
- ACR1222U-C3 Sam
- ACR1222U-C6 Bus
- ACR1222U-C6 Icc
- ACR1222U-C6 Pcc
- ACR1222U-C1 Bus
- ACR1222U-C1 Pcc
- ACR1222U-C1 Sam
- ACR1222L Bus
- ACR1222L Pcc
- ACR1222L Sam
- ACR1261U-C1 Bus
- ACR1261U-C1 Icc
- ACR1261U-C1 Pcc
- ACR1261U-C1 Sam
- ACR1251U-A1 Pcc
- ACR1251U-A1 Sam
- ACR1251U-A2
- ACR1251U-C PICC
- ACR1251U-C SAM
- ACR1251U-C PICC
- ACR1251U-K PICC
- ACR1251U-K ICC
- ACR1252U-A1 PICC
- ACR1252U-A1 SAM
- ACR1252U-A2
- ACR1252U Bootloader
- ACR123-PICC+3SAM Bus
- ACR123-PICC+3SAM Picc
- ACR123-PICC+3SAM Sam
- ACR123-PICC
- ACR123-Bootloader
- ACR33XX — 4SAM Bus
- ACR33XX — 4SAM Icc
- ACR33XX — 4SAM Sam
- ACR33 — A1 Bus
- ACR33 — A1 Icc
- ACR33 — A1 Sam
- ACR33 — A2 Bus
- ACR33 — A2 Icc
- ACR33 — A2 Sam
- ACR33 — A3 Bus
- ACR33 — A3 Icc
- ACR33 — A3 Sam
- ACR38 FW110
- ACR38USAM
- ACR3801
- ACR100I
- ACR101
- ACR102
- AET62 w/o SAM
- AET62 w SAM
- AET65 w/o SAM
- AET65 w SAM
- ACR83
- APG8201
- ACR39U
- ACR3901
- ACR89 Bus Standard
- ACR89 ICC Standard
- ACR89 SAM Standard
- ACR89 FNC Standard
- ACR89 Bus CL
- ACR89 PICC CL
- ACR89 ICC CL
- ACR89 SAM CL
- ACR89 FNC CL
- ACR89 Bus FPA
- ACR89 ICC FPA
- ACR89 SAM FPA
- ACR89 FNC FPA
- ACR88 PID_2010
- ACR88 PID_2011 Bus
- ACR88 PID_2011 Icc
- ACR88 PID_2011 Sam
- ACR88 PID_2011 Fnc
- ACR30
- AET63
- ACR1256A1
- ACR32-A1
- ACR1251U-C1 Bus
- ACR1251U-C1 Icc
- ACR1251U-C1 Pcc
- ACR1251U-C1 Sam
- CryptoMate (T1)
- CryptoMate (T1) Virtual
- CryptoMate (T2)
- CryptoMate (T2) Virtual
- ACR1255U-J1
- ACR1251U-Z2
- ACR1261U-A
- ACR1311
- Imprivita Pcc
- Imprivita Sam
- ACR39-A3
- ACR1251/ACR1281 Bootloader
- ACR3901 Bootloader
- AMR220-C Bus
- AMR220-C Icc
- AMR220-C Pcc
- APG8201B2
- APG8201B2RO
Внимание! Перед установкой драйвера ACS USB Smart Card Reader Drivers рекомендутся удалить её старую версию. Удаление драйвера особенно необходимо — при замене оборудования или перед установкой новых версий драйверов для видеокарт. Узнать об этом подробнее можно в разделе FAQ.
Скриншот файлов архива
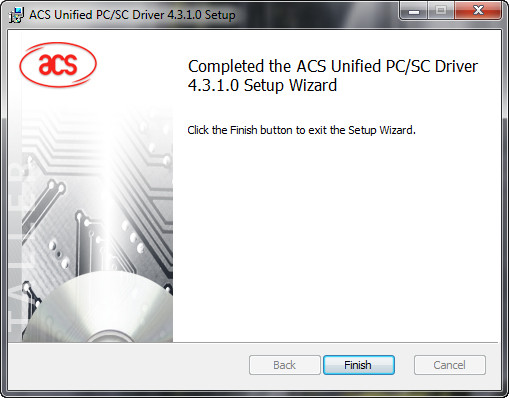
Скриншоты с установкой ACS USB Smart Card Reader Drivers

Файлы для скачивания (информация)
Рейтинг: 4.0/5 ( Проголосовало: 6 чел.)
Smart Card Minidrivers
The smart card minidriver provides a simpler alternative to developing a legacy cryptographic service provider (CSP) by encapsulating most of the complex cryptographic operations from the card minidriver developer.
For information about the specification for smart card minidrivers, see Smart Card Minidriver Specification.
Beginning with Windows Vista, applications can use the Microsoft Cryptography API: Next Generation (CNG) for smart card–based cryptographic services. As part of the elliptic curve cryptography (ECC) effort that was introduced in Windows Vista, ECC smart cards are supported in the new cryptographic framework. Applications and interfaces that interact with existing Rivest-Shamir-Adleman (RSA) card minidrivers through the legacy CAPI subsystem continue to work without modification.
RSA smart card minidrivers can also be registered with the smart card key storage provider (KSP) so that they can be called through the CNG interface. Dual-mode ECC/RSA + ECC-only requests are routed to the KSP and, through it, to the appropriate card minidrivers. For Windows Vista–based clients, ECC-only and ECC/RSA dual-mode cards are supported by using the Windows smart card framework. Dual-mode cards can also be accessed through CAPI primarily to expose RSA-only features.
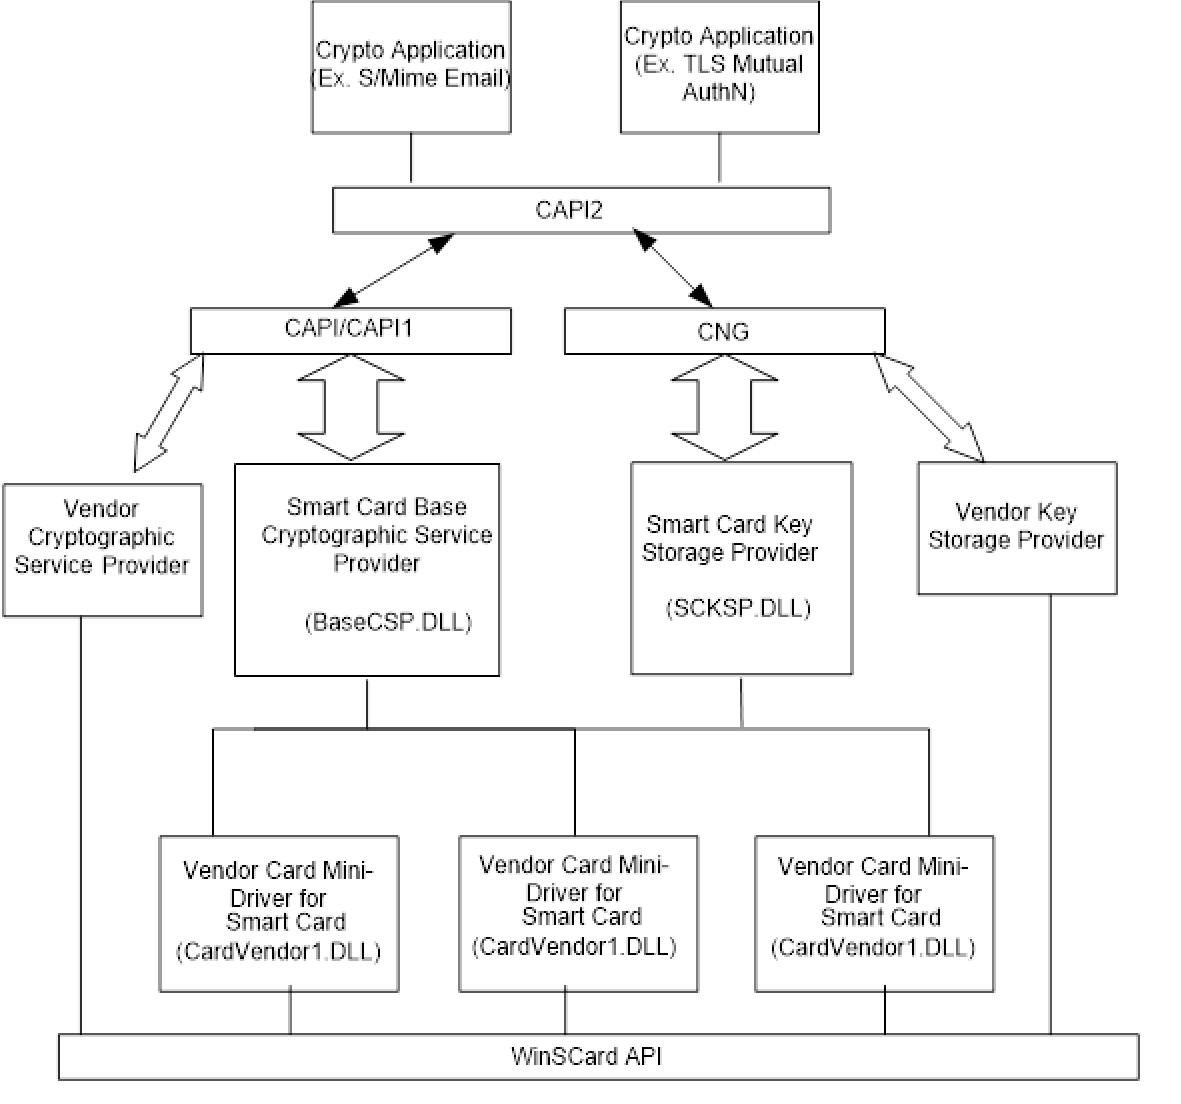
Applications use CAPI for smart card–based cryptographic services. CAPI, in turn, routes these requests to the appropriate CSP to handle the cryptographic requirements.
The Microsoft Smart Card Base CSP and KSP is a refinement of the architecture that separates commonly needed CAPI-based CSP and CNG-based KSP functionality, respectively, from the implementation details that must change for every card vendor.
Although Base CSP can use the RSA capabilities of a smart card only by using the minidriver, the CNG-based KSP supports ECC-only as well as ECC/RSA dual-mode smart cards in WindowsВ Vista and later versions of Windows.
Ultimately, the intention is for the new architecture to support all new smart cards—RSA, ECC, and whatever follows. It splits the implementation of the CSP into two parts:
- The Base CSP/KSP (the common part), which includes functionality for hashing, symmetric, and public key cryptographic operations in addition to personal identification number (PIN) entry and caching.
- A series of plug-ins, which are known as “card minidrivers,” that translate the characteristics of particular smart cards into a uniform interface that is the same for all smart cards. Card minidrivers then communicate with their cards by using the services of the smart card resource manager (SCRM) that similarly abstracts the characteristics of a variety of smart card readers.
The remaining portion for smart card vendors is to implement a card minidriver, a reasonably limited interface layer that provides an abstraction of the card to the Base CSP/KSP and that is organized as a file system, and a set of primitive capabilities. Higher order functionality, such as caching (ensuring that different files on the card have consistent content) or handling naming collisions, is handled at a higher level, outside the card minidriver.
The following figure shows the interfaces between card minidrivers and CAPI-based applications.

The following figure shows the interfaces between card minidrivers and CAPI2-based applications.
It is recommend that developers take advantage of the rich set of libraries that Microsoft provides for cryptographic operations that the minidriver performs. This lets developers benefit from the Microsoft Windows Update infrastructure for the distribution of critical security updates.
Windows Inbox Smart Card Minidriver
Beginning with WindowsВ 7 with Service PackВ 1 (SP1), an inbox generic class minidriver is provided that supports PIV-compliant smart cards and cards that implement the GIDS card edge.
PIV-compliant smart cards and cards that implement the GIDS card edge. For more information about PIV, see Personal Identity Verification (PIV) of Federal Employees and Contractors.
For more information about GIDS, see the Generic Identity Device Specification web page.
When a smart card is inserted into the reader and the Base CSP/KSP calls CardAcquireContext, the class minidriver performs the following discovery process to mark the associated card as either PIV- or GIDS-compliant:
- A SELECT command is issued to locate the PIV AID. If the command succeeds, Windows considers the card to be a PIV device and the discovery process stops.
- If the command fails, a SELECT command is issued to locate the GIDS AID. If the command succeeds, Windows considers the card to be an GIDS device and the discovery process stops.
- If the command fails with a status code that indicates neither AID exists on the smart card, Windows still proceeds as if the card is an GIDS device. If the command fails with any other error, Windows considers the card to be an unknown device.
Electrical Profile for GIDS cards with the Microsoft Generic Profile
For Smart Cards that implement the GIDS card edge, they must be pre-provisioned with an electrical profile that enables them for provisioning with the inbox class minidriver. The information in this section requires deep understanding of APDUs, data model and the card edge as specified in the GIDS specification.
The subsections given here must be followed in the order listed before the card can be used for personalization. Please refer to section 11 of the GIDS specification for more information on APDUs referenced in this section.
GIDS Application Metadata
The DOs described in this section are managed by GIDS and can be retrieved only in the response data field of the SELECT command. This metadata can only be created when the application is in the “creation” state. Please refer to section 6 of the GIDS specification for more information on the GIDS Life Cycle Management.
Note that the metadata provided below only include what is required to be present exactly as described (unless otherwise noted). There are other fields that may be optional, or are customizable by the card application vendor.
File Control Information (DF FCI)
| Tag | Len | Value |
|---|---|---|
| 64 | Var. | Application Template Data Object Tag 4F Len Var. Value Application AID = A0 00 00 03 97 42 54 46 59 xx yy
|
File Management Data (DF FMD)
| Tag | Len | Value |
|---|---|---|
| 64 | Var. | FMD Template Tag 5F2F Len Var. Value PIN usage policy (see “PIN Usage Policy”) = Either 40 or 60
|
File Control Parameters (DF FCP)
| Tag | Len | Value |
|---|---|---|
| 62 | Var. | FCP Template Tag 82 Len 01 Value File descriptor byte: 38 (“not shareable-DF”) Tag 8C Len 03 Value Security attribute in compact format = 03 30 30
|
Once the DF FCP has been created, the card shall transition to the “initialization” state, which is the state required for creating the objects listed in the following sections.
PIN Creation
To create a PIN, a CHANGE REFERENCE DATA APDU for the application password must be sent to the card:
CLA: 00
INS: 24
P1: 01
P2: 80
Lc: Length of command data field
Data Field:
Le: Absent
For example, to set the PIN to 12345678, the following APDU must be sent to the card:
Pin Unblock Key (PUK) Creation
A PUK is used to unblock and/or reset the PIN in the cases where the card becomes blocked or the PIN is forgotten. If admin key challenge/response is to be used instead, DO NOT create a PUK.
To create a PUK, a CHANGE REFERENCE DATA APDU for the application resetting password must be sent to the card:
CLA: 00
INS: 24
P1: 01
P2: 81
Lc: Length of command data field
Data Field:
Le: Absent
For example, to set the PUK to 12345678, the following APDU must be sent to the card:
ACL Creation
ACLs must be created using the CREATE FILE APDU:
CLA: 00
INS: E0
P1-P2: 00 00
Lc: Length of data field
Data Field: FCP template for EF
Le: Absent
The ACLs mentioned in the table below must be created. Each ACL creation APDU must be followed by ActivateFile APDU (00 44 00 00 00)
| ACL | APDU |
|---|---|
| UserCreateDeleteDirAc | 00 E0 00 00 0E 62 0C 82 01 39 83 02 A0 00 8C 03 03 30 00 |
| EveryoneReadUserWriteAc | 00 E0 00 00 0E 62 0C 82 01 39 83 02 A0 10 8C 03 03 30 00 |
| UserWriteExecuteAc | 00 E0 00 00 0E 62 0C 82 01 39 83 02 A0 11 8C 03 03 30 FF |
| EveryoneReadAdminWriteAc | 00 E0 00 00 0E 62 0C 82 01 39 83 02 A0 12 8C 03 03 20 00 |
| UserReadWriteAc | 00 E0 00 00 0E 62 0C 82 01 39 83 02 A0 13 8C 03 03 30 30 |
| AdminReadWriteAc | 00 E0 00 00 0E 62 0C 82 01 39 83 02 A0 14 8C 03 03 20 20 |
Create EF for Admin Key
EF for Admin key must be created using the CREATE FILE APDU:
CLA: 00
INS: E0
P1-P2: 00 00
Lc: Length of data field
Data Field: FCP template for EF (EFID = B080 and KeyID=80)
Le: Absent
The following APDU must be sent to the card to create the EF for a Triple-DES three-key Admin Key:
The command mentioned above must be followed by an ActivateFile APDU:
Inject Admin Key
The Admin Key must be injected onto the card using the PUT KEY APDU:
CLA: 00
INS: DB
P1-P2: 3F FF
Lc: Length of data field
Data Field: Key Usage Template
Le: Absent
The following APDU must be sent to the card to inject the Admin key into KeyID 80:
In the example mentioned above injects the admin key with the following value:
Set Operational State
To transition the card from the “initialization” state to the “operational” state, a SELECT DF with EFID followed an ACTIVATE FILE command needs to be sent to the card.
First, send a SELECT APDU for the DF:
CLA: 00
INS: A4
P1-P2: 00 0C
Lc: 02
Data Field: 3F FF
Le: Absent
Secondly, use the ACTIVATE FILE APDU to change the state of the DF to “operational”:
CLA: 00
INS: 44
P1-P2: 00 00
Lc: 00
Data Field: Absent
Le: Absent
The following APDU must be sent to the card to bring it to operational state:
After this step, the card is ready for placing the file system as described in file system specification section and is considered a “blank card”. Follow the steps for card “creation” to place the filesystem on the card using the minidriver API. Alternatively, follow the steps in the next section to place the filesystem on the card using APDUs.
Data objects on a GIDS card after the filesystem is created
For cards compliant with GIDS specification with Microsoft Generic Profile, the following table describes the data objects and their corresponding EFIDs after the mandatory objects are created as per the section on card “creation”. Place each of the data objects from the table below onto the card using the PUT DATA APDU as specified in the GIDS specification if the minidriver API is not being used for creating the filesystem.
| EFID | DO Tag | Contents | Friendly Name |
|---|---|---|---|
| A000 | DF1F | Master file system table | |
| A010 | DF21 | \cardapps | |
| A010 | DF22 | \cardcf | |
| A010 | DF23 | mscp\cmapfile | |
| A012 | DF20 | \cardid |
INF Sample to re-brand inbox class minidriver
Smart card vendors can use the inbox minidriver without the need to ship a driver package. To add branding information to the Plug and Play experience for such cards, vendors can provide INF files that override various strings to provide branding information. These strings include the following:
- ProviderName
- CardDeviceName
- SmartCardName
The following is a sample INF file that can be used with the inbox minidriver. This INF file is decorated for installation in x86 and amd64 CPU platforms.
The following are required for this type of INF file:
The hardware ID that is specified by the %FabrikamCardDeviceName% string must either be the ATR historical bytes of the device or the decoded value of the device’s smart card framework identifier. For more information about this identifier, see the “Windows Smart Card Framework Card Identifier” section in Discovery Process.
The DefaultInstall section is mandatory in INF files for smart card minidriver packages.
The DriverVer directive in the INF file must have a value that is greater than the version and timestamp value in the inbox driver’s INF file. Otherwise, the system does not install the device by using the vendor’s INF file.
The DriverVer directive has the following syntax.
We recommend that you follow these guidelines when setting the value for the DriverVer directive:
- Specify a date value that is far enough into the future so as to avoid conflicts with Windows service pack updates.
- Although the 4-digit version number is optional, you must specify a version that is significantly higher than the current version that is specified in the inbox driver’s INF file.
For more information on INF files and syntax, see Device and Driver Installation Design Guide.


