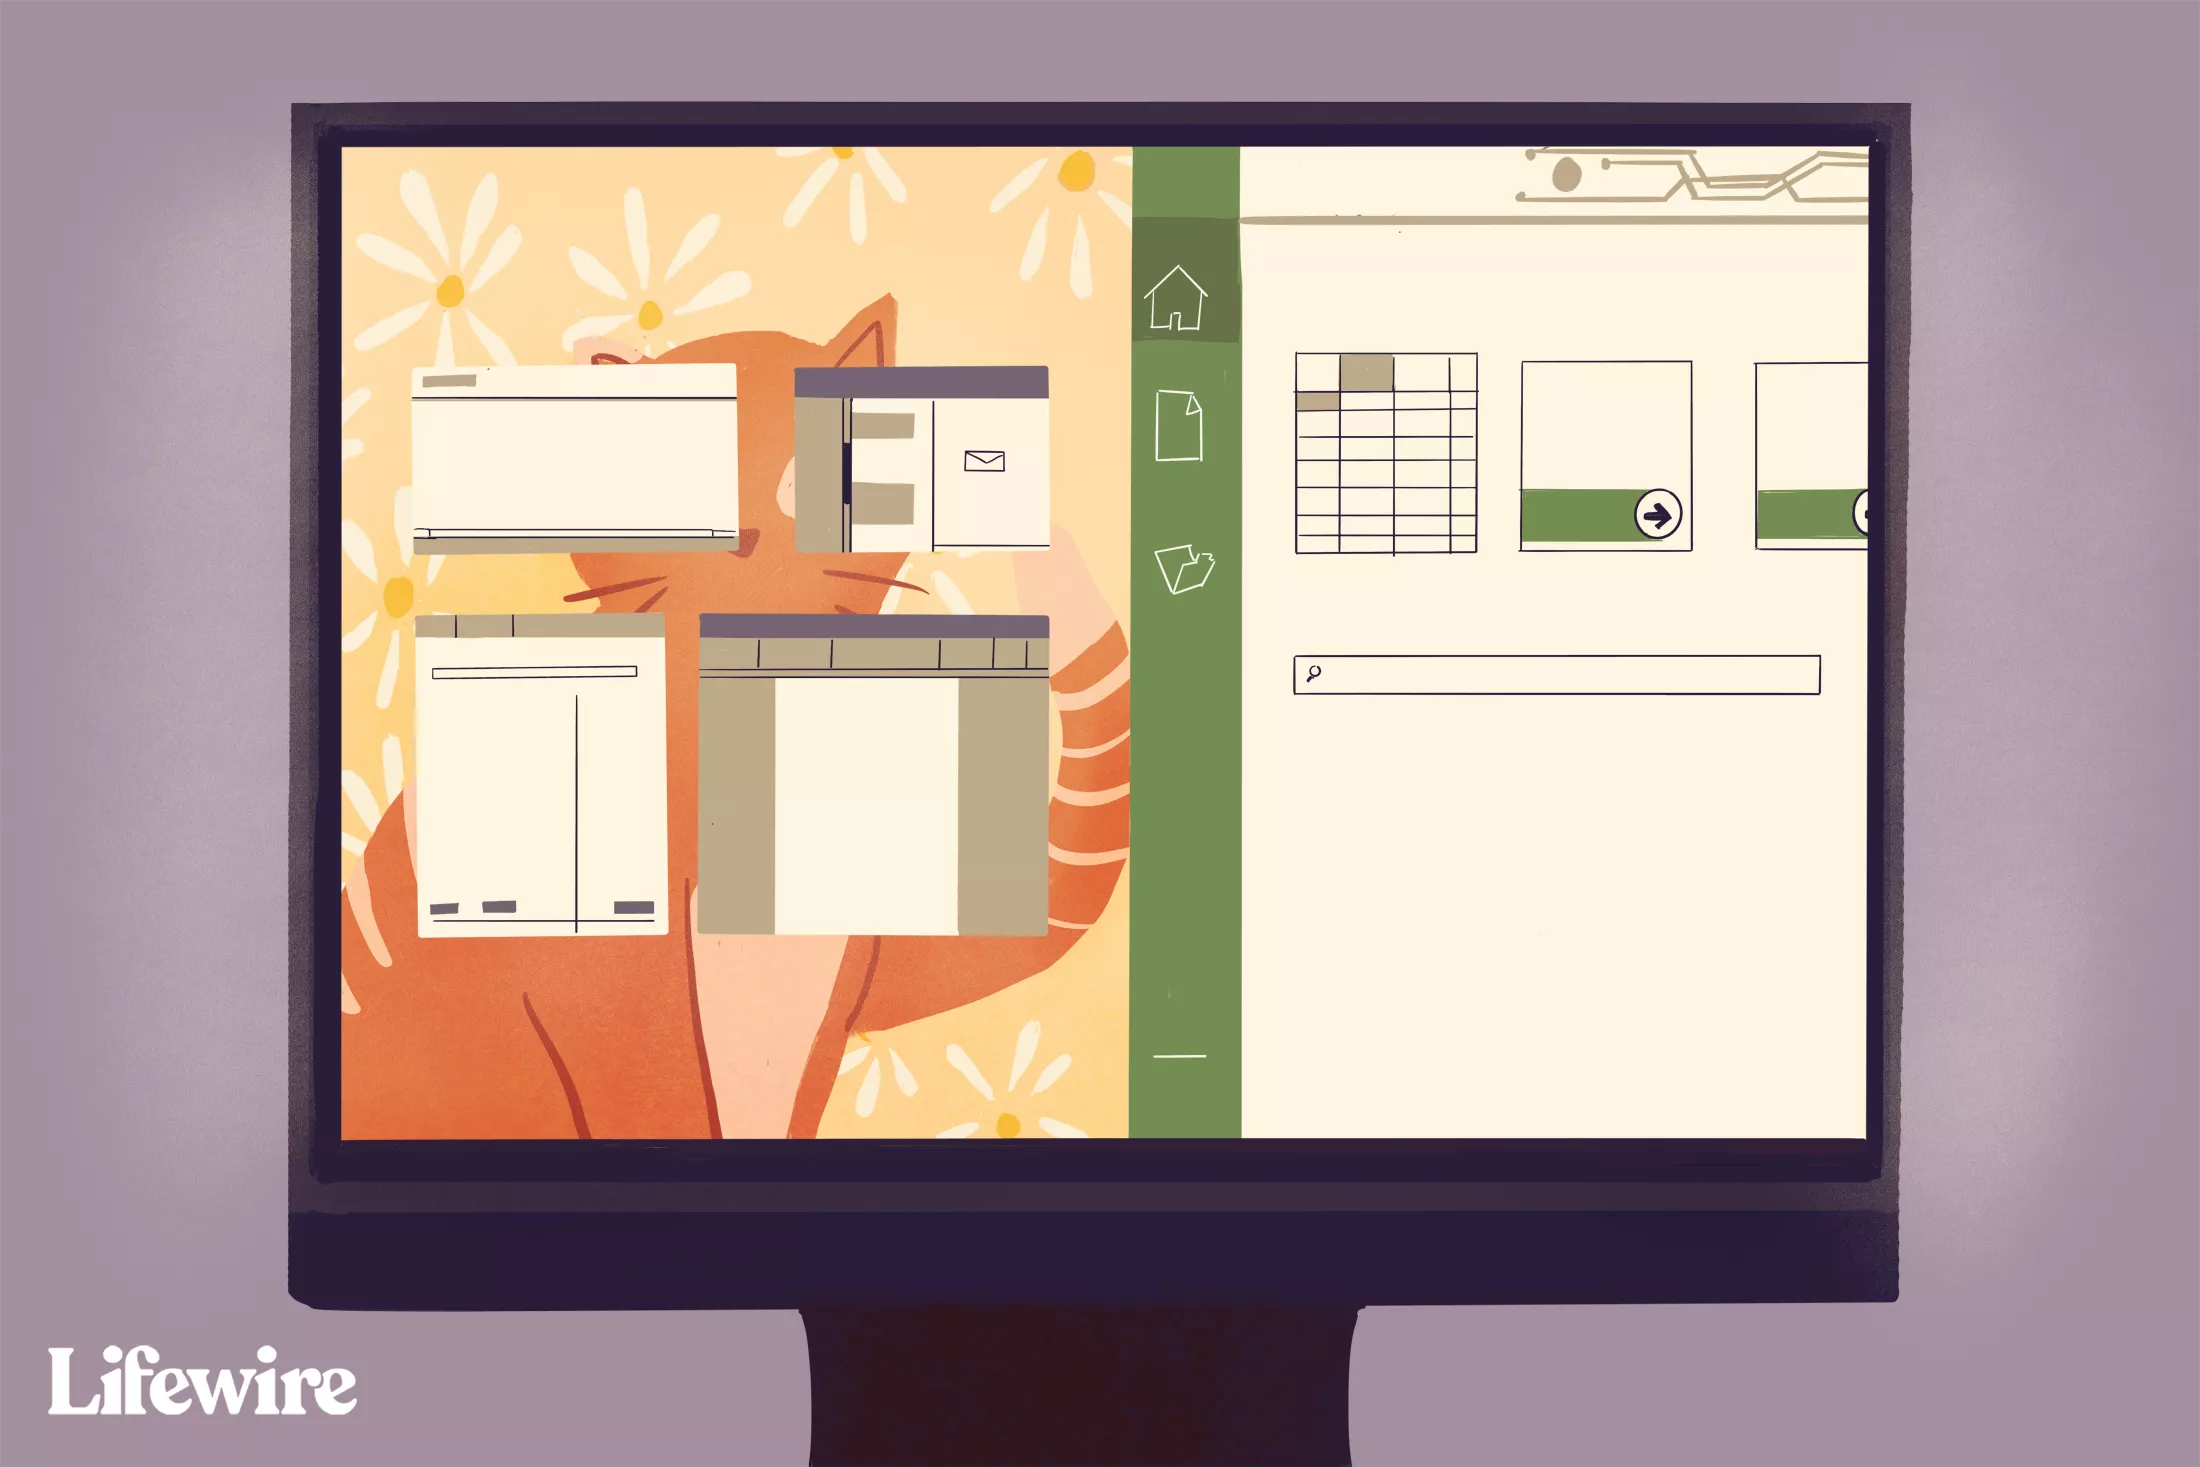
- Разделение экранов в разных версиях Windows
- Разделите экран в Windows 10 с помощью функции Snap Assist
- Чтобы разделить экран в Windows 10 с помощью Snap Assist с помощью мыши:
- Разделение экрана Windows в Windows 8 и 8.1
- Чтобы разделить экран в Windows 8.1
- Разделение экрана Windows в Windows7
- Чтобы использовать функцию Snap в Windows 7 для размещения двух окон бок о бок:
- Need a good software to split your PC screen? Here are our picks
- What’s the best software for splitting my PC screen?
- Divvy
- AquaSnap
- MaxTo
- DisplayFusion
- Split Screens in Different Versions of Windows (10, 8.1, and 7)
- See multiple windows and applications on your screen
- Using Alt+Tab to Switch Between Windows
- Split Your Screen in Windows 10 With Snap Assist
- Windows Split Screen in Windows 8 and 8.1
- How to Do Split Screen in Windows 7
- How to split your screen in Windows 10
- See more
- Snap Assist
- Use the keyboard shortcut
- Snapping more than two windows
- Further reading
- Turning off Snap Assist and adjusting settings
- Customize grids with a third-party app
Разделение экранов в разных версиях Windows
Если вы работаете с несколькими открытыми окнами, вы, вероятно, будете много времени перемещаться между ними. В любой момент у вас может быть открыто несколько окон; веб-браузер для работы в Интернете, почтовая программа для управления электронной почтой, пара приложений для выполнения работы и, возможно, даже игра или две.
Используйте один из стандартных вариантов переключения между ними, например Alt + Tab и изменение размера открытых окон, но есть еще один вариант, который может лучше удовлетворить ваши потребности: разделение экрана Windows.
Разделите экран в Windows 10 с помощью функции Snap Assist

В Windows 10 есть несколько способов разделить экран, но самый простой — с помощью функции Snap Assist. Эта функция должна быть включена в меню «Пуск»> «Настройки»> «Система»> «Многозадачность», хотя она должна быть включена по умолчанию..
Snap Assist позволяет перетащить окно в угол или сторону экрана, чтобы «привязать» его туда, что, в свою очередь, освобождает место для привязки других приложений в результирующем пустом пространстве экрана.
Чтобы разделить экран в Windows 10 с помощью Snap Assist с помощью мыши:
1.Откройте два или более окон или приложений.
2. Наведите указатель мыши на пустую область в верхней части одного из окон, удерживая левую кнопку мыши, перетащите окно в левую часть экрана. Перемещайте его до упора, пока ваша мышь не перестанет двигаться.
3. Отпустите мышь, чтобы привязать это окно к левой части экрана. Теперь оно должен заполнить половину экрана или угол, если вам удалось перетащить его туда.
4. Выберите любое другое окно, которое теперь открыто с правой стороны, чтобы привязать его к правой стороне экрана.
5.Теперь, когда два экрана расположены рядом друг с другом, перетащите разделяющую их линию, чтобы изменить размер обоих окон одновременно. Это полезно, если вам нужно увидеть больше одного окна, а размер другого окна вы можете просто уменьшить.
Разделение экрана Windows в Windows 8 и 8.1
Microsoft предположила в Windows 8 и 8.1, что большинство людей будут использовать устройство с сенсорным экраном. При наличии сенсорного экрана используйте функцию привязки для одновременного размещения двух окон на экране с помощью пальца. В противном случае используйте мышь.
Чтобы разделить экран в Windows 8.1
1.Откройте два или более окон и / или приложений.
2.Наведите указатель мыши на пустую область в верхней части одного из окон, удерживая левую кнопку мыши, перетащите окно в левую часть экрана. Перемещайте его до упора, пока ваша мышь не перестанет двигаться.
3. Отпустите мышь, чтобы привязать это окно к левой части экрана.
4. Выберите любое из других окон, которые теперь открыты с правой стороны, чтобы привязать его к правой стороне экрана.
5. Когда вы перемещаете разделительную линию между окнами, она изменяет размер только одного экрана за раз, а не обоих, как в Windows 10.
Разделение экрана Windows в Windows7
Windows 7 была первой версией Windows, поддерживающей функцию Snap. По умолчанию она была включена.
Чтобы использовать функцию Snap в Windows 7 для размещения двух окон бок о бок:
1. Откройте два окна.
2. Поместите указатель мыши в пустую область в верхней части любого открытого окна, удерживая левую кнопку мыши, перетащите окно в левую часть экрана к центру этой стороны.
3. Отпустите мышь. Окно займет половину экрана.
4. Повторите шаг 2 для второго окна, на этот раз перетащив его вправо, прежде чем отпустить кнопку мыши. Окно займет вторую половину экрана.
Need a good software to split your PC screen? Here are our picks

- Marvel
- Starwars
- National Geographic
- Pixar
Multitasking is often the buzzword in this age to make the most of the given time. And why not, what with computers becoming more powerful by the day and being able to handle several applications simultaneously.
If you need to deal with multiple apps simultaneously, here are a few software solutions for you to do that.
What’s the best software for splitting my PC screen?
Divvy
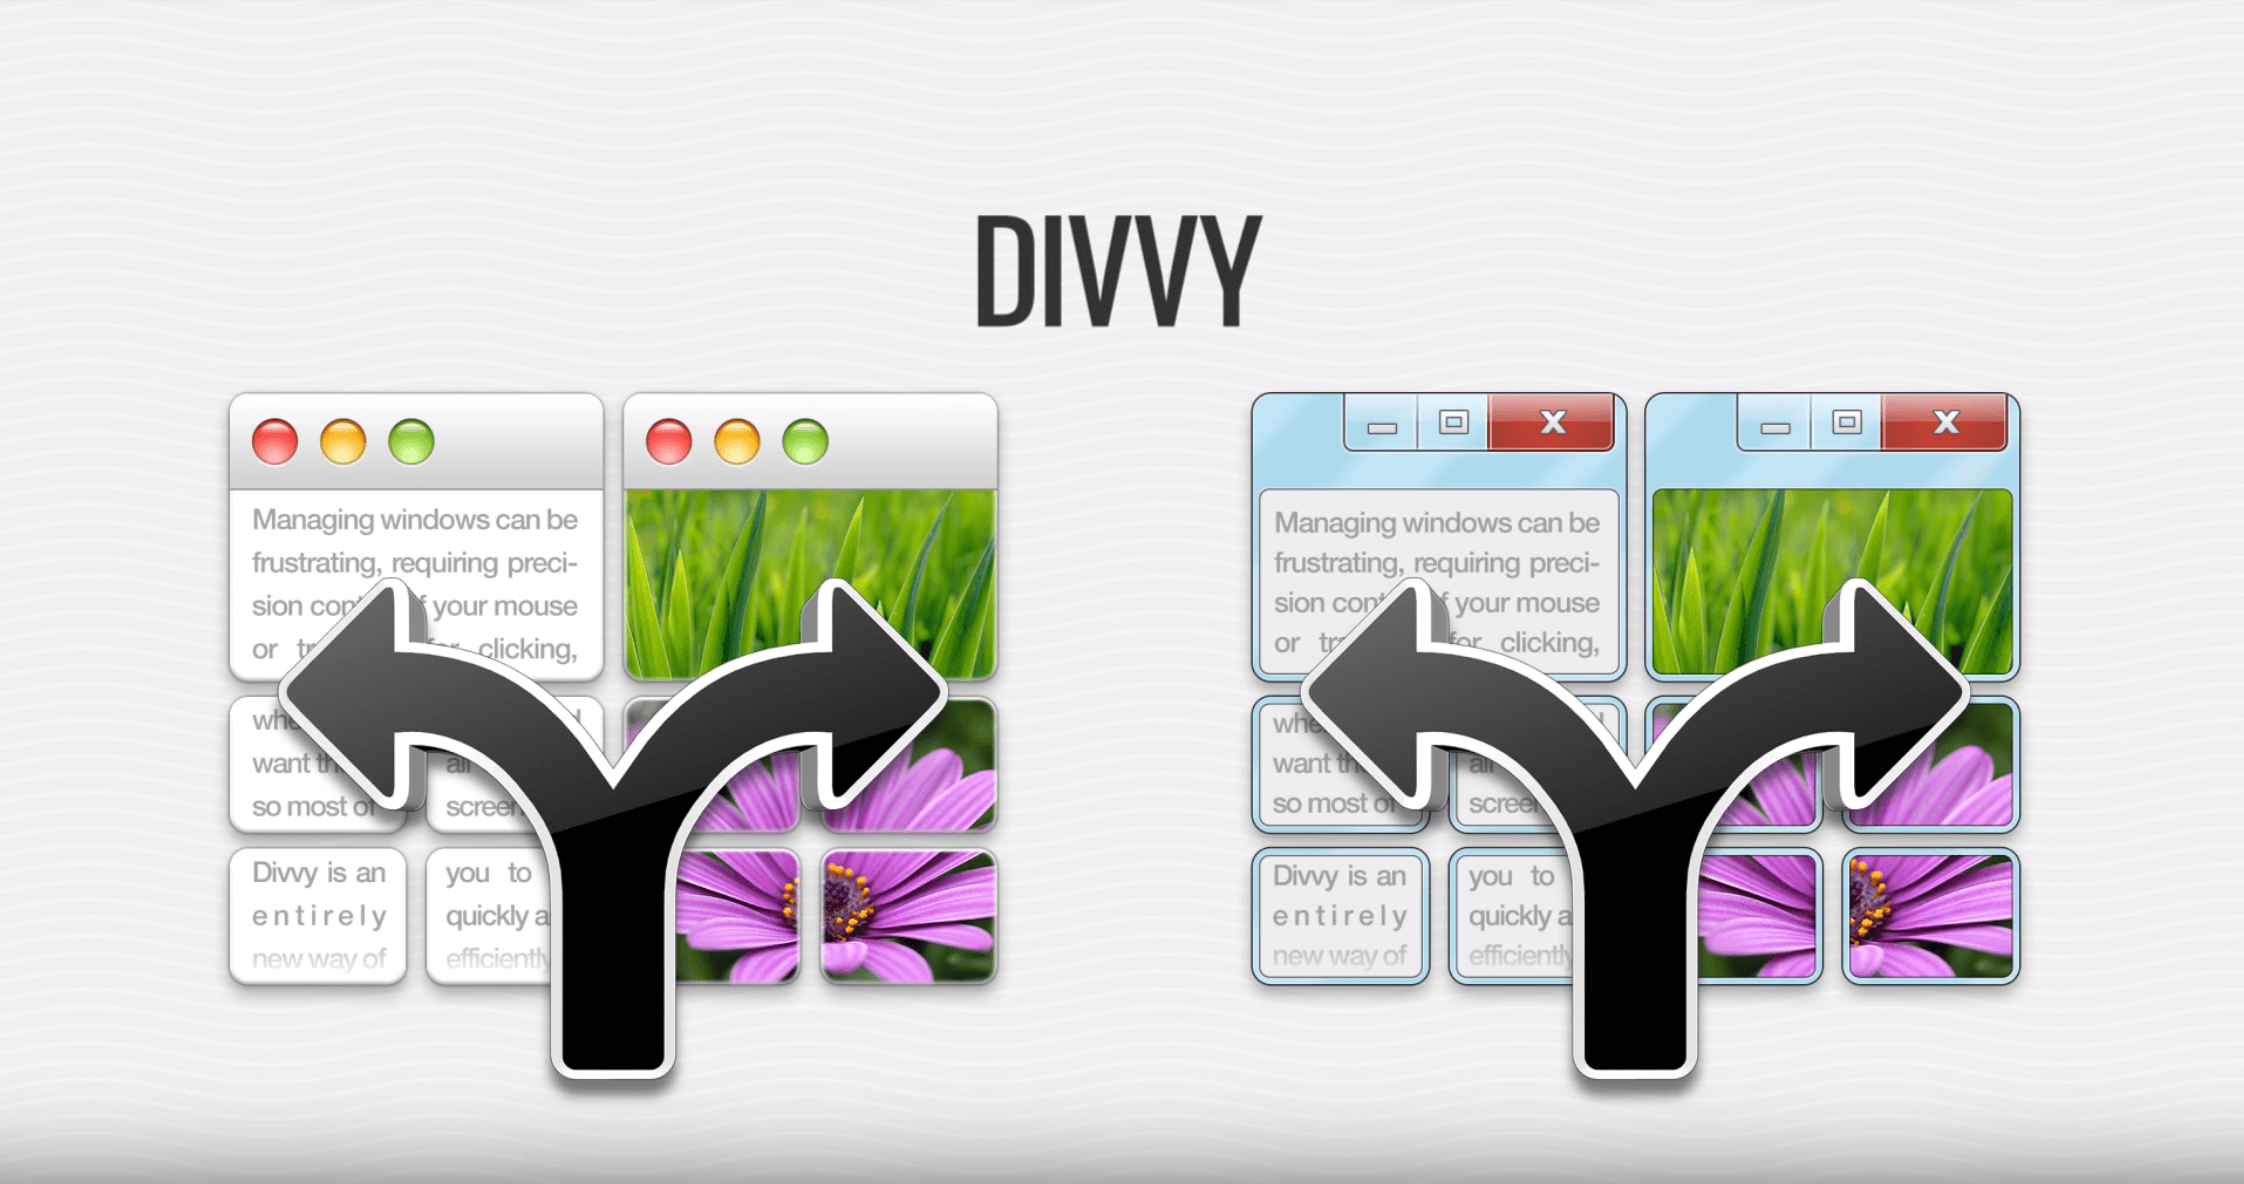
Using the Divvy software is as simple as just dragging and dropping the windows. All you need to do is split up your available screen space into the portions that you need.
Once you have that done, just launch the individual windows followed by dragging and dropping those at the spot that suits you best. The windows resize on its own and you are ready to go. It’s as simple as that.
AquaSnap
With AquaSnap, you will need to drag and drop the windows that you need open to the sides or the corner of your display.
The window will then be resized automatically to fill up one half or a quarter of your display depending on preferences.
Features:
- Window tilling – all other windows will autocratically resize while resizing a certain window
- Window snapping – windows will snap one to another thus utilizing every pixel on your screen
- Window stretching – simply double-click an edge of a window to expand that side
- Ability to move multiple windows at the same time
- Ability to make windows transparent or stay on top
- Various mouse and keyboard shortcuts
MaxTo
If you’re looking for a powerful application that can split your screen, MaxTo is a perfect choice.
You just need to divide your monitor into regions and drag your windows to these regions and you’re good to go.
Features:
- Virtual desktop support
- Ability to load and save different regions.
- Ability to start multiple programs simultaneously and arrange them in specific regions.
- Command line support for advanced users.
- Extensive shortcut support.
- Download MaxTo
DisplayFusion
DisplayFusion will make working with multiple windows a breeze by arranging them in the exact spot where you’d like them to be.
In fact, it can split the display to the extent that each portion will have its own taskbars, wallpapers, functions and so on.
Each portion will work as its own virtual display, therefore allowing for true multitasking operations.
Features:
- Multi-monitor Taskbar
- Advanced monitor controls
- Support for events and triggers
- Download DisplayFusion
There you go, those are some of our picks for the best apps for splitting your screen while multitasking. Be sure to try them all and let us know which application worked best for you.
Split Screens in Different Versions of Windows (10, 8.1, and 7)
See multiple windows and applications on your screen
:max_bytes(150000):strip_icc()/JoliBallew-d00245b1a8a84e8592739e87c8546bd7.jpg)
:max_bytes(150000):strip_icc()/jonfishersquare-93eb80e77a004035887f56816d3623c5.jpg)
If you work with several open windows, you probably spend a lot of time switching between them. At any given moment, you might have several windows open: a browser to surf the internet, an email program, a couple of work applications, and perhaps even a game or two.
In this guide, we show you how to use a split screen in Windows 10, 8.1, and 7 so you can look at two windows at once.
:max_bytes(150000):strip_icc()/split-screens-in-windows-4160920-a6005ddaac234e5680cbe1405a07a93a.gif)
Using Alt+Tab to Switch Between Windows
You can use one of the standard methods for switching between windows and apps, like Alt+Tab, but there’s another option that might suit your needs better: Windows Split Screen.
Split Your Screen in Windows 10 With Snap Assist
There are several ways to split a screen in Windows 10, but the easiest is with Snap Assist. This feature has to be enabled in Start > Settings > System > Multitasking, although it should be enabled by default.
Snap Assist lets you drag a window to a corner or side of the screen to “snap” it there, which in turn makes room for other windows to be snapped in the resulting empty screen space.
You can stack all the windows side by side by right-clicking the taskbar and choosing Show windows side by side. If there are several windows open, they’ll all resize appropriately to fit on the screen.
To split your screen in Windows 10 with Snap Assist using the mouse:
Open two or more windows or applications.
Place your mouse on an empty area at the top of one of the windows. Long-press the left mouse button, and drag the window to the right side of the screen. Move it all the way over, as far as you can go, until your mouse won’t move anymore.
:max_bytes(150000):strip_icc()/001-split-screens-in-different-versions-of-windows-85b39be36cbb4b109288083180cd394d.jpg)
Release the mouse to snap that window to the right side of the screen. It should now fill half the screen, or the corner if you dragged it there.
:max_bytes(150000):strip_icc()/002-split-screens-in-different-versions-of-windows-3ee9981f74c74f08b90e60fca716f49b.jpg)
Select any of the other windows that are open on the left side to snap them to the left side of the screen.
:max_bytes(150000):strip_icc()/003-split-screens-in-different-versions-of-windows-5e89a69ce0ad423aa6b07855523053ce.jpg)
Now that the two screens are beside each other, drag the dividing line that separates them to resize both windows simultaneously. This is helpful if you need to see more of one and can manage a smaller view for the other.
:max_bytes(150000):strip_icc()/004-split-screens-in-different-versions-of-windows-605aabf9775041b5a6463555457ca682.jpg)
You can also use the Windows key + left arrow and Windows key + right arrow to snap windows.
Windows Split Screen in Windows 8 and 8.1
Microsoft assumed with Windows 8 and 8.1 that most people would use a touchscreen device. If you have a touchscreen, use the snap feature to position two windows on the screen at one time using your finger. Otherwise, use a mouse.
Stack all the windows side-by-side by right-clicking the taskbar and choosing Show windows side by side. If there are several windows open, they’ll all resize appropriately to fit on the screen.
To use split screen with Windows 8.1:
Open two or more windows and/or applications.
Place your mouse in an empty area at the top of one of the windows. Long-press the left mouse button, and drag the window to the left side of the screen. Move it all the way over, as far as possible.
On a touchscreen, swipe in from the left and hold your finger on the screen until the second window is docked on the left side of the screen.
Release the mouse to snap that window to the left side of the screen.
Select any of the other windows to snap to the right side of the screen.
Drag the dividing line to resize the windows. When you move the line between the windows or apps, only one screen is resized at a time, not both as in Windows 10.
If your screen resolution is high enough and your video card supports it, you can position three windows on the screen.
How to Do Split Screen in Windows 7
Windows 7 was the first version of Windows to support the Snap feature. It is enabled by default.
You can stack all the windows side-by-side by right-clicking the taskbar and choosing Show windows side by side. If there are several windows open, they’ll all resize to fit on the screen.
To use the Snap feature in Windows 7 to position two windows side-by-side:
Open two windows.
Place your mouse in an empty area at the top of any open window. Long-press the left mouse button, and drag the window to the left half of the screen.
Release the mouse. The window will take up half the screen.
Repeat Step 2 for the second window, this time dragging it to the right side of the screen before releasing the mouse. The window will take up the right half of the screen.
In Windows 7, you can also use the Windows key and the left or right arrow keys to move windows around.
How to split your screen in Windows 10
Windows has always been a great environment for multitasking, with the ability to run multiple applications at once and to switch between them with relative ease.
In Windows 10, Microsoft tightened up the snapping mechanism and expanded its functionality. Today, the latest version of Windows 10 offers a number of ways to split your screen into multiple windows and get real work done, with better support for higher-resolution displays and multiple monitors.
See more
Snap Assist
One of Windows 10’s most important contributions to split-screen multitasking is Snap Assist, which makes it easier to select an open application window when you are choosing which applications to arrange on your screen. Here’s how to use it:
Step 1: Choose the window you want to snap to one half of the screen, then drag it to the edge.

Step 2: A translucent outline of where it will snap to will appear. If you’re happy with it, let go, and your window will snap into that position.
Alternatively, press and hold the Windows key and the Left or Right Arrow key to snap the last selected window to one side of the screen.
Step 3: If you have other windows or applications open, when you snap your chosen window, you’ll also see a number of options that can fill the second half. Click on one, and it will automatically snap into place opposite the first window. If you don’t and the selection grid disappears, drag your second window to the edge of the empty space.

Step 4: To resize the two windows, hover the cursor over the dividing line until it becomes two arrows. Click and hold on the divider to adjust the two windows accordingly. However, there’s a limit to how narrow a window can be.
Note: Is Snap Assist refusing to work or acting strangely? Check your startup programs, the apps that automatically launch when you log into Windows. Sometimes these can interfere with Snap Assist, and disabling them will fix the problem. Our guide on managing startup programs is a great place to start.
Use the keyboard shortcut
Want a faster way to do this on your keyboard? There is a shortcut to split windows that are really useful. In an active window, press and hold the Windows key and then press either the Left or Right Arrow key.
This should automatically snap the active window to the left or right. Select another window to fill the second empty space.
Snapping more than two windows
If you have a large or high-resolution display, you can take advantage of all of that extra screen real estate by snapping up to four windows on a single screen using Corner Snap.
Step 1: Drag and drop your first window into any corner.
Note: To use the keyboard shortcut, press and hold the Windows key followed by the Left or Right Arrow key to snap the active window to the left or right. Next, press and hold the Windows key followed by the Up or Down Arrow key to move the snapped window into the top or bottom corner.

Step 2: With the first active window in a corner, drag and drop your second window into any other available corner. You are not required to pick a specific corner.

Step 3: Repeat Step 2 to fill in the other two corners as needed.
Note that a 2020 update to Windows 10 updated this four-window design and made all the snapped windows act as a single window. This may not sound important, but it’s really handy when you have to do something else, like open an additional app or file while working with your snapped windows — they will now stay together, waiting for you to get back.
Further reading
Turning off Snap Assist and adjusting settings
Snap Assist is easy to disable if it becomes troublesome. Here’s how:
Step 1: Open the Settings app. It’s the gear icon on the Start Menu.
Step 2: Select System.
Step 3: Select Multitasking listed on the left.

Step 4: Click the Toggle displayed under Snap Windows to toggle this feature off.
If you’d rather disable specific Snap Assist features rather than toggling it completely off, there are three settings you can disable instead. Just ignore Step 4 and uncheck the boxes next to each setting as needed:
- When I snap a window, automatically size it to fill available space
- When I snap a window, show what I can snap next to it
- When I resize a snapped window, simultaneously resize any adjacent snapped window
Customize grids with a third-party app
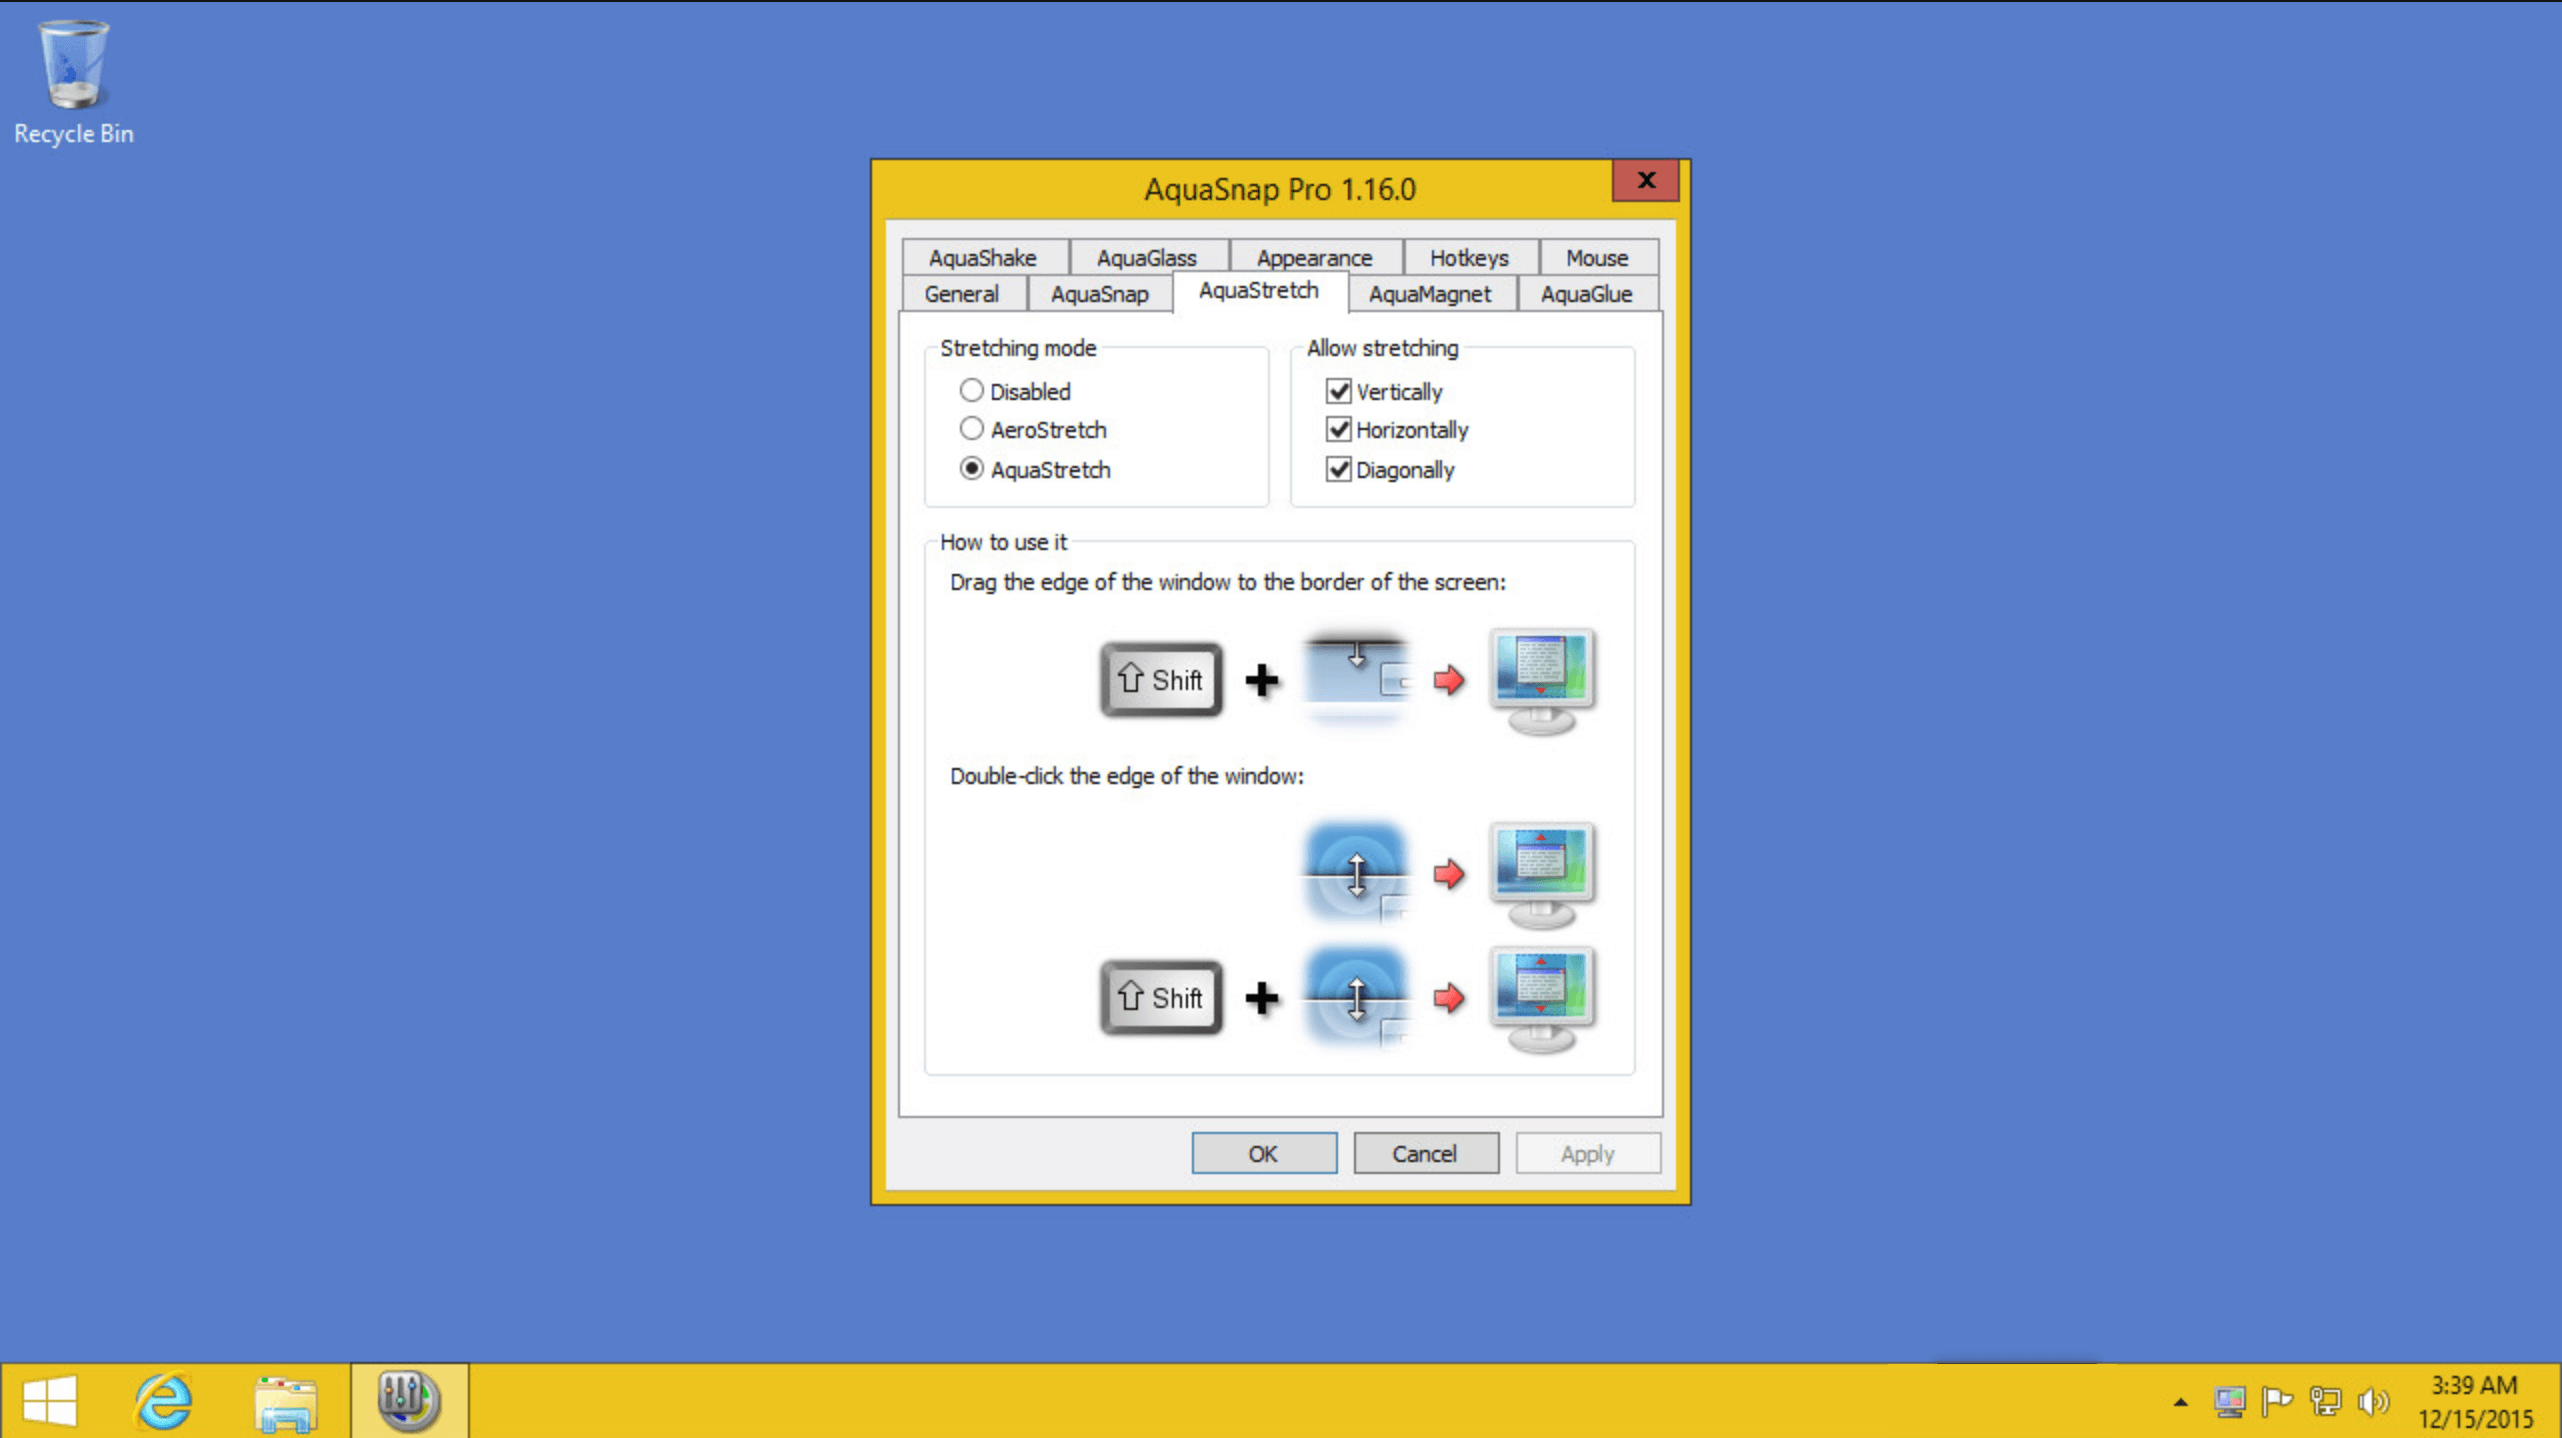
We’ll be the first to point out that the native Windows 10 option is impressive; however, there are a variety of third-party apps that give you a bit more. With these apps, you can enjoy more definitive, grid-like changes to your windows so you can obtain all the tools you love so much (in the perfect size) and place them wherever you desire. Our recommendation is AquaSnap .
AquaSnap lets its users develop and change as many split windows as necessary with a neat snap function that operates similarly to Windows 10. That being said, it’s slightly more flexible and consists of a few cool, extra tools such as snapping small windows together and other sweet gimmicks.
You can download and start using the Personal version of AquaSnap for free. With it, you’ll have access to basic features like docking, snapping, stretching, various keyboard shortcuts, and a whole lot more. If you’re ready to step it up, you can opt for the Professional edition, which comes in two different versions: Standard and Site. You can pay $18 for the Standard version and $600 for the Site version. These special editions allow you to acquire licenses, add convenient mouse shortcuts, benefit from multi-monitor support, and relish three other premium features.


