- Managing Windows 10 Start Menu Layout and Taskbar Pin Apps With GPO
- How to Export and Import Start Menu Layout in Windows 10 With PowerShell?
- Deploying Windows 10 Start Menu Layout using GPO
- Using Partial Lockdown to Lock Certain Items in Start Menu
- How to Manage Pinned Taskbar Items Using GPO?
- Customize Windows 10 Start and taskbar with Group Policy
- Operating system requirements
- How Start layout control works
- Use Group Policy to apply a customized Start layout in a domain
- Use Group Policy to apply a customized Start layout on the local computer
- Update a customized Start layout
Managing Windows 10 Start Menu Layout and Taskbar Pin Apps With GPO
In the Active Directory domain, you can centrally manage and customize Start Menu and Taskbar Layout on Windows 10 users’ computers using Group Policy. This allows you to assign the same settings for icons and pinned app shortcuts in the Start Menu and Taskbar pane for users of various departments. You can set the custom layout for different user groups and make sure that all workstations are configured in the same way.
How to Export and Import Start Menu Layout in Windows 10 With PowerShell?
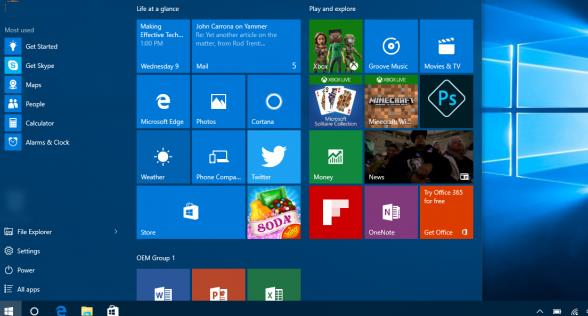
The easiest way to get Start Menu Layout template on Windows 10 (Windows Server 2016) is to manually customize desktop appearance and elements on a reference user profile. Create shortcuts (tiles) for the necessary applications, pin and group them, delete unnecessary elements. Then you can export the current Start Menu layout to an XML file.
You can export the current Start Menu settings using PowerShell cmdlet Export-StartLayout:
Export-StartLayout –path c:\ps\StartLayoutW10.xml
Later you can manually import this Start Menu layout on another Windows 10 computer using the Import-StartLayout cmdlet as follows:
Import-StartLayout –LayoutPath c:\ps\StartLayoutW10.xml –MountPath c:\
The main drawback of the Import-StartLayout cmdlet is that it doesn’t import the Start layout to the current user profile, but to the default user profile (the file Layoutmodification.xml appears in C:\Users\Default\AppData\Local\Microsoft\Windows\Shell\ directory). This XML Start Screen layout will only apply to the new user profiles when they log in for the first time.
Deploying Windows 10 Start Menu Layout using GPO
To deploy your Windows 10 Start Menu layout on domain computers using Group Policy (GPO), you need to copy your layout XML file to the NETLOGON directory on the domain controller. Then run Group Policy Management Console (GPMC.msc) and create a new policy or edit the existing one and link it to the users OU.
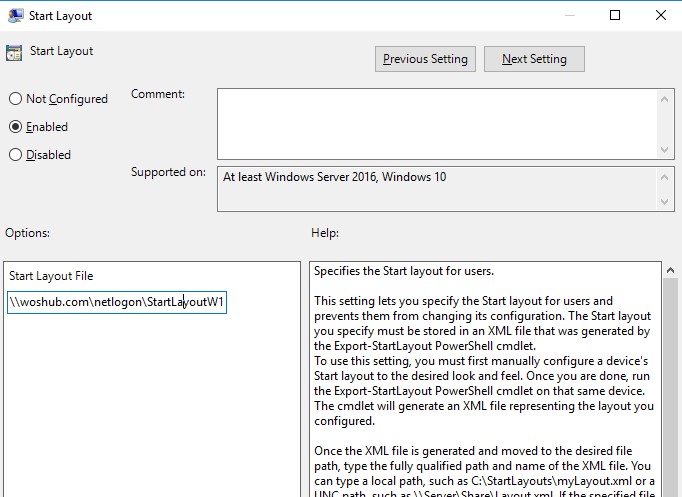
In the Group Policy Management Editor, find the policy with the name Start Layout in the section User Configuration -> Policies -> Administrative Templates -> Start Menu and Taskbar. You can also assign the Start Menu layout to the computer objects. In this case you need to configure the same policy in the Computer Configuration section.

Open the policy, enable it and in Start Layout File field specify the UNC path to the XML file containing Windows 10 Start Menu layout settings (for example, \\woshub.com\netlogon\StartLayoutW10.xml).
If you want to apply the Start Layout policy only to specific user groups or computers, you can use Security Filtering or WMI GPO filters.
Using Partial Lockdown to Lock Certain Items in Start Menu
Partial Lockdown mode, that appeared in Windows 10 1511, allows you to specify groups of Start Menu tiles that users cannot change. Those you can allow the user to change any shortcuts, icons and tiles except for a certain group of corporate app shortcuts.
To set the locked Start Layout groups, you need to manually edit the XML layout file using any text editor (it is convenient to use Notepad ++ to edit the XML file).
Open your file StartLayoutW10.xml and find the following section in it: . To lock the specific shortcut group, you need to change the attribute of this section to 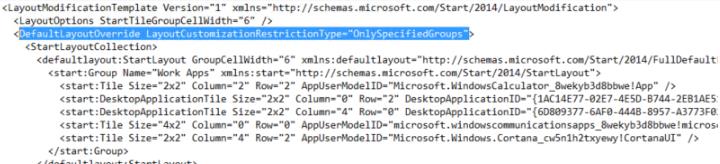
Save the changes to the XML file and deploy it on users’ computers using GPO. Thus, only groups of tiles (shortcuts) specified in the XML file will be locked. All other groups, their contents, and element settings can be changed by users.
Partial Lockdown works both in Windows 10 Enterprise and Pro (starting from 1703 build).
Windows 10 has a small bug when the assigned Internet Explorer shortcut doesn’t appear after applying the XML layout file via GPO. To solve the problem, you need to edit the XML file and change the line for the IE shortcut as follows:
And then through the GPO you need to copy the shortcut file “Internet Explorer.lnk” to the %ALLUSERSPROFILE%\Microsoft\Windows\Start Menu\Programs\.
How to Manage Pinned Taskbar Items Using GPO?
Starting from Windows 10 1607, you can manage pinned shortcuts in the taskbar via the same XML file with the Start Menu layout. To add your own pinned shortcuts to the XML layout, which is distributed through the GPO, edit the XML file. After the tag, add the following code:
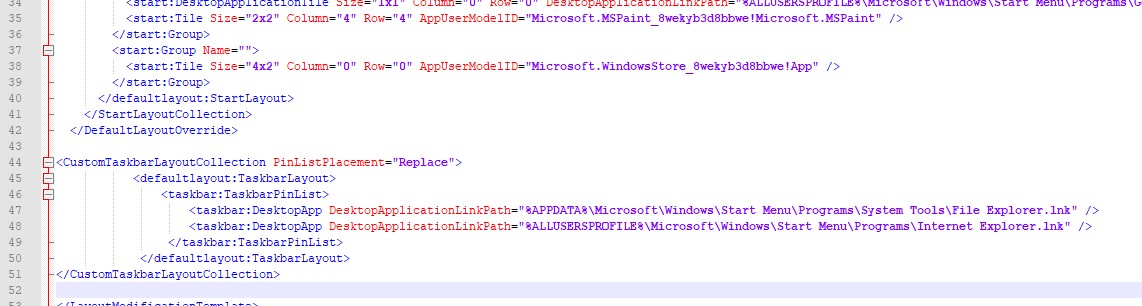
In this example, we will add two pinned shortcuts to the taskbar: File Explorer and Internet Explorer. After applying the policy on the user’s computer, two pinned shortcuts will appear in the Windows 10 taskbar.

In older Windows builds (pre 1607), pinned app shortcuts in the taskbar are configured differently. Let’s try to figure out how.
The list of pinned taskbar shortcuts in Windows 10 is stored in the user profile folder %APPDATA%\Microsoft\Internet Explorer\Quick Launch\User Pinned\TaskBar.
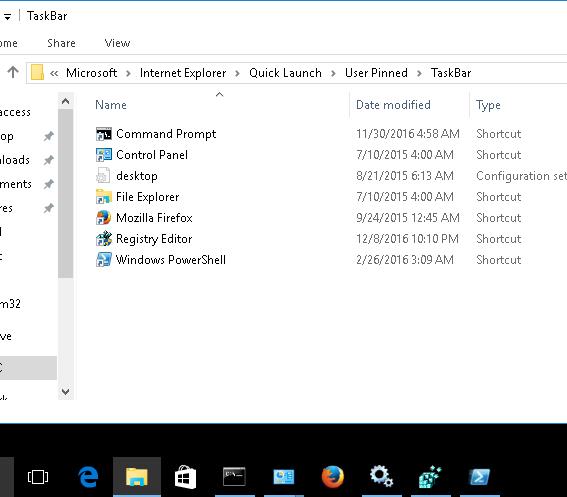
And the settings of the pinned apps are stored encoded in the following registry key HKEY_CURRENT_USER\Software\Microsoft\Windows\CurrentVersion\Explorer\Taskband.
To distribute these Taskbar settings to domain computers, you need to export the contents of this registry key on a reference computer to a REG file:
reg export HKCU\Software\Microsoft\Windows\CurrentVersion\Explorer\Taskband c:\script\PinnedItem.reg
Copy this REG file and the directory containing icons (%APPDATA%\Microsoft\Internet Explorer\Quick Launch\User Pinned\TaskBar) to a shared network folder (for example, you can use NETLOGON). In the Domain Group Policy Editor (User Configuration -> Policies -> Windows Settings -> Scripts (Logon/Logoff) -> Logon), add a logon script (deploy_taskbar.bat) with the following code:
@echo off
set Logfile=%AppData%\pinned.log
if not exist «%Logfile% (
IF EXIST «%APPDATA%\Microsoft\Internet Explorer\Quick Launch\User Pinned\TaskBar» GOTO NOTASKDIR
del «%APPDATA%\Microsoft\Internet Explorer\Quick Launch\User Pinned\TaskBar\*» /S /Q
:NOTASKDIR
xcopy /E /Y «\\woshub.com\netlogon\PinnedItem » «%APPDATA%\Microsoft\Internet Explorer\Quick Launch\User Pinned»
regedit.exe /s «\\woshub.com\netlogon\PinnedItem.reg »
echo PinnedItemImported on %date% at %time% >> %LogFile%
taskkill /IM explorer.exe /f
start explorer.exe
)
A user at logon will see the corporate set of pinned app icons in the Windows 10 Taskbar.
Customize Windows 10 Start and taskbar with Group Policy
Applies to
In WindowsВ 10 Pro, Enterprise, and Education, you can use a Group Policy Object (GPO) to deploy a customized Start and taskbar layout to users in a domain. No reimaging is required, and the layout can be updated simply by overwriting the .xml file that contains the layout. This enables you to customize Start and taskbar layouts for different departments or organizations, with minimal management overhead.
This topic describes how to update Group Policy settings to display a customized Start and taskbar layout when the users sign in. By creating a domain-based GPO with these settings, you can deploy a customized Start and taskbar layout to users in a domain.
When a full Start layout is applied with this method, the users cannot pin, unpin, or uninstall apps from Start. Users can view and open all apps in the All Apps view, but they cannot pin any apps to Start. When a partial Start layout is applied, the contents of the specified tile groups cannot be changed, but users can move those groups, and can also create and customize their own groups. When you apply a taskbar layout, users will still be able to pin and unpin apps, and change the order of pinned apps.
Operating system requirements
In Windows 10, version 1607, Start and taskbar layout control using Group Policy is supported in WindowsВ 10 Enterprise and WindowsВ 10 Education. In Windows 10, version 1703, Start and taskbar layout control using Group Policy is also supported in WindowsВ 10 Pro.
The GPO can be configured from any computer on which the necessary ADMX and ADML files (StartMenu.admx and StartMenu.adml) for WindowsВ 10 are installed. In Group Policy, ADMX files are used to define Registry-based policy settings in the Administrative Templates category. To find out how to create a central store for Administrative Templates files, see article 929841, written for Windows Vista and still applicable in the Microsoft Knowledge Base.
How Start layout control works
Three features enable Start and taskbar layout control:
The Export-StartLayout cmdlet in Windows PowerShell exports a description of the current Start layout in .xml file format.
To import the layout of Start to a mounted Windows image, use the Import-StartLayout cmdlet.
You can modify the Start .xml file to include or create an .xml file just for the taskbar configuration.
In Group Policy, you use the Start Layout settings for the Start Menu and Taskbar administrative template to set a Start and taskbar layout from an .xml file when the policy is applied. The Group Policy object doesn’t support an empty tile layout, so the default tile layout for Windows is loaded in that case.
To learn how customize Start to include your line-of-business apps when you deploy WindowsВ 10, see Customize the Windows 10 Start layout.
Use Group Policy to apply a customized Start layout in a domain
To apply the Start and taskbar layout to users in a domain, use the Group Policy Management Console (GPMC) to configure a domain-based Group Policy Object (GPO) that sets Start Layout policy settings in the Start Menu and Taskbar administrative template for users in a domain.
The GPO applies the Start and taskbar layout at the next user sign-in. Each time the user signs in, the timestamp of the .xml file with the Start and taskbar layout is checked and if a newer version of the file is available, the settings in the latest version of the file are applied.
The GPO can be configured from any computer on which the necessary ADMX and ADML files (StartMenu.admx and StartMenu.adml) for WindowsВ 10 are installed.
The .xml file with the Start and taskbar layout must be located on shared network storage that is available to the users’ computers when they sign in and the users must have Read-only access to the file. If the file is not available when the first user signs in, Start and the taskbar are not customized during the session, but the user will be prevented from making changes to Start. On subsequent sign-ins, if the file is available at sign-in, the layout it contains will be applied to the user’s Start and taskbar.
For information about deploying GPOs in a domain, see Working with Group Policy Objects.
Use Group Policy to apply a customized Start layout on the local computer
You can use the Local Group Policy Editor to provide a customized Start and taskbar layout for any user who signs in on the local computer. To display the customized Start and taskbar layout for any user who signs in, configure Start Layout policy settings for the Start Menu and Taskbar administrative template. You can use the Start Menu and Taskbar administrative template in User Configuration or Computer Configuration.
This procedure applies the policy settings on the local computer only. For information about deploying the Start and taskbar layout to users in a domain, see Use Group Policy to deploy a customized Start layout in a domain.
This procedure creates a Local Group Policy that applies to all users on the computer. To configure Local Group Policy that applies to a specific user or group on the computer, see Step-by-Step Guide to Managing Multiple Local Group Policy Objects. The guide was written for WindowsВ Vista and the procedures still apply to WindowsВ 10.
This procedure adds the customized Start and taskbar layout to the user configuration, which overrides any Start layout settings in the local computer configuration when a user signs in on the computer.
To configure Start Layout policy settings in Local Group Policy Editor
On the test computer, press the Windows key, type gpedit, and then select Edit group policy (Control panel).
Go to User Configuration or Computer Configuration > Administrative Templates >Start Menu and Taskbar.
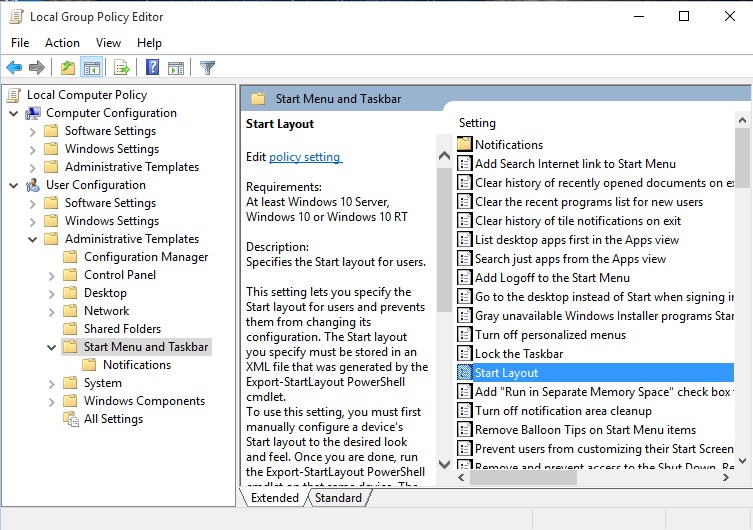
Right-click Start Layout in the right pane, and click Edit.
This opens the Start Layout policy settings.
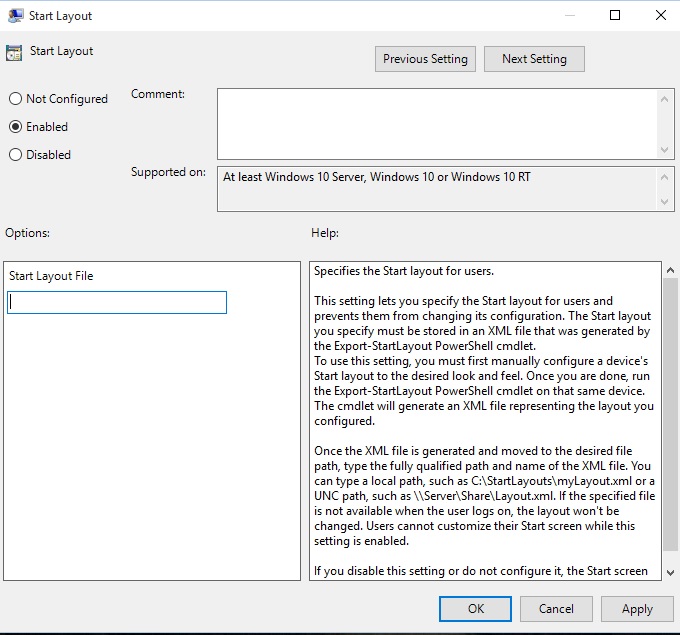
Enter the following settings, and then click OK:
Select Enabled.
Under Options, specify the path to the .xml file that contains the Start and taskbar layout. For example, type C:\Users\Test01\StartScreenMarketing.xml.
Optionally, enter a comment to identify the Start and taskbar layout.
If you disable Start Layout policy settings that have been in effect and then re-enable the policy, users will not be able to make changes to Start, however the layout in the .xml file will not be reapplied unless the file has been updated. In Windows PowerShell, you can update the timestamp on a file by running the following command:
Update a customized Start layout
After you use Group Policy to apply a customized Start and taskbar layout on a computer or in a domain, you can update the layout simply by replacing the .xml file that is specified in the Start Layout policy settings with a file with a newer timestamp.


