- How to create custom Start Menu Live Tiles in Windows 10
- Customize Live Tiles in Windows 10
- Create custom Live Tiles with TileCreator
- Use Better StartMenu
- Add Steam Tiles
- How to fix Windows 10 Start menu tiles not showing
- Fix fix blank Start menu tiles with these solutions
- 1. Pin the Tiles to the Start Menu Again
- 2. Restart the Windows Explorer With Task Manager
- 3. Open the Start Menu Troubleshooter
- 4. Run a System File Scan
- Run a System Scan to discover potential errors
- 5. Reset Start Menu Apps
- 6. Set Up a new User Account
- 7. Restore Windows to a Restore Point
How to create custom Start Menu Live Tiles in Windows 10

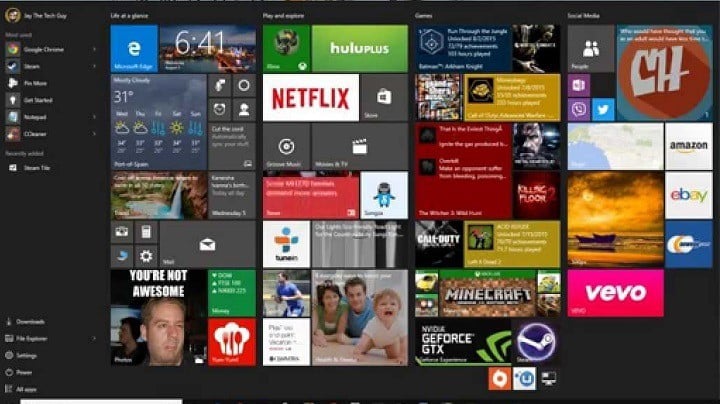
Live Tiles are one of the signature features of Windows 10. It looks like Microsoft did the right thing by combining Windows 8’s Live Tiles with Windows 10’s Start Menu. There are two types of Live Tiles in Windows 10, the one that fits into the system’s color theme, and the one that doesn’t.
However, we don’t have many customization options for changing the appearance of Live Tiles in Windows 10. In fact the only thing we can do is resizing them. Well, that doesn’t have to be the case anymore, as there are a few methods of customzing, and even creating your own custom Live Tiles.
So in this article, we’re going to explore these methods, in case you want to bring some changes to Live Tiles in your Start Menu.
Customize Live Tiles in Windows 10
Create custom Live Tiles with TileCreator
As we said, you can’t do pretty much with Live Tiles using just Windows 10’s built-in features. However, you can always seek help from a third-party solution. In this case, we want a program that will give us the ability to create custom Live Tiles for our Start Menu.
Perhaps the best software of this kind is an app called TileCreator. As its name says, TileCreator allows you to easily create your custom Live Tiles of basically any program or app on your computer, and put them in the Start Menu.
So, let’s see how to use this program to create our own custom Live Tiles for Windows 10:
- First thing first you need to download the TileCreator app. It is available in the Windows Store, and you can grab it for free.
- After installing TileCreator from the Store, download and install a program called TileCreatorProxy. This program allows TileCreator to bypass a pinning restriction imposed in Windows 10, and creates the directory C:\TileCreator. You must run TileCreatorProxy as Administrator for it to work properly
- Now, go to the C:\TileCreator folder the program have just created.
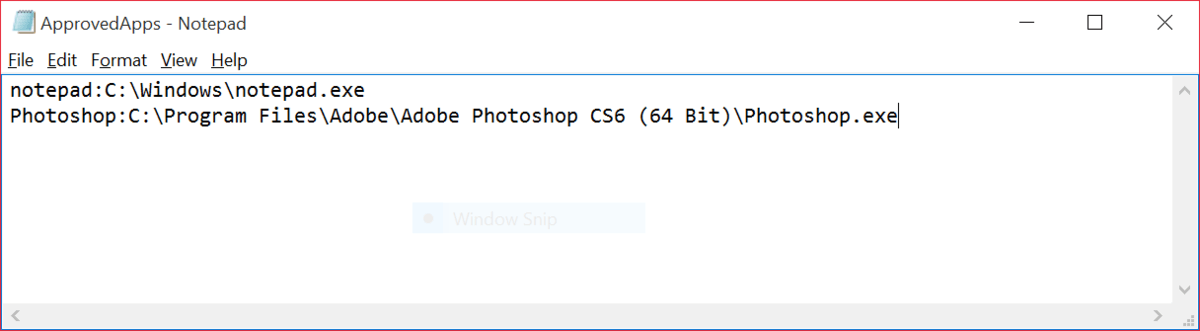
- Open the ApprovedApps.config file from the TileCreator folder
- Now, enter a name and a file path of any app you want to create a custom Live Tile for. Here’s how it should look:

- Save the file
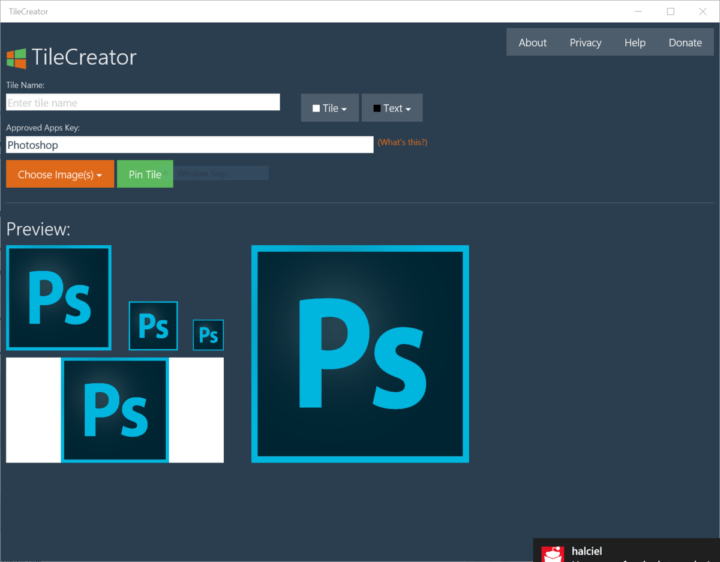
- Once you’ve added the programs you want to create custom Live Tiles for, go back to the TileCreator app
- Enter the ‘key’ you used in the steps before in the ApprovedApps section
- You can now add some customization to your newly created Tile, like setting a Tile color, text color, and image
- Once you’re done, just press the “pin tile” button, and the Live Tile is automatically going to appear in the Start Menu.
There you go, you can pin basically any program or app to the Start Menu using TileCreator. This tool maybe requires some work to get everything working, but once you add a few programs, everything is easy. And it certainly offers more customization features for the Lives Tiles than any Windows 10’s built in feature.
Use Better StartMenu
TileCreator is pretty good, but if you want even more customization, you should put one more app into consideration. The app is called Better StartMenu, and it works on a similar principle as TileCreator, but offers more options.
Better StartMenu is a UWP app available in the Windows Store, and it comes with a price of $2.99 (but you can use a trial version, which apparently has no limitations) . It consists of two parts – Better StartMenu and StartMenu Helper. Better StartMenu collects all title data, including the name, icon, and path of the program, while Better StartMenu is used to pin a Live Tile to your Start Menu.
Here’s how to use Better StartMenu to add custom Live Tiles:
- First thing first, download the app from the Windows Store
- As soon as you open the app, you’ll notice a section for downloading the StartMenu Helper. Follow the instructions, and download StartMenu Helper. Since it comes as a .zip file, unwrap it to get started. Open StartMenu Helper
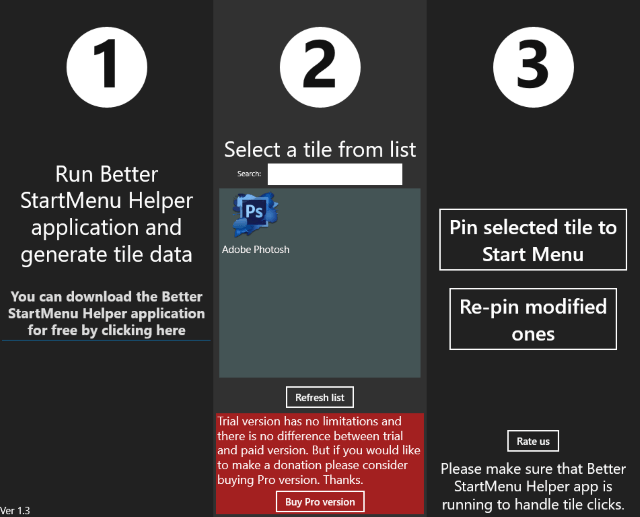
- To create a new tile, select New Tile, click on the Auto Generate all from a single image button, and select an image for your tile.
- Under Other options, add some more details, like the name, a background color (you can even use a transparent color), and more.
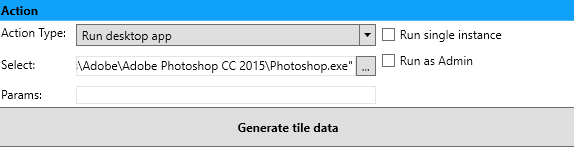
- Once you’ve entered all needed details for your Live Tile, head over to the Action section. Select Run desktop app
- Now, in the Select section, add the file path of an app/program you want the Live Tile to link to. The easiest way to find the file path is to Right-click the program you want to create the Live Tile for> Properties, and copy the Target location.
- Click on Generate tile data and your tile will show up in the Better StartMenu app.
- After you’ve generated and set everything, click on Pin select tile to Start Menu, and your newly created Live Tile will show up in the Start Menu.

Add Steam Tiles
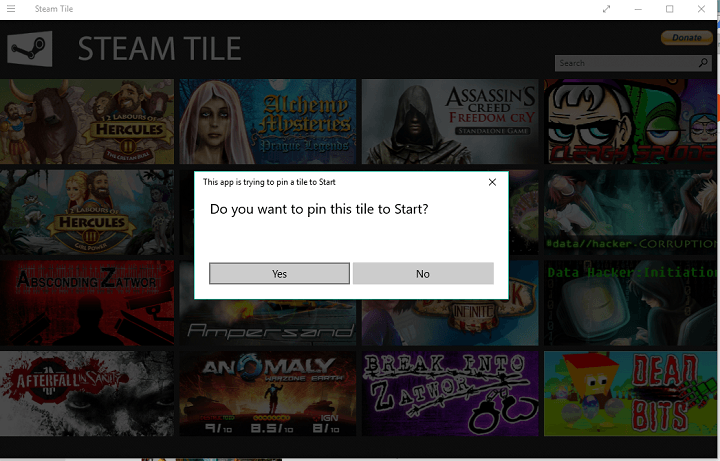
Another great way to add custom Live Tiles is to add the Live Tiles of Steam games from your library. We’re sure our gamer readers will like this solution. There’s a handy UWP app called Steam Tiles, that allows you to add the Live Tile of any game you own on Steam. The app will automatically generate title images of a game you want to pin to the Start Menu, so it will look nice, just like it does in the Steam marketplace.
To add the Live Tile of a Steam game to the Start Menu using Steam Tiles, follow these instructions
- Download the app from the Windows Store
- As soon as you open it, it will ask you for your Steam ID. If you don’t know your Steam ID, open the Steam client, and go to Account Name > Profile, and you’ll notice it
- Just copy your Steam ID in the Steam Tiles app, and press Enter
- The app will show you a list of every game you posses on Steam. To add the Live Tile to the Start Menu, just click on it and choose Yes
- The Live Tile will automatically appear in the Start Menu.
That’s about it, as you can see there are a few handy apps that can help you to add a custom Live Tile to the Start Menu. So, you can choose the one that fits you the best.
If you have any comments, questions or suggestions, just let us know in the comments below.
RELATED STORIES YOU NEED TO CHECK OUT:
How to fix Windows 10 Start menu tiles not showing

- Download Restoro PC Repair Tool that comes with Patented Technologies (patent available here).
- Click Start Scan to find Windows issues that could be causing PC problems.
- Click Repair All to fix issues affecting your computer’s security and performance
- Restoro has been downloaded by 0 readers this month.
Windows 10 has one of the greatest Start menus. Its Start menu is slick, modern and includes app tile shortcuts that give it a whole new dimension.
Yet, that menu in does have a few glitches. Blank app tile shortcuts are one of the Windows 10 Start menu‘s more frequently occurring issues. Some users have found their app tiles are entirely blank with no icons or text on them. This is how you can fix blank Start menu app tiles.
Fix fix blank Start menu tiles with these solutions
1. Pin the Tiles to the Start Menu Again
First, unpin the blank app tiles on the Start menu and pin them back on. Right-click an app tile on the Start menu and select Unpin from Start. Scroll to the app on the Start menu‘s app list, right-click it and select Pin to Start to pin the tile back on.
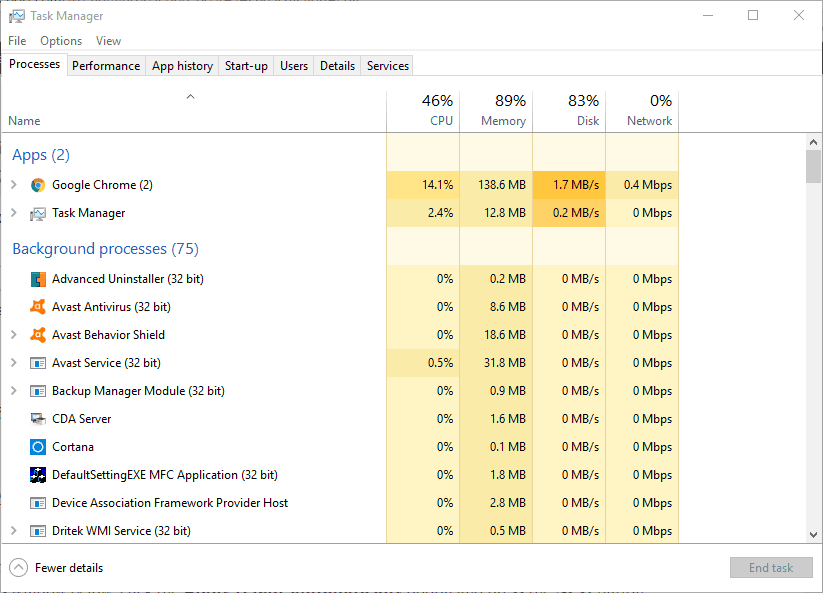
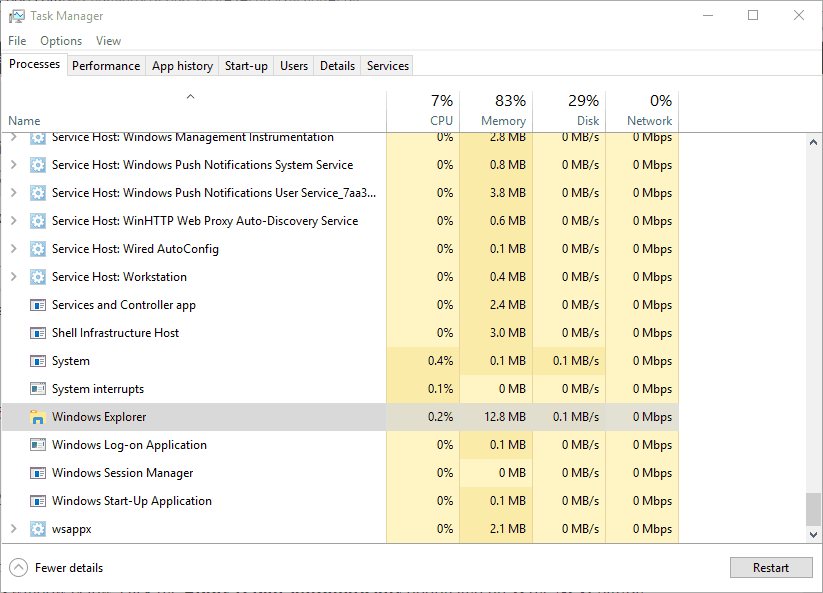
2. Restart the Windows Explorer With Task Manager
- Restarting Windows Explorer via the Task Manager is a potential fix for blank app tiles. To restart Windows Explorer, right-click the taskbar and click Task Manager.
- Select the Processes tab shown in the snapshot directly below.
- Scroll down that tab until you get to Windows Explorer, which is listed under Windows processes.
- Right-click Windows Explorer and select Restart on its context menu.
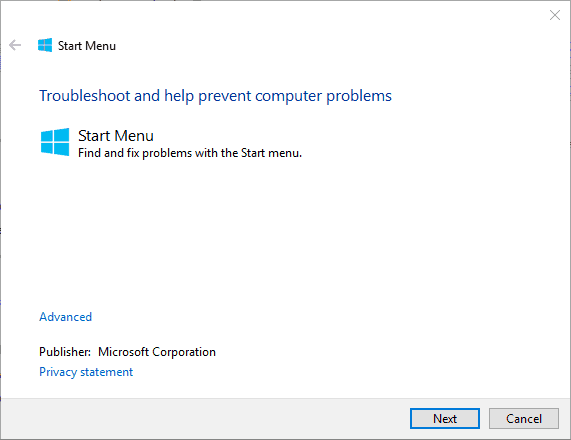
3. Open the Start Menu Troubleshooter
As the Start menu has some glitches, there’s a troubleshooter for it that might help fix blank app tiles. However, the Start Menu Troubleshooter is not included in Windows 10. You can add that troubleshooter to Windows by pressing the Download button on this web page. Open its window below, click the Apply repair automatically option and press the Next button.
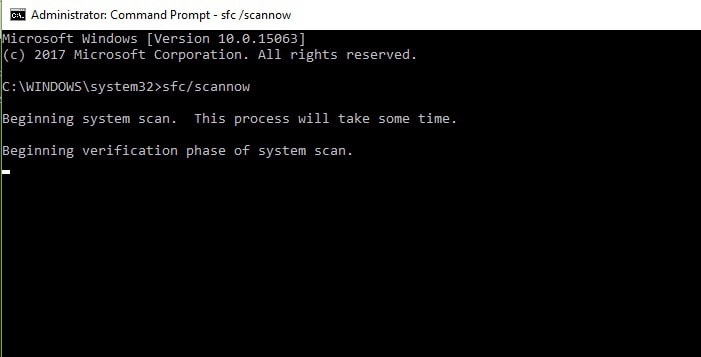
4. Run a System File Scan
Run a System Scan to discover potential errors


Blank app tile shortcuts could be due to corrupted system files. System File Checker is probably the best Windows tool for repairing corrupted system files. This is how you can utilize the SFC in Windows 10 to fix blank app tiles.
- Open the Win + X menu by pressing its Win key + X hotkey.
- Select the Command Prompt (Admin) shortcut on the Win + X menu.
- Enter ‘DISM.exe /Online /Cleanup-image /Restorehealth’ in the Command Prompt, and press the Return key.
- Thereafter, input ‘sfc /scannow’ and press Enter to scan system files. That scan could take between 20-30 minutes.
- Restart the OS if Windows Resource Protection does repair files.

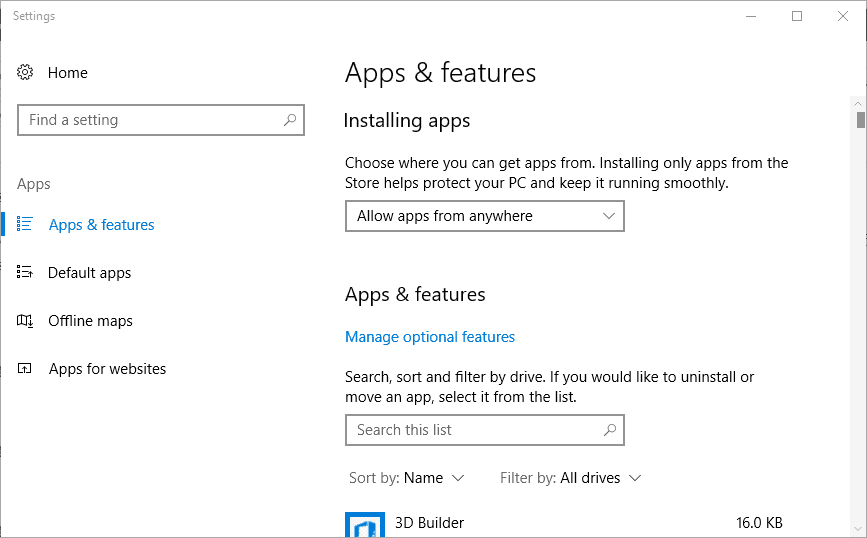
5. Reset Start Menu Apps
Windows 10 includes a Reset option with which you can reset a selected app’s data. That’s a handy troubleshooting option for fixing apps, so it might help restore their tile shortcuts. You can reset apps as follows.
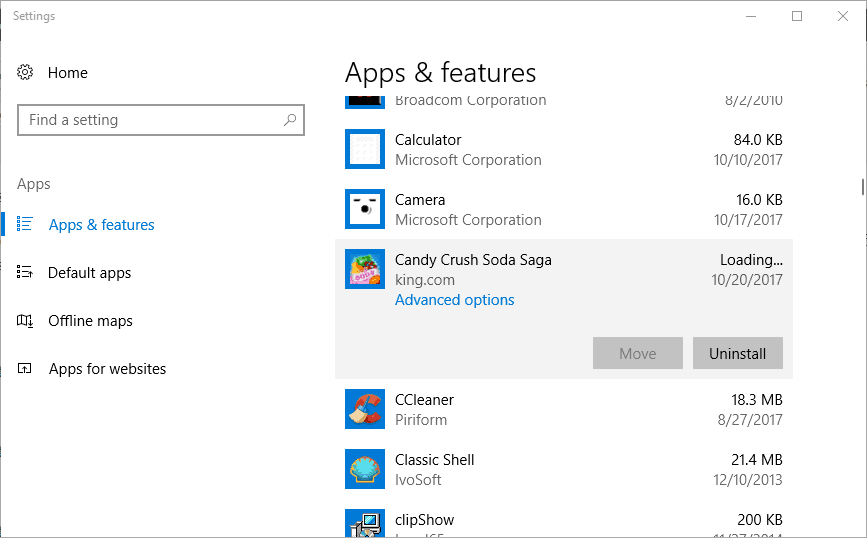
- Click the Cortana button, and input ‘apps’ in the search box.
- Select Apps & features to open the window shown directly below.
- Select an app that has a blank Start menu tile.
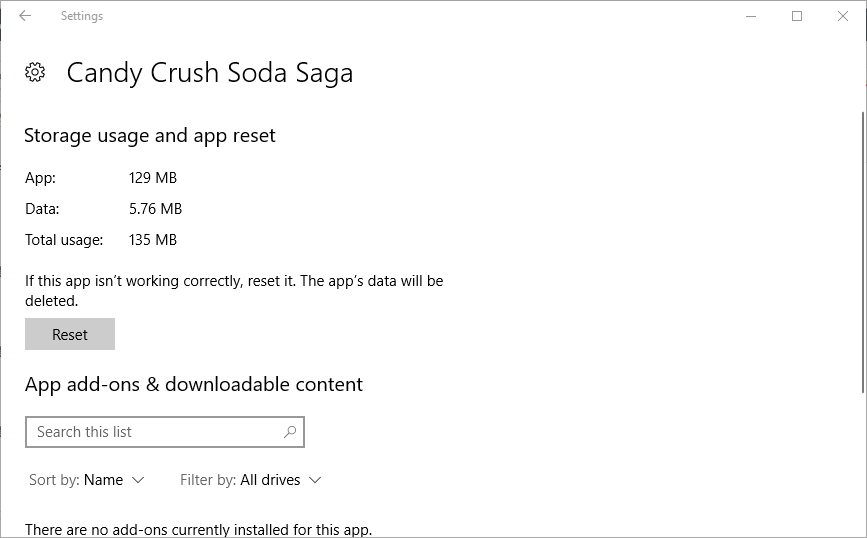
- Click Advanced options to open the Reset option in the snapshot below.
- Press the Reset button, and click Reset again to confirm.
6. Set Up a new User Account
It might be the case that there’s a corrupted Start menu layout database in the TileDataLayer folder. An SFC scan might resolve that, but setting up a new admin user account will reset the Start menu layout. So a new user account might also fix blank app tile shortcuts. You can set up a new account in Windows 10 as follows.
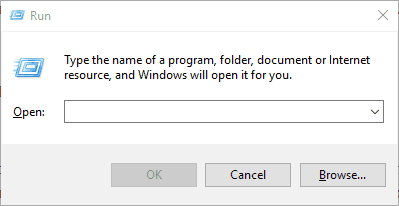
- Open the Win + X menu, and select Run to open the window directly below.
- Input ‘control userpasswords2’ in Run’s text box, and click the OK button.
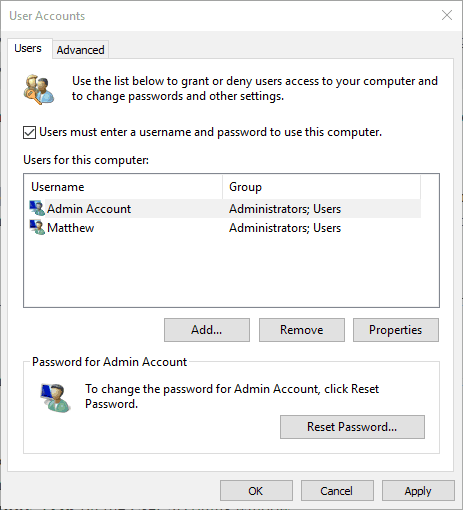
- Press the Add button on the Users tab. If that setting is grayed out, select the Users must enter a username check box.
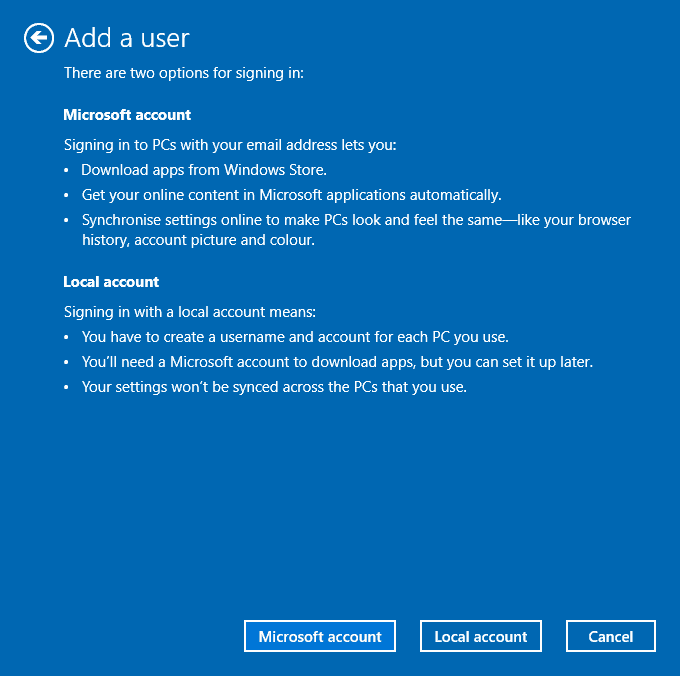
- Click Sign in without a Microsoft account to open the options shown below.
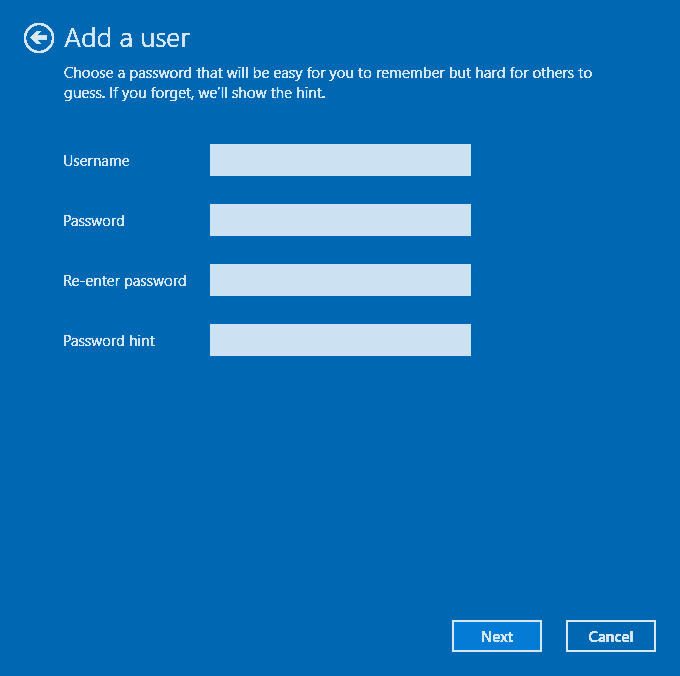
- Press the Local account button to open the text boxes in the snapshot directly below.
- There you can enter username and password details for the new account.
- Press the Next and Finish buttons.
- Click Apply >OK on the User Accounts window.
- Now log in to your new user account.
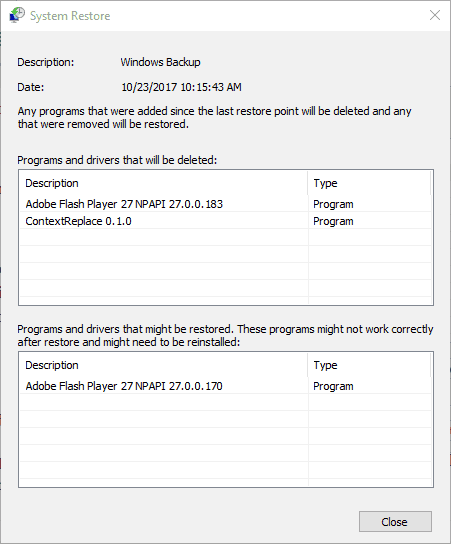
7. Restore Windows to a Restore Point
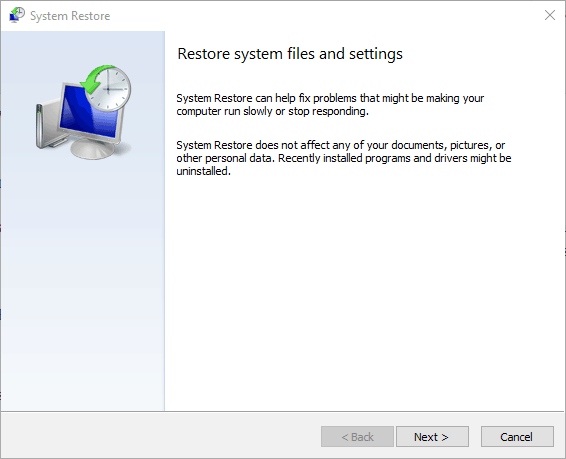
The System Restore tool will revert Windows back to an earlier date. It might remove recently installed third-party software that could be conflicting with the Start menu. In addition, it also rolls back minor updates and can repair system files. As such, System Restore could feasibly fix blank app tiles.
- To open System Restore, enter ‘rstrui’ in Run and click OK.
- Press the Next button to open a list of restore points.
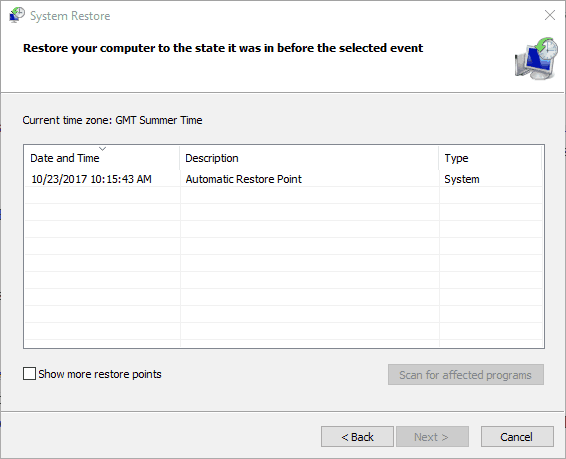
- Select Show more restore points to expand the list of restore points.
- Choose a restore point that will take Windows back to a date when there were no blank tiles on the Start menu.
- Click Scan for affected programs to open the window shown in the shot directly below. That shows you the software that will be deleted when you restore the OS.
- Click Next and Finish to restore Windows to the selected restore point.
Those resolutions will probably restore the app tile shortcuts on your Start menu. Some Windows repair toolkits might also fix the Start menu‘s app tiles. Check out this software guide for further Windows repair toolkit details.
RELATED STORIES YOU SHOULD CHECK OUT:


