- Резервное копирование и восстановление в Windows 10
- Back up and restore your PC
- Back up
- Create a system image
- Keeping different versions of system images
- Create a restore point
- Restore
- Restore a backup made on another computer
- Find files that were restored from a backup made on another computer
- Restore files from a file backup after restoring your computer from a system image backup
- Полное восстановление системы из существующей резервной копии клиентского компьютера Restore a full system from an existing client computer backup
- Что такое полное восстановление системы компьютера? What is computer full system restore?
- Среда предустановки Windows Windows Preinstallation Environment
- BitLocker BitLocker
- Шифрованная файловая система-шифрованные файлы Encrypting File System-encrypted files
- Разделы диска Disk partitions
- RAID и динамические диски RAID and dynamic disks
- Как работает среда восстановления системы? How does the system restore environment work?
- Создание загрузочного флэш-накопителя USB для восстановления клиентского компьютера Create a bootable USB flash drive to restore a client computer
- Создание загрузочного USB-устройства флэш-памяти To create a bootable USB flash drive
- Использование мастера полного восстановления системы Using the Full System Restore Wizard
- Использование мастера полного восстановления системы To use the Full System Restore Wizard
- Где можно найти драйверы для моего оборудования? Where can I find the drivers for my hardware?
- Копирование из архивной копии на флэш-накопитель USB To copy drivers from a backup to a USB flash drive
Резервное копирование и восстановление в Windows 10
Использование истории файлов для резервного копирования системы компьютера
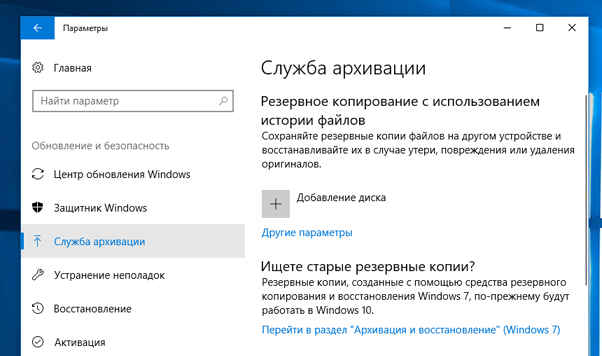
Используйте историю файлов для создания резервной копии на внешнем диске или в сетевой папке. Нажмите кнопку Пуск > Параметры > Обновить & безопасность > Архивация> Добавить диск , а затем выберите внешний диск или сетевое расположение для резервных копий.
Восстановление файлов с помощью истории файлов
Если вы заметили, что у вас отсутствует важный файл или папка, резервную копию которых вы создали, выполните приведенные ниже действия.
В поле поиска на панели задач введите восстановление файлов, а затем выберите Восстановление файлов с помощью истории файлов.
Найдите нужный файл, а затем с помощью стрелок просмотрите все его версии.
Когда найдете нужную версию, нажмите Восстановить, чтобы сохранить ее в исходном расположении. Чтобы сохранить копию в другом месте, щелкните правой кнопкой мыши кнопку Восстановить, выберите элемент Восстановить в и укажите новое расположение.
Поиск резервных копий, созданных в предыдущих версиях Windows
Если вы использовали компонент «Резервное копирование и восстановление» для создания резервных копий файлов или образа системы в предыдущих версиях Windows, эти резервные копии будут по-прежнему доступны в Windows 10. В поле поиска на панели задач введите панель управления. Затем щелкните Панель управления > Система и ее обслуживание > Резервное копирование и восстановление (Windows 7).
Back up and restore your PC
To learn how to back up and restore individual files on a Windows-based computer:
To learn how to back up and restore in Windows 10:
Back up
There are several ways to back up your PC.
Select the Start button, then select Control Panel > System and Maintenance > Backup and Restore.
Do one of the following:
If you’ve never used Windows Backup before, or recently upgraded your version of Windows, select Set up backup, and then follow the steps in the wizard.
If you’ve created a backup before, you can wait for your regularly scheduled backup to occur, or you can manually create a new backup by selecting Back up now.
If you’ve created a backup before, but want to make a new, full backup rather than updating the old one, select Create new, full backup, and then follow the steps in the wizard.
Note: Do not back up files to the same hard disk that Windows is installed on. For example, do not back up files to a recovery partition. Always store media used for backups (external hard disks, DVDs, or CDs) in a secure place to prevent unauthorized people from having access to your files; a fireproof location separate from your computer is recommended. You might also consider encrypting the data on your backup.
Create a system image
System images contain all of the info on your PC at a particular state.
Right-click the Start button, then select Control Panel > System and Maintenance > Backup and Restore.
In the left pane, choose Create a system image, and then follow the steps in the wizard.  If you’re prompted for an administrator password or confirmation, type the password or provide confirmation.
Note: To create a system image of a drive, it must be formatted to use the NTFS file system. If you save the system image on a hard drive or USB flash drive, it must be formatted to use the NTFS file system.
Keeping different versions of system images
You can keep several versions of system images. On internal and external hard drives, older system images will be deleted when the drive runs out of space. To help conserve disk space, delete older system images.
If you’re saving your system images in a network location, you can only keep the most current system image for each computer. System images are saved in the format of drive\WindowsImageBackup\computer name\. If you already have a system image for a computer and are creating a new one for the same computer, the new system image will overwrite the old one.
If you want to keep the old system image, you can copy it to a different location before creating the new system image by following these steps.
Navigate to the location of the system image.
Copy the WindowsImageBackup folder to a new location.
Create a restore point
You can use a restore point to restore your computer’s system files to an earlier point in time. Restore points are automatically created each week by System Restore and when your PC detects change, like when you install an app or driver.
Here’s how to create a restore point.
Right-click the Start button, then select Control Panel > System and Maintenance > System.
In the left pane, select System protection.
Select the System Protection tab, and then select Create.
In the System Protection dialog box, type a description, and then select Create.
Restore
Right-click the Start button, then select Control Panel > System and Maintenance > Backup and Restore.
Do one of the following:
To restore your files, choose Restore my files.
To restore the files of all users, choose Restore all users’ files.
Do one of the following:
To look through the contents of the backup, select Browse for files or Browse for folders. When you’re browsing for folders, you won’t be able to see the individual files in a folder. To view individual files, use the Browse for files option.
To search the contents of the backup, select Search, type all or part of a file name, and then select Search.
Tip: If you’re searching for files or folders associated with a specific user account, you can improve search results by typing the location of the file or folder in the Search for box. For example, to search for all JPG files that were backed up, type JPG in the Search for box. To only search for JPG files associated with the user Bill, type C:\Users\Bill\JPG in the Search for box. Use wildcard characters such as *.jpg to search for all JPG files that were backed up.
Restore a backup made on another computer
You can restore files from a backup that was created on another computer running Windows Vista or Windows 7.
Select the Start button, then select Control Panel > System and Maintenance > Backup and Restore.
Choose Select another backup to restore files from, and then follow the steps in the wizard. If you’re prompted for an administrator password or confirmation, type the password or provide confirmation.
Find files that were restored from a backup made on another computer
If you’re restoring files from a backup that was made on another computer, the files will be restored in a folder under the user name that was used to create the backup. If the user names are different, you’ll need to navigate to the folder where the files are restored. For example, if your user name was Molly on the computer that the backup was made on but your user name is MollyC on the computer that the backup is being restored on, the restored files will be saved in a folder labelled Molly.
To find restored files:
Select the Start button, then select Computer.
Double-click the icon of the drive that the files are saved on, for example C:\.
Double-click the Users folder. You will see a folder for each user account.
Double-click the folder for the user name that was used to create the backup. The restored files will be in the various folders based on where they were located originally.
Restore files from a file backup after restoring your computer from a system image backup
After you restore your computer from a system image backup, there may be newer versions of some of your files in a file backup that you want to restore.
To restore files from a file backup that was created after the system image backup was created, follow these steps.
Select the Start button, then select Control Panel > System and Maintenance > Backup and Restore.
Choose Select another backup to restore files from. If you’re prompted for an administrator password or confirmation, type the password or provide confirmation.
In Backup Period, select the date range of the backup that contains the files that you want to restore, and then follow the steps in the wizard.
Полное восстановление системы из существующей резервной копии клиентского компьютера Restore a full system from an existing client computer backup
Область применения: Windows Server 2016 Essentials, Windows Server 2012 R2 Essentials, Windows Server 2012 Essentials Applies To: Windows Server 2016 Essentials, Windows Server 2012 R2 Essentials, Windows Server 2012 Essentials
Сбои оборудования и операционной системы редки, но они случаются. Hardware and operating system failures are rare, but they can happen. Неисправность вентилятора может привести к перегреву системной платы компьютера и вывести ее из строя. A malfunctioning fan could overheat a computer motherboard and render it useless. Операционная система может быть повреждена и ее запуск окажется невозможным. The operating system could become corrupt and refuse to start. Ущерб от пожара и воды может привести к неустранимым повреждениям оборудования. Fire and water damage can result in permanent hardware damage. Может выйти из строя жесткий диск, или возникнет необходимость замены его более емким. A hard disk drive may fail or you may decide to replace it with a larger hard disk drive.
В этом документе представлены сведения по следующим вопросам: This document provides information about the following topics:
Что такое полное восстановление системы компьютера? What is computer full system restore?
В случае замены жесткого диска или сбоя компьютера, в результате которого дальнейшая его эксплуатация или запуск окажутся невозможными, можно восстановить систему с помощью предыдущей архивной копии компьютера. In the event that you replace a hard disk drive or your computer fails to the point where it cannot be used or does not start up, you can restore the system from a previous backup of the computer. При полном восстановлении возвращается состояние системы на момент создания резервной копии. A full system restore returns the system to the state that it was in at the time of the backup.
Полное восстановление системы провести невозможно, если аппаратное обеспечение (например, системная плата) отличается от заменяемого. You cannot perform a full system restore on computer hardware, such as a system board, that is not similar to the computer hardware that is being replaced. Установленная операционная система тесно связана с аппаратным обеспечением компьютера. An installed operating system is closely dependent on the underlying hardware of the computer. Однако можно провести полное восстановление системы на жесткий диск такого же (или большего) размера, что и заменяемый. However, you can perform a full system restore to a hard drive that is equal in size or larger than the one that is being replaced.
При выполнении полного восстановления системы можно выбрать конкретную архивную копию для восстановления системы со всеми приложениями, настройками и параметрами, существовавшими на момент сбоя, поломки или кражи. When performing a full system restore, you can choose a specific computer backup to restore the system, with all of the applications, configurations, and settings familiar to the user prior to the failure, catastrophe, or theft. Можно также выбрать тома, которые требуется восстановить. You can also choose which volumes that you want to restore.
При планировании или подготовке полного восстановления сетевого компьютера следует учесть следующие моменты: When planning or preparing to restore the full system to a network computer, considering the following:
Среда предустановки Windows Windows Preinstallation Environment
Среда предустановки Windows — это минимальная операционная система, предназначенная для подготовки компьютера к установке Windows. Windows Preinstallation Environment (Windows PE) is a minimal operating system designed to prepare a computer for Windows installation. Для серверов, работающих под Windows Server Essentials, среда предустановки Windows устанавливается автоматически при вставке носителя для восстановления на восстанавливаемый компьютер. For servers running Windows Server Essentials, Windows PE is installed automatically when you insert the restore media on a computer to be restored. Для серверов, работающих под управлением Windows Server Essentials, среда предустановки Windows устанавливается автоматически при запуске компьютера с помощью службы восстановления клиента или USB-накопителя. For servers running Windows Server Essentials, Windows PE is installed automatically when you start the computer with the client restore service or with the USB flash drive.
Среда предустановки Windows не поддерживает беспроводные соединения. Windows PE does not support wireless connections. Из-за этого восстанавливаемый компьютер должен быть физически подключен к сети для малого бизнеса. Because of this, the computer being restored must be physically connected to the small business network.
BitLocker BitLocker
Шифрование диска BitLocker (BitLocker) — это функция защиты данных, доступная в некоторых версиях Windows Vista, Windows 7 и Windows 8. BitLocker Drive Encryption (BitLocker) is a data protection feature that is available in some versions of Windows Vista, Windows 7, and Windows 8. Система BitLocker защищает данные от хищения или несанкционированного просмотра на утерянных или украденных компьютерах, а также обеспечивает более надежное удаление данных при списании компьютеров. BitLocker protects against data theft or exposure on computers that are lost or stolen, and offers more secure data deletion when computers are decommissioned.
Для Windows Server Essentials: Если компьютер, который необходимо восстановить, был зашифрован с помощью BitLocker (будь то диск операционной системы или диск операционной системы и один или несколько других фиксированных дисков), вы по-прежнему можете использовать носитель полного восстановления системы, содержащийся на компакт-диске, поставляемом с сервером, и мастер полного восстановления системы для повторной установки образа жесткого диска, включая операционную систему, из резервной копии и восстановления данных на новом или восстановленном компьютере. For Windows Server Essentials: If the computer that you need to restore was encrypted using BitLocker (whether it was just the operating system drive or the operating system drive and single or multiple other fixed drives), you can still use the full system restore media contained on the CD provided with your server and the Full System Restore Wizard to re-install the hard drive image, including the operating system, from a backup and restore the data to the new or repaired computer.
Для Windows Server Essentials: Если компьютер, который необходимо восстановить, был зашифрован с помощью BitLocker (будь то диск операционной системы или диск операционной системы и один или несколько жестких дисков), можно по-прежнему использовать мастер полного восстановления системы для повторной установки образа жесткого диска, включая операционную систему, из резервной копии и восстановления данных на новом или восстановленном компьютере. For Windows Server Essentials: If the computer that you need to restore was encrypted using BitLocker (whether it was just the operating system drive or the operating system drive and single or multiple other fixed drives), you can still use the Full System Restore Wizard to re-install the hard drive image, including the operating system, from a backup and restore the data to the new or repaired computer.
Когда сервер создает резервные копии дисков, папок и файлов, на сервер сохраняется незашифрованная версия. When the server backs up drives, folders, and files, an unencrypted version is saved to the server. Во время полного восстановления системы незашифрованная версия копируется на компьютер. During full system restore, this unencrypted version is copied to the computer.
После успешного проведения полного восстановления системы необходимо повторно активировать на компьютере систему BitLocker. After a successful full system restore, you must reactivate BitLocker on the computer.
Инструкции по включению BitLocker на компьютерах под управлением Windows 8 см. в разделе BitLocker: включение BitLocker. For instructions about how to enable BitLocker on computers that are running Windows 8, see BitLocker: How to enable BitLocker.
Инструкции по включению BitLocker на компьютерах под управлением Windows 7 см. в разделе Шифрование диска BitLocker пошаговое руководство для Windows 7. For instructions about how to enable BitLocker on computers that are running Windows 7, see BitLocker Drive Encryption Step-by-Step Guide for Windows 7.
Дополнительные сведения об основах шифрования дисков BitLocker см. в статье BitLocker. Вопросы и ответы. For more information about BitLocker Drive Encryption basics, see BitLocker Frequently Asked Questions (FAQ).
Шифрованная файловая система-шифрованные файлы Encrypting File System-encrypted files
Функция «Шифрованная файловая система» (EFS) в Windows обеспечивает дополнительное шифрование на уровне файла пользователя для создания различных уровней безопасности, если на компьютере работают несколько пользователей. The Encrypting File System (EFS) feature in Windows can provide additional user-based file level encryption for different levels of security among multiple users of the same computer. Необходимо отметить, что в отличие от шифрования дисков с помощью BitLocker, папки и файлы, зашифрованные с помощью EFS, остаются зашифрованными в любой архивной копии компьютера. It is important to note that, unlike BitLocker-encrypted drives, EFS-encrypted folders and files continue to be encrypted in any computer backup. Система EFS недоступна в Windows XP Home Edition, Windows Vista Starter, Windows Vista Домашняя базовая, Windows Vista Home Premium, Windows 7 Начальная, Windows 7 Домашняя базовая, Windows 7 Домашняя расширенная или Windows 8. EFS is not available in Windows XP Home Edition, Windows Vista Starter, Windows Vista Home Basic, Windows Vista Home Premium, Windows 7 Starter, Windows 7 Home Basic, Windows 7 Home Premium, or Windows 8. Эта возможность предусмотрена лишь в Windows 8 Pro. It is only available in Windows 8 Pro.
В отличие от BitLocker, доступ к файлам, зашифрованным с помощью EFS, возможен только из операционной системы, в которой выполнялось шифрование. Unlike BitLocker, you can only access EFS-protected files from within the operating system that encrypted them.
Разделы диска Disk partitions
Если размер разделов жесткого диска на новом компьютере такой же или больше, чем на оригинальном компьютере, то жесткий диск автоматически форматируется, а его разделы организовываются заново. If the hard disk drive size on the new computer is the same, or larger than, the original, the hard disk drive is automatically reformatted and repartitioned. Подробнее см. на рисунке ниже: Refer to the chart below for specifics:
| Исходный компьютер Original Computer | Восстановленный или новый компьютер Restored or New Computer |
|---|---|
| Один диск с несколькими разделами Single disk with multiple partitions | Один диск с несколькими разделами, остаток пространства включается в последний раздел Single disk with multiple partitions and any extra space is allocated to the last partition |
| Один диск с одним разделом Single disk with a single partition | Один диск с одним разделом, все доступное пространство используется под один раздел Single disk with a single partition, and all available space is used for the single partition |
В случае различия размеров диска и расположения разделов между оригинальным и восстановленным или новым компьютером, необходимо с помощью функции «Управление диском» создать соответствующие разделы на восстановленном или новом компьютере. If there are disk size and partition layout differences between the original and the restored or new computer, you must use Disk Management to create the appropriate partitions on the restored or new computer. Для этого можно использовать мастер полного восстановления системы. You can do this in the Full System Restore Wizard.
RAID и динамические диски RAID and dynamic disks
Архивация избыточного массива из независимых дисков (RAID) и динамических дисков не поддерживается. Backing up redundant array of independent disks (RAID) and dynamic disks is not supported.
Как работает среда восстановления системы? How does the system restore environment work?
Носитель для восстановления системы, предоставляемый с Windows Server ® 2012 Essentials, устанавливает среда предустановки Windows (Windows PE) на компьютере. The system restore media supplied with Windows Server® 2012 Essentials installs Windows Preinstallation Environment (Windows PE) on the computer. Среда предустановки Windows заменяет среду MS-DOS и содержит основные программные файлы для Windows. Windows PE replaces the MS-DOS environment and contains the core program files for Windows. В Windows Server Essentials существует два способа восстановления системы: с помощью службы восстановления клиента, использующей сеть и не зависящей от носителя, или с помощью флэш-накопителя USB. In Windows Server Essentials, there are two supported ways to restore a system: using the client restore service, which uses a network and does not rely on media, or using the USB flash drive.
Среда предустановки Windows не поддерживает беспроводные соединения. Windows PE does not support wireless connections. Из-за этого восстанавливаемый компьютер должен быть физически подключен к сети для малого бизнеса. Because of this, the computer being restored must be physically connected to the small business network.
Среда восстановления система поставляется с 32-разрядными (x86) и 64-разрядными (x64) программными файлами. The system restore environment comes with 32-bit (x86) and 64-bit (x64) program files. После вставки носителя для восстановления системы выберите необходимую версию файлов. After inserting the system restore media, choose the appropriate version of the files. По умолчанию устанавливается 32-разрядная (x86) версия, которая выбирается автоматически, если вы не выберите другой вариант в течение 30 секунд. 32-bit (x86) is the default, and is selected automatically if you do not choose within 30 seconds. Если на сервере есть обновления программных файлов для полного восстановления системы, обновленные файлы автоматически загружаются на компьютер. If there are updates to the full system restore program files on the server, the updated files are downloaded to the computer automatically.
После установки среды предустановки запускается мастер полного восстановления системы. After the preinstallation environment is set up, the Full System Restore Wizard starts. Этот мастер помогает вам восстановить компьютер из ранее созданного архива. The wizard helps you restore your computer from a previous backup. Вы также можете использовать среду восстановления системы, чтобы восстановить архив на новый компьютер с таким же оборудованием. You can also use the system restore environment to restore a backup to a new computer with similar hardware.
В большинстве случаев программные файлы и драйверы, включенные в среду восстановления системы — это все, что нужно для перезагрузки нового или восстановленного компьютера. In most instances, the program files and drivers contained on the system restore environment are all that is needed to restart the new or restored computer. В зависимости от аппаратного обеспечения нового или восстановленного компьютера, в среде восстановления системы могут содержаться не все драйверы для хранилища и сетевого адаптера, которые потребуются после перезапуска нового или восстановленного компьютера. Depending on the new or restored computer hardware, the system restore environment may not include all of the storage and network adapter drivers that are required when you restart your new or restored computer. При необходимости вы можете установить драйверы с помощью мастера полного восстановления системы. The Full System Restore Wizard gives you an opportunity to install drivers, if necessary. Для получения информации о поиске драйверов для оборудования см. в разделе Где найти драйверы для моего устройства. For information about finding your hardware drivers, see Where can I find the drivers for my hardware?. Дополнительные сведения об использовании носителя для восстановления системы см. в разделе Использование мастера полного восстановления системы. For information about how to use the system restore media, see Using the Full System Restore Wizard.
Создание загрузочного флэш-накопителя USB для восстановления клиентского компьютера Create a bootable USB flash drive to restore a client computer
Если необходимо восстановить клиентский компьютер из существующей резервной копии, но не удается определить путь к установочному компакт-диску, который поставлялся с сервером (в Windows Server Essentials) или вы не хотите настраивать службу восстановления клиента на сервере (в Windows Server Essentials), можно создать загрузочный USB-накопитель. If you need to restore a client computer from an existing backup but cannot locate the Restore CD that came with your server (in Windows Server Essentials) or you do not want to set up the client restore service on your server (in Windows Server Essentials), you can create a bootable USB flash drive. Затем вы сможете использовать USB-устройство флэш-памяти для запуска клиентского компьютера и восстановления системы. You can then use the USB flash drive to start the client computer and restore the system. Объем USB-устройства флэш-памяти должен составлять не менее 1 ГБ. The USB flash drive that you use must be at least 1 GB or larger.
Создание загрузочного USB-устройства флэш-памяти To create a bootable USB flash drive
Откройте Панель администрирования. Open the Dashboard.
Щелкните вкладку Устройства. Click the Devices tab.
На панели Задачи щелкните пункт Настроить параметры архивации компьютеров и журнала файлов. In Tasks pane, click Customize Computer Backup and File History settings.
В Windows Server Essentials щелкните задачи резервного копирования клиентских компьютеров. In Windows Server Essentials, click Client computer backup tasks.
Щелкните вкладку Сервис, а затем — Создать ключ в разделе Восстановление компьютера. Click the Tools tab, and then click Create key in the Computer recovery section. Откроется мастер создания ключа восстановления компьютера. The Create Computer Recovery Key Wizard opens.
Вставьте USB-устройство флэш-памяти объемом от 1 ГБ в сервер и следуйте инструкциям в мастере. Insert a 1 GB or larger USB flash drive in the server, and then follow the instructions in the wizard.
Все данные на USB-устройстве флэш-памяти будут удалены. All data on the USB flash drive will be deleted.
Использование мастера полного восстановления системы Using the Full System Restore Wizard
После успешного использования носителя для восстановления, службы восстановления клиента или USB-устройства флэш-памяти для загрузки компьютера и проверки статуса загрузки драйверов всех аппаратных компонентов на новый или восстановленный компьютер, запустится мастер полного восстановления системы. After successfully using the restore media, client restore service, or USB flash drive to start your computer and verify that all hardware drivers are loaded on the restored or new client computer, the Full System Restore Wizard appears. Этот мастер обеспечивает доступ к серверу, архивной копии компьютера и к тому, который требуется восстановить на компьютере, после чего выполняется процедура восстановления. This wizard enables you to access the server, the computer backup, and the source volumes that you want to restore to the computer, and performs the actual restore process.
Windows Server Essentials не поддерживает следующие сценарии восстановления: Windows Server Essentials does not support the following restore scenarios:
Восстановление диска основной загрузочной записи (MBR) на компьютере, основанном на Единый интерфейс EFI (UEFI). Restoring a Master Boot Record (MBR) disk to a Unified Extensible Firmware Interface (UEFI)-based computer.
- Восстановление резервной копии UEFI/GPT в системе BIOS. Restoring a UEFI/GPT backup to a BIOS system.
Если данные восстанавливаются в одном из этих сценариев, вы не сможете перезагрузить систему. If you restore data in either of these scenarios, you will not be able to boot the system. Кроме того, вы не сможете использовать жесткие диски, размер которых превышает 2 ТБ. In addition, you might not be able to use hard drives that are larger than two terabytes in size.
Предварительные условия. Prerequisites:
Перед началом полного восстановления системы подключите компьютер с помощью сетевого кабеля (проводное соединение) к той же сети, в которой размещен сервер. Before starting the full system restore process, use a network cable (a wired connection) to connect the computer to the same network as the server. Убедитесь, что у вас есть доступ ко всем жестким дискам на клиентском компьютере. Make sure that you have access to all hard drives on the client computer.
Не следует выполнять полное восстановление системы компьютера, подключенного к сети беспроводным способом. Do not attempt to perform a full system restore to a computer that uses a wireless connection to the network.
Если известно, что на компьютере отсутствуют важные драйверы сети или устройств хранения, необходимо найти эти драйверы и скопировать на флэш-накопитель до начала процедуры полного восстановления системы. If you know that the computer is missing critical network or storage device drivers, you will need to locate and copy those drivers to a flash drive before starting the full system restore process. Для Windows Server Essentials: при использовании полного носителя для восстановления системы, который предоставляется на компакт-диске, этот компакт-диск должен остаться на диске во время запуска процесса полного восстановления системы. For Windows Server Essentials: If you are using the full system restore media that is provided on CD, that CD must remain in the drive during the start portion of the full system restore process. Поэтому не следует копировать недостающие драйверы на компакт-диск или DVD, если у вас нет второго устройства чтения компакт-дисков и DVD. Therefore, you should not copy the missing drivers onto a CD or DVD unless you have a second CD/DVD drive. Вместо этого скопируйте отсутствующие драйверы на USB-устройство флэш-памяти. Instead, copy the missing drivers to a USB flash drive.
Для получения информации о поиске драйверов для компьютера см. Где найти драйверы для моего устройства For information about how to find the drivers for your computer, see Where can I find the drivers for my hardware?
Для Windows Server Essentials: если не удается разместить компакт-диск Windows Server Essentials Restore, можно создать загрузочный USB-накопитель. For Windows Server Essentials: If you cannot locate the Windows Server Essentials Restore CD, you can create a bootable USB flash drive. Дополнительные сведения см. в разделе Создание загрузочного USB-устройства флэш-памяти для восстановления клиентского компьютера. For more information, see Create a bootable USB flash drive to restore a client computer.
Использование мастера полного восстановления системы To use the Full System Restore Wizard
Выполните одно из следующих действий. Do one of the following:
Windows Server Essentials: включите клиентский компьютер, который требуется восстановить, вставьте носитель для восстановления, а затем выключите компьютер. Windows Server Essentials: Turn on the client computer that you want to restore, insert the restore media, and then turn the computer off.
Снова включите компьютер, и во время POST нажмите соответствующую функциональную клавишу (F-клавишу) для вызова меню загрузки, затем выберите дисковод CD/DVD. Turn the computer on again, and during Power On Self Test (POST), press the appropriate function key (F-key) to access the Boot Device Menu, and then select the CD/DVD drive. Запускается диспетчер загрузки Windows. The Windows Boot Manager starts.
Windows Server Essentials. Если вы используете службу восстановления клиента, перезагрузите компьютер, используя параметр загрузить из сети . Windows Server Essentials: If you are using the client restore service, restart the computer using the Boot from network option. В противном случае запустите компьютер с помощью USB-ключа. Otherwise, start the computer using the USB key.
Повторно включите компьютер и во время теста POST нажмите соответствующую функциональную клавишу (F-клавишу) для вызова меню загрузки, после чего выберите вариант Загрузка из сети (или используйте загрузку с помощью USB-ключа). Turn the computer on again, and during Power On Self Test (POST), press the appropriate function key (F-key) to access the Boot Device Menu, and then select Boot from network (or you can choose to boot from the USB key). Запускается диспетчер загрузки Windows. The Windows Boot Manager starts.
По документации производителя компьютера определите, какая из функциональных клавиш служит для вызова меню загрузки устройств. Check the documentation from your computer manufacturer to determine which function key accesses the Boot Device Menu.
На носителе для восстановления системы содержатся варианты загрузки для 32-разрядных (x86) и 64-разрядных (x64) систем. The computer restore media contains 32-bit (x86) and 64-bit (x64) boot options. В диспетчере загрузки Windows выберите Полное восстановление системы (x86) или Полное восстановление системы (x64). In the Windows Boot Manager, choose Full System Restore (x86) or Full System Restore (x64). Если драйверы аппаратного обеспечения компьютера 32-разрядные, выберите x86; если они 64-разрядные — выберите x64. If the computer hardware drivers are 32-bit, choose x86; if they are 64-bit, choose x64. Происходит загрузка файлов Windows, и мастер полного восстановления системы проверяет наличие всех драйверов аппаратных компонентов. Windows files are loaded, and the Full System Restore Wizard performs a check to make sure that all hardware drivers are available.
В окне мастера полного восстановления системы выберите предпочитаемый язык и щелкните стрелку. In the Full System Restore Wizard window, choose your preferred language, and then click the arrow.
Выберите нужный формат времени и денежных единиц, а также клавиатуру или способ ввода для данного компьютера. Choose the appropriate Time and currency format, and the Keyboard or input method for this computer. Нажмите кнопку Continue(Продолжить). Click Continue.
Если драйверы отсутствуют, то в сообщении, которое процесс восстановления не сможет проверить, отображаются ли драйверы. If drivers are missing, the message The restore process cannot verify the drivers is displayed. Нажмите кнопку Закрыть и в диалоговом окне приветствия нажмите кнопку Загрузить драйверы. Click Close, and then on the Welcome dialog box click Load drivers.
В диалоговом окне Определить оборудование нажмите кнопку Установка драйверов. On the Detect Hardware dialog box, click Install drivers.
Вставьте флэш-накопитель USB с драйверами устройств, затем в диалоговом окне Установка драйверов нажмите кнопку Поиск. Insert the USB flash drive that contains the hardware drivers, and then on the Install Drivers dialog box, click Scan.
После того, как драйверы найдены, в диалоговом окне Установка драйверов нажмите кнопку OK. On the Install Drivers dialog box, click OK when the drivers are found.
В диалоговом окне Определить оборудование нажмите кнопку Продолжить. On the Detect Hardware dialog box, click Continue.
Если все необходимые драйверы обнаружены при первичной проверке или если все важнейшие драйверы установлены, в окне Полное восстановление системы нажмите кнопку Продолжить. If all drivers were found in the initial check or when all critical drivers are installed, on the Full System Restore window, click Continue.
На странице Мастер полного восстановления системы нажмите кнопку Далее. On the Welcome to the Full System Restore Wizard page, click Next.
Мастер выполняет поиск сервера. The wizard searches for your server.
Если мастеру не удается найти сервер, можно выполнить поиск повторно или ввести IP-адрес сервера. If the wizard cannot locate your server, you are given the option to search again, or to enter the IP address of the server.
Если обнаружены несколько серверов, вам будет предложено выбрать один. If multiple servers were detected, you are asked to select one.
Если сервер находится в списке, отображается страница Вход в . If your server is located, the Log on to page is displayed.
На странице Вход в введите в текстовое поле имя пользователя и пароль учетной записи администратора в текстовом поле пароль , а затем нажмите кнопку Далее. On the Log on to page, type in the User name text box, and the administrator account password in the Password text box, and then click Next.
Необходимо использовать англоязычную учетную запись администратора. You must use an administrator account that is created in English. Если таковая отсутствует, вам потребуется создать новую учетную запись администратора. If you do not have one, then you must create a new administrator account. Для этого откройте вкладку Пользователи в панели мониторинга сервера, переключите клавиатуру на английский язык и запустите Добавление учетных записей пользователя, чтобы создать учетную запись администратора. To do so, first open the Users tab on the server dashboard, next set the keyboard language format to English, and then run the Add a user account task to create the administrator account. После этого используйте новую учетную запись администратора, чтобы продолжить восстановление клиентского компьютера. Next, use the new administrator account to continue to restore the client computer.
На странице Выберите компьютер для восстановления выберите компьютер, который необходимо восстановить, и нажмите кнопку Далее. On the Select a computer to restore page, select the computer you want to restore, and then click Next. Можно выбрать : (этот компьютер) или выбрать другой компьютер в сети из раскрывающегося списка другой компьютер . You can choose either : (This computer) or choose a different computer on the network from the Another computer drop down list.
Если этот компьютер неизвестен серверу (например, новый или переназначенный компьютер), параметр Этот компьютер не отображается. If this is a computer that is unknown to the server (for example, a new or a repurposed computer), the This computer option is not displayed.
На странице Выберите архив для восстановления просмотрите список доступных архивов и выберите нужный для восстановления компьютера. On the Select a backup to restore page, review the list of available backups and select the one that you want to restore to the computer.
Рекомендуется выбрать успешно созданную архивную копию (отмечена зеленым флажком). It is recommended that you select a successful (green-checked) backup. Это гарантирует, что системные файлы и данные будут восстановлены успешно. This helps ensure that all system and data files are restored successfully.
(Необязательно) Выберите архив и нажмите Сведения, чтобы открыть страницу Сведения об архивации и просмотреть дополнительную информацию об этой архивной копии. (Optional) Select a backup and then click Details to open the Backup Details page and view more information about that backup. С помощью данных на странице Сведения об архивации сравните несколько архивных копий, чтобы выбрать оптимальный вариант. Use the information on the Backup Details page to compare multiple backups and help you decide which backup is the best choice. Чтобы вернуться на страницу Выберите архив для восстановления, нажмите кнопку Закрыть на странице Сведения об архивации. Click Close on the Backup Details page to return to the Select a backup to restore page.
На странице Выберите архив для восстановления выберите архив и нажмите кнопку Далее. On the Select a backup to restore page, select a backup and then click the Next button.
На странице Выберите вариант восстановления нажмите одну из следующих кнопок, затем нажмите Далее. On the Select restore option page, click one of the following, and then click Next.
Если автоматическое создание разделов не поддерживается, эта страница не отображается. This page is not displayed if automatic partitioning is not supported.
Позволить мастеру полностью восстановить компьютер (рекомендуется). Let the wizard fully restore the computer (recommended). Этот вариант гарантирует восстановление компьютера до состояния накануне времени и даты создания выбранной архивной копии. This option helps assure that the computer is restored to the state that it was just prior to the time and date of the backup that you chose. Если выбран данный параметр, перейдите к шагу 15. If you choose this option, skip to step 15.
Я выберу тома для восстановления (дополнительно). Let me select volumes to restore (advanced). Этот параметр позволяет выбирать тома, которые требуется восстановить, а также место, в которое их следует восстановить. This option allows you to choose the volumes that you want to restore and where you want to restore them. Можно также создать разделы на жестком диске. You can also create partitions on the hard drive.
На странице Выберите тома для восстановления можно выбрать тома, которые требуется восстановить. On the Select the volumes to restore page, you can choose the volumes that you want to restore.
Эта страница отображается, если на исходном компьютере с резервной копией несколько жестких дисков или если на конечном диске для восстановления меньше места, чем на исходном диске резервной копии. This page is displayed if there are multiple hard drives on the backup source computer, or if the restore destination drive has less storage space than the backup source drive.
Мастер пытается сопоставить исходные и конечные тома. The wizard attempts to match the source and destination volumes. Следует проверить правильность сопоставления по умолчанию. You should verify that the default mapping is correct.
Чтобы снять выделение тома, щелкните на стрелке меню этого тома и затем нажмите кнопку Нет. To deselect a volume, click the list menu arrow for that volume, and then click None.
После завершения выбора томов нажмите кнопку Далее. When you finish selecting the volumes, click Next.
Если размеры тома-источника и конечного тома совпадают, либо если размер источника меньше конечного тома, между двумя томами появляется зеленая стрелка. If the source volume and the destination volume are the same size, or if the source size is smaller than the destination, a green arrow appears between the two. Если размеры томов не совпадают (том-источник больше конечного тома), между источником и конечным томом появляется красный значок X. If there is a volume size mismatch (where the source volume is bigger than the destination volume), a red X appears between the source and the destination.
Красный значок X может также появиться в указанных ниже случаях. A red X can also appear if:
- Размеры сектора диска исходного и конечного томов не совпадают. The disk sector size of the source volume does not match the disk sector size of the destination volume. Это может произойти при замене физического диска на диск с отличным размером сектора или при настройке дискового пространства (который может иметь размер сектора, не совпадающий с размером сектора физического диска). This can occur if you replace the physical disk with a disk that has a different sector size, or if you configure Storage Spaces (which may have a different sector size than that of the physical disk).
- Достигнут максимальный допустимый размер кластера. You reach the cluster number limitation. Чтобы восстановить исходный том в конечном томе, необходимо отформатировать конечный том так, чтобы размер кластера в нем был таким же, как в исходном томе. To restore the source volume to the destination volume, you must format the destination volume with the same cluster size as the source volume. Если конечный том слишком велик, а размер кластера слишком мал, может быть достигнут максимальный допустимый размер кластера. If the destination volume is too large, and if the cluster size is too small, you can reach cluster number limitation.
Нажмите Открыть диспетчер дисков (дополнительно) и создайте новый том такого же размера, что и архивный. Click Run Disk Manager (advanced), and create a new volume that is the same size as the system reserved volume.
Если клиентский компьютер работает Единый интерфейс EFI (UEFI), для инициализации системного диска необходимо использовать средство DiskPart . If a client computer is Unified Extensible Firmware Interface (UEFI)-based, you must use the diskpart tool to initialize the system disk. Для этого откройте окно командной строки (нажмите и удерживайте CTRL+ALT+SHIFT в течение 5 секунд в среде WinPE), запустите diskpart.exe и выполните следующие команды diskpart: To do this, open a command window (press Ctrl+Alt+Shift for 5 seconds in the WinPE environment), run diskpart.exe, and then run the following diskpart commands:
- > списка дисков DISKPARTDISKPART> list disk 2. DISKPART> выбрать диск #DISKPART> select disk # 3. DISKPART> cleanDISKPART> clean 4. DISKPART> convert gptDISKPART> convert gpt 5. DISKPART> создать секцию EFI size =100 (где 100 — пример размера раздела в МБ, который должен совпадать с исходным разделом) DISKPART> create partition efi size=100 (where 100 is an example partition size in MB, should be the same as the original partition) 6. DISKPART> создать секцию MSR size =128 (где 128 — пример размера раздела в МБ, который должен совпадать с исходным разделом) DISKPART> create partition msr size=128 (where 128 is an example partition size in MB, should be the same as the original partition) 7. DISKPART> exitDISKPART> exit
(Необязательно) Выберите параметр Не назначать буквы диска или пути диска. (Optional) Select the option Do Not Assign a Drive Letter or Drive Path.
Отформатируйте том как NTFS. Format the volume as NTFS.
После форматирования щелкните правой кнопкой мыши новый том, а затем выберите команду Отметить раздел как активный. When formatting is complete, right-click the new system volume, and then click Mark Partition as Active.
Если требуются дополнительные тома, соответствующие томам архивной копии, повторите шаги с ii по iv для создания и активации томов, затем завершите процедуру Управление дисками. If you require additional volumes to correspond with other volumes in the backup, repeat steps ii through iv to create and activate the volumes, and then close Disk Management.
На странице Выберите тома для восстановления сопоставьте архивный том системы тому такого же размера, созданному на шаге v. On the Select the volumes to restore page, map the system reserved volume of the backup source to the volume of the same size that you created in step v.
Сопоставьте все исходные тома соответствующим конечным томам. Map all other source volumes to the corresponding destination volumes.
Нажмите кнопку Далее для продолжения восстановления. Click Next to continue with the restore.
На странице Подтвердите выбор томов для восстановления проверьте сопоставления и нажмите кнопку Далее. On the Confirm volumes to restore page, review the mapping, and then click Next. Если необходимо внести какие-либо изменения, нажмите кнопку Назад, затем повторите шаг 14. If you need to make any changes, click Back, and then repeat step 14.
При восстановлении с странице резервного копирования отображается ход выполнения процесса восстановления. The Restoring from page reports the progress of the restore process.
Когда появится страница Восстановление успешно завершено, извлеките носитель для восстановления системы и нажмите кнопку Готово. On the The restore finished successfully page, remove the restore media, and then click Finish. Компьютер будет перезагружен. The computer restarts.
Если перед началом восстановления на компьютере была активирована система шифрования дисков BitLocker, после перезагрузки компьютера необходимо включить ее вручную. If BitLocker Drive Encryption was enabled on the computer before the restore, you must enable BitLocker manually after the computer restarts.
Где можно найти драйверы для моего оборудования? Where can I find the drivers for my hardware?
В зависимости от аппаратного обеспечения нового или восстановленного компьютера, на носителе для восстановления системы могут отсутствовать некоторые драйверы хранилища и сетевого адаптера, которые потребуются после перезапуска восстановленного компьютера. Depending on the new or restored computer hardware, the restore media may not include all of the storage and network adapter drivers that are needed when you restart your restored computer. Необходимо определить, какие драйверы отсутствуют, найти эти драйверы на существующем носителе или на веб-сайте изготовителя, скопировать их на флэш-накопитель, а затем скопировать их с устройства флэш-памяти на новый или восстановленный компьютер при запуске мастера полного восстановления системы. You must determine which drivers are missing, locate those drivers on existing media or on the manufacturer’s website, copy them to a flash drive, and then copy them from the flash drive to the new or restored computer when you run the Full System Restore Wizard.
При архивации компьютера драйверы сохраняются в архивной копии. When a computer is backed up, the drivers for the computer are saved in the backup. Если на носителе для восстановления системы нет всех необходимых драйверов, можно открыть архив данного компьютера и скопировать драйверы на флэш-накопитель USB. If your recovery media does not include all of the drivers that you need, you can open a backup for that computer, and then copy the drivers to a USB flash drive.
Копирование из архивной копии на флэш-накопитель USB To copy drivers from a backup to a USB flash drive
На другом компьютере откройте панель администрирования. On another computer, open the Dashboard.
Щелкните Устройства, затем щелкните значок компьютера, для которого требуются драйверы. Click Devices, and then click the computer for which you need drivers.
Нажмите Восстановить файлы и папки компьютера. Click Restore files or folders for the computer. Откроется мастер восстановления файлов и папок. The Restore Files or Folders Wizard opens.
Нажмите кнопку последней успешной архивной копии и нажмите Далее. Click the most recent successful backup, and then click Next.
Выберите том, который требуется открыть, и нажмите кнопку Далее. Click a volume to open, and then click Next. Откроется окно со списком файлов и папок в архивной копии. A window opens that lists the files and folders in the backup.
Вставьте флэш-накопитель USB в разъем USB на компьютере и скопируйте папку «Драйверы для полного восстановления системы» на флэш-накопитель USB. Insert your USB flash drive in a USB connector on the computer, and then copy the Drivers for Full System Restore folder to your USB flash drive.
Возможно, потребуется нажимать значок На один уровень вверх до тех пор, пока не будет открыт корневой каталог системного тома. You may need to click Up one level until you reach the root of the system volume.
Извлеките флэш-накопитель и вставьте его в восстанавливаемый компьютер. Remove the flash drive, and then insert it into the computer that you are restoring.
Флэш-накопитель USB можно использовать для установки драйверов на компьютер при его восстановлении. You can use the USB flash drive to install the drivers for your computer when you restore it. Во время работы мастера полного восстановления системы мастер восстановления файлов и папок выполняет поиск дополнительных драйверов на данном USB-устройстве флэш-памяти. The Restore Files or Folders Wizard looks for additional drivers on this USB flash drive while using the Full System Restore Wizard. Вероятнее всего, что потребуются драйвер сетевой карты и драйверы устройств хранения. The drivers that you are most likely to need are the network adapter driver and storage device drivers.


