- Как свернуть программу в системный трей на Windows 10 или Windows 7
- Как свернуть программу с помощью RBTray
- Другие программы для сворачивания в область уведомлений
- Что такое системный трей Windows и для чего он нужен?
- Немного из истории системного трея
- Как избавиться от значков удаленных программ в трее?
- How to Hide Notification Area in Windows 10 (System Tray)
- Hide the notification area with Local Group Policy Editor
- About Sergey Tkachenko
- 3 thoughts on “ How to Hide Notification Area in Windows 10 (System Tray) ”
- 6 Ways To Remove Unused Icons from the Notification Area
Как свернуть программу в системный трей на Windows 10 или Windows 7
Системный трей (или область уведомлений, панель уведомлений) – это правая или нижняя часть панели задач, где отображаются иконки программ, которые постоянно находятся в памяти и выполняются в фоновом режиме. Например, в системном трее обычно можно найти программы для закачки файлов, мессенджеры, драйверы и т. д. Также здесь отображаются системные часы, иконка регулировки звука, настройки сети и другие утилиты, относящиеся к операционной системе.
Большинство программ, которые должны работать в фоновом режиме, умеют сворачиваться в системный трей. Но, иногда такой функции нет. В результате подобные программы постоянно висят на панели задач и отвечают пользователя.
Для решения этой проблемы можно использовать специальные утилиты, позволяющие свернуть в системный трей любую программу. В данной статье мы рассмотрим несколько таких программ для Windows 10 и Windows 7.
Как свернуть программу с помощью RBTray
RBTray (Скачать) – одно из лучших решений, для сворачивания программ в системный трей на Windows 10 и Windows 7. Это легкая утилита с открытым исходным кодом, которая не требует установки и работает в фоновом режиме, позволяя сворачивать в системный трей практически любые программы.
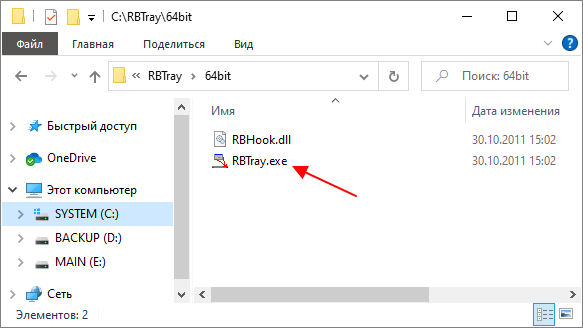
RBTray распространяется в виде архива. Данный архив нужно распаковать в любую папку и запустить 32 или 64 битную версию (в зависимости от вашей операционной системы). После этого RBTray готов к работе.
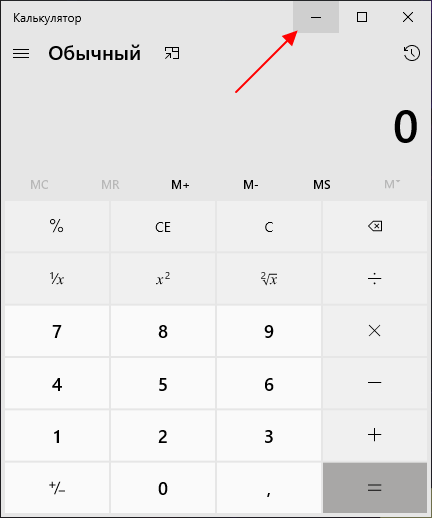
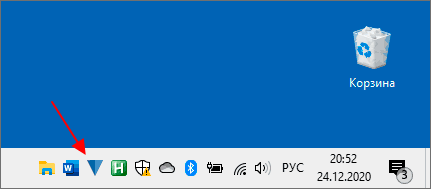
Для того чтобы свернуть программу в системный трей при помощи RBTray достаточно кликнуть правой кнопкой мышки по кнопке « Свернуть » в заголовке окна.
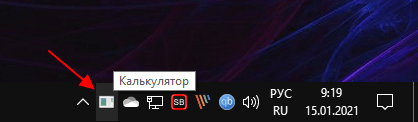
После этого выбранная программа будет свернута на панель уведомлений Windows 10 или Windows 7. Для того чтобы снова открыть окно достаточно кликнуть по ее иконке левой кнопкой мышки.
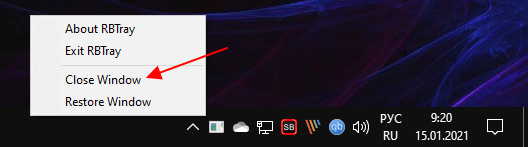
Если кликнуть по свернутой программе правой кнопкой мышки, то появится меню, с помощью которого можно закрыть свернутую программу ( Close Window ), открыть окно ( Restore Window ) или выйти из RBTray ( Exit RBTray ).
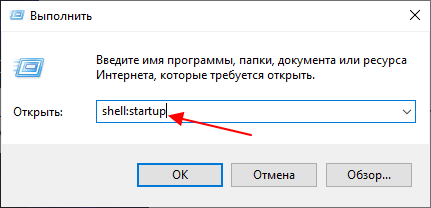
Нужно отметить, что программа RBTray не умеет записываться в автозагрузку Windows. Поэтому, если вы хотите, чтобы она работала постоянно, то вам нужно добавить ее в автозагрузку самостоятельно. Для этого нажмите комбинацию Win-R и выполните команду « shell:startup ».
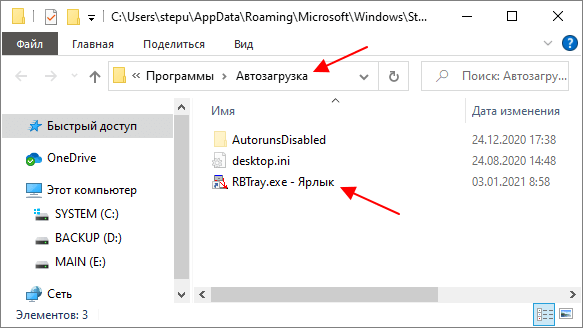
В результате откроется папка « Автозагрузка », в которую нужно добавить ярлык программы RBTray. После этого RBTray будет автоматически запускаться при каждом включении компьютера.
Единственным недостатком RBTray является отсутствие обновлений. Последняя версия RBTray появилась аж в 2011 году. Тем не менее, программа отлично работает как на Windows 7, так и на Windows 10.
Другие программы для сворачивания в область уведомлений
Если программа RBTray вам не подошла, то вы можете воспользоваться другими программами для сворачивания в трей. Ниже мы рассмотрим еще несколько таких.
Traymond (Скачать) – небольшое приложение с открытым исходным кодом для сворачивания других программ в системный трей. Как и RBTray, данная утилита не требует установки и работает в фоновом режиме.
Для того чтобы свернуть окно в область уведомлений используется комбинация клавиш Win-Shift-Z , для восстановления свернутого окна используется двойной клик мышкой по иконке. Если кликнуть по иконке самой Traymond, то можно восстановить сразу все свернутые окна.
MinimizeToTray (Скачать) – еще одна программа с открытым исходным кодом для сворачивания окон в область уведомлений Windows.
Для того чтобы свернуть окно в область уведомлений используется комбинация клавиш Alt-F1 , для восстановления последнего свернутого окна – Alt-F2 , для восстановления всех свернутых окон – F10. Также MinimizeToTray позволяет восстанавливать свернутые окна по одной. Для этого нужно кликнуть правой кнопкой мышки по иконке самой MinimizeToTray и выбрать нужное приложение.

Min2Tray (Скачать) – одна из самых мощных программ для сворачивания окон в область уведомлений.
Min2Tray позволяет сворачивать и восстанавливать окна с помощью мышки или клавиатуры (есть возможность настраивать комбинации клавиш), сворачивать сразу все окна ( BossKey ), автоматически сворачивать выбранные программы, скрывать значки в системном трее и т. д.
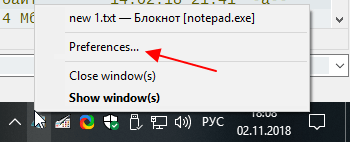
Для получения доступа ко всем настройкам Min2Tray нужно кликнуть правой кнопкой мышки по иконке данной программы и перейти в раздел « Prefernces ».
Что такое системный трей Windows и для чего он нужен?
Сегодня речь пойдет о таком интересном понятии, как системный трей Windows (system tray). Научное определение трея – это область уведомлений или так называемый элемент панели инструментов рабочего стола.
Эта область уведомлений применяется для программ, которые работают в системе продолжительное время или же постоянно, но при этом используются редко. Это могут быть антивирусы, ICQ, Skype и прочий софт. Трей позволяет левой клавишей мыши вывести на экран интерфейсное окно необходимой программы. Путем несложной настройки с помощью специальных программ можно любую программу поместить в трей.

Немного из истории системного трея
Изначально, во времена Windows-95, системный трей использовался для вывода пользователю небольших системных сообщений, например, о начале или невозможности печати документа на принтере, о переполнении жесткого диска и т. д. В этом были и свои минусы. Многие программы помещали в трее свои значки, и он становился чересчур загроможденным.

С появлением Windows XP системный трей стал более современным в части отображения значков. Теперь появилась возможность его настраивать. Можно скрыть ненужные программы и показывать только те, которые требуются постоянно.
Как избавиться от значков удаленных программ в трее?
В новых операционных системах наподобие Windows 7 и выше постепенно в системном трее скапливаются значки уже удаленных программ. Чтобы избавиться от этого выполните ряд несложных команд.
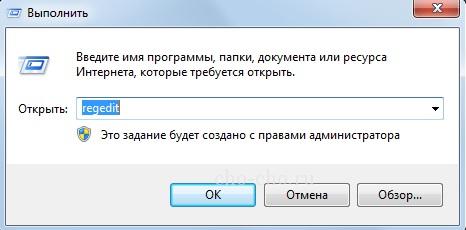
- Запустите редактор реестра, нажав «Пуск» – «Выполнить» или же сочетание клавиш «WIN + R«. В появившемся окне введите команду regedit, затем нажмите «Enter«.

- У вас появится окно с названием «Редактор реестра». Перейдите по пути:
Для изменения области уведомлений (системного трея) создано огромное число различных программ (платных и бесплатных). Они позволяют значительно увеличить его площадь, улучшить многие характеристики. Использовать их или нет – дело каждого. Важный нюанс – они расходуют оперативную память, особенно это ощущается, если компьютер слабый. Ну вот и все о системном трее на сегодня.
How to Hide Notification Area in Windows 10 (System Tray)
As you may already know, notification area, also known as system tray, is a special area on the taskbar where you can see tiny icons of the network status indicator, the volume icon, the action center icon and icons of some apps which run in the background. In this article, we will see how to hide it.
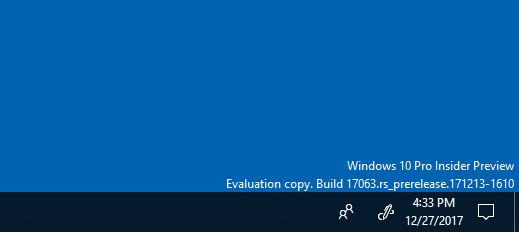
The notification area is hidden in Windows 10
If you want to hide the notification area when Tablet mode is disabled, you will see that there is no such option in the GUI. Hiding the system tray in the regular Desktop mode is a kind of restriction, so it should be done with either a Registry tweak or Group Policy. Let’s review both methods.
To hide the notification area in Windows 10, do the following.
- Open Registry Editor.
- Go to the following Registry key:
Tip: See how to jump to the desired Registry key with one click. If you do not have such a key, then just create it.
Set it to 1 to hide the notification area (system tray) from the taskbar.
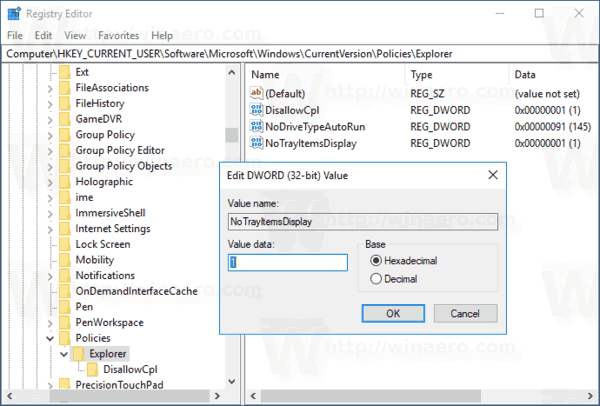
To undo the tweak, delete the NoTrayItemsDisplay value.
Using the method described above, you will be able to hide the system tray for the current user.
If you are running Windows 10 Pro, Enterprise, or Education edition, you can use the Local Group Policy Editor app to hide the system tray area with a GUI.
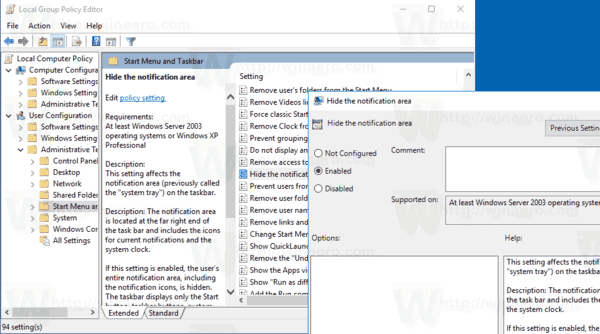
Hide the notification area with Local Group Policy Editor
- Press Win + R keys together on your keyboard and type:
Press Enter.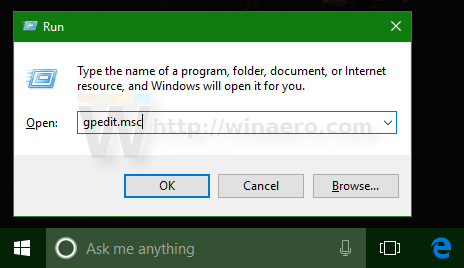
Winaero greatly relies on your support. You can help the site keep bringing you interesting and useful content and software by using these options:
Share this post
About Sergey Tkachenko
Sergey Tkachenko is a software developer from Russia who started Winaero back in 2011. On this blog, Sergey is writing about everything connected to Microsoft, Windows and popular software. Follow him on Telegram, Twitter, and YouTube.
3 thoughts on “ How to Hide Notification Area in Windows 10 (System Tray) ”
what is your primary computer specs?
I’d like to be able to put 1 or 2 icons on the Taskbar then hide the ‘Tray’!
Maybe this will be added to Winaero Tweaker.
6 Ways To Remove Unused Icons from the Notification Area
The Windows notification area, also known as the system tray, shows the system clock and other important icons such as network and audio volume by default. It has evolved since it first appeared and is currently split into two parts, visible icons and hidden icons. The hidden icons are shown when you press the up arrow to the far left. Windows decides which icons go in the hidden area and how many are permanently visible.
It’s quite easy to control yourself what icons stay in the main notification area. Simply right click on the clock and select “Customize notification icons”. Windows 10 users need to also click “Select which icons appear on the taskbar” in Settings. In Windows 7 you have the option to show the icons and notifications permanently, hide them and don’t show any notifications, or only show notification popups when they appear. Windows 10 has the option to put the icons into the visible notification area (on), or in the hidden area (off).
The main issue with the window that lists all the notification area icons is unused or even uninstalled software can leave entries behind and it can get a bit messy. Although those redundant icons won’t appear in either the main or hidden notification areas, it’s recommended to remove them if there a number of unused entries. There is no way to remove anything through the select icons window and it has to be done manually. Here are 6 ways in which you can do it.
1. Notification Area Cleaner
This tool is from the same developer as the useful Network Activity Indicator and Network Lights programs, ITSamples. The program is portable and not much more than 100KB in size with separate 32-bit and 64-bit versions.

Just run the program and press the Clean button and it will go through the process of clearing the necessary registry entries. Then Explorer is restarted which you need to do to complete the removal. Although it says for Windows 7 in the title bar, the tool does work fine in Windows 10, just make sure to close any Explorer or Settings windows before running.
2. CCleaner
In actual fact, one of the most popular system and junk cleaning tools of all time has an option built in to clear the notification area cache. You might miss it because the option is grayed out and not enabled by default. If you have CCleaner installed on your system, there will be no need to use anything else for the task.

All you have to do is open the CCleaner window and check the Tray Notifications Cache box in the Default section of the Windows Cleaner tab. On checking the box a dialog will popup telling you Explorer needs to be restarted manually. Click Run Cleaner to clear the cache. Either kill and restart Explorer.exe from Task Manager or use this simple Restart Explorer batch script.
3. Tray Cleaner 2
Tray Cleaner 2 is a very simple and portable tool that only has three buttons on its user interface, Clean, Exit and About. On launch, Tray Cleaner will tell you if there are any entries to clean or not. The clean button will be whited out if there is nothing to clean, which probably means you have deleted the cache without restarting Explorer afterwards. When the program opens you simply press the Clean button.

A useful feature is the program will backup the TrayIcons registry key where the necessary values are stored. Double click that file to restore everything back. Weirdly, it doesn’t restart Explorer automatically or even warn that you need to manually restart it for the changes to take effect. Tray Cleaner will work with Windows XP and newer systems.
4. System Tray Cleaner
System Tray Cleaner is a program we have mentioned before because it’s quite useful to identify icons in your tray that don’t have a visible name. Although it may be a bit overkill to just delete the redundant icons from the tray, System Tray Cleaner becomes quite valuable if you want to do both that and check any icons you are not sure about at the same time.
After install, right click the tray icon for the program and select “Display info for tray icons only”. When the page listing your current tray icons appears, simply press the Restore Default Tray Settings button. After receiving the warning that Explorer will be restarted, the icons that are not currently attached to a running program will be cleared.
5. Remove The Notification Icons Via The Registry
The tools above do the same thing which is delete the required registry values. They just make it easier and more comfortable from a user interface. To do it yourself, open Regedit from Start or the Run dialog (Win+R) and navigate to the following key.
For safety, backup the key first by right clicking on TrayNotify and selecting Export, then give the backed up .REG file a name. In the right pane find the value Name of IconStreams, right click and delete it. Do the same for PastIconStream.
Explorer then has to be killed and restarted. To do it via Task Manager, end the Explorer.exe process and go to File > New Task (Run…) and type Explorer into the Open box. Alternatively download the Restart Explorer batch script which will do it for you.
6. Use a Batch Script To Remove The Registry Entries
Taking the manual removal a step further, it’s easy to use a simple batch script to delete the two registry values. The option can also be added to terminate and restart the Explorer process so it behaves pretty much the same as the third party utilities. The main difference is the batch script uses only built in Windows commands.
We’ve already created a simple script that will ask if you want to backup the TrayNotify key to the desktop, then delete the values and finally ask if you want to restart Explorer to complete the process.


