- Как изменить фон в приложении Windows Terminal
- Appearance profile settings in Windows Terminal
- Color scheme
- Font face
- Font size
- Font weight
- Retro terminal effects
- Cursor
- Cursor shape
- Cursor height
- Background image
- Background image path
- Background image stretch mode
- Background image alignment
- Background image opacity
- Acrylic
- Enable acrylic
- Acrylic opacity
- Window
- Padding
- Scrollbar visibility
- Color settings
- Tab color
- Foreground color
- Background color
- Selection background color
- Cursor color
- Unfocused appearance settings
- Unfocused appearance settings (Preview)
- Pixel shader effects
- Как включить прозрачный фон в терминале Windows.
- Как включить Прозрачность в Windows Terminal
Как изменить фон в приложении Windows Terminal

Новое приложение Windows Terminal может похвастать не только расширенным функционалом, позволяющим открывать в одном окне несколько вкладок с разными консольными утилитами, но и гибкостью настроек внешнего вида, хотя настройки эти не так очевидны. По умолчанию в Windows Terminal используется черный фон, но при желании вы можете заменить его другим и придать ему эффект акрила.
Давайте же посмотрим, как это можно сделать. Настройки терминала хранятся в файлах defaults.json и settings.json . Первый находится в папке установки и недоступен для редактирования, а вот со вторым, расположенным в папке профиля, можно работать без ограничений.
Чтобы его открыть, нажмите значок треугольника рядом с кнопкой «Новая вкладка».
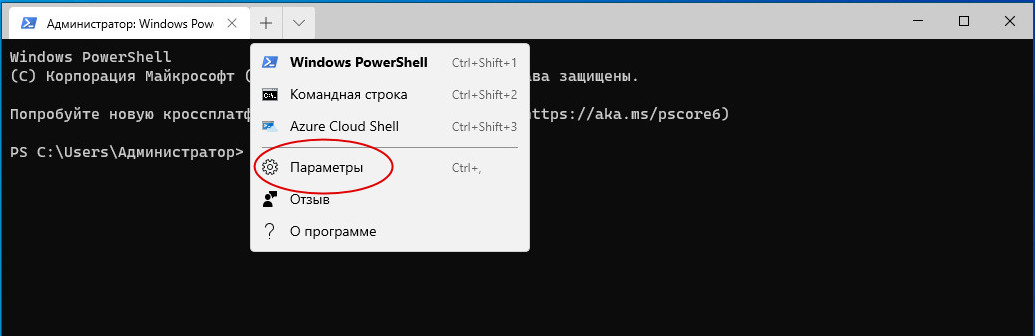
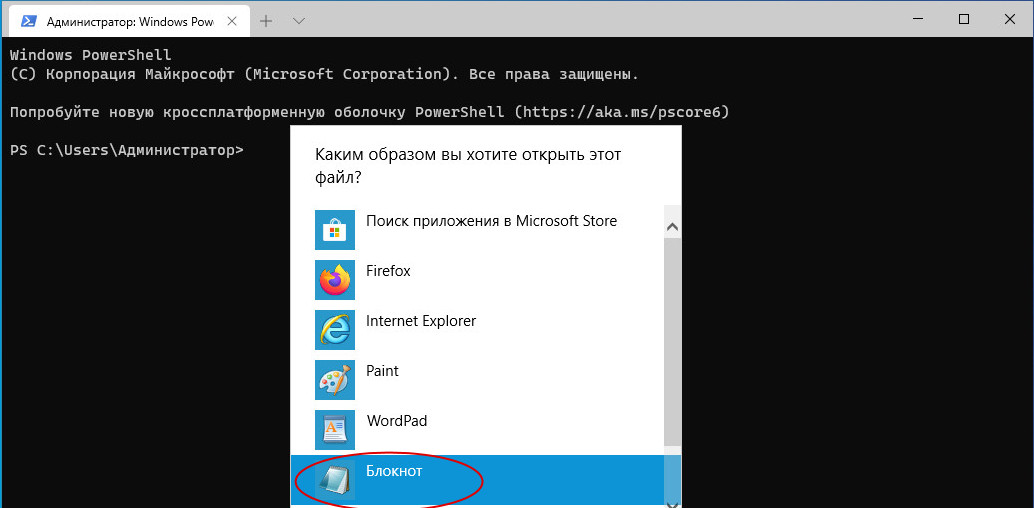
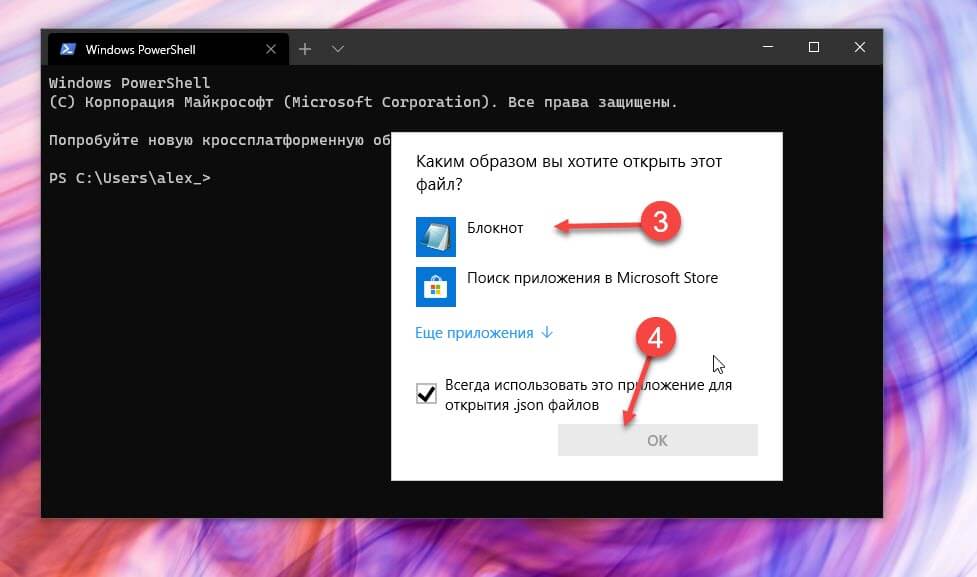
И выберите в качестве приложения для работы с файлом обычный Блокнот или текстовый редактор с поддержкой схем JSON .
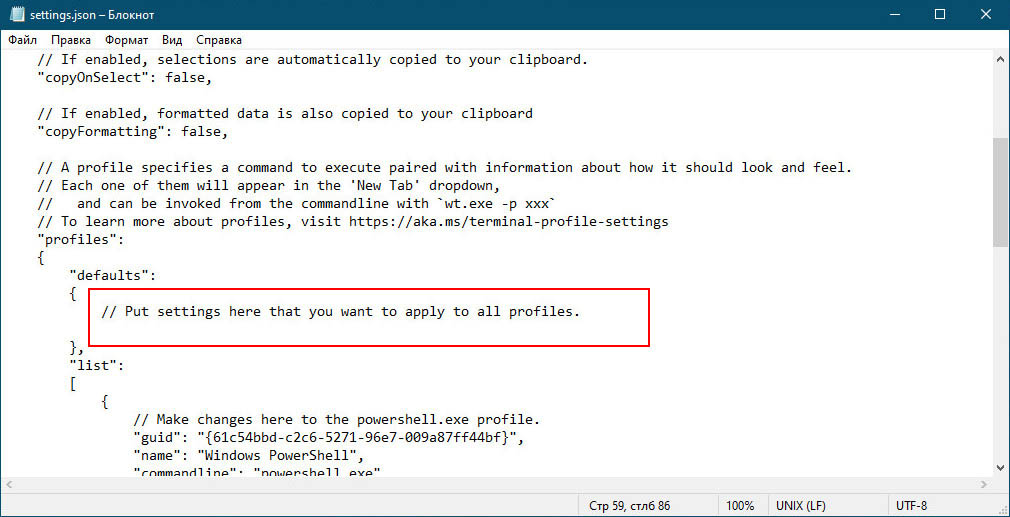
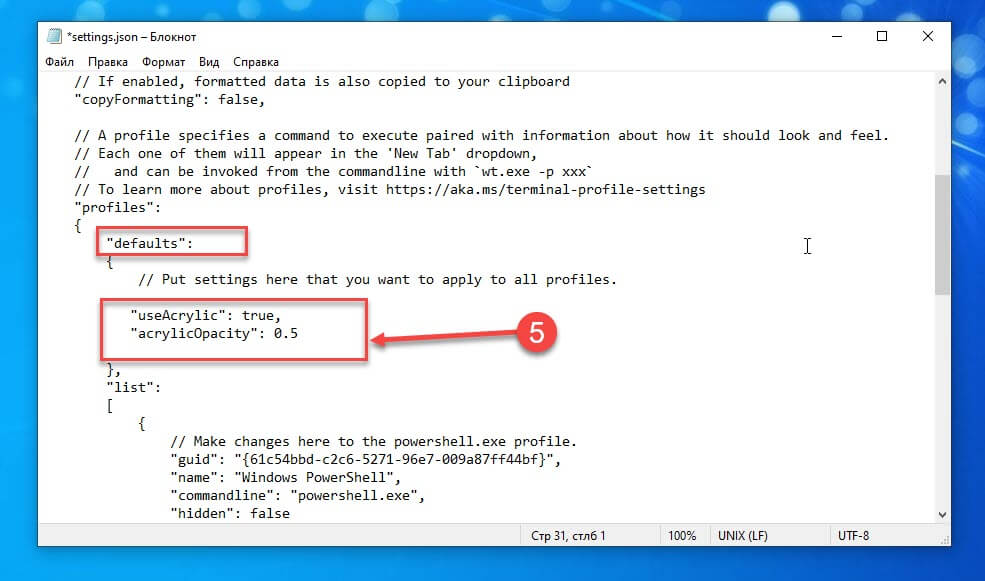
Прокрутив содержимое окна, найдите блок defaults, в нём будет закомментированная строка «Put settings here that you want to apply to all profiles»,
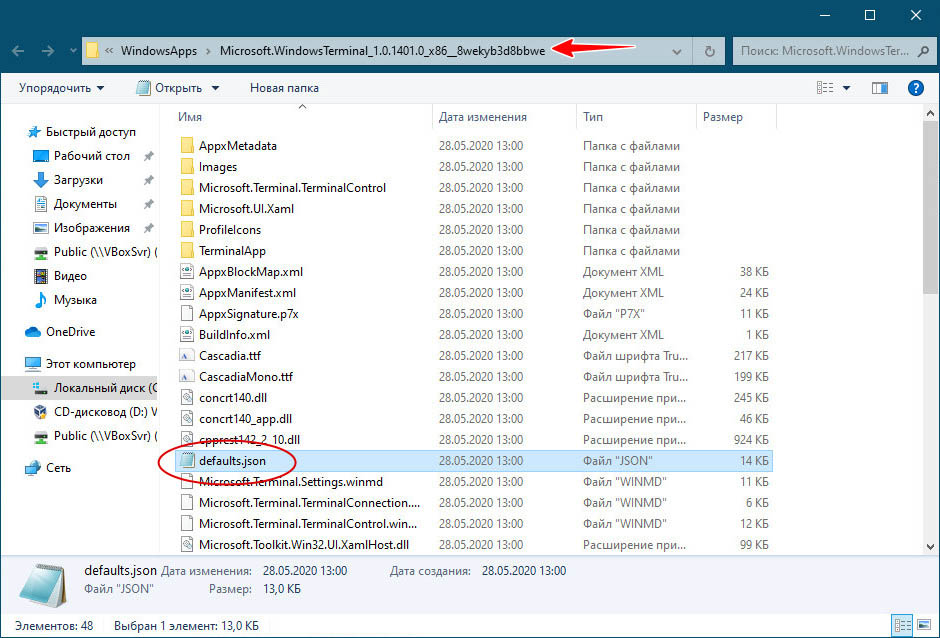
приглашающая вставить в это место пользовательские настройки, подсмотреть которые в свою очередь можно в файле defaults.json , хранящимся в папке C:\Program Files\WindowsApps\Microsoft.WindowsTerminal_№версии .
Откройте его Блокнотом и найдите блок profiles, в нём как раз и будут перечислены настройки.
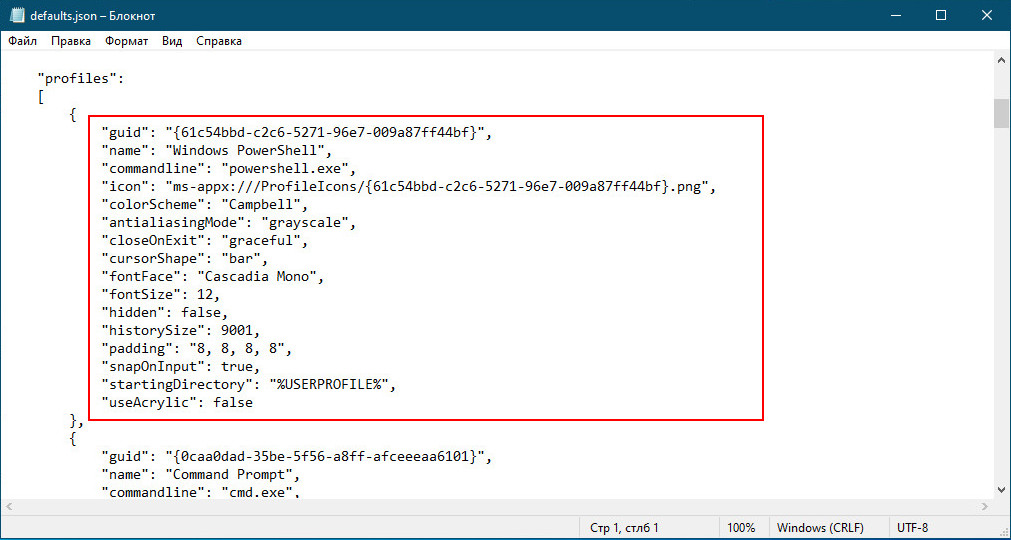
За цвет фона, например, отвечает параметр colorScheme, в качестве значения которого указывается название встроенной темы.
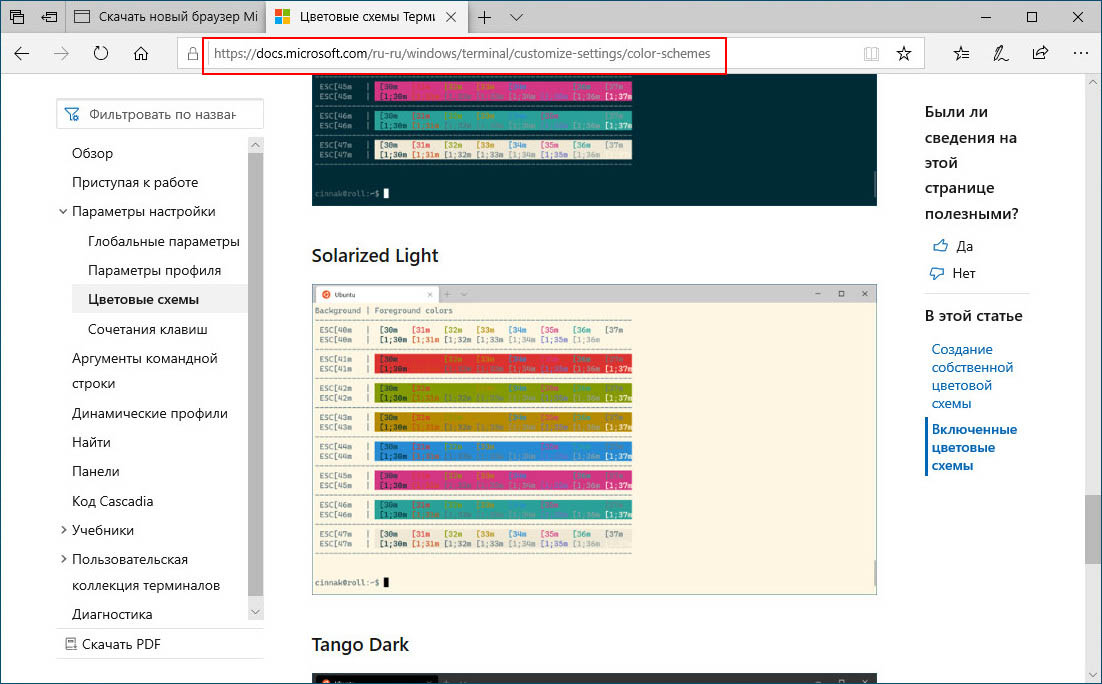
Полный список поддерживаемых тем можно подсмотреть на официальной страничке docs.microsoft.com/ru-ru/windows/terminal/customize-settings/color-schemes, на ней же приводится пример создания собственной уникальной темы.
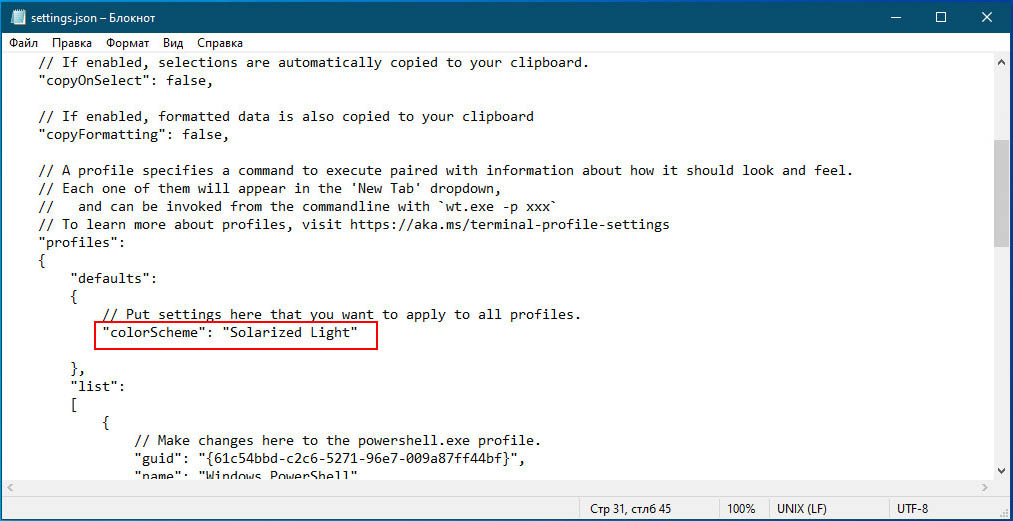
Установим для примера тему «Solarized Light». Формируем такую строку и вставляем ее в указанное выше место в файле settings.json :
«colorScheme»: «Solarized Light»
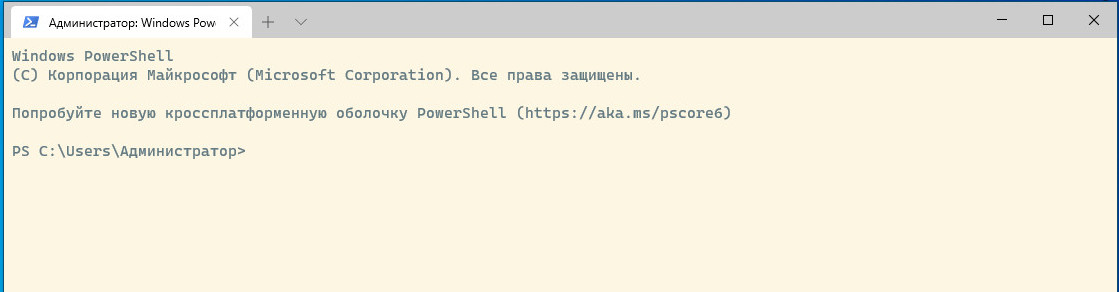
Сохраняем файл настроек и видим, что фон терминала изменился.
Аналогичным образом корректируются и другие настройки — параметры шрифта, иконка в заголовке, открываемая по умолчанию вкладка и т.д. Если настроек несколько, после каждой из них не забываем ставить запятую.
Но ведь мы еще хотели включить для терминала эффект акрила, давайте это сделаем.
За включение прозрачности отвечает параметр useAcrylic, а за степень прозрачности параметр acrylicOpacity.
Добавляем в settings.json две такие строки:
«useAcrylic»: true,
«acrylicOpacity»: 0.5
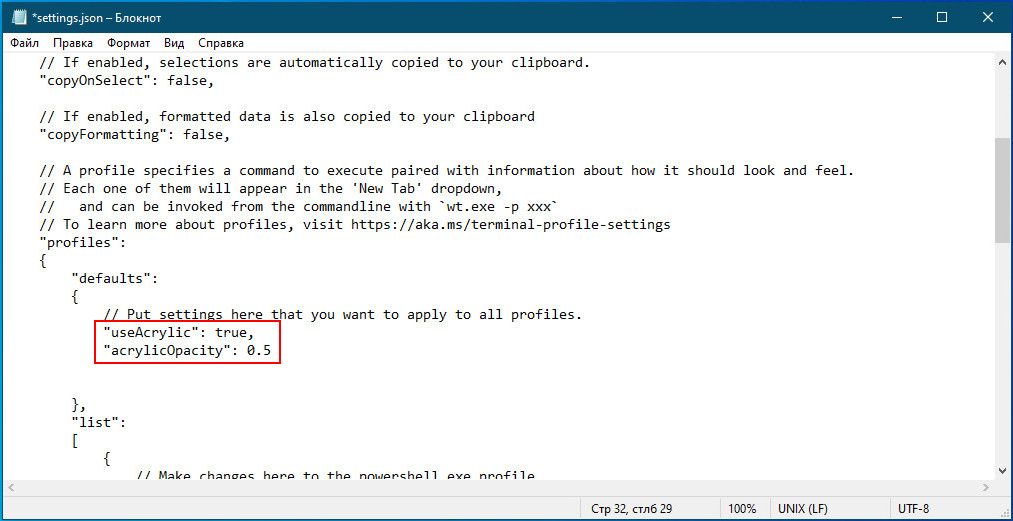
Чем меньше значение второго параметра, тем более прозрачным должен быть фон.
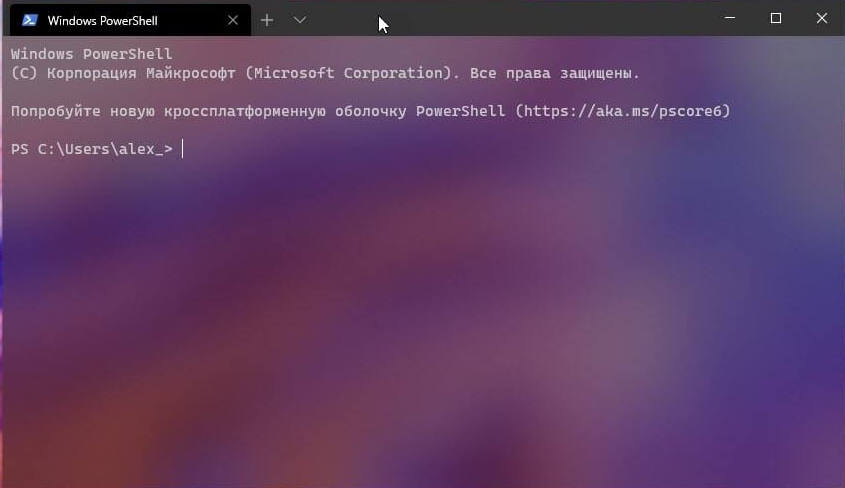
К сожалению, в тестируемой нами сборке Windows 10 прозрачность так и не появилась, не исключено, что это связано с какой-то ошибкой. Возможно, вам повезет больше, ведь как-то не верится, чтобы разработчики ни с того ни с сего вдруг взяли и отключили эту настройку.
Appearance profile settings in Windows Terminal
The settings listed below are specific to each unique profile. If you’d like a setting to apply to all of your profiles, you can add it to the defaults section above the list of profiles in your settings.json file.
Color scheme
This is the name of the color scheme used in the profile. Color schemes are defined in the schemes object. More detailed information can be found on the Color schemes page.
Property name: colorScheme
Necessity: Optional
Accepts: Name of color scheme as a string
Default value: «Campbell»
Font face
This is the name of the font face used in the profile. The terminal will try to fallback to Consolas if this can’t be found or is invalid. To learn about the other variants of the default font, Cascadia Mono, visit the Cascadia Code page.
Property name: fontFace
Necessity: Optional
Accepts: Font name as a string
Default value: «Cascadia Mono»
Font size
This sets the profile’s font size in points.
Property name: fontSize
Necessity: Optional
Accepts: Integer
Default value: 12
Font weight
This sets the weight (lightness or heaviness of the strokes) for the profile’s font.
Property name: fontWeight
Necessity: Optional
Accepts: «normal» , «thin» , «extra-light» , «light» , «semi-light» , «medium» , «semi-bold» , «bold» , «extra-bold» , «black» , «extra-black» , or an integer corresponding to the numeric representation of the OpenType font weight
Default value: «normal»
Retro terminal effects
When this is set to true , the terminal will emulate a classic CRT display with scan lines and blurry text edges. This is an experimental feature and its continued existence is not guaranteed.
If experimental.pixelShaderPath is set, it will override this setting.
Property name: experimental.retroTerminalEffect
Necessity: Optional
Accepts: true , false
Default value: false
 Configuration: Retro Command Prompt
Cursor
Cursor shape
This sets the cursor shape for the profile. The possible cursors are as follows: «bar» ( в”ѓ ), «vintage» ( в–ѓ ), «underscore» ( в–Ѓ ), «filledBox» ( в–€ ), «emptyBox» ( в–Ї ), «doubleUnderscore» ( ‗ )
Property name: cursorShape
Necessity: Optional
Accepts: «bar» , «vintage» , «underscore» , «filledBox» , «emptyBox» , «doubleUnderscore»
Default value: «bar»
Cursor height
This sets the percentage height of the cursor starting from the bottom. This will only work when cursorShape is set to «vintage» .
Property name: cursorHeight
Necessity: Optional
Accepts: Integer from 25-100
Background image
Background image path
This sets the file location of the image to draw over the window background. The background image can be a .jpg, .png, or .gif file. «desktopWallpaper» will set the background image to the desktop’s wallpaper.
Property name: backgroundImage
Necessity: Optional
Accepts: File location as a string or «desktopWallpaper»
Background image stretch mode
This sets how the background image is resized to fill the window.
Property name: backgroundImageStretchMode
Necessity: Optional
Accepts: «none» , «fill» , «uniform» , «uniformToFill»
Default value: «uniformToFill»
 Background image source
Background image alignment
This sets how the background image aligns to the boundaries of the window.
Property name: backgroundImageAlignment
Necessity: Optional
Accepts: «center» , «left» , «top» , «right» , «bottom» , «topLeft» , «topRight» , «bottomLeft» , «bottomRight»
Default value: «center»
 Background image source
Background image opacity
This sets the transparency of the background image.
Property name: backgroundImageOpacity
Necessity: Optional
Accepts: Number as a floating point value from 0-1
Default value: 1.0
Acrylic
Enable acrylic
When this is set to true , the window will have an acrylic background. When it’s set to false , the window will have a plain, untextured background. The transparency only applies to focused windows due to OS limitations.
Property name: useAcrylic
Necessity: Optional
Accepts: true , false
Default value: false

Acrylic opacity
When useAcrylic is set to true , this sets the transparency of the window for the profile. This accepts floating point values from 0-1.
Property name: acrylicOpacity
Necessity: Optional
Accepts: Number as a floating point value from 0-1
Default value: 0.5

Window
Padding
This sets the padding around the text within the window. This will accept three different formats: «#» and # set the same padding for all sides, «#, #» sets the same padding for left-right and top-bottom, and «#, #, #, #» sets the padding individually for left, top, right, and bottom.
Property name: padding
Necessity: Optional
Accepts: Values as a string in the following formats: «#» , «#, #» , «#, #, #, #» or value as an integer: #
Default value: «8, 8, 8, 8»
Scrollbar visibility
This sets the visibility of the scrollbar.
Property name: scrollbarState
Necessity: Optional
Accepts: «visible» , «hidden»
Color settings
Tab color
This sets the color of the profile’s tab. Using the tab color picker will override this color.
Property name: tabColor
Necessity: Optional
Accepts: Color as a string in hex format: «#rgb» or «#rrggbb»
Foreground color
This changes the foreground color of the profile. This overrides foreground set in the color scheme if colorScheme is set.
Property name: foreground
Necessity: Optional
Accepts: Color as a string in hex format: «#rgb» or «#rrggbb»
Background color
This changes the background color of the profile with this setting. This overrides background set in the color scheme if colorScheme is set.
Property name: background
Necessity: Optional
Accepts: Color as a string in hex format: «#rgb» or «#rrggbb»
Selection background color
This sets the background color of a selection within the profile. This will override the selectionBackground set in the color scheme if colorScheme is set.
Property name: selectionBackground
Necessity: Optional
Accepts: Color as a string in hex format: «#rgb» or «#rrggbb»
Cursor color
This sets the cursor color of the profile. This will override the cursorColor set in the color scheme if colorScheme is set.
Property name: cursorColor
Necessity: Optional
Accepts: Color as a string in hex format: «#rgb» or «#rrggbb»
Unfocused appearance settings
Unfocused appearance settings (Preview)
An object you can add to a profile that applies settings to the profile when it is unfocused. This setting only accepts appearance settings.
Property name: unfocusedAppearance
Necessity: Optional
Accepts: backgroundImage , backgroundImageAlignment , backgroundImageOpacity , backgroundImageStretchMode , cursorHeight , cursorShape , cursorColor , colorScheme , foreground , background , selectionBackground , experimental.retroTerminalEffect , experimental.pixelShaderPath
Example:
This feature is only available in Windows Terminal Preview.
Pixel shader effects
This setting allows a user to specify the path to a custom pixel shader to use with the terminal content. This is an experimental feature and its continued existence is not guaranteed. For more details on authoring custom pixel shaders for the terminal, see this documentation.
If set, this will override the experimental.retroTerminalEffect setting.
Property name: experimental.pixelShaderPath
Necessity: Optional
Accepts: A path to an .hlsl shader file, as a string
Как включить прозрачный фон в терминале Windows.
Новое приложение Windows Terminal, может похвастаться вкладками, запускать Cmd, PowerShell, Bash и Python в одном окне. Новый терминал легко настроить, вы даже можете установить анимированные GIF-изображения в качестве фона. Вы можете использовать Командную строку, PowerShell или Linux с прозрачным фоном в терминале Windows, вот как включить эту функцию.
Наряду со способностью устанавливать собственные темы и изменять цвет фона, вы также можете применять акриловый фон для добавления эффектов прозрачности и размытия с помощью Microsoft Fluent Design System.
В этом руководстве для Windows 10, вы узнаете, как включить и настроить эффект прозрачности в терминале Windows.
Как включить Прозрачность в Windows Terminal
Чтобы включить акриловый прозрачный фон на терминале, выполните следующие действия:
Шаг 1: Откройте Windows Terminal.
Шаг 2: Нажмите кнопку меню (стрелка вниз) рядом с вкладкой.
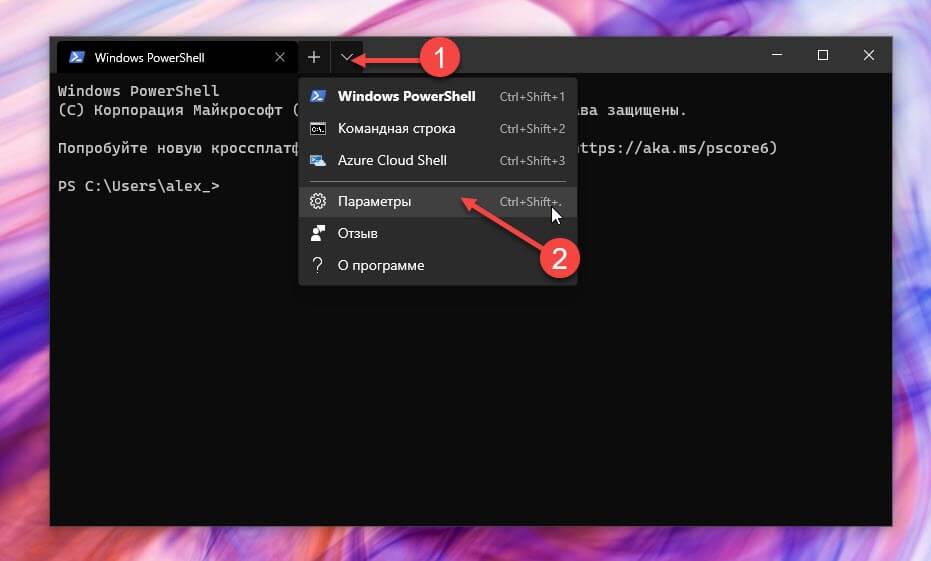
Шаг 3: Нажмите «Параметры».
Подсказка. Рекомендуется использовать редактор который включает в себя схему JSON, это упрощает изменение настроек, но можно использовать обычный блокнот.
Шаг 4: В разделе «defaults» скопируйте и вставьте следующую команду, чтобы включить прозрачность во всех приложениях командной строки:
«useAcrylic»: true,
«acrylicOpacity»: 0.5
Шаг 5: И сохраните JSON файл.
Если вы хотите настроить прозрачный фон, только для одного приложения, например powershell
В разделе «list» выберите профиль (приложение), чтобы установить акриловый фон. Например, после:
«commandline»: «powershell.exe»
вставьте запятую ( ,) в конце строки, скопируйте и вставьте следующие строки:
«useAcrylic»: true,
«acrylicOpacity»: 0.5

Вы можете это повторить для Командной строки и др.
(Необязательно) В настройках «acrylicOpacity» измените значение выбранного уровня прозрачности. Например, 0.6 сделает фон менее прозрачным, а 0.4 сделает фон более прозрачным.
Сохраните файл, чтобы применить изменения.
Выполнив эти шаги, вы можете использовать Windows Terminal с акриловым фоном для определенного приложения или всех приложений сразу в зависимости от вашей конфигурации.


