- Windows theme install folder
- Вопрос
- Ответы
- Where are custom themes stored in Windows 7? Themes folder location
- In what folder does Windows 7 store your themes?
- Where does Windows 10 store Themes?
- Where does Windows 10 store Themes
- Extract audio & wallpaper from a Windows 10 Theme
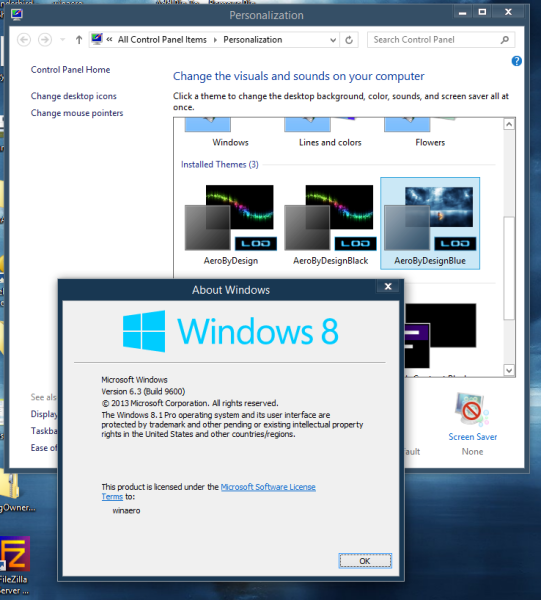
- How to install and apply third party themes in Windows 8.1
- How to apply third party visual styles (themes) in Windows 8.1
- About Sergey Tkachenko
- 31 thoughts on “ How to install and apply third party themes in Windows 8.1 ”
- How to install a theme for all users in Windows 10, Windows 8 and Windows 7
- About Sergey Tkachenko
- 1 thought on “ How to install a theme for all users in Windows 10, Windows 8 and Windows 7 ”
Windows theme install folder
![]()
Вопрос
![]()
![]()
The My Themes folder seems to have disappeared. I have unhidden all folders and checked the \users\username\local\apps\microsoft\windows folder and it is not there. The section is also blank when I display the Personalization window. The only themes are the default ones provided when Windows 7 is installed. How can I find or recreate the folder?
Ответы
![]()
![]()
Yes, I found references to the location you mentioned. However, there was no Themes folder in the c:\Users\yourusername\AppData\Local\Microsoft\Windows folder. I did find a Themes in c:\users\yourusername\AppData\Roaming\Microsoft\Windows and moved my themes to that location. Still did not show up when opening the Personalization window. Is there a registry entry which determines the folder?
All of the default Themes that are installed with Windows 7 are located in the
C:\Windows\Resources\Themes folder. This is also where all of the system files that enable themes and other display components are located.
Any other Themes that a user downloads and installs are placed in the
C:\Users\yourusername\AppData\Local\Microsoft\Windows\Themes folder.
When you download a Theme pack, you must double click the downloaded file to install the theme.
If you manually move the themes to another folder, the system will not be able to find them and they will not appear in the Personalization component.
Where are custom themes stored in Windows 7? Themes folder location
The previous tutorial explained how you can save themes in Windows 7: while Windows 7 includes a special functionality we’ll discuss later, which lets you save themes for sharing, how do you access your saved, custom themes? Where is the Themes folder in Windows 7? As you’ll see, all custom themes are saved and stored in a single folder (or «directory») under your own profile. This allows Windows 7 to keep track of themes based on who is currently logged in (to avoid having one user see the saved themes of another Windows user on the same computer!)
In what folder does Windows 7 store your themes?
Follow these steps to open the Windows 7 Themes folder inside Windows Explorer:
- As mentioned earlier, this folder is stored under your own profile, which depends on your user name: we will show you a way to access that folder regardless of your actual Windows user name.
- Click on the start menu, and enter the following line inside the search field (the easiest being to copy that path below, and paste it in the start menu) . Triple-click on the path below to select it, right-click and choose «Copy«, and then paste it in the start menu.
- %userprofile%\AppData\Local\Microsoft\Windows\Themes
- Once you have pasted the Themes folder path in the start menu, hit Enter .
- Windows Explorer will open, and display all custom themes you have saved on this computer:
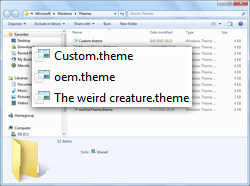
Note: any theme you find inside the Themes folder in Windows 7 will also be visible under «My Themes» inside the Control Panel!
Where does Windows 10 store Themes?
Windows 10 can be customized using themes, wallpapers, and lock screen images. Just like any other wallpapers and lock screen images, Windows 10 stores Themes in a dedicated location. They are like an archive file that stores wallpapers, pictures, effects, and audio files.
Where does Windows 10 store Themes

When creating or modifying themes using Windows 10 Personalization feature, you must have changed the wallpaper, sound, and other things. Once adjusted, they can be saved under a different name. Every theme you install is available under a different name, and a new theme file is created.
If you want to share a beautiful theme you created with someone else or want to copy it to another computer, there is no direct option. That’s why it becomes necessary to find the Windows 10 Store Themes. To do this-
Open RUN prompt.
Copy-paste the following and hit Enter:
File Explorer will open with a list of folders and theme files.
You can copy these files and place them in the same location, but on a different computer and they will appear in Windows 10 Settings > Personalization > Themes.
When you download a theme from Windows 10 Store, it will be available in this folder.
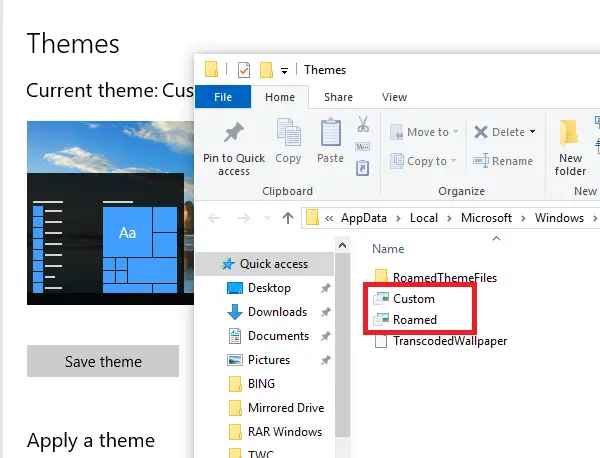
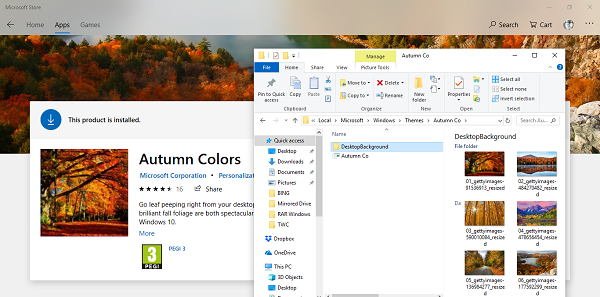
I downloaded the Autumn Colors theme from the Microsoft store. It became available in an Autumn Co subfolder under this folder:
The wallpapers were present in the “DesktopBackground” folder, while the rest of the files are available in the theme file.
There are two themes usually available in this folder: Custom and Roamed. “Custom” theme comes into the picture when you modify existing theme files. “Roamed” is when you choose to sync themes between multiple computers. It will work when you use the same Microsoft account on different Windows 10 devices.
Extract audio & wallpaper from a Windows 10 Theme
If you want to extract the audio & wallpaper from a Windows 10 Theme, you need to use and using any file compression & decompression software like 7-Zip.
I hope this helps!
How to install and apply third party themes in Windows 8.1
We here at Winaero love Windows customization and we post several custom 3rd party visual styles and themepacks from time to time. We have a HUGE and amazing collection of themes for changing the look-n-feel of Windows. But Windows doesn’t allow 3rd party themes by default, so we need to unlock Windows to be able to use those themes.
Note: If you are not a Windows 8.1 user, please refer to the following article.
With every new Windows release, Microsoft makes some minor changes to the theme engine and/or its format. This leads to the situation where for every single release, you need a special software (a so called UXTheme patcher) which supports that new release. Windows 8.1 is no exception.
To use third party themes in Windows 8.1, you should follow these simple steps.
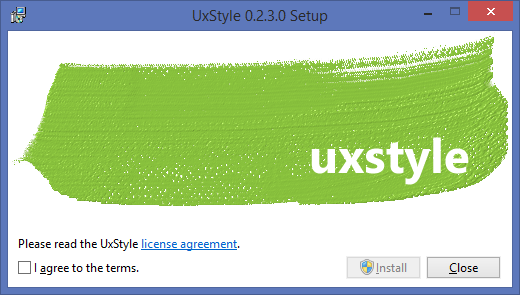
Our friend Rafael Rivera created an amazing utility, Uxstyle, few years ago, which allows you to use third party themes in Windows XP and above. He has updated it to be compatible with Windows 8.1, so that’s awesome news.
The main benefit of UxStyle is that it does not modify system files on disk. While files stay untouched on disk, the software performs in-memory patching and works smoothly and safely.
To get UxStyle, please refer to its official home page: http://uxstyle.com/ .
Run the installer and follow the instructions. It is quite simple because it only has a license agreement page and the «Done» page.
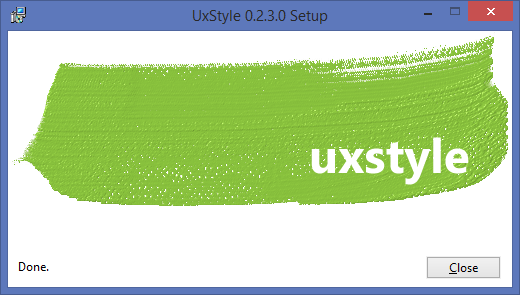
Voila, the magic is done, not even a reboot is required! You will see that it runs as an «Unsigned Themes» service.
How to apply third party visual styles (themes) in Windows 8.1
- Once you have installed UxStyle, it’s time to get some cool visual styles. In the screenshot above, I have featured the AeroByDesign theme for Windows 8.1. You can give it a try too.
- Copy your theme folder containing a .theme file and a folder containing .msstyles file to «Windows\Resources\Themes» folder, the directory on the system drive where Windows is installed. Usually it is the C: drive.
- Now double-click on the .theme file and it’ll apply the theme. You can also apply it using the Personalization Control panel as you can see in my screenshot.That’s it.
Winaero greatly relies on your support. You can help the site keep bringing you interesting and useful content and software by using these options:
Share this post
About Sergey Tkachenko
Sergey Tkachenko is a software developer from Russia who started Winaero back in 2011. On this blog, Sergey is writing about everything connected to Microsoft, Windows and popular software. Follow him on Telegram, Twitter, and YouTube.
31 thoughts on “ How to install and apply third party themes in Windows 8.1 ”
Can you please tell me how to take a backup of the uxtheme.dll file before patching it ??
It does not patch the file on disk so you don’t need a backup, it patches it in memory. If Windows is unstable or crashes after installing UxStyle, just uninstall it.
No matter how i do it, i simply can’t make it work..
The themes dosn’t have the ”images” the only difference is a black screensaver, no matter the theme, I have tried a lot
Can you give me an example of the theme you tried to install?
The one featured here on this site, the AeroByDesign
ohh , I will look.
I have the same problem to my man. I know this thread is a lil dated but hopefully someone can offer advice. I got uxstyle installed, areo glass, oldnewexplorer, and also startisback installed on windows 8.1. Ive been searching google so hopefully ill find a solution soon. Ive tried using an installable executable file to install the themes aswell as “personalization” control panel. llike he said when i install the theme the background and color change but no startmenu images or taskbar…..HELP PLEASE!
i used uxtheme multipatcher but the start menu was still screwy when it would load but most themes still did the same thing as before. if i fig it out i will post a reply.
I install it for Win 8.1 then goto Personalization but do not see any themes.
Just the same themes that were always there:
My Themes(1)
Windows Default Themes (3)
High Contrast Themes (4)
It doesn’t work with start8. the start menu becomes too wide. This was with the base theme installed.
http://i.imgur.com/LzeQ4Eu.png
I would love to use this if it work with start8. If it doesn’t than it’s pretty much useful to me.
After the recent update 1 for windows 8.1, the uxstyle program and also any theme causes some functionality to be lost within the windows start page, you should be able to right click on an app and have a menu of options, however when a custom theme is loaded this functionally it not usable. is there a way this can be fixed as i am unable to use a custom theme due to this problem
I have a problem with UXstyle. I works very good but after restart it never works.
Hmm
Which OS you are using?
Hello,
I have just tried to patch my win8.1 with the UxStyle and then i did restart my computer.
The thing is none of the theme im pasting in the root themes folder seem to be working.
WIN CurrentVersion 6.3
CurrentBuild 9600
any idea ?
Thank you in advance
S.
Hello Steven.
Make sure that the ‘Unsigned Themes’ service is running.
Same problem,after restart it dosen-t work,the service is running,i have to unninstall and install again to work,
Is there a way to install a windows 7 theme onto windows 8.1, this is pretty much keeping me from getting 8 as I really love my current theme.
No there is no way. If you know how to create themes using WindowsStyleBuilder, you can port the theme to the newer OS.
Hello . I am from a computer illiterate community. So I am new in computer world. I don’t understand really how to install a third party themes specially that my chosen theme is in a .rar file formal.
Hi Dear, I have windows 8.1 Enterprise With Update 3. iOS Skin installed on my PC, but my taskbar, close,minimize,maximize button, and my windows not changed. UXStyle or UXTheme Patcher installed, but not worked .see:
I have created an in-depth video on how you can install custom themes on windows 8.1. So if you like video format you can check out my video..
Link: https://www.youtube.com/watch?v=Mzq54X3eVJ8
it’s always give me a black screen after booting up sometimes on windows 8.1 even with update 1, how do i prevent this?
Which app you have used for the third party themes support?
sorry my mistake.
uxstyle
i think some system has problem
Well, maybe it is some UxStyle bug?
Try to re-install it.
yup!
are you going to post another post to enable 3rd party themes in windows 10?
Well, it is a good idea
uxstyle
i think some system has problem
sir, do we need to copy both the sfx file and the application file in the theme file ?
What is the application file?
use windows+R then there is pop up window called run type this path: %windir%\Resources\Themes hit ok
paste the theme extracted folder to the poped explorer called Themes and run uxstlye for windows 8.1 to patch And enjoy.
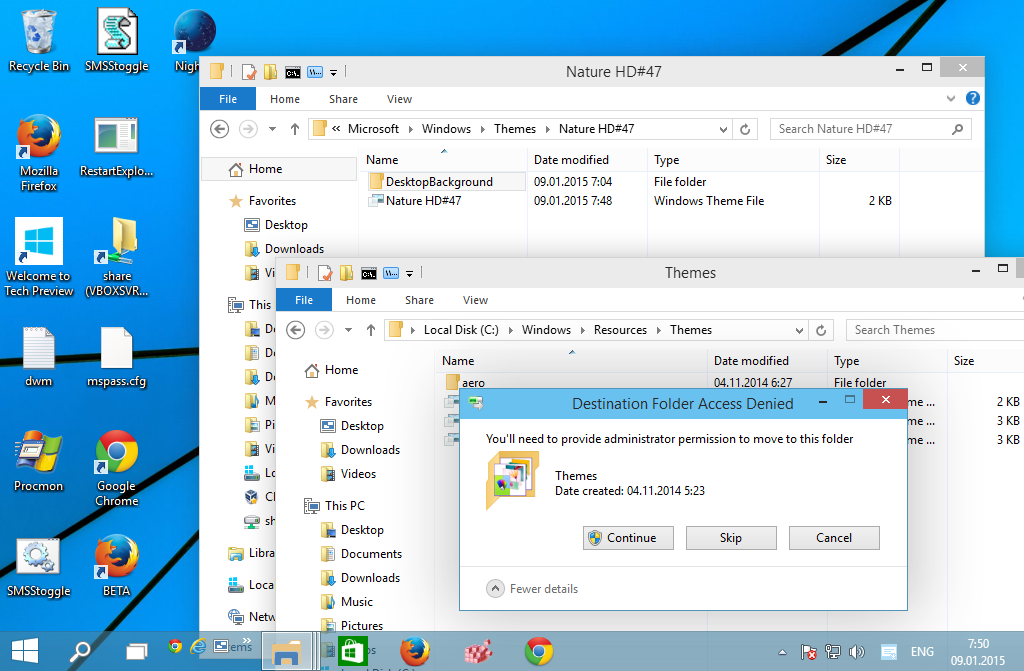
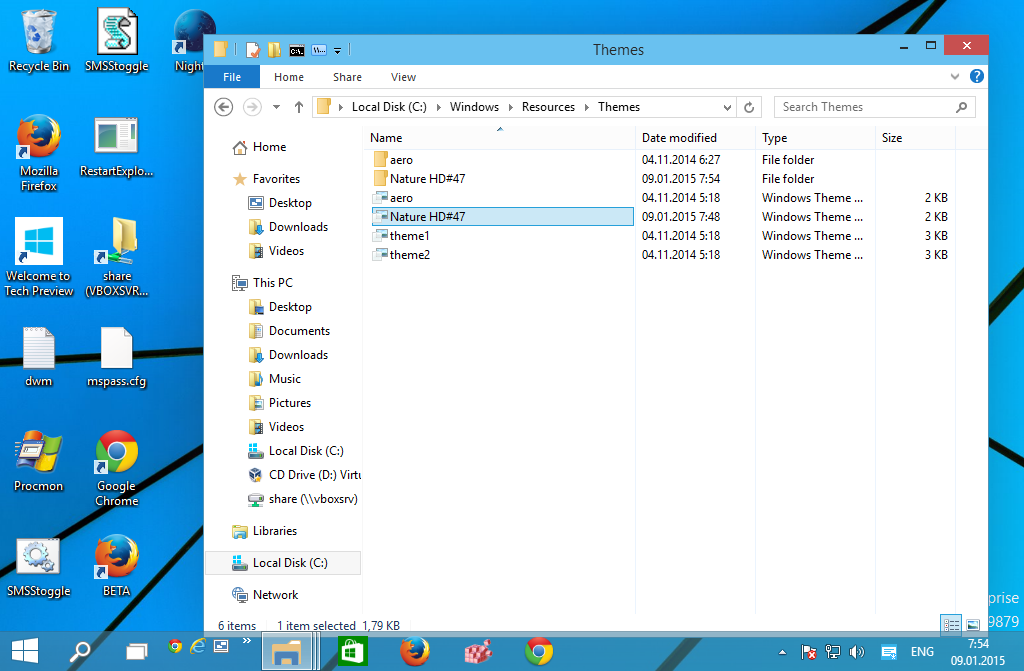
How to install a theme for all users in Windows 10, Windows 8 and Windows 7
Whenever you install a new desktop theme (themepack) in Windows 10, Windows 8 and Windows 7, it gets installed only for your user account. Other users on your PC will not have access to the installed theme. They will need to install it again when they are signed in to their personal account. This is not intuitive and also wastes disk space. Here’s a trick to install any theme for all users in Windows 10, Windows 8 and Windows 7.
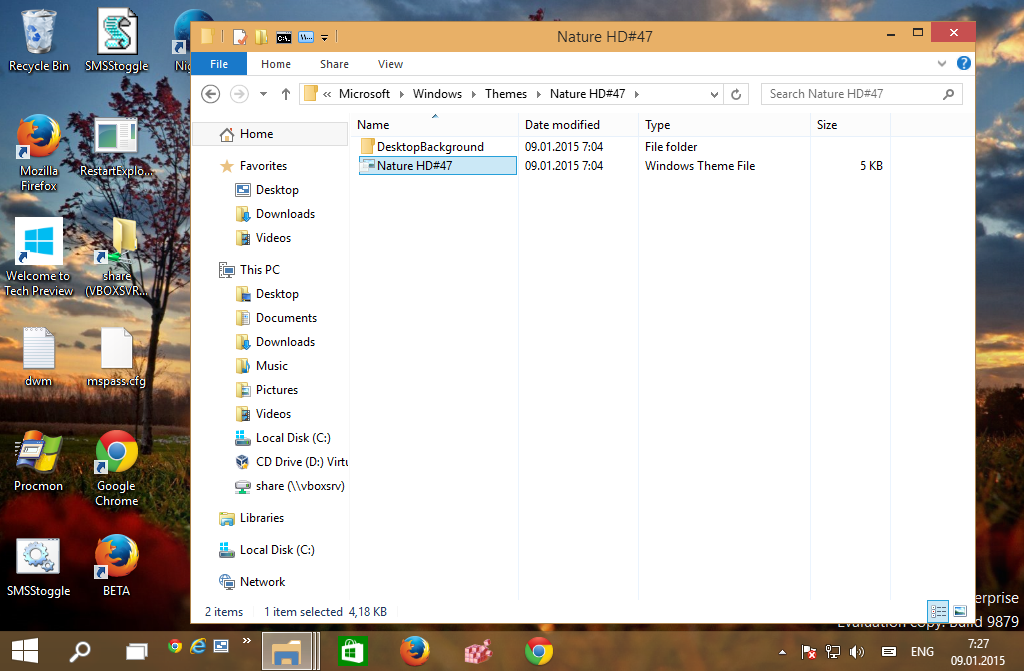
- Double click the *.deskthemepack or *.themepack file you have downloaded. The theme will be installed and applied for your user account. I am using the following theme: Nature HD#47 theme. It can be installed in Windows 10.

- All installed themes go to the following folder:
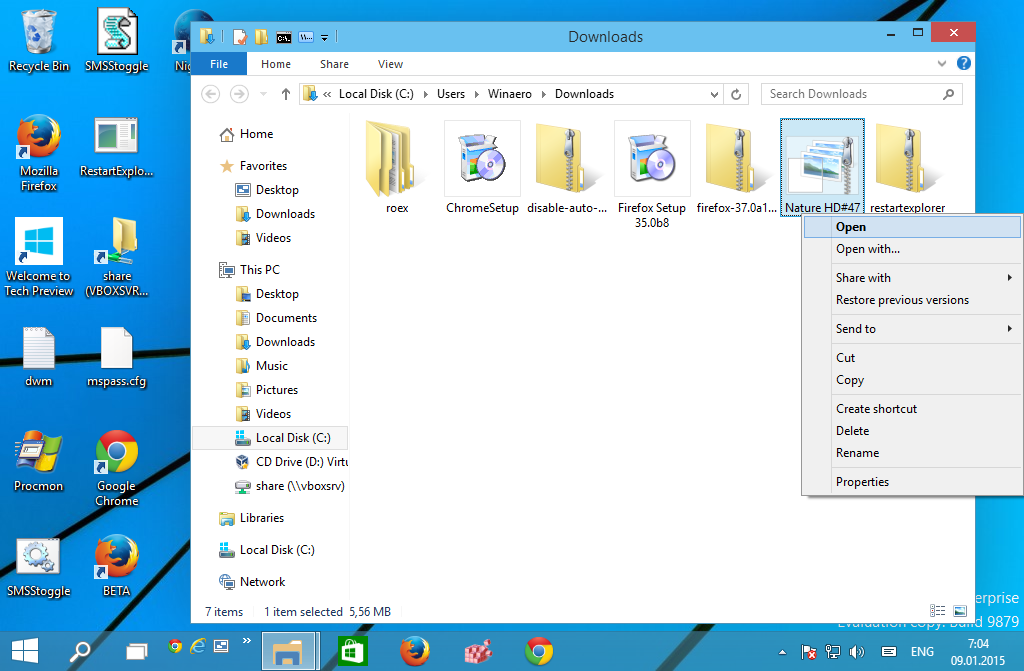
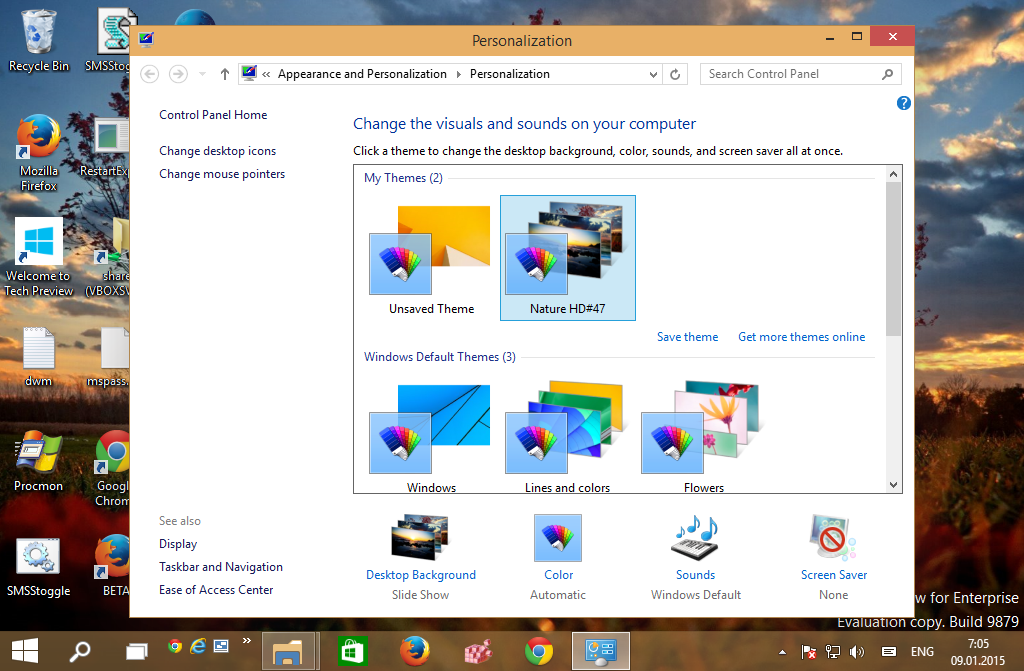
To open it, press Win + R shortcut keys together on the keyboard and type/copy-paste the above text in the Run box. 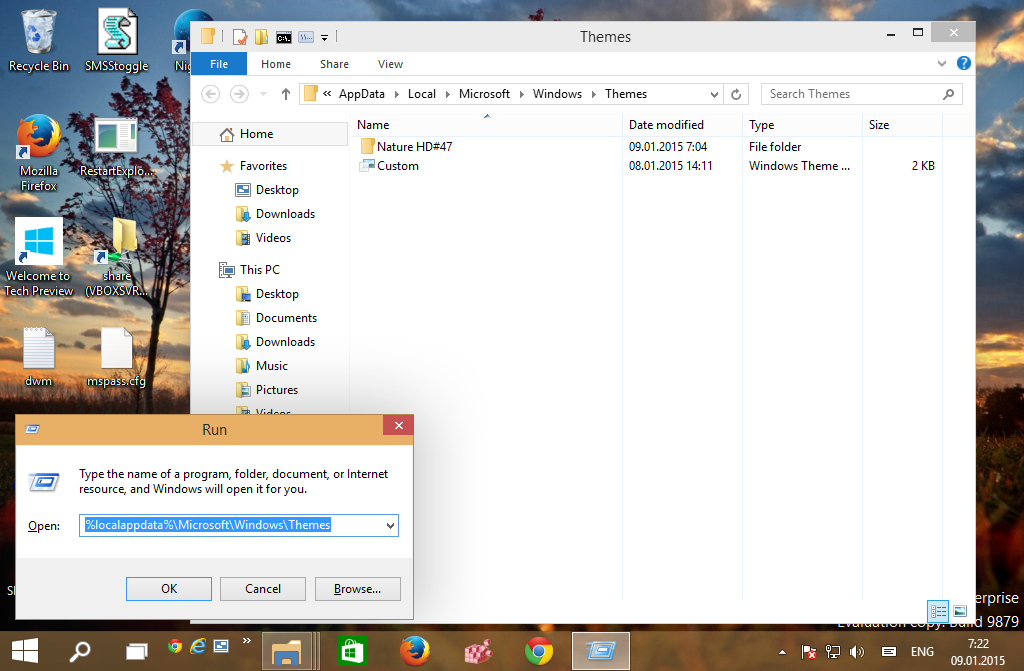
Tip: See the list of environment variables and Win key shortcuts for reference.
Before: 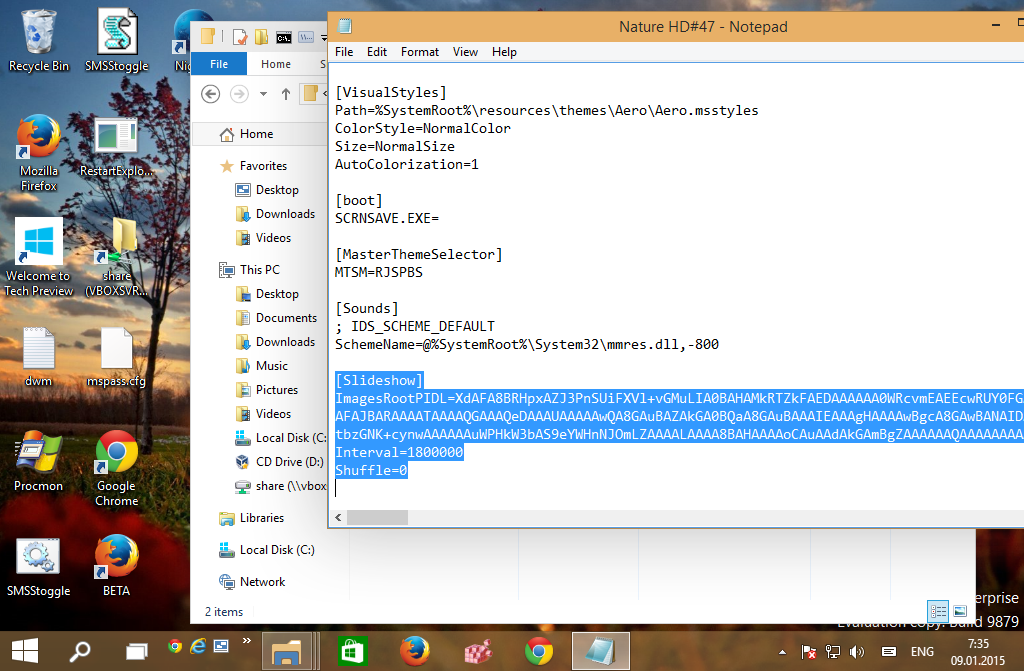
After: 
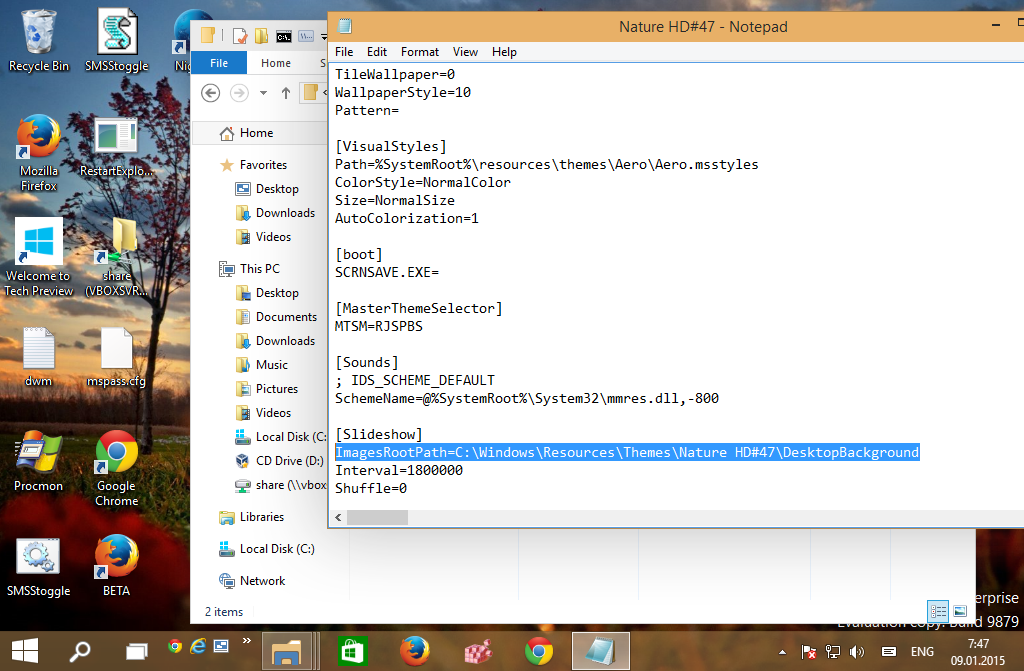
Add the following line to the Slideshow section:
where THEMENAME must be substituted properly.
For my example above, it must be
You will get the following files and folders:
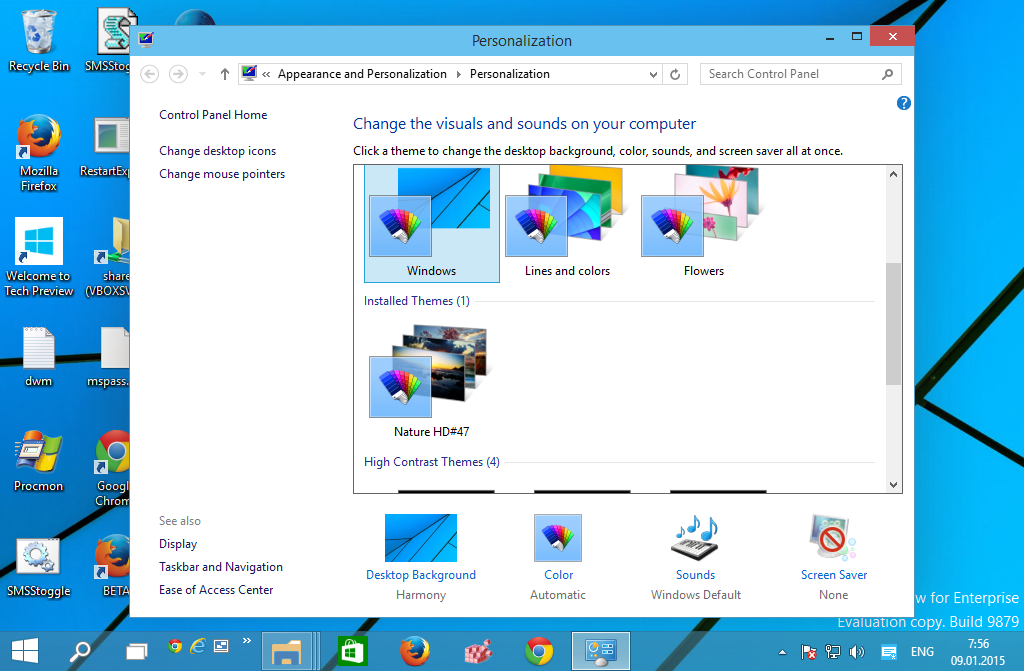
That’s it. You are done.
Winaero greatly relies on your support. You can help the site keep bringing you interesting and useful content and software by using these options:
Share this post
About Sergey Tkachenko
Sergey Tkachenko is a software developer from Russia who started Winaero back in 2011. On this blog, Sergey is writing about everything connected to Microsoft, Windows and popular software. Follow him on Telegram, Twitter, and YouTube.
1 thought on “ How to install a theme for all users in Windows 10, Windows 8 and Windows 7 ”
This works, thank you Sergey!
I had already installed more than 50 themes so instead of doing this manually I wrote a small C# script to carry out this process automatically for all themes.
I will be happy to post the script for the benefit of other readers of your site but I don’t think it is possible to add attachments in comments.


