- How to Install Windows 10 Custom Themes
- How to Install Microsoft Themes on Windows 10
- How to Install Non-Microsoft Themes on Windows 10
- Step 1: Creating a System Restore Point
- Step 2: Compatibility Checks
- Step 3: Installing UltraUXThemePatcher
- Step 4: Using 3rd party Windows themes
- Windows Themes Installer: Install Windows 7 & Vista themes easily
- Windows Themes Installer
- Windows Theme Installer
- Review
- A portable tool which installs and removes Windows themes.
- Windows Theme Installer 1.1 on 32-bit and 64-bit PCs
How to Install Windows 10 Custom Themes
Using a Windows 10 theme is the quickest way to customise your PC. A theme can contain custom sounds, wallpapers, color adjustments as well as other personalization tweaks. So far, Microsoft didn’t go crazy about letting us customise Windows 10 however we want. Sure, a lot of those restrictions were imposed for security reasons, but geeks will always find ways to tinker with how Windows looks and behaves.
Microsoft does not officially support 3rd party themes unless they are digitally signed by them. It’s somewhat understandable since people might embed them with malware and spread it across the internet. However, users have found ways to bypass Microsoft’s limitation and install third-party themes n Windows 10.
If you want to stay on the official site, I’m sorry to break it to you, but most Microsoft-supported themes are nothing short of boring. It’s true that the selection on their website got better lately, but they severely limit the customizations that can be done by UI designers. If you’re looking for something really special, independent design websites like DeviantArt have superior Windows 10 themes in terms of aesthetics.
Are you in the market for a customized Windows 10 theme? Then you got some choices to make. You either stay official and install a Microsoft theme, or you take the long route modify your computer to allow the installation of non-Microsoft themes. Keep in mind that Microsoft themes are extremely easy to install, while 3rd party themes will require you to take extra steps with a minimal amount of risk.
To make it easier for you, we created two guides below that will cover both the official(Method 1) and the unofficial way(Method 2). Let’s see how you can customize your Windows 10 look.
How to Install Microsoft Themes on Windows 10
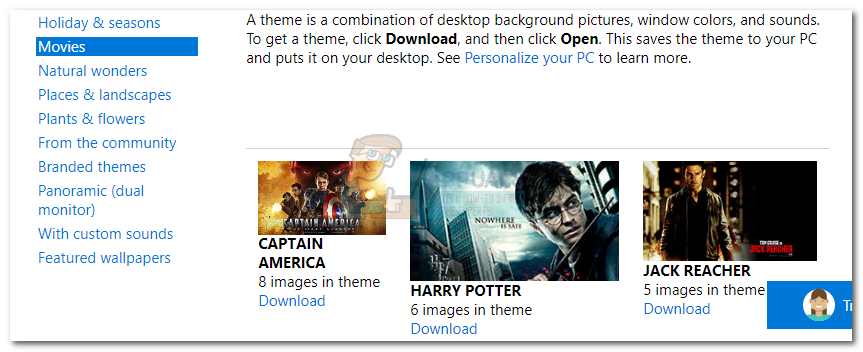
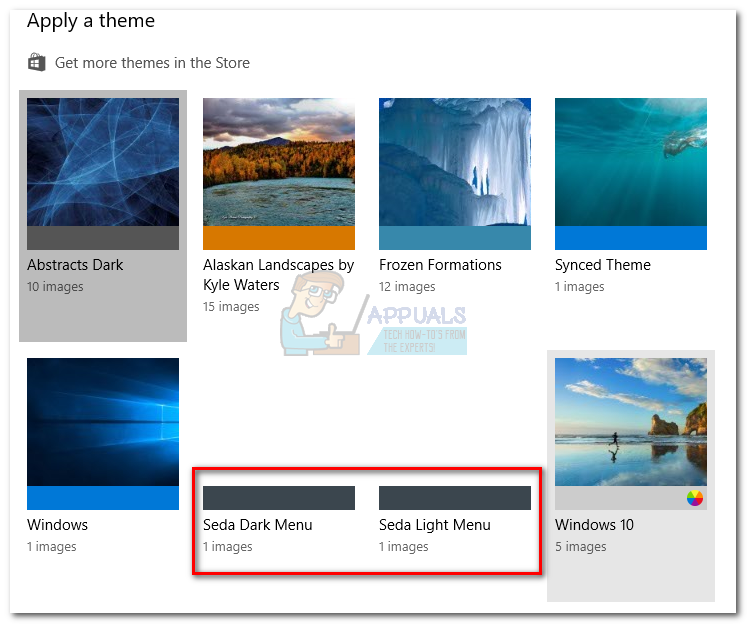
If you’re after the quickest way of installing a Windows 10 theme, Microsoft has hundreds of different options neatly grouped into intuitive categories. You can browse all of them by visiting this website. The installation is extremely easy, but here’s a quick guide, just in case you get confused:
- Visit Microsoft’s website and browse for a theme. Don’t settle for just the Featured themes category, as a lot of good themes aren’t present there. If you use a dual monitor, select a theme from the Panoramic category.
 Note: Keep in mind that this website is exclusively designed for Window 10 themes. Installing them on an older Windows version won’t work.
 - Once you decide on a theme, click the Download button under it and wait for the process to complete.
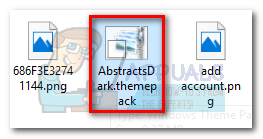
- Open the .themepack file and wait for the theme to unpack.
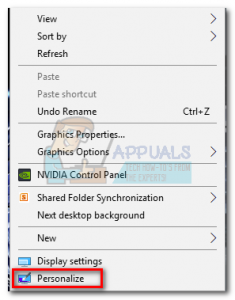
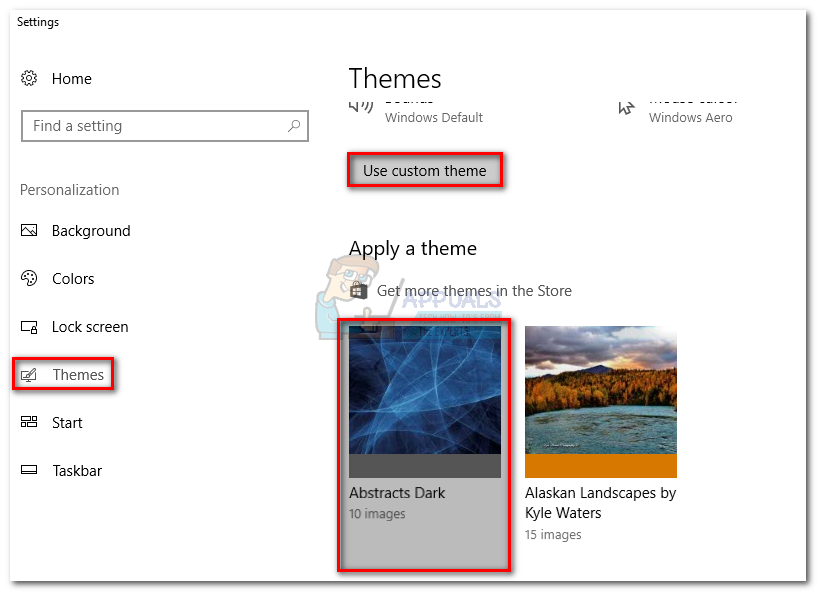
- Now right-click anywhere on your desktop and click Personalize.
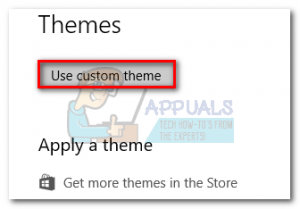
- Go to Themes, click on the theme that you’ve just unpacked and click Use Custom Theme.
 Note: Keep in mind that this website is exclusively designed for Window 10 themes. Installing them on an older Windows version won’t work.
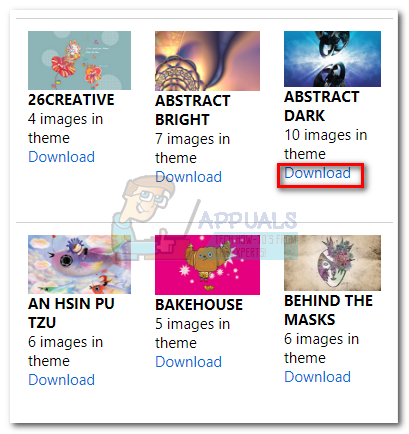
That’s it. The Microsoft theme you previously downloaded is active.
Note: Another way to apply a Microsoft-certified theme is to go to Settings > Themes and click on Get more themes in the Store (under Apply a theme). This will open up a Microsoft Store window with a limited selection of Windows 10 themes. But the theme selection in Microsoft Store is very limited when compared to the first method. 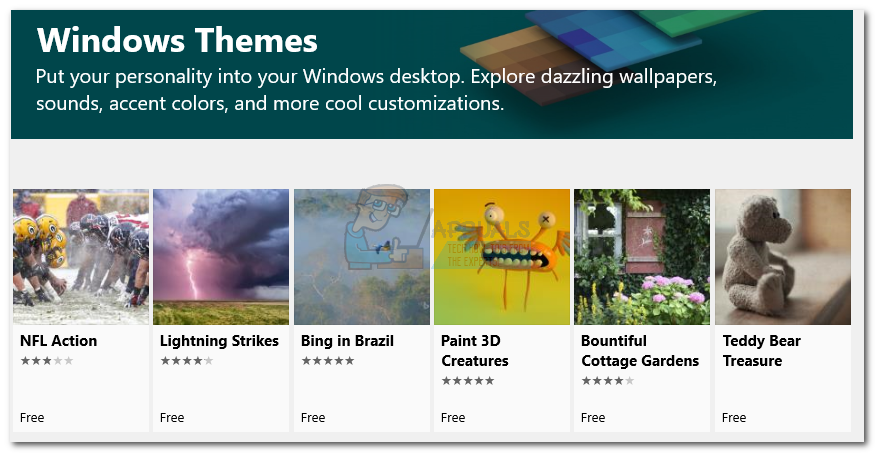
How to Install Non-Microsoft Themes on Windows 10
If you want to apply third-party themes, you’ll need to patch your system first. The DeviantArt community is filled with fancy third-party themes, but they are not as easier to install. To use them, you’ll have to spend a few minutes tinkering with your system.
Keep in mind that tinkering with system files can be dangerous and precaution methods should be taken. In order to eliminate every potential risk, we strongly advise you to start this process by creating a system restore point. If something goes terribly wrong, you’ll be able to save your Windows installation with minimal effort.
The software used to modify the stuff required to allow 3rd party themes is called UltraUXThemePatcher. The good news is, the software has reached a stage where it’s stable for the vast majority of users. The installer will automatically back up the original system files. So if anything goes wrong after the installation, uninstalling UltraUXThemePatcher will revert your system to the original behavior.
Note: Installing this application might lead to unexpected problems that might not be resolved by uninstalling UltraUXThemePatcher. To eliminate this risk, I strongly advise you to start with Step 1 where we create a system restore point.
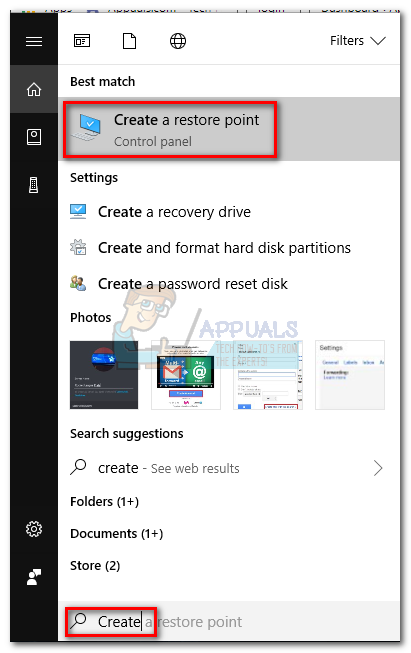
Step 1: Creating a System Restore Point
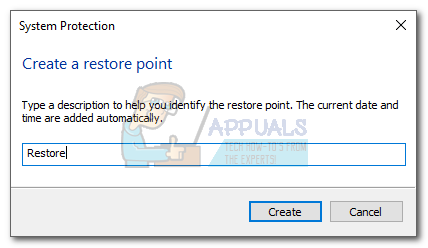
- Access the search bar in the bottom-left corner. Search for “restore” and click on Create a Restore point.
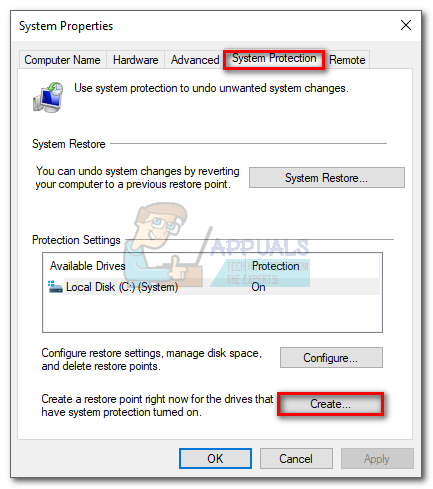
- Under System Protection, click on Create.
- Name your restore point and click on Create.
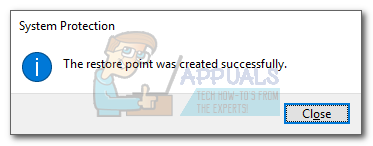
- Wait until the restore point is created. Do not start with Step 2 until the process is complete.
Step 2: Compatibility Checks
Before you let UltraUXThemePatcher modify important system files, it’s extremely important to verify if the software is compatible with your Windows version is supported. Here’s what you need to do:
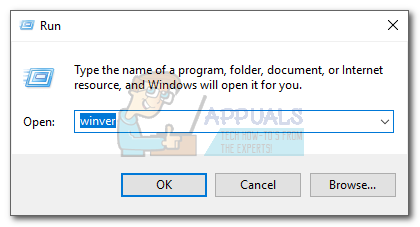
- Press Windows Key + R, type “winver” and press Enter.
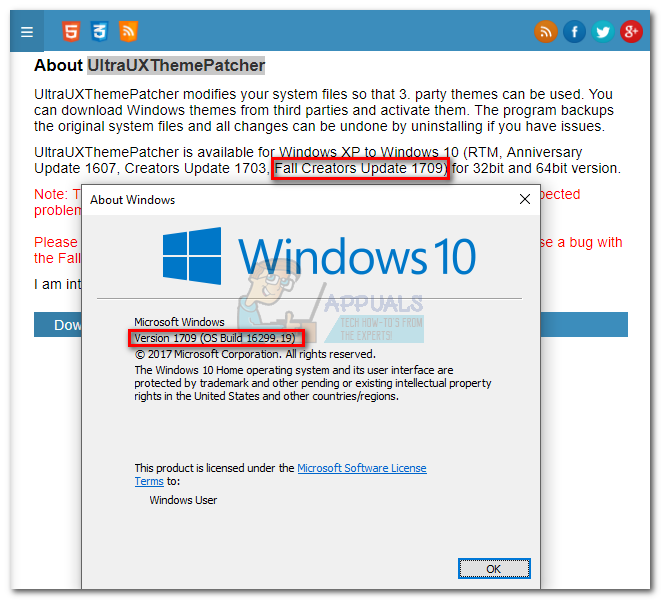
- Find out your Windows 10 version. You can leave the About window open for further references.
- Visit this link, go to the About section and see if your version of Windows 10 is supported by UltraUXThemePatcher. If it is, you can proceed safely to Step 3.

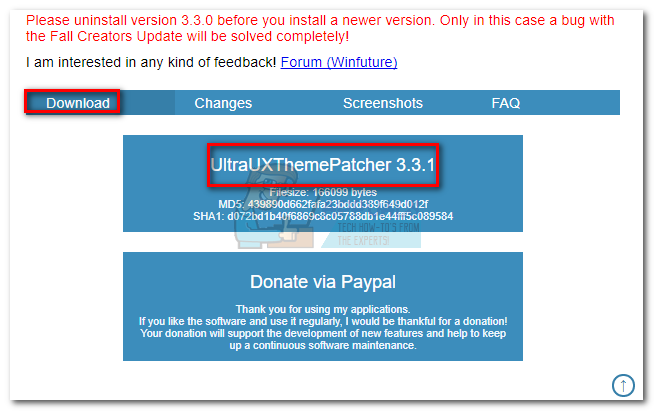
Step 3: Installing UltraUXThemePatcher
- Visit this link and download the latest version of UltraUXThemePatcher. Scroll down to the Download section and download the latest version.
- Right-click on the UltraUXThemePatcher executable and click on Run as Administrator.
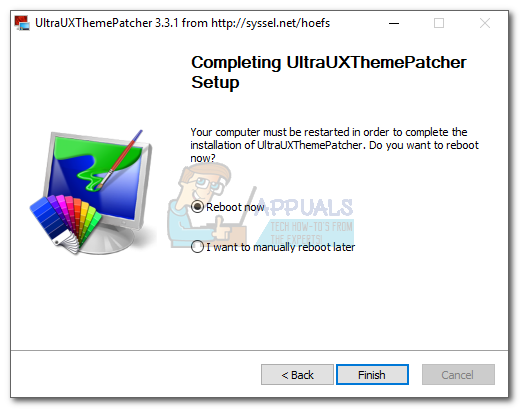
- Follow through with the installation instructions, then hit the Install button.
- Reboot your system to allow the changes to take effect.


Step 4: Using 3rd party Windows themes
Now that you’ve successfully patched your system files, you can use 3rd party themes from websites like DeviantArt. Some premium themes are paid only, but you can find a decent amount of freebies. Here’s a quick guide on how to apply them to your system:
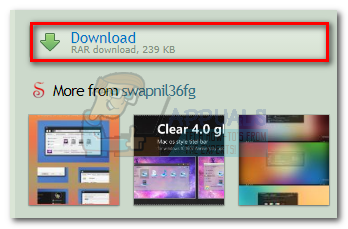
- Download a 3rd party theme from a website like DeviantArt. Keep in mind that most custom 3rd party themes will only work on certain Windows 10 builds. Before you apply it to your system, check out the Description section to find if yours is supported.
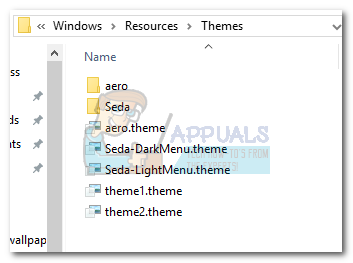
- Unpack the theme and make sure to copy the folder specifically designed for your Windows 10 build.
- Paste the theme folder in C:\ Windows \ Resources \ Themes.
- Now, right-click an empty space on the desktop, select Personalize > Themes and scroll down just under Apply a theme. You should be able to see the 3rd party theme.
- Select the theme, then click on Use custom theme to enable it on your system.

Windows Themes Installer: Install Windows 7 & Vista themes easily
We are pleased to release Windows Themes Installer. Windows Themes Installer is a freeware portable utility which allows you to install a theme, remove a theme, and restore defaults easily in Windows 7 & Vista.
UPDATE: 22.03.10. Windows Theme Installer has been updated to v 1.1. This new version will automatically patch the system files without the need of a 3rd party system file patcher.
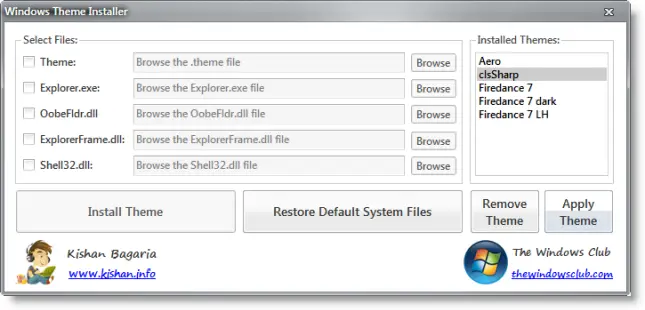
Windows Themes Installer
Windows does not allow you to install 3rd party themes. You have to patch some system files to be able to do so. This new version 1.1 will automatically patch the system files without the need of a 3rd party system file patcher. If the system files are already patched then it does nothing. To restore the patched files yo,u will need to use Universal Theme Patcher.
How to use Windows Themes Installer:
INSTALL A THEME AND CHANGE SYSTEM FILES:
1. Run the tool as Administrator.
2. Select the options which you want to install:
- Theme
- Explorer.exe
- OobeFldr.dll
- ExplorerFrame.dll
- Shell32.dll.
3. Once you have selected the options, click on the “Browse” button, and browse for the file of the desired option.
4. Now click on “Install Theme” button to install the theme and replace the system files.
RESTORE DEFAULT SYSTEM FILES:
To restore the default system files click on the “Restore Default System Files” button.
REMOVE A THEME:
To remove a theme select the theme which you want to remove from the list and click on the “Remove Theme” button.
APPLY A THEME:
To apply a theme select the theme which you want to apply from the list and click on the “Apply Theme” button.
It is always a good idea to create a system restore point first before making any changes to your system. Should the need arise, the System File Checker Utility will help you replace your system files with ‘good original’ Windows system files.
Windows Themes Installer v 1.1 has been developed for TWC, by our TWCF member Kishan. Some security software may report it as being suspect. This is because the tweaker changes the Windows system setting. Rest assured that it is a false-positive. If your antivirus software flags it as suspect, you may need to add it to its Ignore, Exclusions or safe list. If you wish to customize your Start Orb, you can use Windows 7 Start Button Changer.
If you wish to give feedback, please visit TWC Forum Feedback Thread.
Here is a theme I installed easily using Windows Theme Installer. You can check out for some good Windows 7 themes at DeviantArt. A downloaded theme may or may not contain all the specified files, but should definitely contain the .theme file.
Check out Ultimate Windows Customizer, which allows you to customize your Windows installation, including changing the Start Button, Logon Screen, Thumbnails, Taskbar, Explorer look, Windows Media Player, and more!
You may want to check out our other freeware releases here.
Date: March 20, 2010 Tags: Themes, TWC App
Windows Theme Installer
Review

A portable tool which installs and removes Windows themes.
Windows Vista and Windows 7 offer their users the ability to install themes, but without properly patching your system, you’re limited to themes offered by Microsoft only. With Windows Theme Installer, you can bypass Microsoft restrictions and install all kinds of themes on your system.
Whether you download a theme from a site like this or you find something charming on a site like DeviantArt, this theme installer is a small and compact utility which patches your system and can also install the themes you’ve downloaded.
To install a theme on your system, you first have to patch it and then reboot. Afterwards while running this program, just click on the Theme option and browse the location to where your theme was downloaded. Once completed, click on «Install Theme». All that is required is a .theme file.
Overall, Windows Theme Installer is a simple utility which allows you to install Windows themes without any complication.
Windows Theme Installer 1.1 on 32-bit and 64-bit PCs
This download is licensed as freeware for the Windows (32-bit and 64-bit) operating system on a laptop or desktop PC from theme software for windows without restrictions. Windows Theme Installer 1.1 is available to all software users as a free download for Windows. Filed under:
- Windows Theme Installer Download
- Freeware Theme Software for Windows
- Theme Instalation Software


