- error occurred while synchronizes with time.windows.com How can I make it synchronize work for updating time? please sending email reply to Email removed for privacy Thanks
- FIX: Time synchronization failed with time.windows.com
- How can I fix the time.windows.com synchronization error?
- 1. Check if Windows Time service is running
- 2. Use a different server
- 3. Restart Windows Time service
- 4. Use Command Prompt
- 5. Disable your third-party firewall
- Run a System Scan to discover potential errors
- 6. Change the default update interval
- 7. Add more servers to the registry
- 8. Change registry values
error occurred while synchronizes with time.windows.com How can I make it synchronize work for updating time? please sending email reply to Email removed for privacy Thanks
When I Click on Internet Time, it is showong an error occurred while synchronizes with time.windows.com How can I make it synchronize work for updating time? This problem is solved,but I can’t delete this post and thank you for your help.
Was this reply helpful?
Sorry this didn’t help.
Great! Thanks for your feedback.
How satisfied are you with this reply?
Thanks for your feedback, it helps us improve the site.
How satisfied are you with this reply?
Thanks for your feedback.
Firstly, check if your windows time service is running. To check the status, click on start; in the start search type Services.msc and hit Enter. Highlight Windows Time and check if the service is running or not. If it is not running, right click on it and start the service. Then try to synhronize your system clock with Internet Time Server.
Which Anti-virus software are you using?
Some times, this issue occurs due to some third party anti-virus/firewalls (in particular McAfee) which blocks W32Time Service (The W32Time service synchronizes an authoritative time server with an outside time source). I would suggest you to disable your Anti-virus/Firewalls completely and then try to update the time.
Note: Do not forget to re-enable the security software once you’re able to figure out what is causing the problem.
You can also try changing the default Internet Time Server (from time.windows.com to time.nist.gov).
To do so,
1. Right-click on the system clock in the system tray, and then choose Adjust Date/Time from the menu.
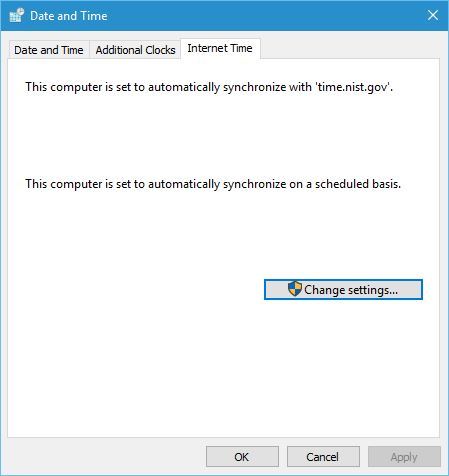
2. Click on the Internet Time tab.
3. Now click the Change settings button.
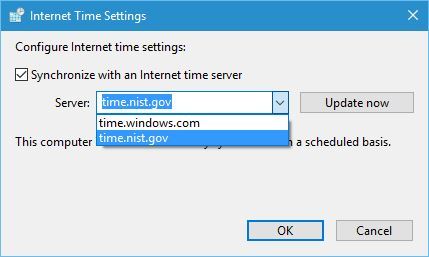
4. In the Internet Time Settings dialog, you can change the default server by choosing an item from the drop-down, or you can type in a new entry (for ex: time.nist.gov) You can also test it immediately by clicking the Update now button.
If you’re not able to update the time and you still receive an error, then try the following steps to stop and start the time update application.
1. Click on Start; in the start search type cmd.
2. Right click on Cmd.exe and choose Run as administrator.
3. Type the following command. After typing each command press enter.
net stop w32time
w32tm.exe /unregister
w32tm.exe /register
net start w32time
Hope this information is helpful and let me know if this worked.
Mouneshwar R – Microsoft Support
—————————————————————————————————————
Visit our Microsoft Answers Feedback Forum and let us know what you think
[If this post helps to resolve your issue, please click the «Mark as Answer» or «Helpful» button at the top of this message. By marking a post as Answered, or Helpful you help others find the answer faster.]
FIX: Time synchronization failed with time.windows.com

- You can have issues online if your time synchronization fails on Windows 10.
- Some users suggested performing SFC and DISM scans, as that seemed to help.
- Other users reported that changing registry values also did the trick.
- Alternatively, disabling or tweaking your firewall’s filters also seems to help.

- Download Restoro PC Repair Tool that comes with Patented Technologies (patent available here).
- Click Start Scan to find Windows issues that could be causing PC problems.
- Click Repair All to fix issues affecting your computer’s security and performance
- Restoro has been downloaded by 0 readers this month.
Automatic clock synchronization has been a part of Windows for years, and this feature is also present in Windows 10.
Unfortunately, few users are having some issues with clock synchronization and they are reporting An error occurred while windows was synchronizing with time.windows.com error message.
How can I fix the time.windows.com synchronization error?
Table of contents:
1. Check if Windows Time service is running
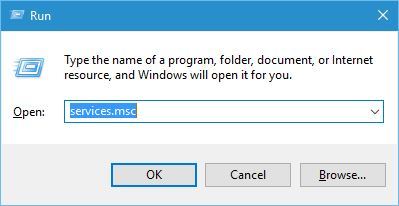
- Press Windows Key + R and enter services.msc. Press
- Enter or click OK.

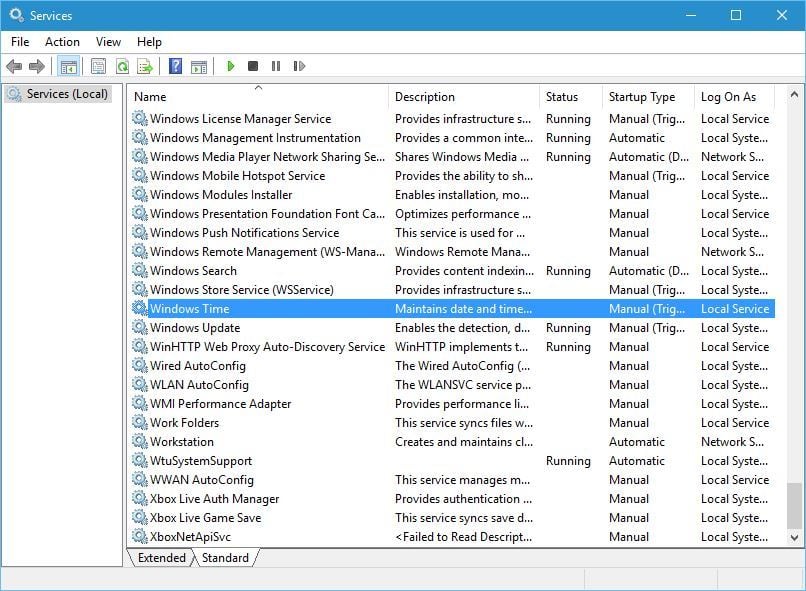
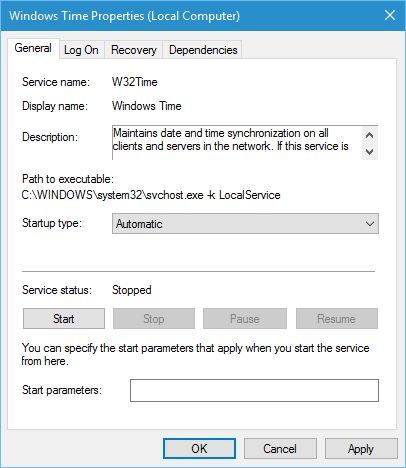
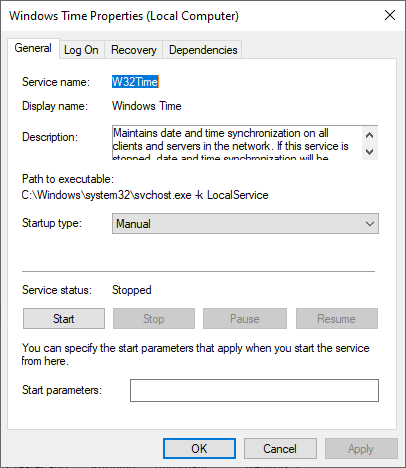
- When the Services window opens, locate Windows Time service and double click it to open its properties.
- Set Startup type to Automatic and click the Start button to start Windows Time service.
- After doing that, click Apply and OK to save changes.
Time synchronization feature relies heavily on Windows Time service, and if Windows Time service isn’t running, you might encounter this error.
2. Use a different server
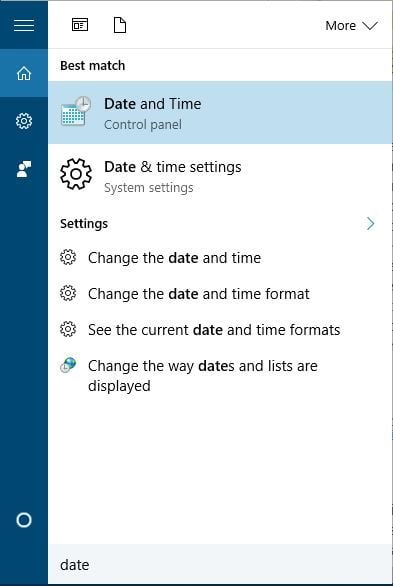
- Press Windows Key + S and enter the date.
- Select Date and Time from the menu.
- When Date and Time window opens, go to Internet Time and click the Change settings button.
- Select time.nist.gov as the Server and click the Update now button.
- Some users also reported that using pool.ntp.org as the server fixes this problem, so you can try using it as well.
- Click OK to save changes.
Users reported that they managed to fix this problem simply by using a different server.
There are different time servers that you can use, and some of them are time-a.nist.gov, time-b.nist.gov, time-a.timefreq.bldrdoc.gov, and time-b.timefreq.bldrdoc.gov.
Before trying this solution, make sure that Windows Time service is set to Automatic and running. For detailed instructions on how to do that, be sure to have a look at our previous solution.
3. Restart Windows Time service
- Go to Services and open Windows Time service properties.
- Go to Log On tab and select the Local System account option. Check Allow service to interact with desktop option.
- After that, click Apply and OK and restart your PC.
In order to fix this issue, you might have to restart the Windows Time service. To do that, open the Services window and double click the Windows Time service to open its properties.
If the service is running, stop it. Set the Startup Type to Automatic and start the service again. Click Apply and OK to save changes and restart your computer.
Some users are also suggesting to change Log On settings of Windows Time service before applying changes and restarting your PC. Keep in mind that you need to do this step right after restarting the Windows Time service.
4. Use Command Prompt
According to users, you can fix this issue simply by using Command Prompt and running a few commands. To do that, follow these steps:
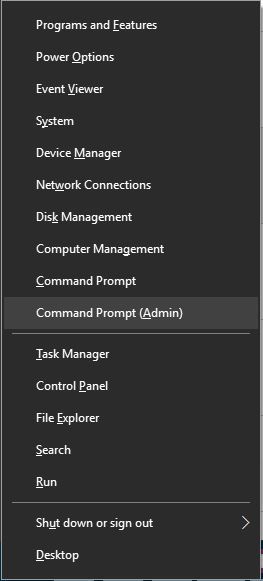
- Press Windows Key + X to open the Win+X menu and choose Command Prompt (Admin).
- When Command Prompt starts, enter the following commands:
- w32tm /debug /disable
- w32tm /unregister
- w32tm /register
- net start w32time
- If everything was successful, you should see “The windows Time Service is starting. The windows time service was started successfully.” message.
- Close Command Prompt and try to synchronize your clock.
5. Disable your third-party firewall
Run a System Scan to discover potential errors


Firewall tools are always useful because they prevent potentially dangerous applications from accessing the Internet. Unfortunately, sometimes these tools can interfere with your clock and cause this error to appear.
To fix this error, be sure to temporarily disable your firewall and check if that fixes the problem. If the issue persists, you might want to uninstall your firewall completely.
Users reported that after switching to Standard mode in their firewall or after disabling it completely, they were able to synchronize their clock without any problems.
In addition, you might want to configure your firewall to unlock NPT access on UDP port 123. If you changed your router’s firewall configuration, you might have to unlock UDP port 123 on your router as well.
Do you need to configure your router? Modify any settings easily with these software tools.
6. Change the default update interval
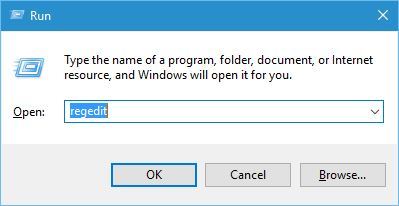
- Press Windows Key + R and enter regedit.
- Press Enter or click OK.
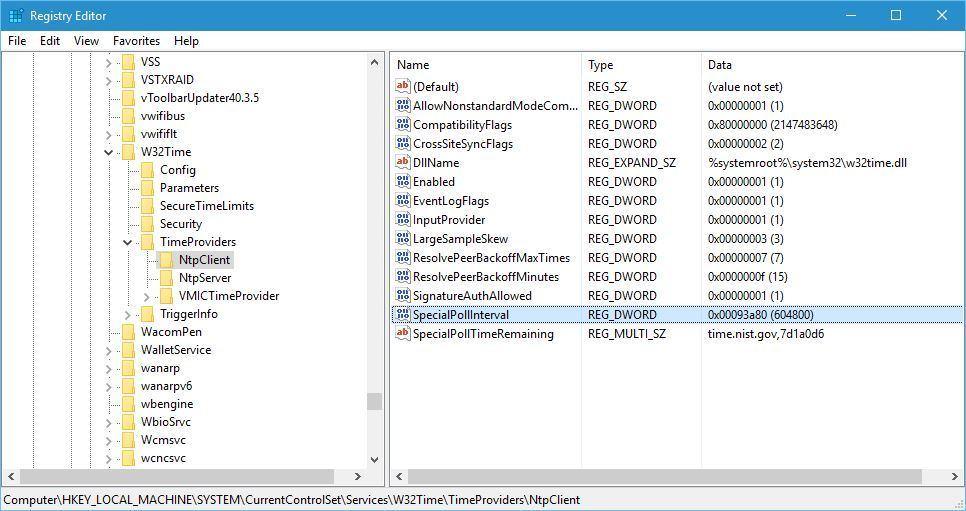
- When Registry Editor starts, navigate to the following key in the left pane:
- HKEY_LOCAL_MACHINE\SYSTEM\CurrentControlSet\Services\W32Time\TimeProviders\NtpClient .
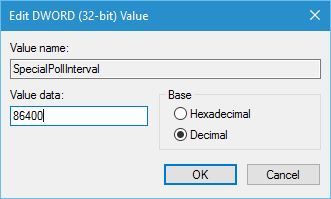
- Double click the SpecialPollInterval key.
- In the Base section select Decimal.
- By default Value, data should be set to 604800.
- This number represents 7 days in seconds, but you can change it to 86400 so it represents 1 day.
- After doing that, click OK to save changes.
Sometimes these errors can occur due to your update interval, but you can easily fix this error by changing few values in your registry.
We have to warn you that modifying your registry can lead to system stability issues if you don’t do it properly, therefore you might want to create a backup of your registry just in case.
7. Add more servers to the registry
- Open Registry Editor and navigate to the following key in the left pane:
- HKEY_LOCAL_MACHINE\SOFTWARE\Microsoft\Windows\CurrentVersion\Date\Time\Servers
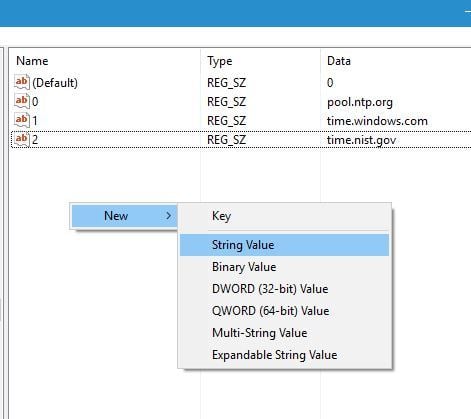
- You should see several values available in the right pane. Every server will be represented by a number.
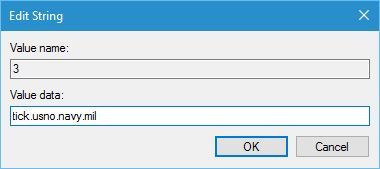
- To add a new time server, right-click the empty space and choose New > String Value.
- Enter the appropriate number as the name, in our case that’s 3 since we already have 3 servers available, and double click it.
- In the Value data field enter the server‘s address. Users reported that tick.usno.navy.mil server worked for them, so you can add it if you want.
- Click OK to save changes.
- Optional: You can add as many servers as you want by following the previous steps. Regarding the servers, you can add any of these:
- time-a.nist.gov
- time-b.nist.gov
- 128.105.37.11
- europe.pool.ntp.org
- clock.isc.org
- north-america.pool.ntp.org
- time.windows.com
- time.nist.gov
After you add servers to the registry, simply go to Time and Date settings and choose any of the servers that you added. For more information on how to change a time server, be sure to check Solution 2 for detailed instructions.
8. Change registry values
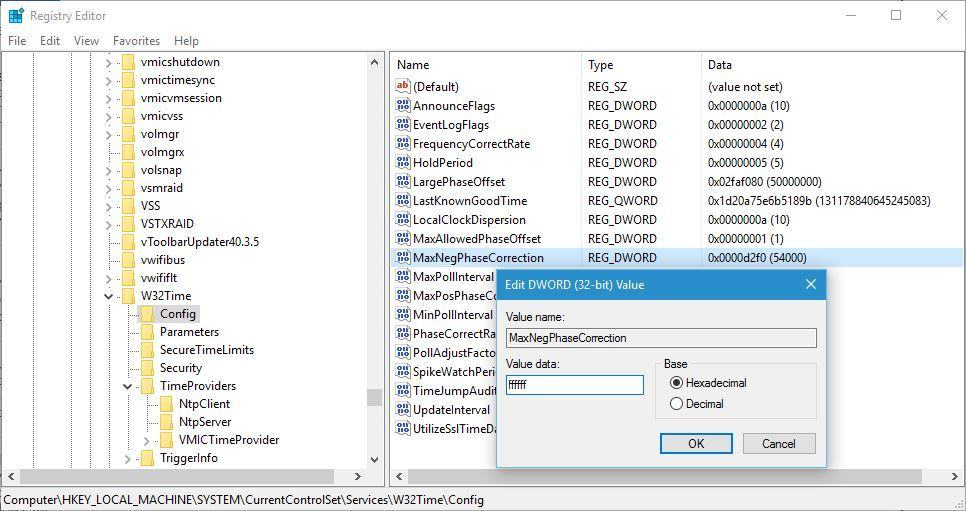
- Open Registry Editor and navigate to the following key in the left pane:
- HKEY_LOCAL_MACHINESYSTEMCurrentControlSetServicesW32TimeConfig
- In right pane double click on MaxNegPhaseCorrection and set the Value data to ffffff.
- Click OK to save changes.
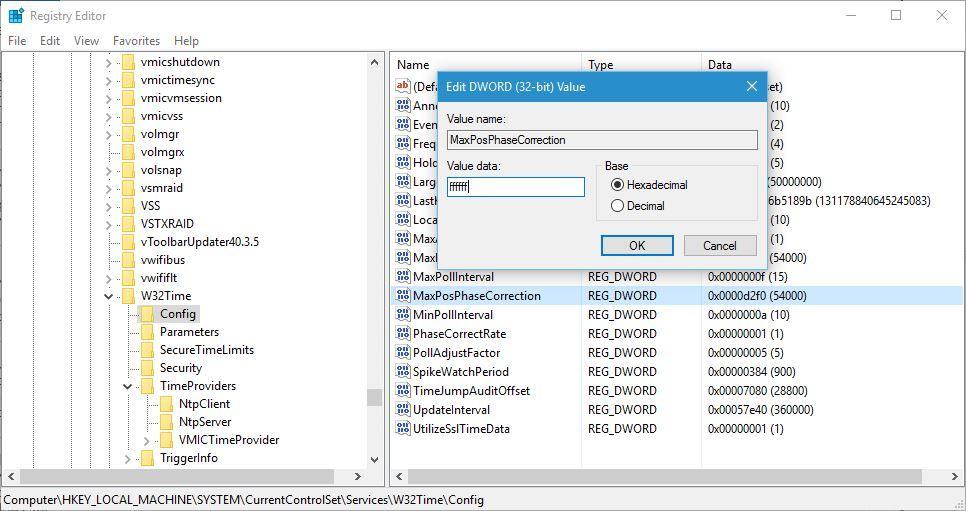
- Double click on MaxPosPhaseCorrection and set Value data to ffffff. Click OK to save changes.
- Close Registry Editor.
Users reported that you can fix this problem simply by changing two values in your registry. After doing that, try to synchronize your clock again. Before trying this solution it’s recommended to back up your registry in case anything goes wrong.
An error occurred while Windows was synchronizing with time.windows.com error can prevent your clock from synchronizing, but you can easily solve this problem by changing your time server or by using any other of our solutions.
If you have any more questions or suggestions, feel free to drop them in the comments section below.


