- SOLVED: Windows 10 Won’t Install or Download Updates
- Repair Corrupt System Files
- Solution 1: Run the Windows Update Troubleshooter
- Solution 2: Ensure that all services related to Windows Update are running
- Solution 3: Using a Registry Tweak to reset Windows Update
- Solution 4: Fix the issue via an elevated Command Prompt
- Solution 5: Turn OFF Metered Connection
- Windows Update: FAQ
SOLVED: Windows 10 Won’t Install or Download Updates
While Windows 10 is the latest and greatest iteration of the Windows Operating System in existence, it is far from perfect. That being the case, Microsoft periodically rolls out tons of updates for both Windows 10 and the programs and applications that it contains. Unlike with older versions of Windows, however, all updates rolled out to Windows 10 computers via Windows Update are mandatory and are automatically downloaded and installed at one time or another. Regardless of the important status of an update and regardless of whether or not you want to install it, it will eventually be downloaded and installed, although you do have the power to delay the occurrence slightly.
Some Windows 10 users, unfortunately, have been and continue to be affected by an issue where their computers accumulate tons of pending updates, some of which are marked as waiting to be downloaded, some marked as waiting to be installed, but none actually being downloaded or installed no matter how many times affected users try to download and install them. When users affected by this issue go into Windows Update, they see a list of all of the updates available for their computer but are unable to download and/or install any of them even though some are marked as waiting to be downloaded and some waiting to be installed.
Thankfully, though, this problem is not a dead-end problem and can be fixed by pretty simple means. The following are the three most effective solutions that you can use to try and fix this problem:
Repair Corrupt System Files
Download and run Restoro to scan for corrupt files from here, if files are found to be corrupt and missing repair them and then check if it fixes the issue, if not then proceed with Solutions listed below.
Before you Proceed: Make sure to leave the process for at least an hour or two to make sure that Windows isn’t just initializing updates.
Solution 1: Run the Windows Update Troubleshooter
If a Windows 10 component is not working or behaving the way it is supposed to, what you need to do is simply run Windows 10’s built-in Troubleshooting utility, but run it specifically for the component that is malfunctioning. The same applies to Windows Update – since Windows Update is behaving strangely, the first solution you should try out is running the Windows Update Troubleshooter. To do so, you need to:
- Open the Control Panel.
- Switch to Icons
- Click on Troubleshooting.
- Click on View all in the left pane.
- Click on Windows Update.
- Click on Next, and then proceed with the troubleshooter all the way through to the end, following the on-screen instructions along the way.

The Troubleshooter will try to identify any and all problems with Windows Update and fix any problems that it finds. Once you have successfully run the Troubleshooter, you should restart your computer and try downloading and installing Windows Updates once it boots up to see whether or not the issue still persists.
Solution 2: Ensure that all services related to Windows Update are running
You may be facing this Windows Update issue if one or more of the services pertaining to Windows Update is either not enabled or are not running on your computer. If that is the case, this issue can be easily remedied by making sure that all Windows Update-related services are enabled and running.
- Hold down the Windows Logo key, and while doing so, press R to open a Run
- Type services.msc into the Run dialog and press Enter.
- Locate and right-click on the Windows Update service, and click on Properties.
- Set the service’s Startup type to Automatic, if the service is stopped, click on Start to start it, click on Apply and then click on OK.
- Locate and right-click on the Background Intelligent Transfer Service (BITS), and click on Properties.
- Repeat step 4.
- Locate and right-click on the Cryptographic Service, and click on Properties.
- Repeat step 4.
Close the utility, restart your computer and check to see whether or not the problem has been fixed once it boots up.
Solution 3: Using a Registry Tweak to reset Windows Update
If the solutions provided above doesn’t fix your problem there is a possibility that registry keys are corrupted or modified there is a Registry Tweak that you can try, basically it will reset the Windows Update‘s registry keys and set them to default which can potentially fix the issue you are having.
- Click hereto download the Registry Tweak.
- Wait for the Registry Tweak to be downloaded.
- Navigate to where the Tweak was downloaded to and double-click on it to run it.
- There will be a pop-up asking “Are you sure you want to continue?” Press “Yes”
- Now press ok.
- Restart your Computer then check to see if the issue still persists.
Solution 4: Fix the issue via an elevated Command Prompt
If none of the solutions listed and described above have worked for you, you may just be able to fix this issue through an elevated Command Prompt. In order to do so, you need to:
- Right-click on the Start Menu button to open the WinX Menu.
- Click on Command Prompt (Admin).
- One by one, type the following commands into the elevated Command Prompt, pressing Enter after typing in each one and waiting for one command to be executed fully before typing in the next:
Once all of the commands listed above have been fully executed, close the Command Prompt and restart your computer.
Check whether or not you are now able to download and install updates via Windows Update once your computer boots up.
Solution 5: Turn OFF Metered Connection
In some cases, the internet connection that you are using might be set up as a metered connection due to which the download restriction might be implemented on it. Therefore, in this step, we will be turning this metered connection OFF and then check to see if the issue still persists. For that:
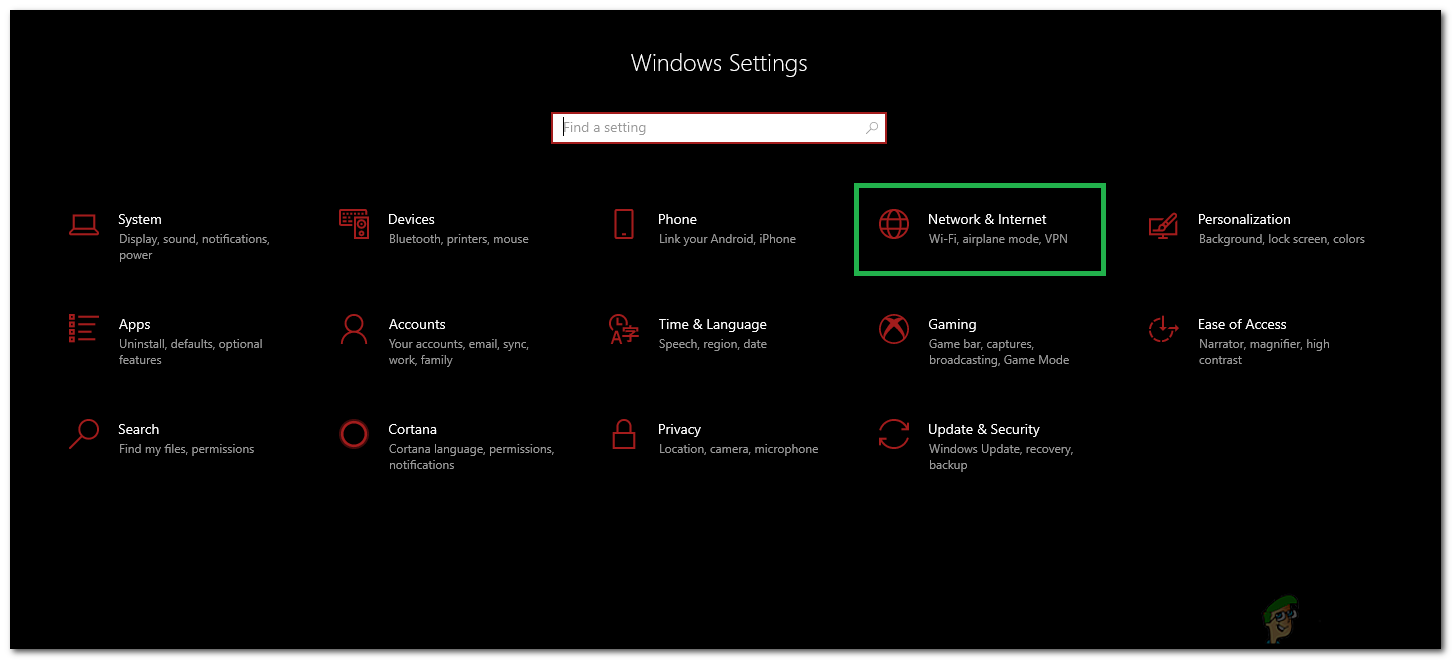
- Press “Windows” + “I” to open settings.
- Click on the “Networkand Internet” option.
 Selecting “Network and Internet” Options
 - Click on the “Wifi” option on the left pane and select “Manage known Networks” in the next window. Accessing the Manage known networks menu
- Click on the Wifi name in the next window and select “Properties”.
- Click on the “Toggle” for “Set as Metered Connection” to turn it off.
- Check to see if the issue persists.
 Selecting “Network and Internet” Options
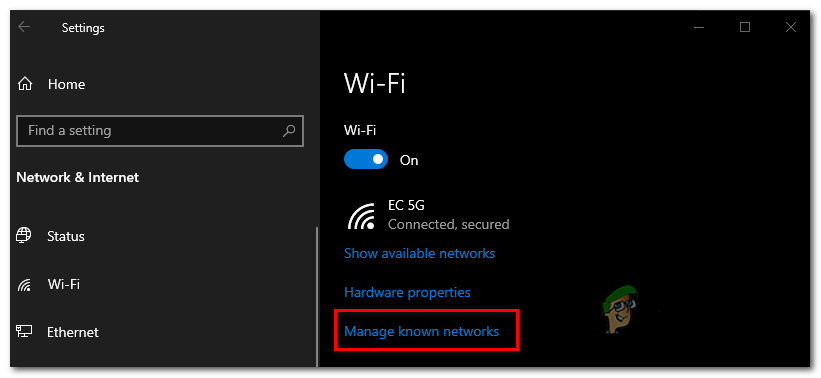 Accessing the Manage known networks menu
Windows Update: FAQ
Note: If you’re looking for Microsoft Office update info, see Install Office updates.
In Windows 10, you decide when and how to get the latest updates to keep your device running smoothly and securely. When you update, you’ll get the latest fixes and security improvements, helping your device run efficiently and stay protected. In most cases, restarting your device completes the update. Make sure your device is plugged in when you know updates will be installed.
If other questions come up when you update Windows 10, here are some other areas that might interest you:
When you only want info about updating Windows 10, you’ll find answers to many of your questions here:
When the Windows 10 May 2020 Update is ready for your device, it will be available to download and install from the Windows Update page in Settings. Choose a time that works best for you to download the update. You’ll then need to restart your device and complete the installation. After that, your device will be running Windows 10, version 2004.
To manually check for the latest recommended updates, select Start > Settings > Update & Security > Windows Update > Windows Update .
To get help updating to the latest version of Windows 10, go to the Microsoft software download page and download the Update Assistant.
Some updates may not be available on all devices at the same time—we’re making sure updates are ready and compatible.
To stay up to date, select Start > Settings > Update & Security > Windows Update > Windows Update , and then select Check for updates.
If a feature update is available for your device, it will appear separately on the Windows Update page. To install it, select Download and install now.
Here are a few things you can try if you’re having trouble installing updates:
Make sure that your device is connected to the internet. Downloading updates requires an internet connection.
If you’re connected the internet, try to install the updates manually. Select Start > Settings > Update & Security > Windows Update > Windows Update , and then view available updates.
Check for updates
Run the Windows Update Troubleshooter. Select Start > Settings > Update & Security > Troubleshoot . Under Get up and running, select Windows Update.
The time required to download updates primarily depends on internet connection speed, network settings, and update size. Make sure your device is plugged in and connected to the internet to download updates faster.
You can’t stop updates entirely—because they help keep your device safe and secure, updates will eventually need to be installed and downloaded, regardless of your update settings. Here’s how to temporarily pause updates from being downloaded and installed. Note that after the pause limit is reached, you’ll need to install the latest updates before you can pause updates again.
In the Windows 10 November 2019 Update (version 1909) or later, or in Windows version 1809 for Pro or Enterprise, select Start > Settings > Update & Security > Windows Update . Then choose one of the following options:
Select Pause updates for 7 days.
Select Advanced options. Then, in the Pause updates section, select the drop-down menu and specify a date for updates to resume.
To finish installing an update, your device will need to restart. Windows will try to restart your device when you’re not using it. If it can’t, you’ll be asked to schedule the restart for a more convenient time. Or, you can schedule anytime by following these steps:
Select Start > Settings > Update & Security > Windows Update > Windows Update .
Select Schedule the restart and choose a time that’s convenient for you.
You can set active hours to make sure automatic restarts for updates only happen when you’re not using your device. Learn about active hours for Windows 10.
Try deleting files you don’t need, uninstalling apps you don’t use, or moving files to another drive like an external USB drive or OneDrive. For more tips on freeing up disk space, see Free up drive space in Windows 10.
We recommend keeping devices like laptops and tablets plugged in when you’re not using them. This way, if updates are installed outside active hours, your device will have enough power to complete the installation. Windows updates don’t consume more battery than other typical system processes.
An update history is available so you can see which updates were installed, and when. You can also use this list to remove specific updates, although we don’t recommend this unless it’s necessary.
Select Start > Settings > Update & Security > Windows Update > Windows Update > View update history .
For more info about what’s included in updates for Windows 10, see Windows 10 update history.
We don’t recommend that you remove any installed updates. However, if you must remove an update, you can do so in update history.
Select Start > Settings > Update & Security > Windows Update > View update history > Uninstall updates.
Select the update you want to remove, then select Uninstall.
Feature updates are typically released twice per year and include new functionality and capabilities as well as potential fixes and security updates. Quality updates are more frequent and mainly include small fixes and security updates. Windows is designed to deliver both kinds of updates to devices through Windows Update.
To double check that your device is up to date, open Settings > Update & Security > Windows Update and see your update status and available updates.
To find which version of Windows you’re running, see Which version of Windows operating system am I running?
Reserved storage is not automatically turned on by Windows in any update scenarios. It is only turned on for new devices with the Windows 10 May 2019 Update (version 1903) or later preinstalled, or devices on which a clean install was performed.
Note: If you’re looking for Microsoft Office update info, see Install Office updates.
The best way to keep Windows 8.1 up to date is to turn on automatic updates. With automatic updates, you don’t have to search for updates online or worry about missing critical fixes or device drivers for your PC. Instead, Windows Update automatically installs important updates as they become available.
To turn on automatic updates:
Open Windows Update by swiping in from the right edge of the screen (or, if you’re using a mouse, pointing to the lower-right corner of the screen and moving the mouse pointer up), select Settings > Change PC settings > Update and recovery > Windows Update. If you want to check for updates manually, select Check now.
Select Choose how updates get installed, and then, under Important updates, select Install updates automatically (recommended).
Under Recommended updates, select Give me recommended updates the same way I receive important updates.
Under Microsoft Update, select Give me updates for other Microsoft products when I update Windows, and then select Apply.
Click the questions below to see answers about how Windows Update keeps your device up to date.
Note: If your PC is connected to a network where updates are managed by Group Policy, you might not be able to change settings related to Windows Update. For more info, contact your organization’s technical support.
Open Windows Update by swiping in from the right edge of the screen (or, if you’re using a mouse, pointing to the lower-right corner of the screen and moving the mouse pointer up), select Settings > Change PC settings > Update and recovery > Windows Update. To check for updates manually, select Check now.
An update history is available so you can see which updates were installed, and when. You can also use this list to remove specific updates, although we don’t recommend this unless it’s necessary.
To see your PC’s update history, open Windows Update by swiping in from the right edge of the screen (or, if you’re using a mouse, pointing to the lower-right corner of the screen and moving the mouse pointer up), select Settings > Change PC settings > Update and recovery > Windows Update > View your update history.
We don’t recommend that you remove any installed updates. However, if you must remove an update, you can do so in update history.
Open Windows Update by swiping in from the right edge of the screen (or, if you’re using a mouse, pointing to the lower-right corner of the screen and moving the mouse pointer up), select Settings > Change PC settings > Update and recovery > Windows Update > View your update history.
Select the update you want to remove, then select Uninstall.
Here are a few things to try if you’re having problems installing updates:
Make sure that your PC is connected to the internet. Some updates can’t be installed if you’re using a metered internet connection.
If you’re connected the internet and updates aren’t installed automatically, wait a few minutes and then try to install the updates manually.
See the Fix Windows Update errors guided walkthrough to try to fix the problem.
Support for Windows 7 ended on January 14, 2020
We recommend you move to a Windows 10 PC to continue to receive security updates from Microsoft.
Click the questions below to see answers about how Windows Update keeps your device up to date.


