- Fix: Windows Update Service could not be Stopped
- What Causes the Windows Update Service to prevent being Stopped?
- Solution 1: Stopping wuauserv Process
- Solution 2: Clearing the Contents of Update Folder
- Solution 3: Perform a Repair Installation
- How to stop automatic updates on Windows 10
- How to disable automatic updates using Settings
- How to disable automatic updates using Group Policy
- Disable updates
- Limit updates
- How to disable automatic updates using Registry
- Disable updates
- Limit updates
- More Windows 10 resources
- Halo: MCC’s live service elements make it better, not worse
- Microsoft’s Surface Duo is not ‘failing up’
- Here’s what you can do if Windows 10 update KB5001330 is causing issues
- These are the best PC sticks when you’re on the move
Fix: Windows Update Service could not be Stopped
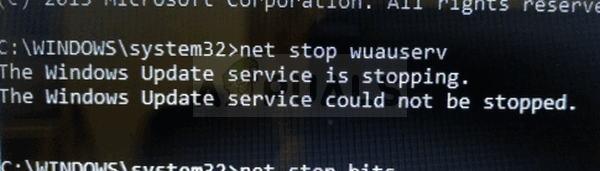
This problem appears when users are unable to stop the Windows Update Service using the Services tool or Command Prompt. The reasons for trying to stop the service are numerous and many problems regarding Windows Update can be resolved simply by stopping the service and starting it once again.
 Windows Update Service could not be Stopped
This article will feature some modules which may cause this problem to occur as well as some workarounds which can be used to stop the service forcefully. Make sure you follow the instructions carefully and the problem should be resolved in no time.
What Causes the Windows Update Service to prevent being Stopped?
The causes of this problem are often unknown and this problem often needs to be circumvented rather than resolved. Nonetheless, when Windows Update service stops misbehaving, new updates are installed and they often resolve the problem. However, here are some common causes:
- Missing administrator privileges may prevent Windows Update Service from stopping and you should use an elevated Command Prompt in order to stop it.
- Something is wrong with your computer on a more serious note and you should consider an in-place upgrade or a repair installation.
Solution 1: Stopping wuauserv Process
Command Prompt with administrative permissions can be used to circumvent this problem. The command you will use will end the process recognized by its PID and it should be stopped. Note that you will need to use the Services tool to restart the process once you stop it if you wish to use the Windows Update functionality in the future.
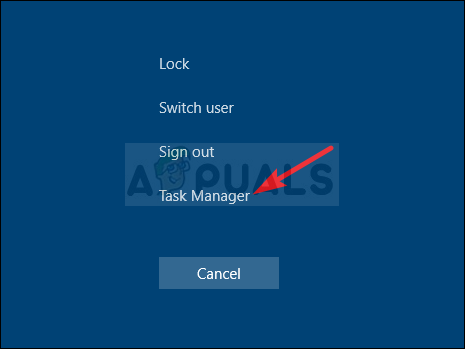
- Use the Ctrl + Shift + Esc key combination by pressing the keys at the same time to open the Task Manager utility.
- Alternatively, you can use the Ctrl + Alt + Del key combination and select Task Manager from the popup blue screen which will appear with several options. You can also search for it in the Start menu.
 Running Task Manager
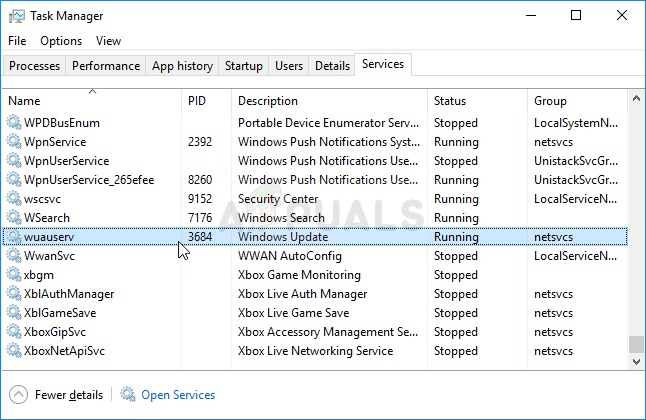
- Click on More details at the bottom left part of the window in order to expand Task Manager. Navigate to the Services tab and right-click somewhere around the names of the columns and check the box next to the PID entry in the context menu.
- Locate the Windows Update service by checking the Description column or by looking for the ‘wuauserv’ service under the Name column. Note down its PID number.
 Locating the PID of Windows Update Service
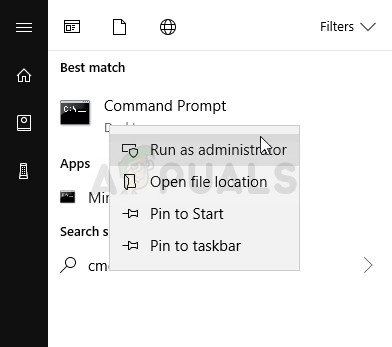
- Search for “Command Prompt” either right in the Start menu or by tapping the search button right next to it. Right-click on the first result which appears at the top and select the “Run as administrator” option.
 Running CMD with admin permissions
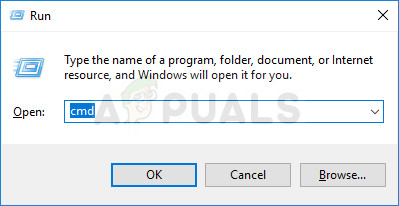
- Users who are using an older version of Windows can use the Windows Logo Key + R key combination in order to bring up the Run dialog box. Type in “cmd” in the box and use the Ctrl + Shift + Enter key combination in order to run Command Prompt as an administrator.
- Copy and paste the command shown below and make sure you click the Enter key on your keyboard.
- Make sure you replace [PID] with the number you noted down regarding Windows Update Service. If the Command Prompt reports that the service was successfully stopped, your problem is resolved!
Solution 2: Clearing the Contents of Update Folder
If you want to stop the Windows Update Service because you are either resetting Windows Update components or if you are simply trying to solve a problem regarding the automatic updates, you can follow this set of commands along with deleting the contents of a folder. The method is similar to Solution 1 but the command is different.
- Search for “Command Prompt” either right in the Start menu or by tapping the search button right next to it. Right-click on the first result which appears at the top and select the “Run as administrator” option.
- Users who are using an older version of Windows can use the Windows Logo Key + R key combination in order to bring up the Run dialog box. Type in “cmd” in the box and use the Ctrl + Shift + Enter key combination in order to run Command Prompt as an administrator.
 Running CMD using Run box
 - Copy and paste the command shown below and make sure you click the Enter key on your keyboard.
 Running CMD using Run box
- Navigate to the following location on your computer by opening the Windows Explorer and clicking on This PC:
- Use the Ctrl+ A key combination to select all files, right-click on one of them and choose Delete from the context menu.
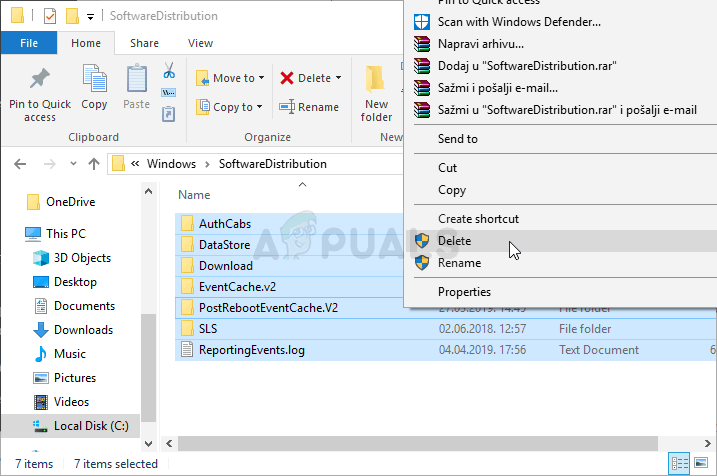 Deleting the contents of SoftwareDistribution folder
- If you wish to restart both the BITS and the Windows Update service, run the following set of commands in Command Prompt:
Solution 3: Perform a Repair Installation
This method might seem desperate as it includes creating a bootable Windows 10 media and actually performing a repair installation but it can help you since you won’t lose any of your personal files. This has helped plenty of users deal with the problem and you should check it out as a last resort, especially if you are trying to get Windows Update to work as this will also install the latest version of Windows.
- Download the Media Creation Tool software from Microsoft’s website. Open the downloaded file you just downloaded and accept the terms and conditions.
- Select the Create installation media (USB flash drive, DVD, or ISO file) for another PC option from the initial screen.
 Choose Create installation media for another PC
- The language, architecture, and other settings of the bootable drive will be chosen based on your computer’s settings, but you should uncheck the Use the recommended options for this PC in order to select the correct settings for the PC which has the password attached to it (if you are creating this on a different PC, and you probably are).
- Click Next and click on the USB drive or DVD option when prompted to choose between USB or DVD, depending on which device you want to use to store this image on.
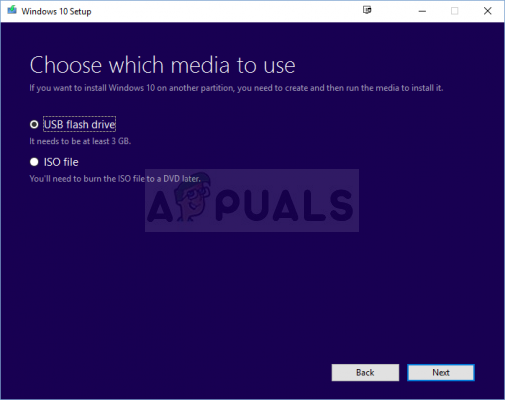 Choose between USB or DVD
- Click Next and choose the USB or DVD drive from the list which will show the storage media connected to your computer.
- Click Next and the Media Creation Tool will proceed to download the files necessary to install create the installation device.
Now that you probably have your recovery media, we can start actually solving the booting issue by starting the recovery drive which you should boot from.
- Insert the installation drive you own or which you have just created and boot your computer. The initial screen will differ depending on the operating system you have installed.
- Windows Setup should open prompting you to enter the preferred language and time and date settings. Enter them correctly and choose the Repair your computer option at the bottom of the window.
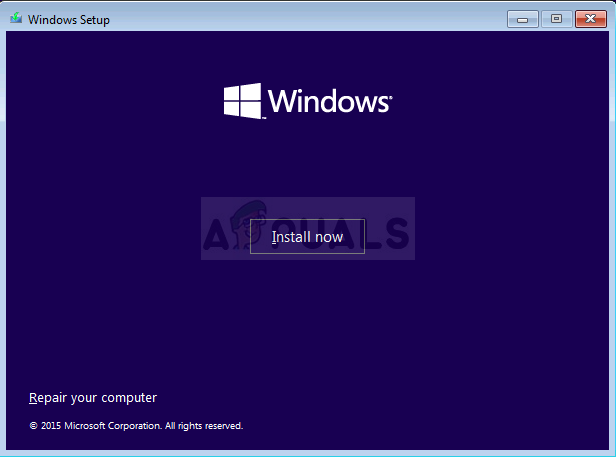 Choose Repair your computer
- The Choose an option screen will appear so navigate to Troubleshoot >> Reset this PC. This will let you keep your personal files but it will delete the apps you have installed. Follow the further set of instructions on-screen and wait for the process to finish. Check to see if the BSODs still appear in a loop!
How to stop automatic updates on Windows 10
 Source: Windows Central
On Windows 10, when new quality updates (also referred as cumulative updates) become available, they download and install automatically on your computer. Although the automatic approach ensures that every device receives security updates to patch vulnerabilities and performance as well as stability enhancements, it’s one of the most controversial features.
Typically, the biggest reason is that updates are known to contain bugs that can negatively affect the experience, and they require a restart to complete the installation that can disrrupt the current workflow.
If you’re always noticing problems as a direct result of updates, or you have a good reason to use a device unpatched, depending on your edition of Windows 10, you can stop automatic updates using the Windows Updates settings or permanently using Group Policy or Registry.
In this Windows 10 guide, we’ll walk you through the steps to block Windows Update from downloading and installing updates on your device automatically.
How to disable automatic updates using Settings
Usually, it’s not necessary to disable the Windows Update settings permanently. If you want to skip an update, you can pause updates until the day you want to apply them. Using the Settings app, you can stop system updates for up to 35 days on Windows 10 Pro or Home.
To disable automatic updates temporarily, use these steps:
- Open Settings.
- Click on Update & Security.
- Click on Windows Update.
Click the Advanced options button.
 Source: Windows Central
Under the «Pause updates» sections, use the drop-down menu and select how long to disable updates.
Source: Windows Central
Once you complete the steps, updates for Windows 10 will be completely disabled until the day you specified. When the device reaches the pause limit, you must install the latest updates available for the option to be available again.
You can always undo the changes with the same instructions outlined above, but on step No. 5, choose the Select date option. Another way to perform the same task is to click the Resume updates button on the Windows Update page.
In the past, the «Advanced options» page also included options to defer security and feature updates, but these options are no longer available with the latest version of Windows 10.
How to disable automatic updates using Group Policy
On Windows 10 Pro, the Local Group Policy Editor allows you to disable automatic updates permanently, or you can change the Windows Update policies to decide when updates should install on the device.
Disable updates
To disable automatic updates on Windows 10 permanently, use these steps:
- Open Start.
- Search for gpedit.msc and click the top result to launch the Local Group Policy Editor.
Navigate to the following path:
Computer Configuration > Administrative Templates > Windows Components > Windows Update
Double-click the Configure Automatic Updates policy on the right side.
 Source: Windows Central
Check the Disabled option to turn off the policy and disable automatic updates permanently.
![]() Source: Windows Central
Source: Windows Central
After you complete the steps, Windows 10 will stop downloading updates automatically on the device. However, the ability to check for updates manually will continue to be available in Settings > Update & Security > Windows Update. While on the page, you need to click the Check for updates button to download and install the most recent patches.
If you want to re-enable automatic updates on the device, you can use the same instructions outlined above, but on step No. 5, make sure to select the Not Configured option.
Limit updates
Alternatively, you can customize the policy to decide how you want to disable automatic updates using the Local Group Policy Editor.
To manage Windows Update automatic downloads with Group Policy, use these steps:
- Open Start.
- Search for gpedit.msc and select the top result to launch the experience.
Navigate to the following path:
Computer Configuration > Administrative Templates > Windows Components > Windows Update
Double-click the Configure Automatic Updates policy on the right side.
Source: Windows Central
Check the Enable option to turn on the policy.
![]() Source: Windows Central
Source: Windows Central
Under the «Options» section, select the best settings to prevent updates from downloading and installing automatically on Windows 10:
- 2 — Notify for download and auto install.
- 3 — Auto download and notify for install.
- 4 — Auto download and schedule the install.
- 5 — Allow local admin to choose setting.
- 7 — Auto Download, Notify to install, Notify to Restart.
Quick tip: The closest option to disable automatic updates is the 2 — Notify for download and auto install option, but you can select any other option that best fits your situation. If you choose option number 2, updates won’t download or install automatically. Instead, in the Windows Update settings page, you’ll now see an «Install now» button that you need to click manually to get the improvements.
 Source: Windows Central
Once you complete the steps, automatic updates will be permanently disabled on Windows 10. However, when a new patch becomes available for the system, you’ll be able to install it manually from the Windows Update settings page.
How to disable automatic updates using Registry
On Windows 10 Pro, you can also disable automatic updates using the Registry in at least two different ways.
Warning: This is a friendly reminder that editing the Registry is risky and can cause irreversible damage to your installation if you don’t do it correctly. It’s recommended to make a full backup of your PC before proceeding.
Disable updates
To disable Windows 10 update permanently modifying the Registry, use these steps:
- Open Start.
- Search for regedit and click the top result to launch the Registry Editor.
Navigate to the following path:
Right-click the Windows (folder) key, select the New submenu, and then choose the Key option.
Source: Windows Central
Right-click the newly created key, select the New submenu, and choose the Key option.
Source: Windows Central
Right-click the AU key, select the New submenu, and choose the DWORD (32-bit) Value option.
Source: Windows Central
Double-click the newly created key and change its value from 0 to 1.
Source: Windows Central
After you complete the steps, Windows Update will no longer install monthly updates automatically on Windows 10. However, similar to using the Local Group Policy Editor, you’ll still be able to download and install updates as needed by clicking the Check for updates button in the Windows Update settings.
Limit updates
It’s also possible to use the Registry to configure how updates are delivered for Windows 10 to prevent automatic installs.
To customize Windows Update settings to block updates with the Registry, use these steps:
- Open Start.
- Search for regedit and click the top result to open the Registry Editor.
Navigate to the following path:
Right-click the Windows (folder) key, select the New submenu, and choose the Key option.
Source: Windows Central
Right-click the newly created key, select the New submenu, and choose the Key option.
Source: Windows Central
Right-click the AU key, select the New submenu, and select the DWORD (32-bit) Value option.
Source: Windows Central
Double-click the newly created key and change its value (number only) to:
- 2 — Notify for download and auto install.
- 3 — Auto download and notify for install.
- 4 — Auto download and schedule the install.
- 5 — Allow local admin to choose settings.
- 7 — Auto Download, Notify to install, Notify to Restart.
These options work identically to the Group Policy settings, and number 2 is the closest option to disable Windows Update on Windows 10 permanently on your computer.
Source: Windows Central
Once you complete the steps, Windows 10 will stop installing updates automatically. However, you’ll receive notifications when new updates are available, allowing you to install them manually.
You can always use the same instructions to restore the original settings, but on step No. 4, right-click the WindowsUpdate key, select the Delete option then reboot the device to complete applying the settings.
On Windows 10, like in any other platform, updates are essential to improve the experience, and they’re critical to keeping your computer and data safe against malicious attacks and malware.
Typically, it’s never a good idea to continue using a device without the latest patches, but there are some situations when disabling updates might be appropriate. For instance, if you want to have complete control when applying updates. You want to minimize the chances of running into problems due to bugs with cumulative updates. Or you’re working with critical software and equipment that may stop working if updates are installed.
More Windows 10 resources
For more helpful articles, coverage, and answers to common questions about Windows 10, visit the following resources:
![]()
Halo: MCC’s live service elements make it better, not worse
Halo: The Master Chief Collection is more popular than ever, but some fans don’t agree with the live service approach 343 Industries has taken with it. Here’s why those elements are, at the end of the day, great for the game and for Halo overall.
![]()
Microsoft’s Surface Duo is not ‘failing up’
Microsoft announced this week that it was expanding Surface Duo availability to nine new commercial markets. While Surface Duo is undoubtedly a work in progress, this is not a sign of a disaster. It’s also doesn’t mean that Surface Duo is selling a ton either. Instead, the reason for the expansion is a lot more straightforward.
![]()
Here’s what you can do if Windows 10 update KB5001330 is causing issues
In this guide, we’ll show you the steps to get rid of the update KB5001330 to fix profile, gaming, and BSoD problems with the Windows 10 October 2020 Update and May 2020 Update.
![]()
These are the best PC sticks when you’re on the move
Instant computer — just add a screen. That’s the general idea behind the ultra-portable PC, but it can be hard to know which one you want. Relax, we have you covered!


