- Как отключить Безопасность Windows 10 (встроенный антиврус)
- Через параметры
- Через редактор групповой политики
- Через редактор реестра
- Убрать иконку защитника windows из трея
- Как отключить Безопасность Windows
- Virus & threat protection in Windows Security
- Run the scans you want
- Manage your Virus & threat protection settings
- Manage your real-time protection
- Get access to cloud-delivered protection
- Send us files with automatic sample submission
- Tamper Protection defends your security settings
- Protect files from unauthorized access
- Exclude items from virus scans
- Curate your notifications
- Protect your device with the latest updates
Как отключить Безопасность Windows 10 (встроенный антиврус)
Защитник Windows, в последних версиях Windows 10 он называется «Безопасность Windows» — это встроенное антивирусное приложение от Microsoft. Когда вы устанавливаете сторонний антивирусный продукт, то защитник Windows автоматически отключается, и когда удаляете сторонний антивирус, то безопасность Windows автоматически активируется.
В последнее время Защитник Windows в Windows 10 показывает отличные результаты по независимым тестам. Не спорю, в Windows XP, 7, 8.1 он был совсем дырявый и толку от него было мало, но сейчас он быстро набрал темпы и продолжает набирать. Если вы следите за различными тестами, то наверняка заметите, что защитник Windows 10 входит в топ 5 антивирусных программ. Для любителей и фанатов сторонних антивирусов, разберем, как полностью отключить защитник windows 10, центр безопасности, также уберем иконку защитника windows 10 из трея. Эти способы подойдут для версий 1809, 1709, 1909, 2004.
Через параметры
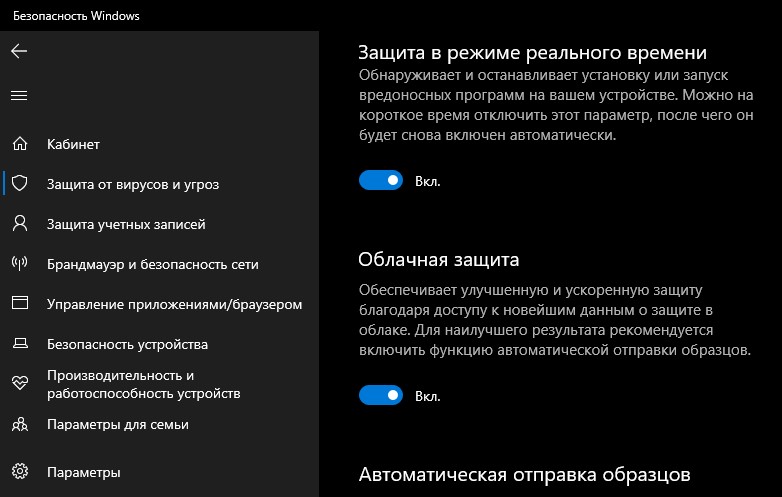
Самый простой способ отключить встроенный антивирус от microsoft — это просто отключить его в настройках безопасности windows. Откройте «Безопасность Windows» и перейдите «Защита от вирусов и угроз» (Иконка в виде щита). Далее в графе «Параметры защиты от вирусов и других угроз» нажмите на «Управление настройками» и Выключите все ползунки:
- Защита в реальном времени
- Облачная защита
- Автоматическая отправка образцов
- Защита от подделки
- Контролируемый доступ к папкам, если его включали
Через редактор групповой политики
Важно: В редакции Windows 10 HOME, нет редактора групповых политик.
Шаг 1. Первым делом нужно отключить функцию «Защита от подделки», которая при включенном состоянии не позволит вносить изменения через групповую политику. Откройте встроенный антивирус windows 10 и отключите защиту от подделки.

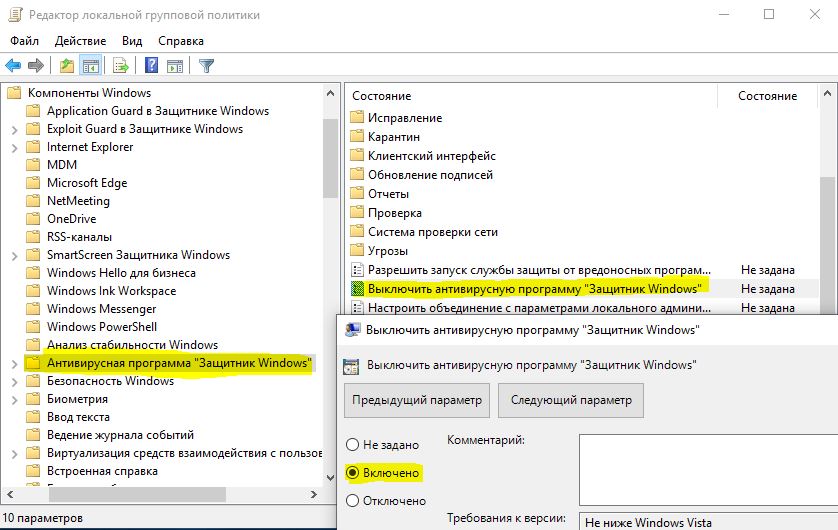
Шаг 2. Нажмите сочетание кнопок Win+R и ведите gpedit.msc, чтобы открыть редактор групповых политик. В политиках перейдите:
- Конфигурация компьютера > административные шаблоны > Компоненты Windows > Антивирусная программа Защитника Windows.
- Справа нажмите два раза на «Выключить антивирусную программу Защитник Windows«.
- В новом окне выберите «Включено«, нажмите применить и ok.
- Не закрывайте редактор, это не все, следуем шагу 3.
Шаг 3. Теперь отключим дополнительные параметры сканирования и работы безопасности windows. Разверните графу «Антивирусная программа Защитника Windows» > «Защита в режиме реального времени» и справа отключите:
- Включить наблюдение за поведением.
- Проверять все загруженные файлы и вложения.
- Отслеживать активность программ и файлов на компьютере.
- Включить проверку процессов, если включена защита реального времени.

Через редактор реестра
Microsoft убрала возможность полного отключения антивируса через реестр. Компания утверждает, когда пользователь устанавливает сторонний антивирус, то безопасность windows автоматически отключается и не работает. В частности убран из реестра параметр DisableAntiSpyware, который не будет работать даже при создании ключей. Не рекомендую проделывать данный способ, так как последствия неизвестны после последних обновлений. Вы можете просто ознакомиться с данным способом, он в точности такой же как и в групповой политики, только через реестр. Также, если у вас редакция HOME, то можно:
Шаг 1. Жмем Win+R, пишем regedit для входа в системный реестр и переходим по пути:
- HKEY_LOCAL_MACHINE\SOFTWARE\Policies\Microsoft\Windows Defender
- Перейдите к папке Windows Defender.
- Нажмите справа на пустом поле правой кнопкой мыши и выберите Создать >Параметр DWORD (32 бита).
- Создайте новое значение с именем DisableAntiSpyware и значением 1.
Чтобы включить защиту обратно, задайте обратно значение 0, удалите ключ, затем раздел (папку).

Шаг 2. Теперь создайте новую подпапку Real-Time Protection в папке Windows defender для этого:
- Нажмите правой кнопкой мыши на папке Windows defender >Создать >Раздел.
- Назовите новый раздел (папку) Real-Time Protection.

Шаг 3. В новом созданном разделе Real-Time Protection нужно будет создать четыре новых ключа со значением 1. Нажмите справа на пустом поле «Создать» > «Параметр DWORD (32 бита)» и:
-
- DisableBehaviorMonitoring
- DisableOnAccessProtection
- DisableScanOnRealtimeEnable
- DisableIOAVProtection
Перезагрузите компьютер и защитник windows 10 будет отключен полностью.

Убрать иконку защитника windows из трея
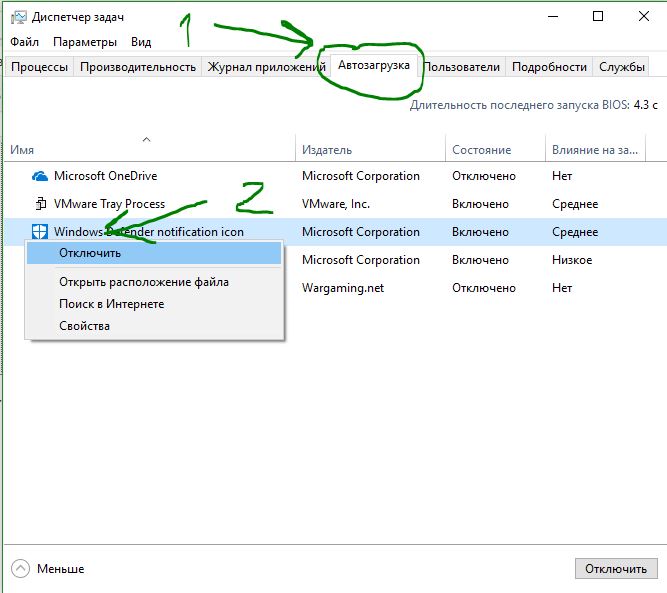
Если у кого иконка не пропала, то запустите диспетчер задач, нажатием кнопок Ctrl+Alt+Delete и перейдите во вкладку «Автозагрузка», найдите «Windows Security notification icon» и отключите его, нажав правую кнопку мыши по нему.
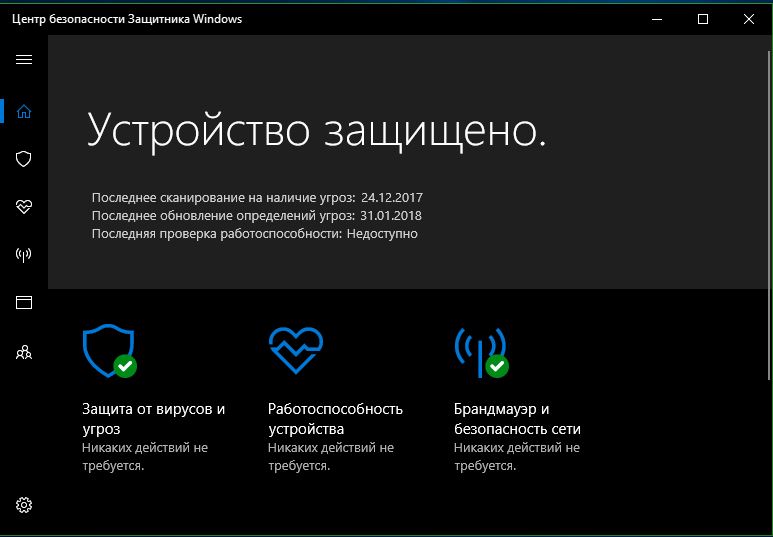
Как отключить Безопасность Windows
Также, вы можете отключить сам центр управление параметрами антивируса «Безопасность Windows».
Нажмите Windows + R и введите regedit, чтобы вызвать редактор реестра. Перейдите по следующему пути:
- HKEY_LOCAL_MACHINE\SYSTEM\CurrentControlSet\Services\SecurityHealthService
- Ищем с права значение с именем Start, жмем по нему два раза и в поле вводим цифру 4.
Чтобы вернуть обратно «Центр безопасности» введите значение 3.

Virus & threat protection in Windows Security
If you’re running Windows 10 in S mode, some of the features of the Windows Security interface will be a little different. Windows 10 in S mode is streamlined for tighter security, so the Virus & threat protection area has fewer options than those described here. This is because the built-in security of Windows 10 in S mode automatically prevents viruses and other threats from running on your device. Additionally, devices running Windows 10 in S mode receive security updates automatically.
In previous versions of Windows 10, Windows Security is called Windows Defender Security Center.
Virus & threat protection in Windows Security helps you scan for threats on your device. You can also run different types of scans, see the results of your previous virus and threat scans, and get the latest protection offered by Microsoft Defender Antivirus.
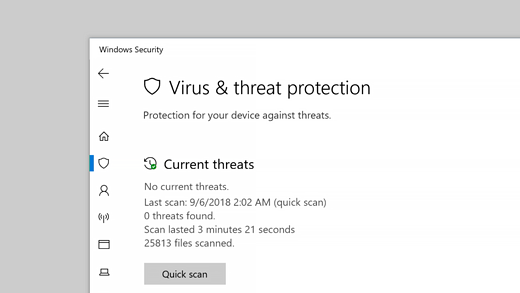
The Current threats area lets you:
See any threats currently on your device.
See the last time a scan was run on your device, how long it took, and how many files were scanned.
Start a new scan.
See threats that have been quarantined before they can affect you.
See anything identified as a threat that you have allowed to run on your device.
Note: If you are using third-party antivirus software, you’ll be able to use its virus and threat protection options here.
Run the scans you want
Even though Windows Security is turned on and scans your device automatically, you can perform an additional scan whenever you want.
Quick scan. Concerned that you may have done something to introduce a suspicious file or virus to your device? Select Quick scan (called Scan now in previous versions of Windows 10) to immediately check your device for any recent threats. This option is useful when you don’t want to spend the time running a full scan on all your files and folders. If Windows Security recommends that you run one of the other types of scans, you’ll be notified when the Quick scan is done.
Scan options .Select this link (called Run a new advanced scan in previous versions of Windows 10) to choose from one of the following advanced scan options:
Full scan. Scans every file or program that’s currently running on your device to make sure there’s nothing dangerous in progress.
Custom scan. Scans only files and folders that you select.
Microsoft Defender Offline scan. Uses the latest definitions to scan your device for the latest threats. Run it when you are concerned that your device has been exposed to malware or a virus, or if you want to scan your device without being connected to the Internet. This will restart your device, so be sure to save files you may have open.
Manage your Virus & threat protection settings
Use Virus & threat protection settings when you want to customize your level of protection, send sample files to Microsoft, exclude trusted files and folders from repeated scanning, or temporarily turn off your protection.
Manage your real-time protection
Want to stop running real-time protection for a short while? You can use the Real-time protection setting to turn it off temporarily; however, real-time protection will turn back on automatically after a short while to resume protecting your device. While real-time protection is off, files you open or download won’t be scanned for threats.
Note: If the device you’re using is part of an organization, your system administrator may prevent you from turning off real-time protection.
Get access to cloud-delivered protection
Provide your device with access to the latest threat definitions and threat behavior detection in the cloud. This setting allows Microsoft Defender to get constantly updated improvements from Microsoft while you’re connected to the internet. This will result in more accurately identifying, stopping, and fixing, threats.
This setting is turned on by default.
Send us files with automatic sample submission
If you’re connected to the cloud with cloud-delivered protection, you can send suspicious sample files to Microsoft to check them for potential threats. Microsoft will notify you if you need to send additional files—and alert you if a requested file contains personal information.
Tamper Protection defends your security settings
Microsoft Defender Antivirus settings can occasionally get changed by malicious, or careless, apps or processes; or sometimes by unaware people. With Tamper Protection turned on, important settings like real-time protection, can’t be easily or accidentally turned off.
This setting is turned on, by default, for consumers.
Protect files from unauthorized access
Use the Controlled folder access setting to manage which folders untrusted apps can make changes to. You can also add additional apps to the trusted list so they can make changes in those folders. This is a powerful tool to make your files safer from ransomware.
When you turn on Controlled folder access, a lot of the folders you use most often will be protected by default. This means that content in any of these folders cannot be accessed or changed by any unknown or untrusted apps. If you add additional folders, they become protected as well.
Exclude items from virus scans
There may be times when you’ll want to exclude specific files, folders, file types, or processes from being scanned, such as if these are trusted items and you are certain you don’t need to take time to scan them. In those rare instances you can add an exclusion for them.
Curate your notifications
Windows Security will send notifications about the health and safety of your device. You can turn these notifications on, or off, on the notifications page. In Virus & threat protection, under Virus & threat protection settings, select Manage settings, scroll down to Notifications and select Change notification settings.
Protect your device with the latest updates
Security intelligence (sometimes referred to as «definitions») are files that contain information about the latest threats that could infect your device. Windows Security uses security intelligence every time a scan is run.
Microsoft automatically downloads the latest intelligence to your device as part of Windows Update, but you can also manually check for it. On the Virus & threat protection page, under Virus & threat protection updates, select Check for updates to scan for the latest security intelligence.


