- How to Fix the Error Can’t connect to this network on Windows 10
- Method 1: Tweak Wireless Network Adapter Drivers
- Method 2: Power Cycle your Router or Modem
- Method 3: Run the Windows Troubleshooter
- Method 4: Change Network Key (Security/Encryption) from WPA-PSK/WPA2-PSK to WPA2-PSK with TKIP/AES for your Wireless Adapter
- Method 5: Forgetting Network
- Method 6: Network Reset
- Method 7: Changing Transmission Mode
- Method 8: Re-Enabling Wireless Adapter
- Method 9: Changing Network Name
- Method 10: Network Reset
- Fix “Windows Can’t Connect To This Network” Error
- Forget The Network & Reconnect To It
- Toggle The Airplane Mode On & Off
- Uninstall The Drivers For Your Network Adapter
- Run Commands In CMD To Fix The Issue
- Reset Your Network Settings
- Disable IPv6 On Your PC
- Use The Network Troubleshooter
How to Fix the Error Can’t connect to this network on Windows 10
The “can’t connect to this network” can be regarded as one of the biggest problems that Windows users face. The Internet has become a fundamental necessity and when you are denied access to connect to your for no apparent reasons. The methods listed in this guide are the most likely culprits of this issue.
Pay careful attention and note down any changes you may have made, such as updating or replacing the router or changing the security key of your wireless network, or anything else prior to the issue. Depending on what exactly happened, you can choose one of the methods below or if you do not know anything at all about changing anything then simply start from Method 1 till the end until the issue is sorted out.
Method 1: Tweak Wireless Network Adapter Drivers
In the first method, we will be showing you how you can manually update the network adapter drivers to resolve this issue. Most of the time, this problem is caused by outdated network adapter drivers and this has to be the first solution you should try:
- Press Windows key + X to invoke the menu above the start button.
- Select Device Manager from the list.
- From the list, select Network Adapters and then your network adapter (The names can differ based on the make of your computer).
- Right-click on the adapter and select “Update driver software”.
- Select “Search automatically for updated driver software” from the list.
- The updated driver will then begin downloading and will install itself. Click on “Close” when done.

- Restart your computer. If it cannot find the driver or update it you can also re-install the driver by connecting your computer via Ethernet to the router and then going to the manufacturer’s site to download the driver.
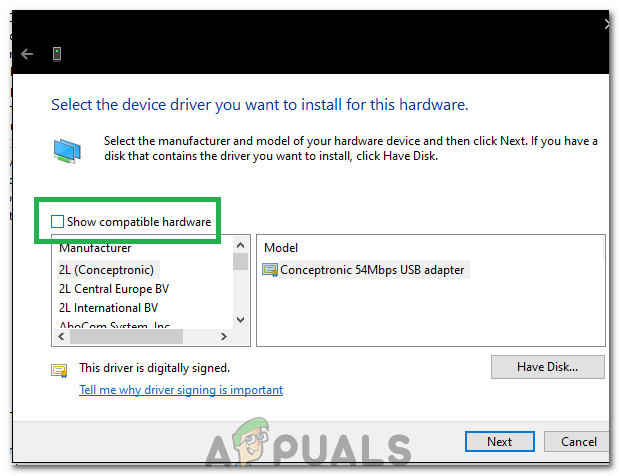
- If this doesn’t work, repeat the process till the fourth step and choose the “Browser my Computer for Driver Software” and then select the “Let me pick from a list of devices“.
- Uncheck the “Show compatible Hardware” option and then select the appropriate driver from the list. Unchecking the “Show Compatible Hardware” option.
- Check to see if the issue persists
- If the issue still persists, try to roll back your drivers by repeating the process till step 3 and then selecting “Properties” after right-clicking on the driver.
- Click on the “Driver” tab and then select the “Rollback Driver” option. Selecting “Rollback Driver” option
- Follow the onscreen prompts to roll back the driver and check to see if the issue persists.
 Unchecking the “Show Compatible Hardware” option.
 Selecting “Rollback Driver” option
Method 2: Power Cycle your Router or Modem
As a second method, we will be showing you how you can try to fix the issue by turning your router off for some time and then trying to connect again:
- Press the power button at the back of your router to turn it off.
- Wait for 30 minutes before turning it on again.
- When the network starts showing on your Wi-Fi connection search list, try connecting with it again to see if the problem is still there.
This didn’t solve the issue for you either? Try the next method.
Method 3: Run the Windows Troubleshooter
Follow these steps:
- Press Windows key + R and write Control Panel in the Run dialog. Press enter.
- In the “Search control panel” bar present at the top right-hand side of the window, type “Troubleshooter” and press enter.
- From the search results, select “Troubleshooting”
- Now move over to the Hardware and sound panel by clicking on it.
- Click on Hardware and devices.
- From the Hardware and sound tab, click on ”Configure a device” and follow to see if you have Windows 1o compatible drivers. If not, continue to the next step.
- Download the network drivers from your manufacturer’s website and save them on your desktop.
- Press Windows key + R and type “devmgmt.msc” in the Run dialog. Running the Device Manager
- Find your network adapter under the Network adapters section and right-click on it.
- Select properties from the list and then move to the driver tab and select Follow the on-screen instructions to complete the uninstallation.
- Go to the driver that you have downloaded. Right-click on it and select
- Move over to the compatibility
- Find the checkbox behind the “Run this program in compatibility mode for” option and select “Windows 7” from the list. Uncheck Run this Program in Compatibility Mode
- Now right click on the downloaded driver file. Select “Run as administrator” from the dropdown list and when prompted, say “Okay”.
- Complete the installation and then restart.
 Running the Device Manager
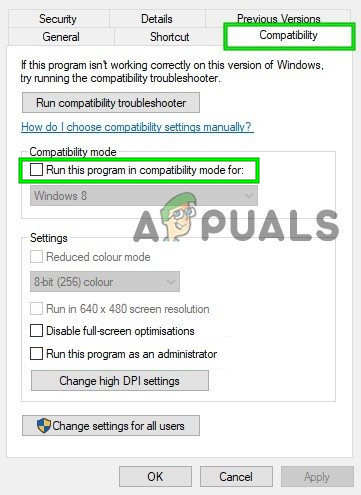 Uncheck Run this Program in Compatibility Mode
If this still doesn’t solve the issue, then continue reading.
Method 4: Change Network Key (Security/Encryption) from WPA-PSK/WPA2-PSK to WPA2-PSK with TKIP/AES for your Wireless Adapter
Wired Equivalent Privacy or WEP is the algorithm that was supported by most of the operating systems before Windows 8. From Windows 8 and onwards, Microsoft removed the support for WEP and WPA-PSK. So if your network connection is using WEP (or WPA-PSK) still, you won’t be able to connect to it. To confirm this, follow these steps: (Note: To find this out, you need to be connected to the network that is giving you problems. For this purpose, you can either use a LAN cable or just connect from a computer that doesn’t have this issue. Also, these steps are for Windows 10. Follow similar ones on Windows 8 or other versions.)
- Press Windows Key + A to invoke the action center.
- Select Settings from the list.
- Then click on Network and Internet.
- Now click on advanced options.
- Here, under the properties section and against Security type you will see the one that your network is using.
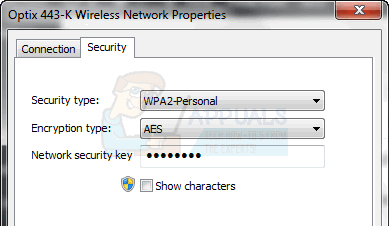
If the current one is WEP, ask your network provider to change it to WPA-personal and use the TKIP algorithm for encryption purposes; that should enable you to connect to the network. Advanced users can also try this method themselves by connecting the PC via a LAN cable and then going to the wireless security tab on your router to change the WEP or WPA-PSK to WPA2-PSK with TKIP/AES encryption. The easiest way to access the router settings is by locating your Default Gateway IP and then typing that IP into the browser’s address bar. You can get the IP from the command prompt, by clicking Start -> typing cmd and in the command prompt type ipconfig /all.
Go through the list of the information until you see Default Gateway IP
Method 5: Forgetting Network
In some cases, the network might not have been working properly due to the wrong configuration by the computer. Therefore, in this step, we will be forgetting the network and then reconnecting to fix this issue. For that:
- Right-click on the “Wifi” icon in the system tray and select “Open Network and Internet Settings” option.
- Click on the “Wifi” button in the left column.
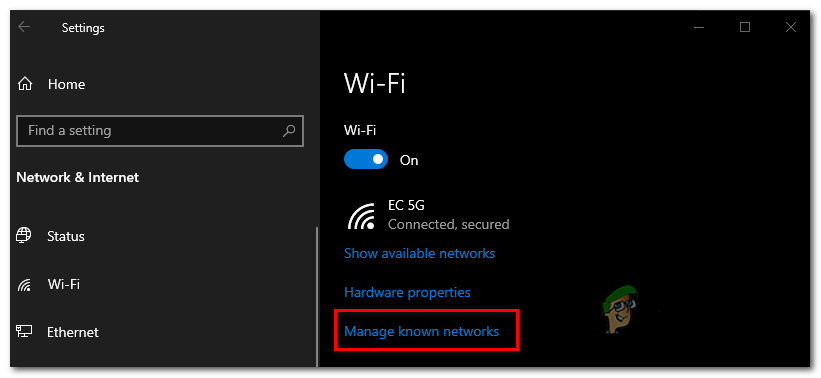
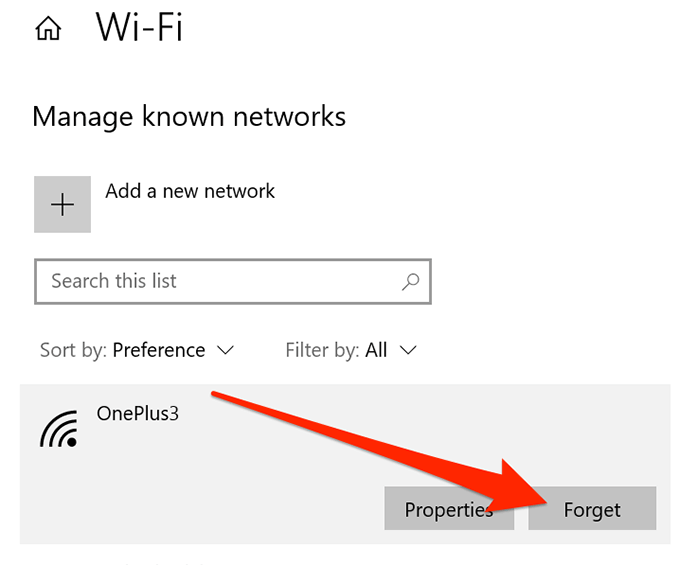
- Select the “Manage Known Networks” button and then click on your current Wifi network. Accessing the Manage known networks menu
- Select the “Forget” button and then close the settings.
- Connect to your internet connection again and then check to see if the issue is fixed.
 Accessing the Manage known networks menu
Method 6: Network Reset
In some cases, the issue can be triggered if there are bugs/glitches in the Windows 10 network settings. Therefore, in this step, we will be resetting our network configurations. For that:
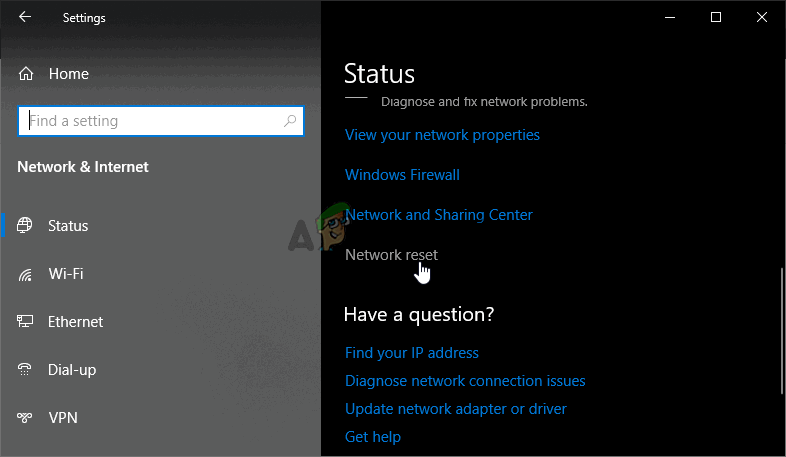
- Press “Windows” + “I” to open settings.
- Click on the “Network& Internet” option and then select “Network Reset” from the list. Performing a network reset
- Click on the “Reset Now” button and wait for it to be reset.
- Check to see if the issue persists.
 Performing a network reset
Method 7: Changing Transmission Mode
In some cases, the transmission channel that you might have selected in the transmission settings might not be supported by your router. Therefore, in this step, we will be changing the transmission mode and then check if that fixes this issue. For that:
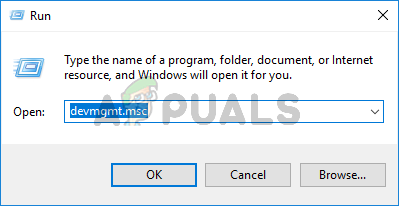
- Press “Windows” + “R” to open Run prompt.
- Type in “Devmgmt.msc” and press “Enter”.Type devmgmt.msc and Press Enter to Open Device Manager
- Expand the “Network Adapters” list and right-click on your “Network Adapter”.Clicking on the “Network Adapters” option
- Click on “Properties” and then select the “Advanced” tab.
- Select the “802.11n” mode from the list and select “Disabled” from the “Value” dropdown. Clicking on the “Advanced” tab and disabling the option
- Check to see if the issue persists.
 Type devmgmt.msc and Press Enter to Open Device Manager
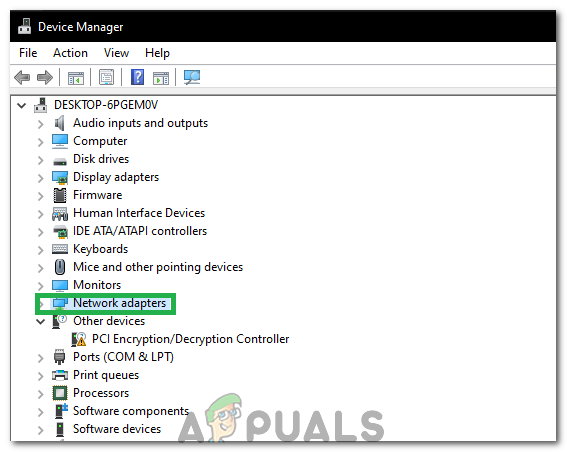 Clicking on the “Network Adapters” option
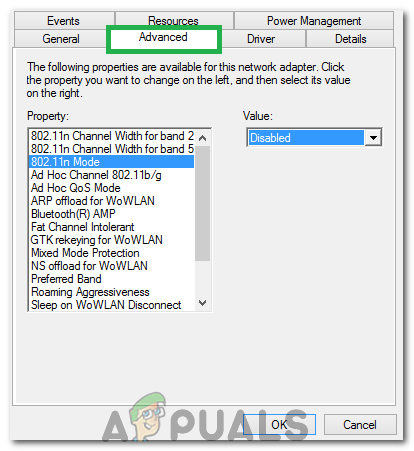 Clicking on the “Advanced” tab and disabling the option
Method 8: Re-Enabling Wireless Adapter
In certain situations, the issue is simply fixed by first disabling the network adapter and then enabling it back up. This reportedly gets rids of the glitch with the network adapter and causes it to load right up. In order to do this, follow the guide below.
- Press “Windows” + “R” to open Run prompt.
- Type in “Devmgmt.msc” and press “Enter”.Type devmgmt.msc and Press Enter to Open Device Manager
- Expand the “Network Adapters” list and right-click on your “Network Adapter”.Clicking on the “Network Adapters” option
- Right-click on your adapter and select “Disable Device”.
- After waiting for 10 seconds, right-click on it again and select “Enable Device”.
- Also, try to disable all other Network adapters inside and only keep the one used by the PC enabled.
- Check to see if the issue persists.
Method 9: Changing Network Name
In a weird turn of events, this issue was fixed for some people by simply changing their network name from the router. This can be done by logging on to the router page and then navigating to network settings. Under which, you can change your network name. This differs from router to router and ISP to ISP so consult your router manual for detailed instructions.
Method 10: Network Reset
This error can also be fixed by performing a Network Reset. In order to do so, we have to open up an elevated command prompt and then type in the reset command into it. For that:
- Press “Windows” + “R” to open the Run prompt.
- Type in “cmd” and press “Shift” + “Ctrl” + “Enter” to grant administrative privileges.
- Type in the following commands and press “Enter” to execute it.
Note: Also try rebooting the router by unplugging it from power and then connecting after 30 seconds. In addition to that, disconnect all your peripherals from the computer such as Keyboard, mouse, headset and monitor temporarily and check if that fixes this issue.
Fix “Windows Can’t Connect To This Network” Error
One of these methods should help
“Windows 10 can’t connect to this network” is one of the issues you could face while trying to connect your Windows machine to a network. As you can see, except for telling you you can’t connect to the network, the error doesn’t say much about why the issue has occurred and what you can do about it.
If you’ve found yourself in the situation for the first time, you’re probably clueless and have no idea what to do. Luckily, there are a few ways to get around the issue and successfully connect to your chosen network on your PC.
Forget The Network & Reconnect To It
When there’s an issue on your computer, you’re usually asked to reboot your machine and that’ll hopefully fix it for you. The same can be done for your network connection as well. You can try forgetting the network and then re-connecting to it to see if it then connects without any issues.
Although it’s one of the most basic things to do, it may just work out for you, and there’s no harm in doing it.
- Find the network icon in your system tray, right-click on it, and select Open Network & Internet settings.

- Click on the option that says Wi-Fi in the left sidebar to view your wireless adapters.

- On the following screen, click on Manage known networks on the right-hand side pane to view your networks.
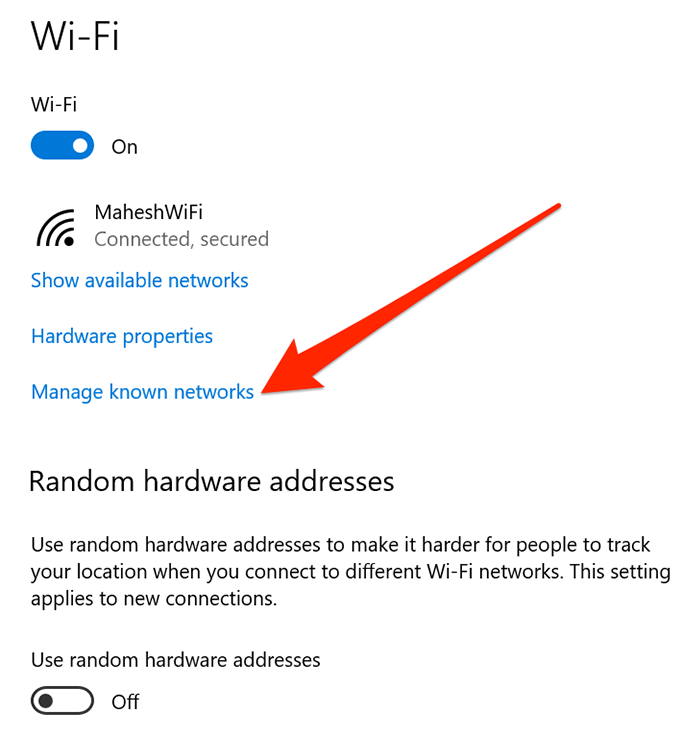
- You’ll see a list of all the networks you’ve ever connected to from your PC. Click on the one you’re having trouble connecting to and select the Forget button for it.
- The network will be removed from the list.
- To reconnect to it, scan for it as you would normally and click on it.
Toggle The Airplane Mode On & Off
On smartphones like iPhone and Android, when you face the “windows 10 can’t connect to this network” issue, one of the things you’re asked to do is toggle the airplane mode and see if that fixes the problem for you. It works in many cases as it helps your device fully disconnect from any networks, and you can then turn it off and manually connect to your chosen network.
You can use the same method on your Windows PC as well.
- Click on the notification-like icon at the bottom-right corner to open the Windows Action center.

- You’ll see several tiles you can enable and disable for your machine. Click on the one that says Airplane mode to turn it on.

- The tile will turn full blue meaning the airplane mode has been enabled on your PC.
- Wait for about a minute and then click on the same tile again. This time, it’ll disable the airplane mode.

- Reconnect to your network and you should be able to do it without an issue.
Uninstall The Drivers For Your Network Adapter
Your Windows computer recognizes your network adapter because you have its drivers installed on your machine. If there’s an issue with the drivers, it can cause issues like “Windows can’t connect to this network”.
One of the ways to resolve the driver-related issues is to uninstall the device and the drivers. Your machine will then automatically install the proper and required drivers for your device.
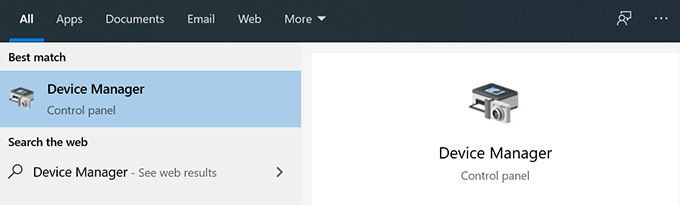
- Search for Device Manager using Cortana search and launch it.
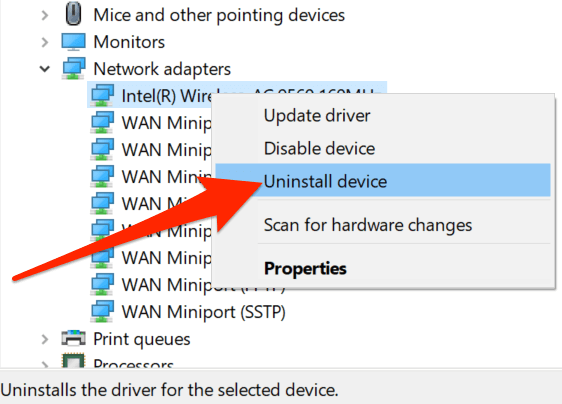
- Expand the Network adapters menu by clicking on it. Then, select your wireless adapter from the list, right-click on it, and select Uninstall device.
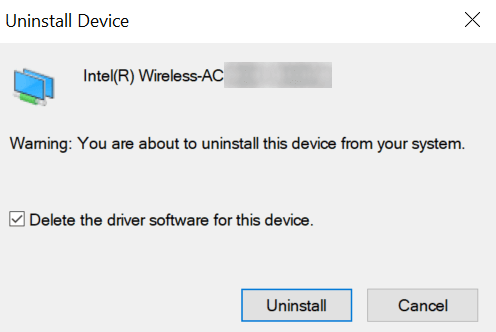
- Tick-mark the box that says Delete the driver software for this device and click on Uninstall. It’ll remove the device as well as the drivers for it from your computer.
- Reboot your computer.
- Your computer will automatically find and install the required drivers for your adapter.
Run Commands In CMD To Fix The Issue
The “Can’t connect to network” issue you’re facing on your Windows 10 could be due to an IP related issue as well. In that case, Microsoft recommends you use a command to release your IP and flush the DNS cache.
These commands can be run from the Command Prompt utility on your computer. You don’t need to configure them or anything like that; all you need to do is copy and paste them into your CMD window.
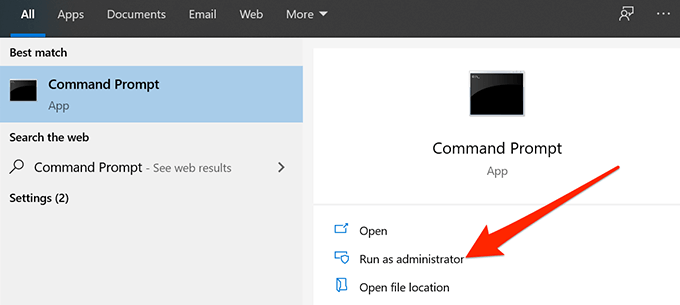
- Search for Command Prompt using the Cortana search and click on the Run as administrator option.
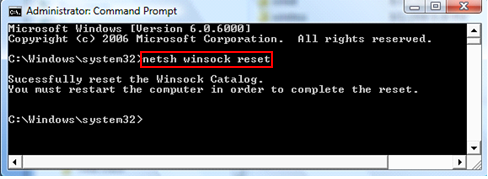
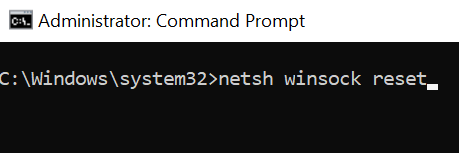
- Type the following commands into the Command Prompt window one by one hitting Enter after each line.
netsh winsock reset
netsh int ip reset
ipconfig /release
ipconfig /renew
ipconfig /flushdns
- Reboot your computer and your issue should likely be fixed.
Reset Your Network Settings
Sometimes an improper configuration in your network settings can lead to errors like “Windows 10 can’t connect to this network”. The best way to resolve the issue, without getting into much details, is to reset your network settings.
It brings your settings back to the factory defaults, and you can always reconfigure them when needed.
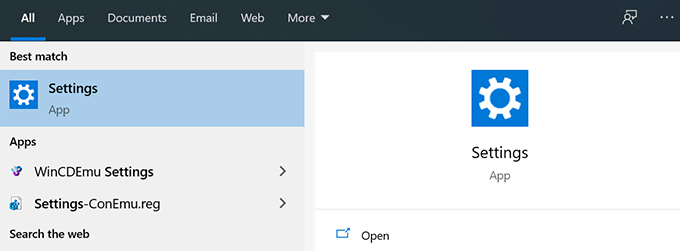
- Launch the Settings app using Cortana search on your PC.
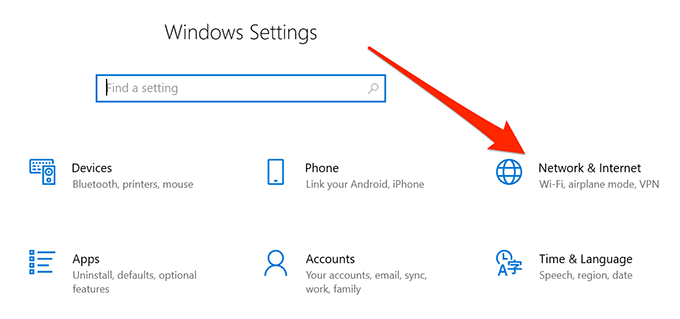
- Click on the option that says Network & Internet.
- Select Status from the left sidebar on your screen.

- Scroll down in the right-hand side pane and click on the option that says Network reset. It should be at the very bottom of your screen.

- Click on the Reset now button to reset your settings.

Disable IPv6 On Your PC
You can try disabling IP version 6 on your computer and see if it helps fix the connection issue on your machine. Most computers can work just fine with IPv4 and you shouldn’t have any issues at all, unless you work on something that specifically requires IPv6.
- Right-click on the network icon in your system tray and select Open Network & Internet settings.

- Click on Change adapter options on the following screen.

- Find your wireless adapter, right-click on it, and select Properties.
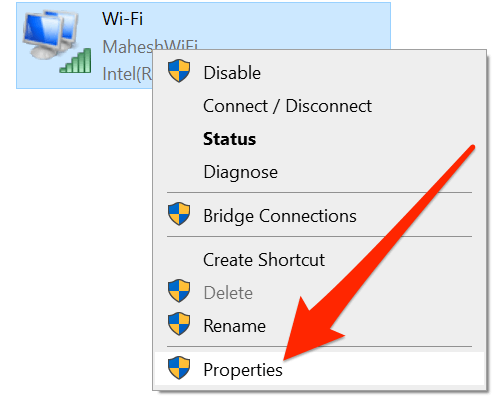
- You’ll see several options you can enable and disable for your adapter. Untick the box that says Internet Protocol Version 6 (TCP/IPv6) to disable IPv6. Then click on OK at the bottom.

Use The Network Troubleshooter
If you have still not been able to figure out the issue yet, you might want to take help of the built-in network troubleshooter to find and fix the underlying problem on your computer.
- Launch the Settings app on your PC.

- Click on Update & Security.
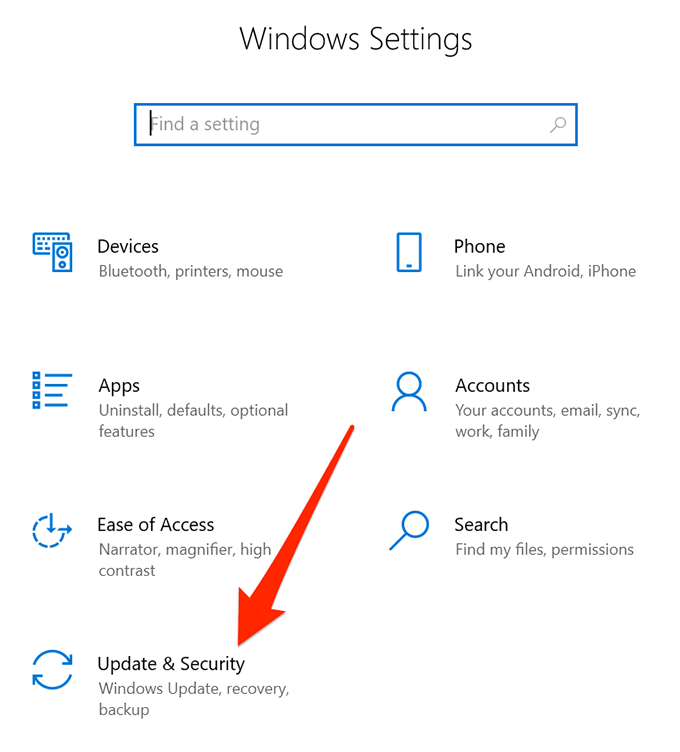
- Select Troubleshoot from the left sidebar.

- Find Network Adapter in the list, click on it, and choose Run the troubleshooter.
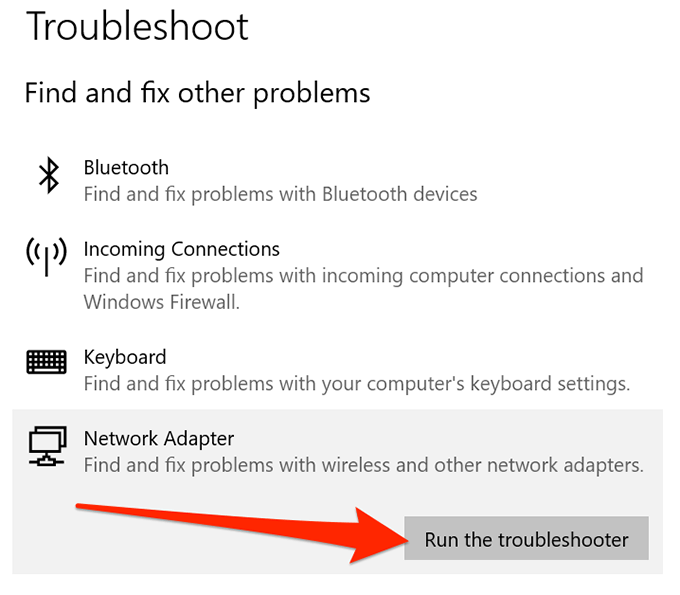
- The troubleshooter will find and help fix the issue on your machine.
The “Windows can’t connect to this network” issue basically paralyzes you as it won’t let you connect to the Internet, and that means you can’t access your sites, emails, and anything else that requires an active Internet connection.
If you were able to fix the issue using any of the above methods, please let us know your experience in the comments below.
Mahesh has been obsessed with technology since he got his first gadget a decade or so ago. Over the last few years, he’s written a number of tech articles on various online publications including but not limited to MakeTechEasier and Android AppStorm. Read Mahesh’s Full Bio


