- Windows was unable to connect to home network
- Windows was unable to connect to «nameofwirelessnetwork/SSID»
- unable to connect to wireless network windows 7, wi
- Fix “Windows Can’t Connect To This Network” Error
- Forget The Network & Reconnect To It
- Toggle The Airplane Mode On & Off
- Uninstall The Drivers For Your Network Adapter
- Run Commands In CMD To Fix The Issue
- Reset Your Network Settings
- Disable IPv6 On Your PC
- Use The Network Troubleshooter
Windows was unable to connect to home network
I have a home network via a wireless router. My laptop recognises the home newtwork and states that the signal strength is»excellent». When I try to connect via the wireless network I click «connect», enter the Security Key and this brings up a dialogue box «Windows was unable to connect to home network». Depite clicking on the «troubleshoot problems» tool, the laptop is still not able to connect to the home network, bringing up a dialogue box «Invesigate router or access point issues». Some other details:
- I am able to connect to the internet via the same router when it is physically connected to the laptop via an ethernet cable
- I have thouroughly checked with my ISP (AOL) and there are no problems at their end
- Previously I was able to connect wirelessly
- The problem seems to correlate with the downloading of Microsoft updates of 12 April 2010
Some system details:
- Acer Aspire 5332
- Windows 7
- AOL
- Thomson Speedtouch Router
Did you make any changes to your computer recently?
You may try the below methods one by one and check if this helps.
Method 1: SSID settings:
Routers and access points use a wireless network name known as a service set identifier (SSID). Most manufacturers use the same SSID for all of their routers and access points. We recommend that you change the default SSID to keep your wireless network from overlapping with other wireless networks that might be using the default SSID. It makes it easier for you to identify which wireless network is yours, if there’s more than one nearby, because the SSID is typically shown in the list of available networks. Check the information that came with your device for instructions about how to change the default SSID.
Let us set up the router by following the steps in the article below, make sure you enter the correct settings for SSID using the user manual.
Method 2: Check if the issue persists in clean boot state.
Putting your system in clean boot state helps in identifying if any third party applications or startup items are causing the issue. If yes, you may go ahead and disable or uninstall the same.
Follow the below steps to put your computer in clean boot state:
1. Log on to the computer by using an account that has administrator rights.
2. Click Start, type msconfig.exe in the Start Search box, and then press ENTER to start the System Configuration Utility. If you are prompted for an administrator password or for confirmation, type your password, or click Continue.
3. On the General tab, click Selective Startup, and then click to clear the Load startup items check box. (The Use Original Boot.ini check box is unavailable.)
4. On the Services tab, click to select the Hide all Microsoft services check box, and then click Disable all.
5. Click OK, and then click Restart.
The above steps would put the computer in clean boot state.
Refer the link below for more details on how to troubleshoot a problem by performing a clean boot in Windows Vista or in Windows 7:
How to troubleshoot a problem by performing a clean boot in Windows Vista or in Windows 7
http://support.microsoft.com/kb/929135
After you’ve finished troubleshooting, follow these steps to reset the computer to start as usual:
1. Click Start, type msconfig.exe in the Start Search box, and then press ENTER. If you are prompted for an administrator password or for confirmation, type your password, or click Continue.
2. On the General tab, click the Normal Startup option, and then click OK.
3. When you are prompted to restart the computer, click Restart.
Method 3: Perform system restore on your computer.
System restore will take your computer to pervious state when it was not facing such problem, this can be done by selecting the proper restore point.
To restore the operating system to an earlier point in time, follow these steps:
1. Click Start, type system restore in the Start Search box, and then click System Restore in the Programs list.
If you are prompted for an administrator password or confirmation, type your password or click Continue.
2. In the System Restore dialog box, click Choose a different restore point, and then click Next.
3. In the list of restore points, click a restore point that was created before you began to experience the issue, and then click Next.
4. Click Finish.
Windows was unable to connect to «nameofwirelessnetwork/SSID»
Last 3 days, my wifi is working properply but now it says that :Windows was unable to connect to «SSID»
. Do you think my antivirus and firewall are one of the reasons? I have a Gateway laptop, and a M NVG510 as the router.
When I plugged in the ethernet cable, it works. But if I try it wirelessly, the bold line above pops out. This really bugs me. Help pls? Thanks in advance.
Thank you for replying.
If you have any further issues on the computer, please post the question regarding Windows and we will be happy to help you.
Was this reply helpful?
Sorry this didn’t help.
Great! Thanks for your feedback.
How satisfied are you with this reply?
Thanks for your feedback, it helps us improve the site.
How satisfied are you with this reply?
Thanks for your feedback.
Were there any changes made on the computer prior to the issue?
Try to restart your computer in Safe mode with networking and check if the problem persists.
If it works fine in safe mode try performing a clean boot to find the root cause.
Refer the article for steps on how to start your computer in clean boot state.
How to troubleshoot a problem by performing a clean boot in Windows Vista or in Windows 7
Note : After troubleshooting, see the section “Reset the computer to start as usual” to return the computer to a Normal startup mode.
Refer to the link and try to run the troubleshooter and check if it helps.
Wired and wireless network connection problems in Windows
I would suggest you to disable the anti-virus software and check if it helps.
Note : Running the computer without firewall or the anti-virus software is a potential threat to the computer; make sure to enable the security software after completing the troubleshooting steps and after identifying the issue.
unable to connect to wireless network windows 7, wi
W ndows 7 ultimate 64 working fine for 2 weeks, network ok with a Dlink dir 628, my wife’s macbook air connects ok, now my Dell Inspiron e1705 does not detect any available networks, in network and sharing center did everything even setup a new connection, manualy but does not work, i unistall and reinstal the adapter (dell 1390 WLAN mini-card) that was working fine (and did connect to the wireless network for the last two weeks), any suggestion? eas:
- Programs you are having problems with
- Error messages
- Recent changes you made to your computer
- What you have already tried to fix the problem
Remember — This is a public forum so never post private information such as email or phone numbers!
Welcome to Microsoft Answers Forum!
To troubleshoot the issue better, please provide us the more information.
a) Have you made any recent changes on the computer?
Step 1:
Firstly I would suggest you to turn on network discovery and check whether it helps to fix the issue. To do so, please follow the steps below:
1. Open Advanced sharing settings by clicking the Start button, and then clicking Control Panel. In the search box, type network, click Network and Sharing Center, and then, in the navigation pane, click Change advanced sharing settings.
2. Click the chevron to expand the current network profile.
3. Click Turn on network discovery, and then click Save changes. If you’re prompted for an administrator password or confirmation, type the password or provide confirmation.
Step 2:
Also please verify with the WLAN service is started and set to automatic, if the WLAN service is stopped, I would suggest you to start the service and put it to automatic.
Please follow the steps to start the WLAN service.
a) Click on Start, type in services.msc
b) Select WLAN Autoconfig from the list, Right click properties
c) Change the startup type to Automatic
d) Click on Start button
e) Click on Apply , Ok.
f) Restart the computer and verify if it works.
If the issue persists, then I would suggest you to download the latest network adaptor drivers from the manufacturer’s website and install the same on the computer and check whether it helps you to fix the issue.
Step 3:
Also I would suggest you to run a network diagnostic tool and check hope that will fix your issue.
To perform this troubleshooting problem, please follow the steps below.
a) Click on Start > Control Panel.
b) Click on Network and Internet, and then click on Network and Sharing center.
c) Under Network and Sharing centre, click on Troubleshoot Problem.
For additional information on how to troubleshoot common network problems, please refer to the links below:
I hope this information helps. Please get back to us if you have any more questions about this issue.
Fix “Windows Can’t Connect To This Network” Error
One of these methods should help
“Windows 10 can’t connect to this network” is one of the issues you could face while trying to connect your Windows machine to a network. As you can see, except for telling you you can’t connect to the network, the error doesn’t say much about why the issue has occurred and what you can do about it.
If you’ve found yourself in the situation for the first time, you’re probably clueless and have no idea what to do. Luckily, there are a few ways to get around the issue and successfully connect to your chosen network on your PC.
Forget The Network & Reconnect To It
When there’s an issue on your computer, you’re usually asked to reboot your machine and that’ll hopefully fix it for you. The same can be done for your network connection as well. You can try forgetting the network and then re-connecting to it to see if it then connects without any issues.
Although it’s one of the most basic things to do, it may just work out for you, and there’s no harm in doing it.
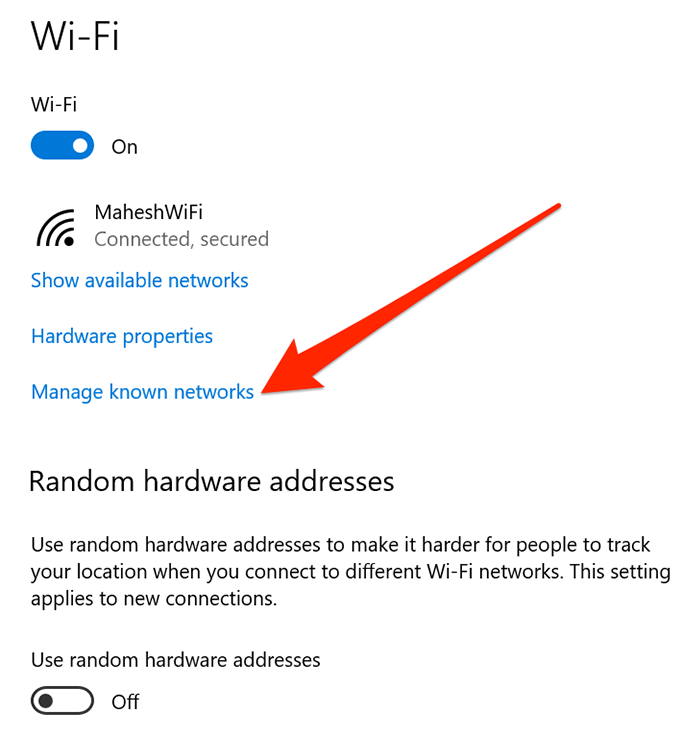
- Find the network icon in your system tray, right-click on it, and select Open Network & Internet settings.

- Click on the option that says Wi-Fi in the left sidebar to view your wireless adapters.

- On the following screen, click on Manage known networks on the right-hand side pane to view your networks.
- You’ll see a list of all the networks you’ve ever connected to from your PC. Click on the one you’re having trouble connecting to and select the Forget button for it.
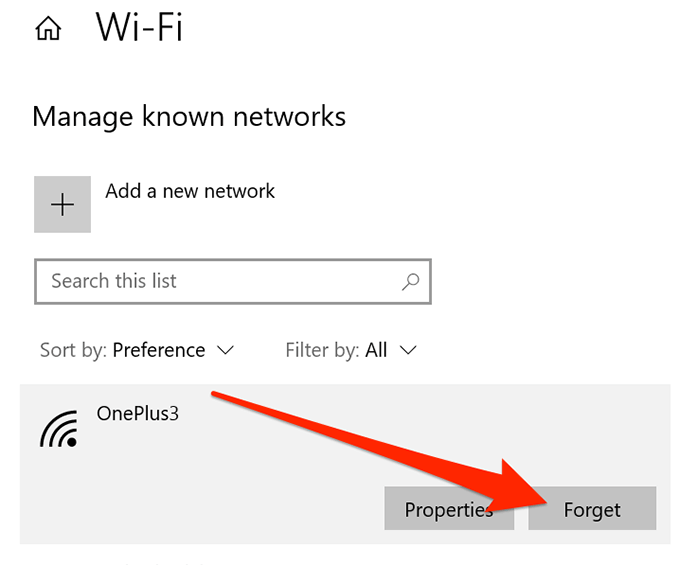
- The network will be removed from the list.
- To reconnect to it, scan for it as you would normally and click on it.
Toggle The Airplane Mode On & Off
On smartphones like iPhone and Android, when you face the “windows 10 can’t connect to this network” issue, one of the things you’re asked to do is toggle the airplane mode and see if that fixes the problem for you. It works in many cases as it helps your device fully disconnect from any networks, and you can then turn it off and manually connect to your chosen network.
You can use the same method on your Windows PC as well.
- Click on the notification-like icon at the bottom-right corner to open the Windows Action center.

- You’ll see several tiles you can enable and disable for your machine. Click on the one that says Airplane mode to turn it on.

- The tile will turn full blue meaning the airplane mode has been enabled on your PC.
- Wait for about a minute and then click on the same tile again. This time, it’ll disable the airplane mode.

- Reconnect to your network and you should be able to do it without an issue.
Uninstall The Drivers For Your Network Adapter
Your Windows computer recognizes your network adapter because you have its drivers installed on your machine. If there’s an issue with the drivers, it can cause issues like “Windows can’t connect to this network”.
One of the ways to resolve the driver-related issues is to uninstall the device and the drivers. Your machine will then automatically install the proper and required drivers for your device.
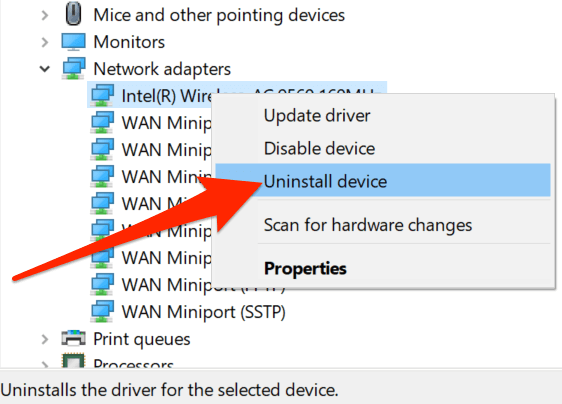
- Search for Device Manager using Cortana search and launch it.
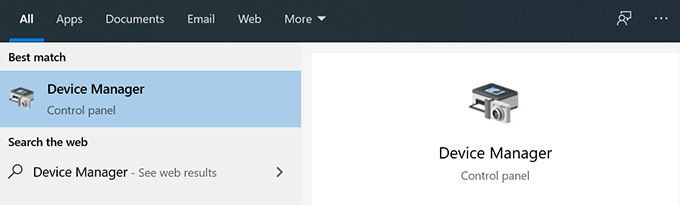
- Expand the Network adapters menu by clicking on it. Then, select your wireless adapter from the list, right-click on it, and select Uninstall device.
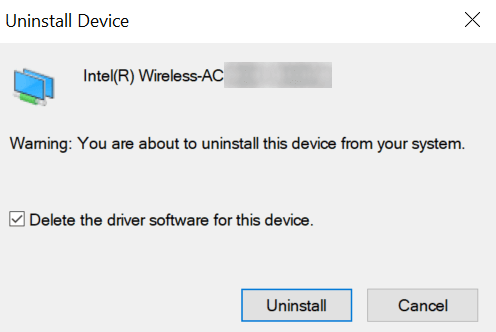
- Tick-mark the box that says Delete the driver software for this device and click on Uninstall. It’ll remove the device as well as the drivers for it from your computer.
- Reboot your computer.
- Your computer will automatically find and install the required drivers for your adapter.
Run Commands In CMD To Fix The Issue
The “Can’t connect to network” issue you’re facing on your Windows 10 could be due to an IP related issue as well. In that case, Microsoft recommends you use a command to release your IP and flush the DNS cache.
These commands can be run from the Command Prompt utility on your computer. You don’t need to configure them or anything like that; all you need to do is copy and paste them into your CMD window.
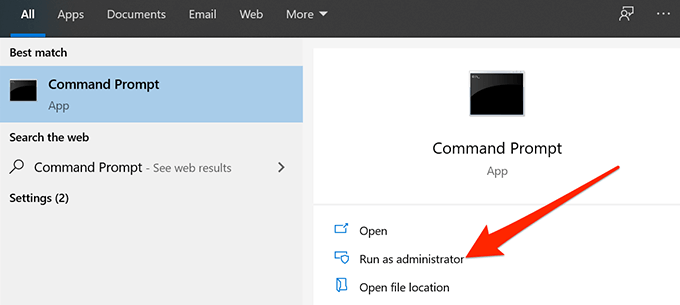
- Search for Command Prompt using the Cortana search and click on the Run as administrator option.
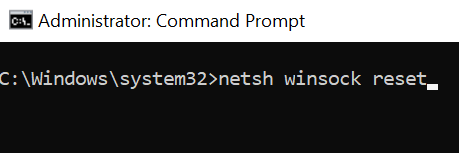
- Type the following commands into the Command Prompt window one by one hitting Enter after each line.
netsh winsock reset
netsh int ip reset
ipconfig /release
ipconfig /renew
ipconfig /flushdns
- Reboot your computer and your issue should likely be fixed.
Reset Your Network Settings
Sometimes an improper configuration in your network settings can lead to errors like “Windows 10 can’t connect to this network”. The best way to resolve the issue, without getting into much details, is to reset your network settings.
It brings your settings back to the factory defaults, and you can always reconfigure them when needed.
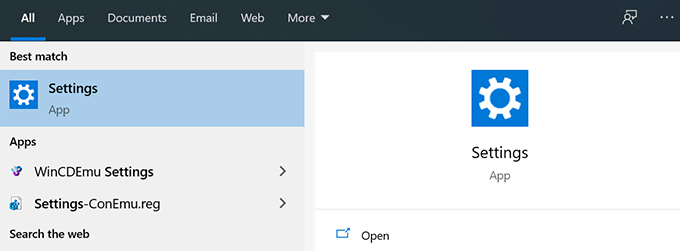
- Launch the Settings app using Cortana search on your PC.
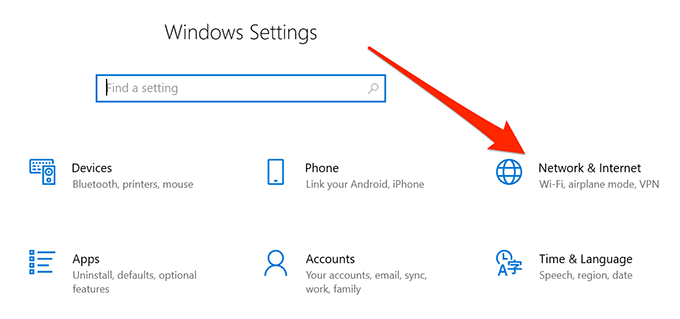
- Click on the option that says Network & Internet.
- Select Status from the left sidebar on your screen.

- Scroll down in the right-hand side pane and click on the option that says Network reset. It should be at the very bottom of your screen.

- Click on the Reset now button to reset your settings.

Disable IPv6 On Your PC
You can try disabling IP version 6 on your computer and see if it helps fix the connection issue on your machine. Most computers can work just fine with IPv4 and you shouldn’t have any issues at all, unless you work on something that specifically requires IPv6.
- Right-click on the network icon in your system tray and select Open Network & Internet settings.

- Click on Change adapter options on the following screen.

- Find your wireless adapter, right-click on it, and select Properties.
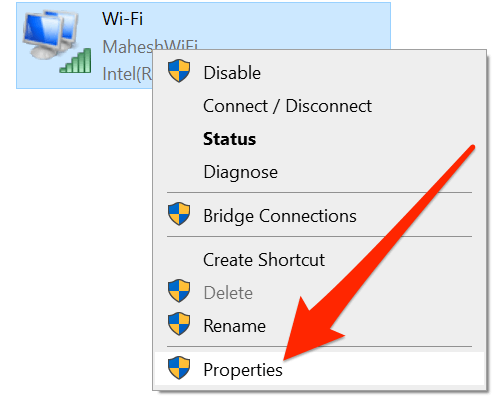
- You’ll see several options you can enable and disable for your adapter. Untick the box that says Internet Protocol Version 6 (TCP/IPv6) to disable IPv6. Then click on OK at the bottom.

Use The Network Troubleshooter
If you have still not been able to figure out the issue yet, you might want to take help of the built-in network troubleshooter to find and fix the underlying problem on your computer.
- Launch the Settings app on your PC.

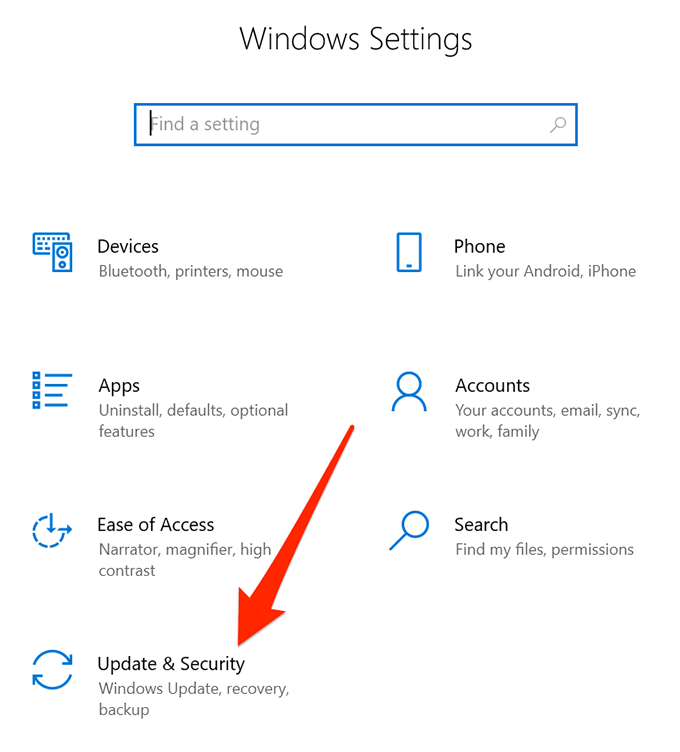
- Click on Update & Security.
- Select Troubleshoot from the left sidebar.

- Find Network Adapter in the list, click on it, and choose Run the troubleshooter.
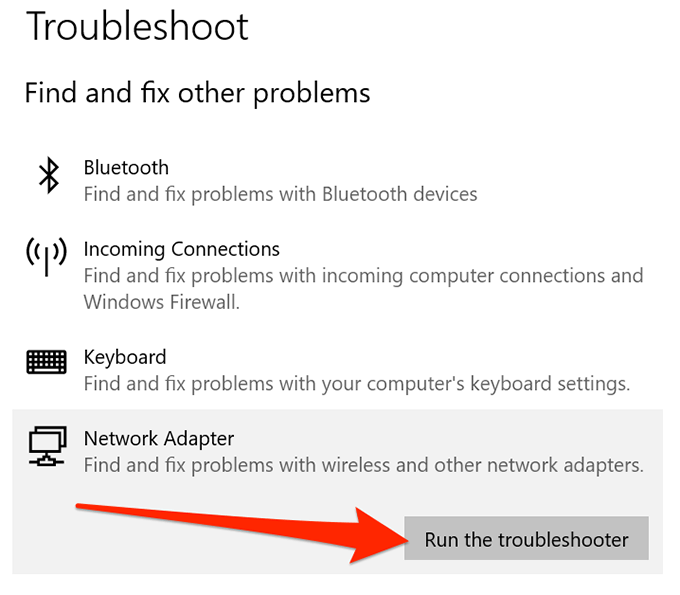
- The troubleshooter will find and help fix the issue on your machine.
The “Windows can’t connect to this network” issue basically paralyzes you as it won’t let you connect to the Internet, and that means you can’t access your sites, emails, and anything else that requires an active Internet connection.
If you were able to fix the issue using any of the above methods, please let us know your experience in the comments below.
Mahesh has been obsessed with technology since he got his first gadget a decade or so ago. Over the last few years, he’s written a number of tech articles on various online publications including but not limited to MakeTechEasier and Android AppStorm. Read Mahesh’s Full Bio


