- Unable to access shared folder on Windows 10 [Super Guide]
- What to do if shared folder is not accessible on Windows 10?
- 1. Check the availability of the folder sharing setup on your PC
- 2. Enable network discovery
- 3. Check your PC’s credentials
- 4. Enable all Network services
- 5. Run the Shared Folder Troubleshooter
- Unable to find my username in C:\Users
- Replies (8)
- How to fix “Windows can not find a certificate to log you on the network” error on Windows XP
- Unable to display current owner on Windows 10 [SOLVED]
- What prevents Windows from displaying the current owner?
- How can I bypass Unable to display current owner error?
- 1. Try to uninstall your folder lock software
- Revo Uninstaller
- 2. Grant access to the locked folder
- 3. Run chkdsk scan
- 4. Enable the administrator’s account
- 5. Give ownership to all administrators
- Frequently Asked Questions
- How do I force ownership of a folder?
- How do you fix permission to access this folder?
- How do I change administrator to owner?
Unable to access shared folder on Windows 10 [Super Guide]


Many Windows 10 users reported that Windows is unable to access the shared folder on their PC. This can be an issue, and in today’s article we’re going to show you how to fix this problem.
What can I do if I’m unable to access shared folder on Windows 10? First thing that you should do in order to fix this problem is to enable folder sharing and network discovery. To do that, just check your network settings window. If the problem is still there, make sure that the required services are running and are set to start automatically.
What to do if shared folder is not accessible on Windows 10?
- Check the availability of the folder sharing setup on your PC
- Enable network discovery
- Check your PC’s credentials
- Enable all Network services
- Run the Shared Folder Troubleshooter
1. Check the availability of the folder sharing setup on your PC
If you are unable to access a shared folder on Windows 10, the first thing to do is to check your system, to ascertain if the File Sharing setup is available. Normally, this setup is built-in on Windows; thus, it is usually present.
To run this check, follow the guidelines below:
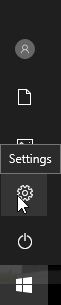
- Open the Start Menu and click on Settings.

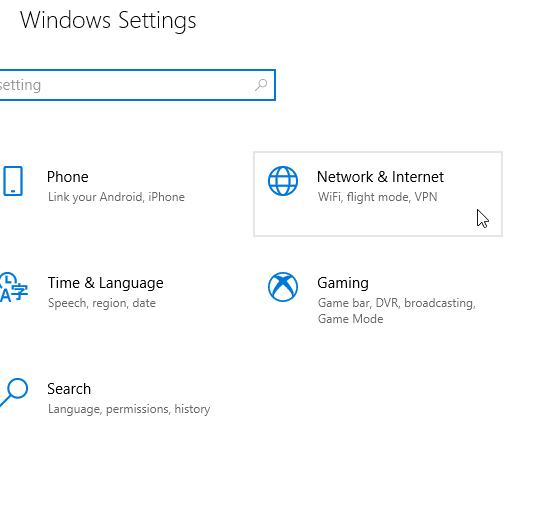
- Select Network and Internet.
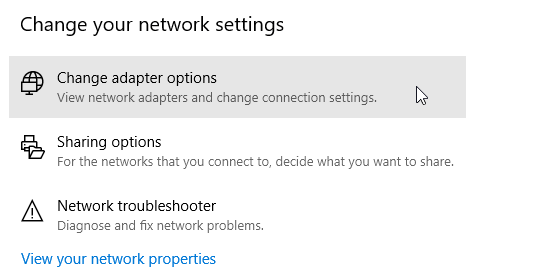
- Under Network and Internet, select Network and Sharing Center.
- Now click on Change adapter settings.
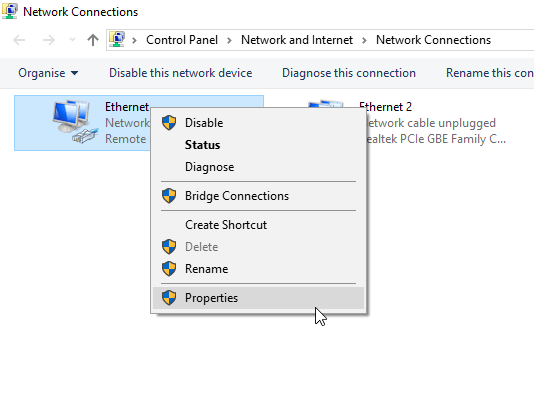
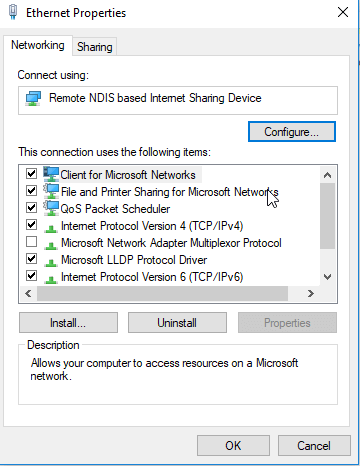
- Locate your network connection, right-click on it and select Properties.
- Navigate to the This connection uses the following items area and then locate the File and Printer Sharing for Microsoft Networks.
- If the option is available, simply check the box next to it; otherwise, proceed.
- Click on the Install.
- Afterward, click OK.
- Exit the window and restart your PC.
If the problem persists, you can try the next fix.
2. Enable network discovery
In case you are experiencing the Windows 10 unable to access shared folder error, it is recommended you check if your PC‘s network is discoverable by other computers. To configure Network discovery on Windows 10, follow the simple steps below:
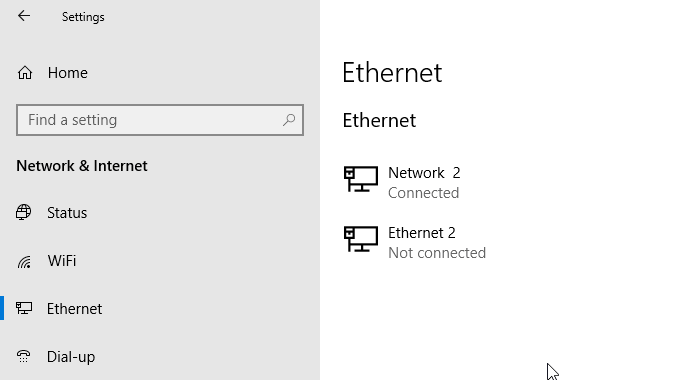
- Open the Settings app.
- Select Network and Internet.
- In the left panel, click either Wi-Fi or Ethernet (depending on your connection type).
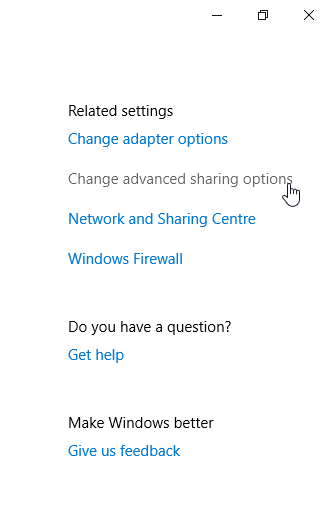
- Under the Related Settings menu, click on Change advanced sharing options.
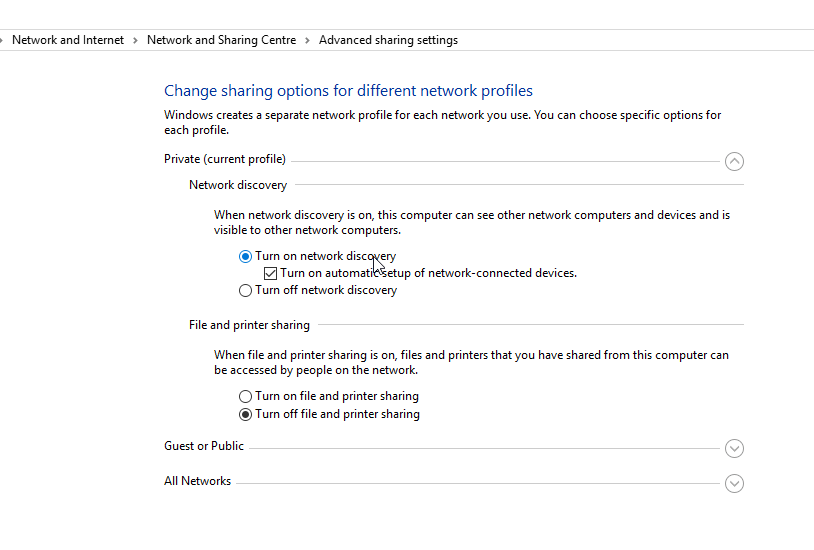
- Under Advanced options, check if the Make this PC discoverable option is enabled ( On). If it is not enabled (Off), simply enable it by toggling the button to On.
- Then click on Save changes
If the problem persists after making your PC discoverable, there is obviously another factor in play. Thus, you can try the next solution.
3. Check your PC’s credentials
If you’re unable to access the shared folder on your PC, it’s possible that you have issues with credentials. However, you can fix that by doing the following:
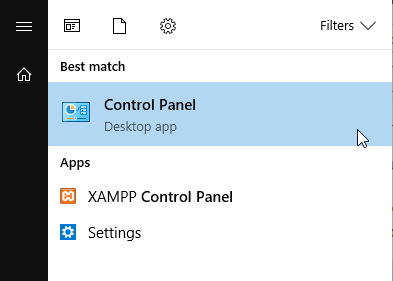
- Open the Start Menu and search for control panel.
- Select Control Panel.
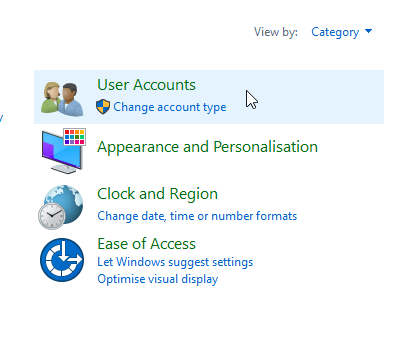
- Navigate to User Accounts and click on it.
- Under User Accounts, locate and select Credential Manager.
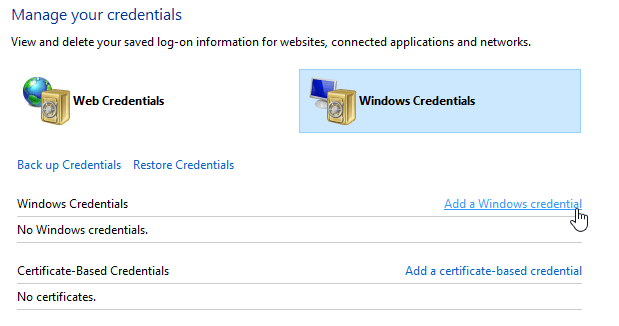
- Locate and click on Windows Credentials.
- Select Add a Windows credential.
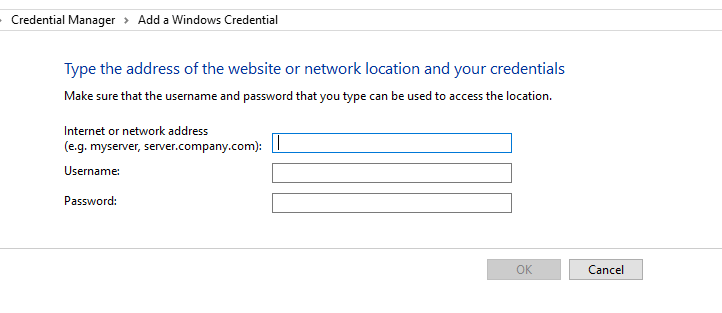
- Add other relevant details like Admin username, password and hosting PC‘s IP.
- Save changes by clicking OK.


If the problem persists after running this, you can try the next solution.
4. Enable all Network services
If you’re unable to access shared folder on your PC, ensure that you enable all relevant network services on your PC. Below is a list of relevant services that should be enabled and run automatically in order for file sharing to work:
- IPv6
- SSDP Discovery
- Publication
- Function Discovery Provider
- DNS Client
- Peer Networking Group
- Host
- Function Discovery Result
- UPnP Device Host
- Home Group Provider
- Home Group Listener.
If the problem persists, you can try the next solution.
5. Run the Shared Folder Troubleshooter
There is a designated troubleshooter on Windows 10 that is specially designed for fixing errors such as this. If you’re still unable to access shared folders, running the troubleshooter might be helpful. You can do that by following these steps:
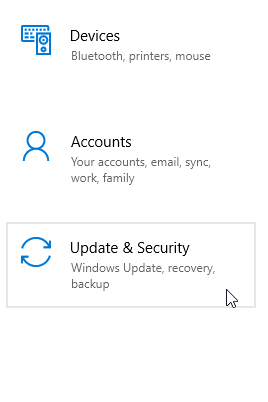
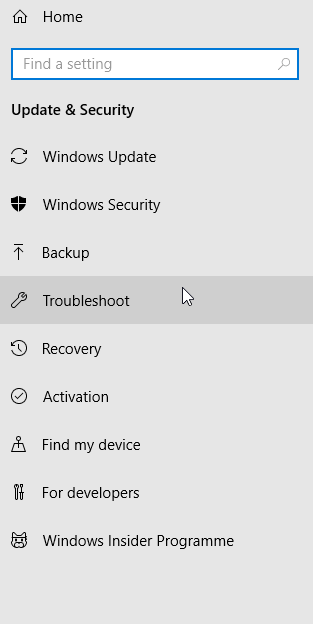
- Go to Settings. Locate and click on Update & Security.
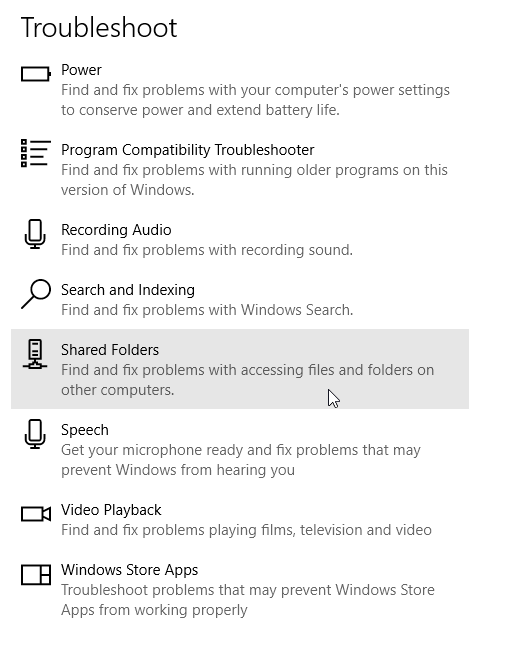
- Select Troubleshoot > Shared Folders.
- Follow the on-screen instructions to finish up the process.
- Exit program and restart PC.
There you go, these are a couple of solutions that might help you fix Windows 10 unable to access shared folder. Feel free to let us know in the comments section if these solutions helped you fix the problem.
Unable to find my username in C:\Users
C:\Users on my WIndows 10 computer does not contain my current username, or at least it’s not visible. Something seems to have gone very wrong. Not sure where to start with this problem.
Thanks for any responses in advance.
Replies (8)
![]()
We’re sorry to hear the inconvenience you have experienced.
Check if your files got hidden by accident. You can change your settings to view hidden files and folders. Here’s how:
1. Right click your Start button, and select «Control» / Search «control» on the search box/cortana and click the result.
2. Change your view to «Small icons«.
3. Click on «Folder Options«
4. Go to the «View Tab» and check — Show hidden files, folders, and drives.
5. Uncheck Hide protected operating system files (Recommended)
6. Go back to the C:\Users folder and see if you find your account name.
7. If you do find it, Right Click on the folder and click on Properties
8. Uncheck the checkbox Hidden, click Apply. You’ll be asked how to apply the changes, apply it to all folders, subfolders, and files.
9. Refresh your desktop and see if your icons now show up.
Once you’re done, make sure to undo your view settings, as modifying hidden files can affect your system.
Let us know if this worked for you. Thanks!
How to fix “Windows can not find a certificate to log you on the network” error on Windows XP
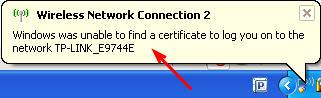
When you try to log onto a wireless network, you may see this error message: “Windows was unable to find a certificate to log you onto the network xxxx”.
This error is typically related to wireless network authentication and often appears because your Windows device is mistakenly searching for an 802.1x connection. To correct this error, follow the steps below.
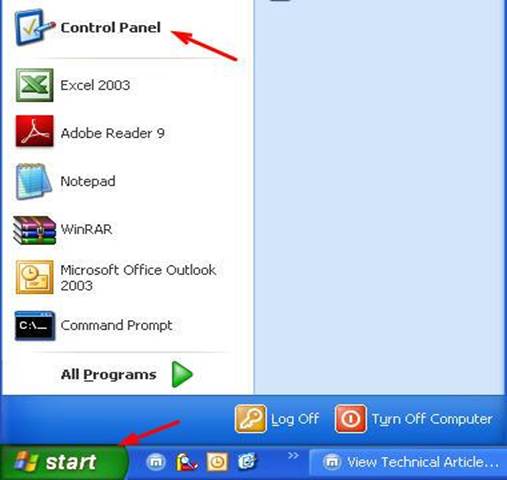
Step 1
Select Start Menu>Control Panel.
Step 2
Double-click Network Connections in the new window.

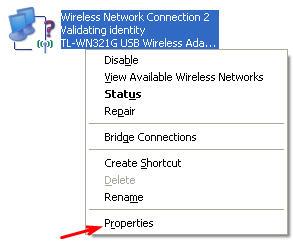
Step 3
Right-click wireless network connection, then select Properties.
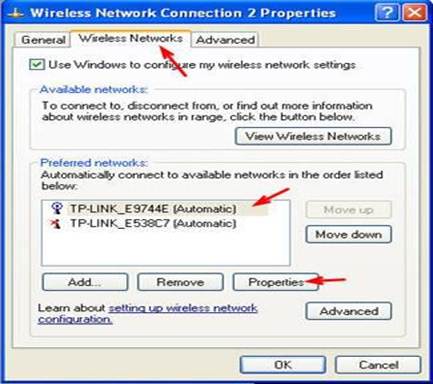
Step 4
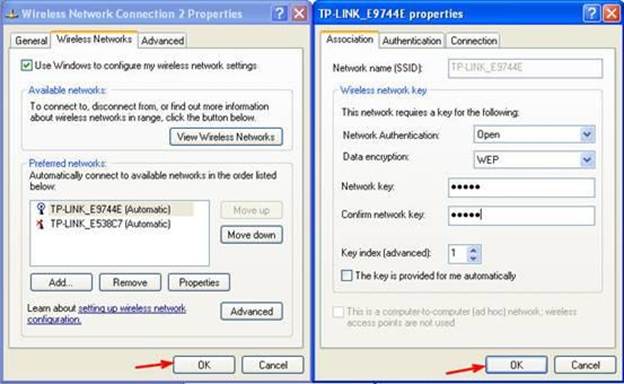
Select the Wireless Networks tab, and then select the network from the bottom list. Select Properties once you locate the wireless network causing the error.
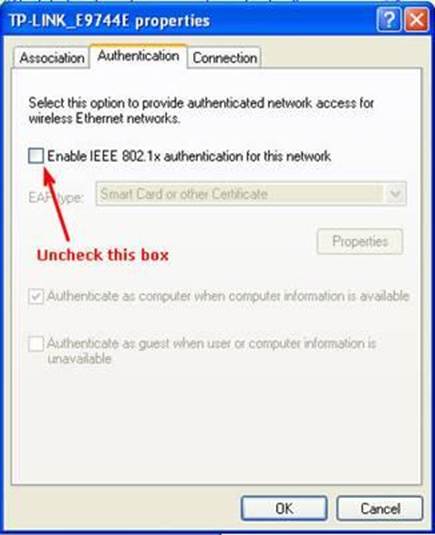
Step 5
Select the Authentication tab and uncheck the Enable IEEE 802.1x authentication for this network box.
If the Enable IEEE 802.1x authentication for this network box is checked, it will trigger the “unable to find a certificate to log you on to the network” message because Windows is looking for a certificate but your wireless router is not set up for certificate security.
Step 6
Select the Connection tab and check the Connect when this network is in range box.

Step 7
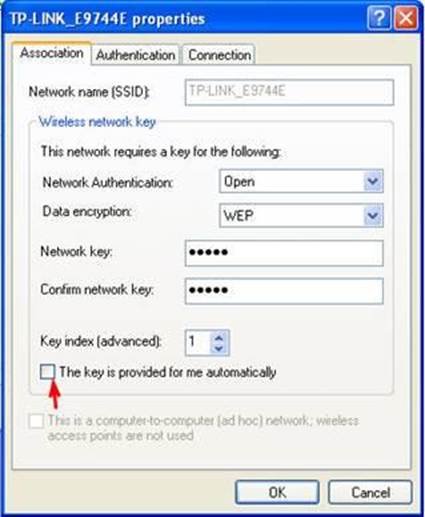
Select the Association tab and uncheck the “The key is provided for me automatically” box, then select Network Authentication & Data encryption and type in the Network key according to the wireless settings on your router.
Note: If you are not able to locate the Network key, contact your router’s technical support for assistance.
Step 8
Select OK, and then OK again to save your settings.
Once the error is fixed, Windows can automatically log you onto the network.
Unable to display current owner on Windows 10 [SOLVED]

- The Unable to display current owner message can be problematic, but not impossible to bypass.
- Removing folder lock software or using the Command Prompt are some of the solutions which we detail below.
- Getting access to certain apps or programs is a mystery sometimes, but we might have the answer in our Sing-In Errors section.
- Furthermore, you’ll find similarly useful articles in the Windows 10 Troubleshooting Hub.

When a user wants to claim ownership of a file or folder, the error message Unable to display current owner can sometimes pop up.
Oftentimes this error message can lead to another error message known as Access is denied.
What prevents Windows from displaying the current owner?
These are some common causes for the Unable to display current owner message.
- The user does not have full access
- The folder or file the user is trying to access has corrupted files
- The folder might be locked thereby denying access for the user
These types of problems usually occur if you don’t have the necessary privileges. By gaining full control over the affected directory you should be able to fix the problem.
Below are simple solutions that can be followed to get this error message solved.
How can I bypass Unable to display current owner error?
- Try to uninstall your folder lock software
- Grant access to the locked folder
- Run chkdsk scan
- Enable the administrator’s account
- Give ownership to all administrators
1. Try to uninstall your folder lock software

Folder lock on your system or any kind of software that operates like it may tend to help you protect your files by locking them. However, this software can sometimes cause Unable to display current owner message to appear.
More so, this software might not allow some files or folder to open. To fix the issue, all you got to do is to remove the folder lock software.
There are several ways to do that, but most effective is by using uninstaller software to make sure that any traces of the respective program are removed
We suggest you use Revo Uninstaller, a program that not only deletes all files and registry entries related to the unwanted tool but also comes with special cleaning features to remove junk files, group Windows tool in one place and permanently delete files and folders.
The uninstall process is quick and easy, and can be completed in just a couple of steps: you download and install Revo, you click on the Uninstall option, and choose the program you want to delete and allow the software to complete the process.
Revo Uninstaller
2. Grant access to the locked folder
- Make a right-click on the file and select Properties.
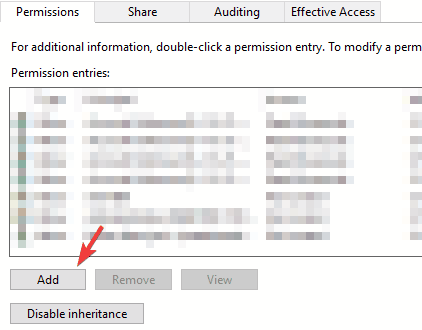
- Click on the Security tab and then click on Advanced.
- Select the Permissions tab and then click on Add.
- Select Add a principal. Search and double click on Authenticated users.
- Click on OK.
- Check the Full control in the permission box and save the changes.
- Reboot your PC.

3. Run chkdsk scan
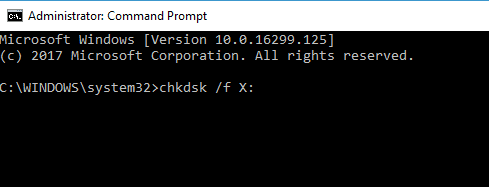
- Start Command Prompt as administrator.
- Type chkdsk /f X: and press Enter. Be sure to replace X with the drive you want to scan.
- If the message This volume will be checked the next time the system restarts appears afterward, press Y, close the Command Prompt , and reboot.
After rebooting, the scan will start automatically before the Windows 10 boots. Once your PC boots, check if the problem is still there.
4. Enable the administrator’s account
- Start Command Prompt as administrator.
- In the Command Prompt, type net user administrator /active:yes and hit Enter.
- As soon as this is done, log out of your current user account and you will see a new user named Administrator. Click on it to log in.
- After you log in to the new administrator account, try to access the file you have issues with.
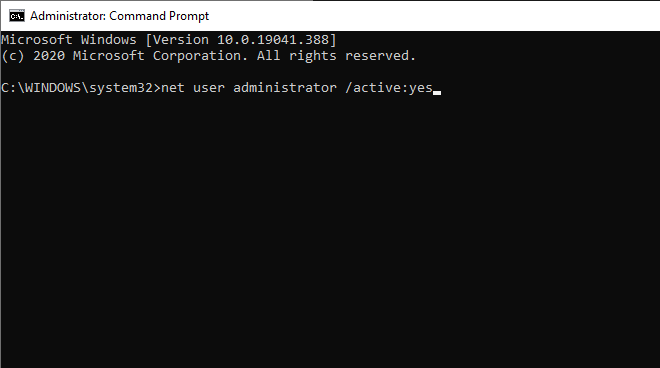
Once you’re done, log out, start Command Prompt as administrator and run net user administrator /active:no command to disable the Administrator account.
5. Give ownership to all administrators
If the previous solution didn’t work for you, you can fix the problem by granting ownership to all Administrators on your PC. To do that, follow these steps:
- Start Command Prompt as administrator.
- Type takeown /F “complete path of folder or file” /a /r /d y in the Command Prompt and press Enter.
- Type icacls “complete path of folder or file” /grant administrators:F /t into the Command Prompt and press Enter. It will show a message Successfully processed 1 (or more) files if successful and Failed processing 1 files or Successfully processed 0 files if it failed.
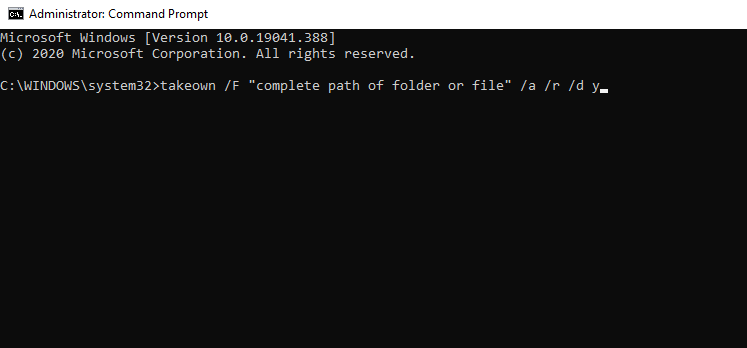
If the command was successful, try accessing the folder you have problems with.
There you go, these are just a couple of solutions that might help you fix Unable to display current owner error. Let us know in the comments section if our solutions were helpful to you.
Frequently Asked Questions
How do I force ownership of a folder?
When you want to take ownership of a certain that folder or file, you only need to tweak some details in its Properties.
How do you fix permission to access this folder?
If I don’t have permission to access a certain folder, you can try changing the ownership to you or using Command Prompt.
How do I change administrator to owner?
Changing admin to owner can be easily done from the Security option of a specific file or folder.


