- Печенюшка
- Установка Windows 7. Setup Was unable to Create A New System Partition or locate an existing system partition
- What to do if Windows was unable to locate boot.wim
- How can I fix Windows was unable to locate boot.wim error?
- 1. Temporarily disable antivirus
- 2. Create a bootable media
- 3. Make modifications in the Registry
- Ошибка обращения к диску при установке Windows
- Windows was unable to locate
Печенюшка
Установка Windows 7. Setup Was unable to Create A New System Partition or locate an existing system partition
 Недавно столкнулся с такой особенностью во время установки Windows 7. Дело в том, что при выборе раздела или диска, на который я хотел установить Windows 7 и при нажатии кнопки «Продолжить (Next)», установщик все время писал, что не может создать раздел и отправлял меня читать LOG файл. Если быть точным, то сообщение выглядело следующим образом: Setup Was unable to Create A New System Partition or locate an existing system partition. See the Setup LOG Files for More information.
Проблема решается следующим образом. В BIOS’е есть всем известная опция — приоритет загрузки среди жестких дисков, если дисков несколько. У меня проблема была в том, что первым номером шла флэшка, жесткий диск был вторым номером и т.д. Необходимо изменить приоритет жесткого диска, на который будет устанавливаться Windows 7 – сделать его первым, выбрать загрузку с CD-ROM и все прекрасно и быстро установится.
Быть может, кому пригодится.
Вот блин-то! И правда.
Ставил сервер на материнку GA-P55-US3L (6SATA Intel-RAID + 2SATA GA-RAID)
При включенном рейде отказался ставиться Server2003 (BSOD 0A), а Server2008 выдал вышеуказанную ошибку по поводу разделов.
Не знаю точно, что помогло, но вытащил флешку, отключил на SATA0-3 Native Mode (хотя режим оставил RAID) и отключил второй рейд на GSATA — и установка пошла…
What to do if Windows was unable to locate boot.wim


Although not too common, there have been some instances of a few users getting the Windows was unable to locate boot.wim error message.
This error usually appears when upgrading from one version of Windows to another, so today we’ll try to fix it.
How can I fix Windows was unable to locate boot.wim error?
- Temporarily disable antivirus
- Create a bootable media
- Make modifications in the Registry
1. Temporarily disable antivirus
If you have any anti-virus application running on your PC, that might be the cause for Windows was unable to locate boot.wim error.
So the best solution here would be to disable the virus protection while downloading and installing the desired software.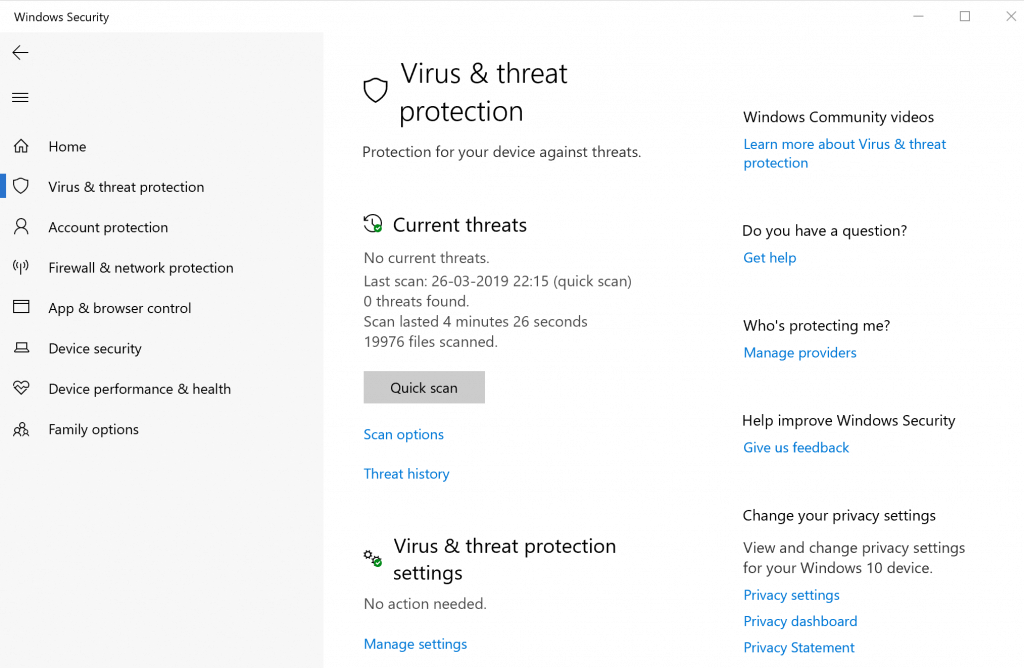
To disable the virus protection, launch the anti-virus application and follow instructions for the same, or you can do the same from the Windows Security Center as well.
Be sure to restore the protection after the installation is complete to prevent malware infections later on.
If your antivirus software was causing this issue, you might be able to fix the problem by switching to a different antivirus solution.
Bitdefender offers reliable protection, and it won’t interfere with your system in any way, so feel free to try it out.
2. Create a bootable media
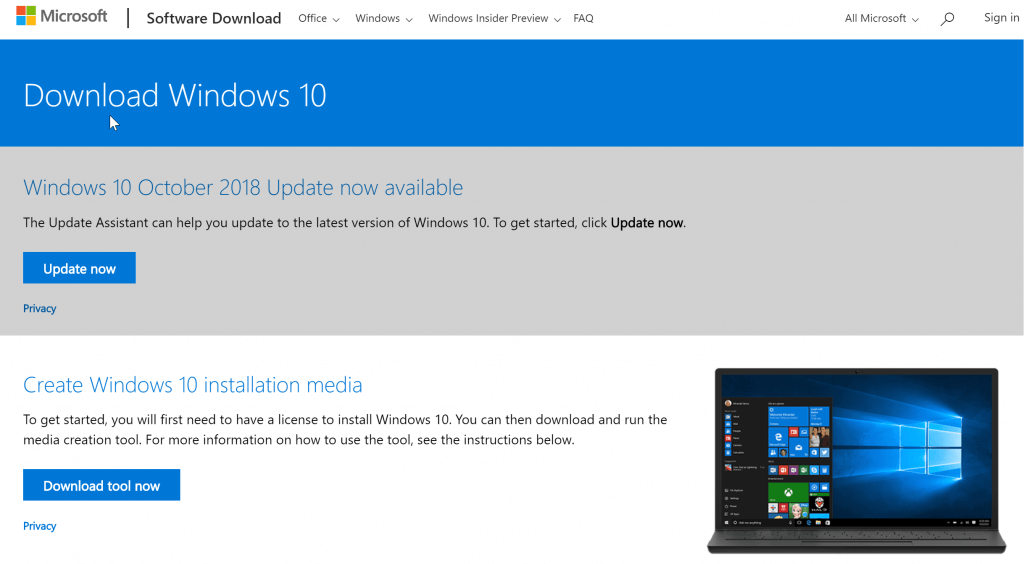
If you’re getting Windows was unable to locate boot.wim error while upgrading to a new version of Windows, you might be able to fix the problem by using a Windows 10 media to install Windows 10 on your device.
To do that, you’ll need to download Media Creation Tool and create a bootable media. The process would vary depending on the installation media (USB flash drive or DVD) you wish to create.
Follow instructions on the screen to complete the process. Once you create bootable media, use it to install the latest version of Windows 10.
3. Make modifications in the Registry
Another way to fix Windows was unable to locate boot.wim error is to modify your registry. To do that, follow these steps:
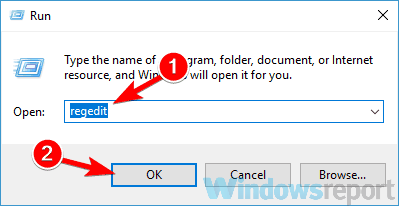
- Press Windows + R buttons on your keyboard.
- Type regedit and press enter. This will launch Registry Editor.

- Alternately, you can also type regedit on the Cortana search box. Right-click on the search result shown and select Run as administrator.
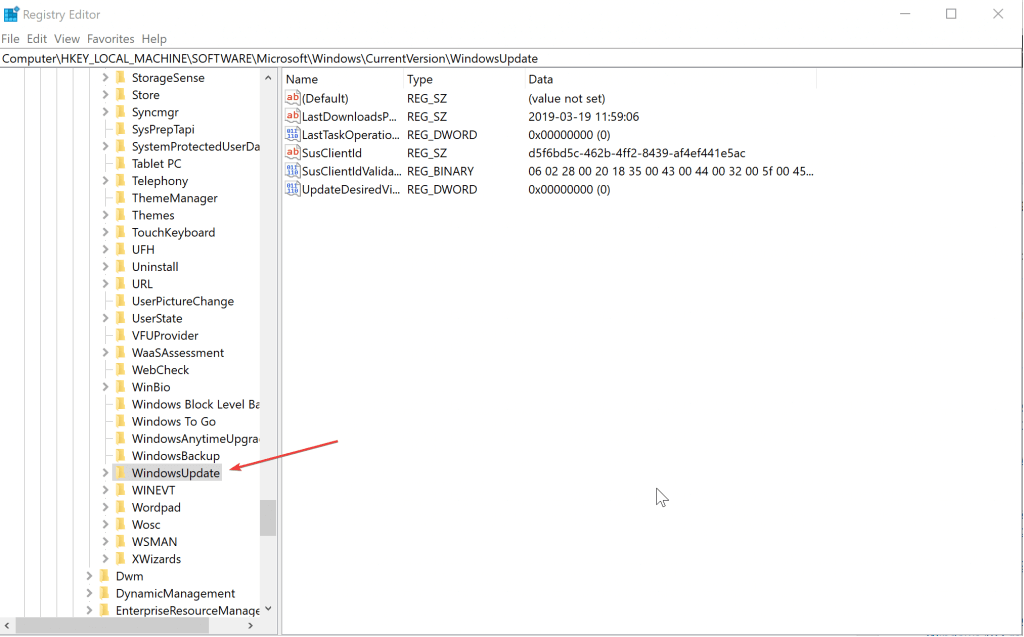
- In the Registry Editor window, locate HKEY_LOCAL_MACHINE\SOFTWARE\
Microsoft\Windows\CurrentVersion\
WindowsUpdate\OSUpgrade on options in the left. - Create a new DWORD (32-bit) Value with Name = AllowOSUpgrade, and set the Value = 0x00000001. You can create a new DWORD value by right-clicking on the blank portion on the right and hovering over New. Select DWORD (32-bit) Value
- Launch Control Panel again and navigate to Windows Update.
- You should get to see a button Getting Started. Click on it to launch the Windows 10 installation process. Follow on-screen instructions that show up.
In case the folder or key, OSUpgrade is not there in Step 4, you will have to create it. Here are the steps.
- Right-click on the blank portion on the right. There is only one option that you get to see – New. Hover on it and from the sub-menu that appears, click on Key. A new folder appears under WindowsUpdate. Name it OSUpgrade and press Enter.
- Double-click on the newly created key OSUpgrade to open it.
- Check if the value AllowOSUpgrade is present, and make sure its value data is set to 0x00000001. If yes, that’s fine. If not, there is something more you need to do.
- If the value AllowOSUpgrade is not present, right-click again as before and select DWORD (32-bit)Value and name it AllowOSUpgrade.
- With the value created, double-click on it to set it at 0x00000001. Do the same if the value is set to something else.
- Reboot your PC for the new changes to take effect.
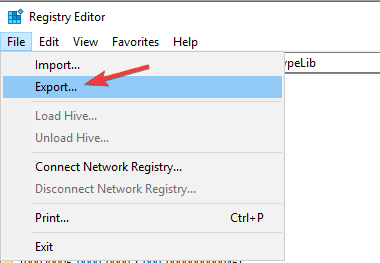
A word of caution. It is always recommended to back up your registry before making any changes to it. Here is how you do that.
- Click on File in the menu bar at the top and select Export.
- In the Export Registry File window that opens, set the location where you wish to save the settings in the Save in box. Also, give it a name as well and click Save.
If you sense something wrong with your PC immediately after you have tinkered with the registry, simply navigate to the backed-up file and double click on it. Follow on-screen instructions and restart your PC when prompted. You should be back to where you started from.
Ошибка обращения к диску при установке Windows
Если при установке Windows получаем ошибку:
Setup was unable to create a new system partition or locate an existing system partition. See the Setup log files for more information.
- открывает консоль: Shift + F10
- и смотрим журнал ошибок [1] :
Если видим ошибку: Couldn’t find info for boot disk[0]
Значит возникла ошибка в таблице разделов, её нужно пересоздать. Это можно сделать с помощь загрузочного диска Windows или Linux. В Windows используем утилиту DiskPart, а в Linux — parted (консольная) или gparted (графическая).
Рассмотрим восстановление из линукса. Загрузимся с live-CD/DVD/USB, например Ubuntu или, если хотим читать справки на русском языке, то используем какой-нибудь русский дистрибутив, например Alt Linux или Росинка
Таблицу разделов можно исправить в GUI, ипользуя gparted или в консоли (Ctrl + Alt + F1), используя parted.
Рассмотрим консольную утилиту parted. Переходим в консоль, нажав Ctrl + Alt + F1. Переключаемся на рута:
- Смотрим список подключенных дисков:
- Редактируем нужный. Вполне возможно, что достаточно будет просто удалить все разделы на диске, что установщик создал их заново:
Но можно также создать новый раздел (размером 100Гб) и пометить его как загрузочный:
- После этого опять загружаемся с установочного диска Windows и повторяем установку с самого начала.
Windows was unable to locate
Сообщения: 1
Благодарности: 0
| Конфигурация компьютера |
| Материнская плата: Нет |
| HDD: Нет |
| Звук: Нет |
| CD/DVD: Нет |
| ОС: Нет |
I already know all this. I’m the one who yesterday gave you the URL, it’s on page one in this thread. And I know how the Media Creation Tool works. I used it yesterday morning to install the free upgrade. but personally, I prefer to create the media disk from the ISO file it’s faster this way. 1)= The Media Creation Tool has to first upload from Microsoft the installation 2)= Then verifies the upload. 3)= Then erase the Malfunctioning installation folder that was alredy installed in 4)= Then it has to install in your (C:) drive the new installation folder. 5)=Then install Windows 10. That’s to many hours. My way to get the ISO : 1)= and 2)= same as yours. 3)= Installs the ISO in my Download folder. 4)= I burn that ISO to a DVD disk. From step 1)= to a complete finish install = One hour and 48 minutes. As a rule I always prepare my primary hard drive before installing a new version of Widows. I delete all junk and defrag (optimize) my hard drive. Was this reply helpful? Sorry this didn’t help. Great! Thanks for your feedback. How satisfied are you with this reply? Thanks for your feedback, it helps us improve the site. How satisfied are you with this reply? Thanks for your feedback.
Forgot to mention this. The «Queue» does exist. If you zoom up this page you will able to read what I circled in red. By the way this announcement was provided to us by the Management of this Community. Was this reply helpful? Sorry this didn’t help. Great! Thanks for your feedback. How satisfied are you with this reply? Thanks for your feedback, it helps us improve the site. How satisfied are you with this reply? Thanks for your feedback. Was this reply helpful? Sorry this didn’t help. Great! Thanks for your feedback. How satisfied are you with this reply? Thanks for your feedback, it helps us improve the site. How satisfied are you with this reply? Thanks for your feedback.
Well at least the «Queue’ Was nice to your Father. Only 2 hours of waiting time and «INSTANLY» you were told you are ready to install. You revealing this happening will make a lot of people envious. Hum . but then again. I wonder . Was this reply helpful? Sorry this didn’t help. Great! Thanks for your feedback. How satisfied are you with this reply? Thanks for your feedback, it helps us improve the site. How satisfied are you with this reply? Thanks for your feedback.
Does this mean I am ready to install The Free Windows10 upgrade on this this computer ? This 1 of 2 computers. The other Win.7 SP1, I already upgrade it yesterday using the burned ISO file to a blank DVD. As for this one, just curious how long it will take, to get the OK from Microsoft to go ahead and upgrade. Was this reply helpful? Sorry this didn’t help. Great! Thanks for your feedback. How satisfied are you with this reply? Thanks for your feedback, it helps us improve the site. How satisfied are you with this reply? Thanks for your feedback.
just got the answer a few minutes ago, when I went to check the status of my Windows updates. According to the previous message «You’re good to go», well I’m not. Does not matter, yesterday I also downloaded the ISO file for this computer ( Win. 8.1 Pro. ). My other computer is already upgraded. But for this WIN 8.1 Pro. comp., I’ll hold on to upgrade for a while. P.S.: to be able to read this picture, you’ll need to go down to the Status Bar at the bottom right corner of this page, and change the zoom level to at least 150%, for a better reading experience. Was this reply helpful? Sorry this didn’t help. Great! Thanks for your feedback. How satisfied are you with this reply? Thanks for your feedback, it helps us improve the site. How satisfied are you with this reply? Thanks for your feedback.
Was this reply helpful? Sorry this didn’t help. Great! Thanks for your feedback. How satisfied are you with this reply? Thanks for your feedback, it helps us improve the site. How satisfied are you with this reply? Thanks for your feedback. My wife reserved hers a week after I did and hers is ready to install so that blows your 1st come 1st serve theory out of the water. I’m in the same boat as the originator of this thread, missing an installation file for some reason. Was this reply helpful? Sorry this didn’t help. Great! Thanks for your feedback. How satisfied are you with this reply? Thanks for your feedback, it helps us improve the site. How satisfied are you with this reply? Thanks for your feedback. You most likely don’t get it in same manner as it was for me. Windows 10 upgrade for some reasons checks if there are leftovers of updates in C:\Windows\SoftwareDistribution\Download I had to remove all of the files from there and then do the following command line code as admin. wuauclt.exe /updatenow after you have done this go and check you control panel update window. It should either start downloading your first fresh windows 10 installation folder in C:/ drive which would be hidden. Can make it visible by going to file>view>show hidden items |


