- [5 Ways] How to Remove Write Protection from USB in Windows
- Part 1. How to Remove Write Protection from USB in Windows 10/8/7
- Method 1. Remove Write Protection from USBВ with PhysicalВ Lock Switch
- Method 2. RemoveВ Write Protection fromВ USB viaВ Diskpart Command
- Method 3. Use Third-Party USB Write Protection Removal Tool
- Method 4.В Clear Write Protection fromВ USB Devices UsingВ Registry Editor
- Method 5. Turn Off BitLocker to UnlockВ Write ProtectedВ USB in Windows 10/8/7
- Part 2. Recover Data and Format USB afterВ Write Protection Removal
- #1. Recover Data First If File LostВ After Removing USB Write Protection
- #2. How to Format USB Drive to NTFS or FAT32:
- What CausedВ Write Protection on USB
- Conclusion
- People Also Ask
- 1. How to remove write protection from the Micro SD card?
- 2. How can I remove the write protection from a single file?
- 3. How do you add write protection to a flash drive?
- 4. How do I removeВ write protection from Seagate external hard drive?
[5 Ways] How to Remove Write Protection from USB in Windows
When you get the ‘disk is write protected’ error on USB or other devices, you can’t make changes on your drive. Here is how to remove write protection from USB, HDD in Windows 10/8/7: [1] Remove write protection in 5 ways; [2] Let EaseUS file recovery software restore all your files.
Table of Contents
About the Author
Reviews and Awards
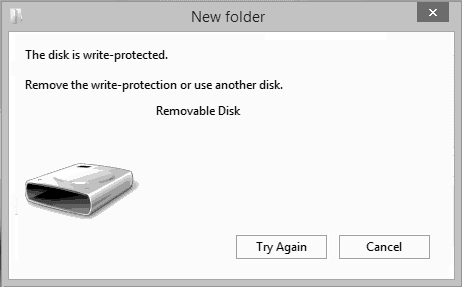
Don’t worry when you get «The disk is write protected. Remove the write-protection or use another disk» error message and you can’t make changes to filesВ on USB flash drives, SD card, internal or external HDD/SSD.
Follow this complete guide, you’ll learn howВ to remove write protection from USB, SD card, or internal HDD/SSD on your own.
Part 1. How to Remove Write Protection from USB in Windows 10/8/7
How do I remove and disable write protection onВ a hardВ drive, USB or SD card, etc in Windows 10/8/7 computers? We will take USB as an example to show you the whole process of removing write protection in 5 practical ways.
| Workable Solutions | Step-by-step Troubleshooting |
|---|---|
| Fix 1. Check Physical Lock Switch | Find the lock switch on either side of the USB. Full steps |
| Fix 2. Run Diskpart Command | Open Command Prompt > Type diskpart. Full steps |
| Fix 3. Run Write Protection Remover | Download EaseUS Tools M on your PC > Run. Full steps |
| Fix 4. Edit Registry | Open Run in Windows 10/8/7 > Type Regedit. Full steps |
| Fix 5. Turn off BitLocker Partition | Open Windows File Explorer > Right-click. Full steps |
Note: The fixes are listed from easy to complex.В Follow them one by one to remove write protection fromВ your USB flash drive, memory card, computer HDD/SSD.
Method 1. Remove Write Protection from USBВ with PhysicalВ Lock Switch
Sometimes, whenВ the USB drive or SD card physical switch is locked, the device will become write-protected on all PC or devices. Let’s see howВ to use the physical switch to remove the protection on your USB now:
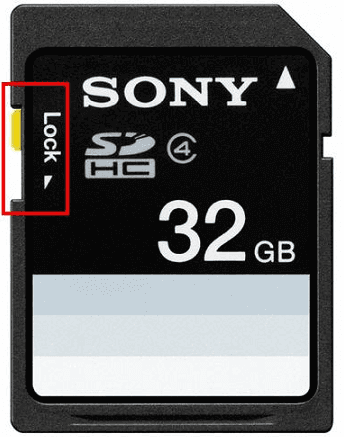
Step 1. Locate and turn the physical switch from ON to OFFВ on your USB or SD card.
Step 2. Connect the unlocked USB or SD card to your computer,В check if the write-protected state disappears.
Image 1 — USB flash driveВ switch
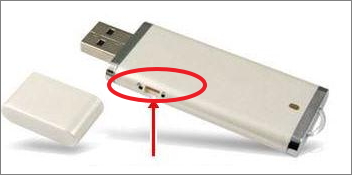
Image 2 — SD card lock switch
Note that if your USB doesn’t have a switch or the system still warns your USB is write-protected,В follow Method 2 to remove write protection.
Method 2. RemoveВ Write Protection fromВ USB viaВ Diskpart Command
This option applies toВ clear read only (namely write-protection) state on an internal or external hard drive, and it also works on a USB flash drive or SD card.
Let’s see how to use the Diskpart command line and fix this issue now:
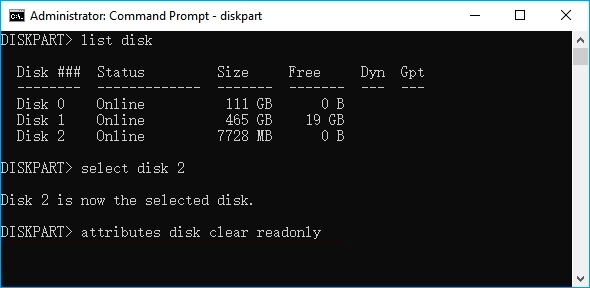
Step 1. Press «Win + R», type cmd to open «Command Prompt».
Step 2. Type diskpart and hit Enter. Click «Yes» to open Diskpart.
Step 3. Type list disk and hit Enter.
Step 4. Type select disk 2 and hit Enter.В (Replace 0 with the write-protected device number.)
Step 5. Type attributes disk clear readonly and hit Enter.
Step 6. Type exit to close the diskpartВ once the write protection removing process completes.
After this, restart your PC and check if you can access and use the saved data on your USB or hard drive again.
Method 3. Use Third-Party USB Write Protection Removal Tool
If you are not professional in computing management and not familiar with command lines, don’t worry. EaseUS R&D team has promoted a fresh kit for helping you resolve the write-protection issue on your hard drive, external hard drive, USB or SD card, etc., devices.
EaseUS Tools M is a practical computer fixing tool that is safe and light-weighted. It’s a perfect alternative to the command line.В
Use this one-click tool to solve the write-protection issues on your own:
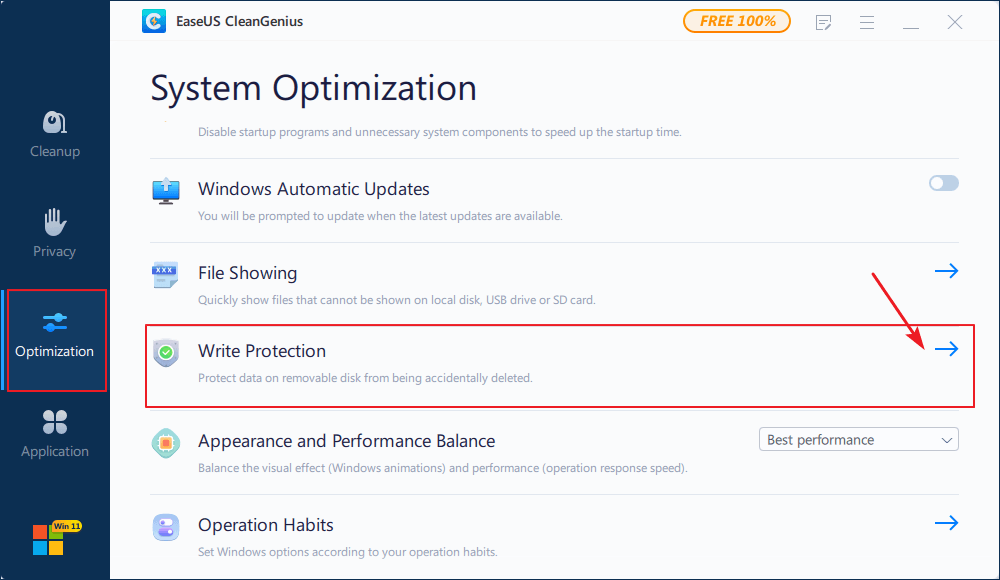
Step 1: оњљ DOWNLOADВ and install EaseUS Tools MВ for free.
Step 2: Run EaseUS Tools M on your PC, choose the «Write Protection» mode.
Step 3: Select the device which is now «Write-Protected» and click «Disable» to remove the protection.
Method 4.В Clear Write Protection fromВ USB Devices UsingВ Registry Editor
Registry Editor also works to fix USB, SD, or internal/external HDD/SSD write-protected error. Note thatВ if you’re not professionals, this method doesn’t fit. Any false operation with Registry may affect the system performance.
Be really careful while removingВ write protection in the Registry editor in Windows 10/8/7/XP/Vista:
Step 1. Connect your write-protected removable device to PC.
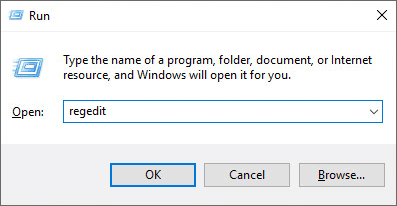
Step 2.В Open Registry by clicking «Start» > TypeВ regeditВ in the Run dialog > Click «OK».
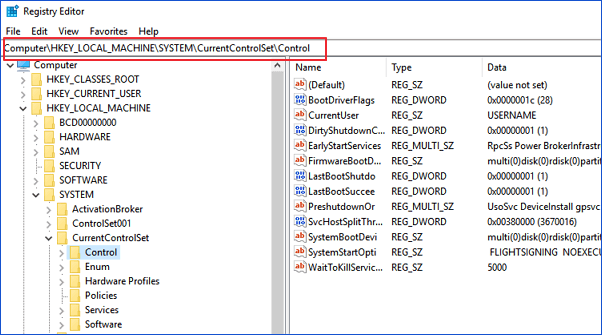
Step 3. Click on HKEY_LOCAL_MACHINE > ExpandВ «System».
Step 4. ClickВ «Current Control Set»В in System list > Click on «Control».
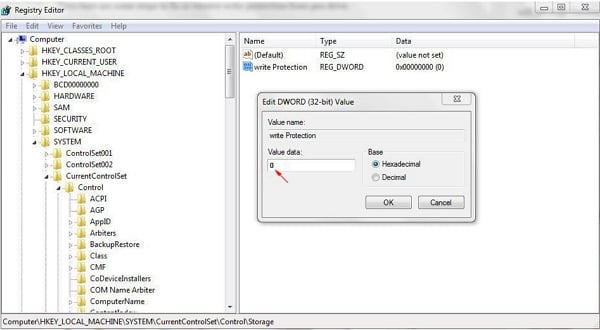
Step 5. CheckВ «Storage Device Policies»В > Change DWORD value data to «0» > ClickВ «OK».
Step 6. ExitВ Registry and reboot PC.
Wait for the computer to restart, then you can check if your device is accessible.
Method 5. Turn Off BitLocker to UnlockВ Write ProtectedВ USB in Windows 10/8/7
Mostly, when you enable BitLocker on your hard drive partition, it will protect your files with its encryption feature. To make changes to the BitLocker partition,В you’ll need to remove the protection from it.
Here are the detailed steps of unlocking write-protected BitLockerВ USB or partitions on your PC:
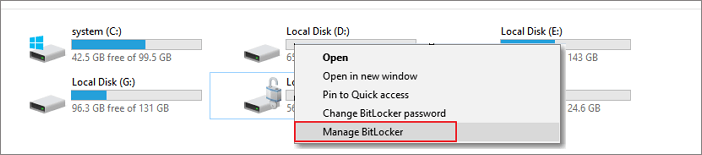
Step 1. Open File Explorer, right-click on your BitLocker partition or USB, selectВ «Manage BitLocker».
Step 2. Select the locked device and clickВ Turn off BitLocker.
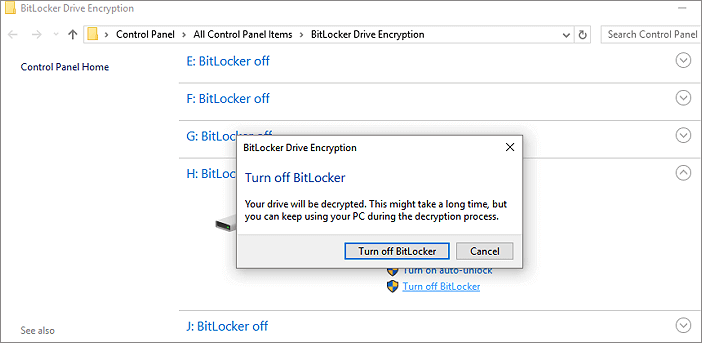
Step 3. Wait for BitLocker to decrypt on its own.В
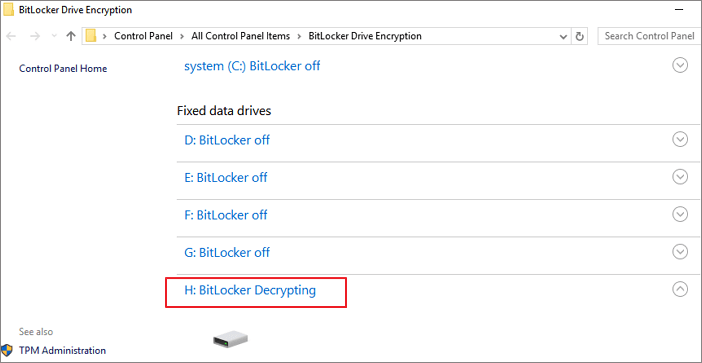
After this, with BitLocker off, you can manage data on your USB partition and save new files to it again.
Part 2. Recover Data and Format USB afterВ Write Protection Removal
After removing write protection from your storage devices, you can access files and make changes to your USB flash drive or external USB drive again.
However, if files were lost or the USB is still inaccessible, follow through the two tips below:
#1. Recover Data First If File LostВ After Removing USB Write Protection
Download EaseUS Data Recovery Wizard to recover any lost data during the write protection removal.
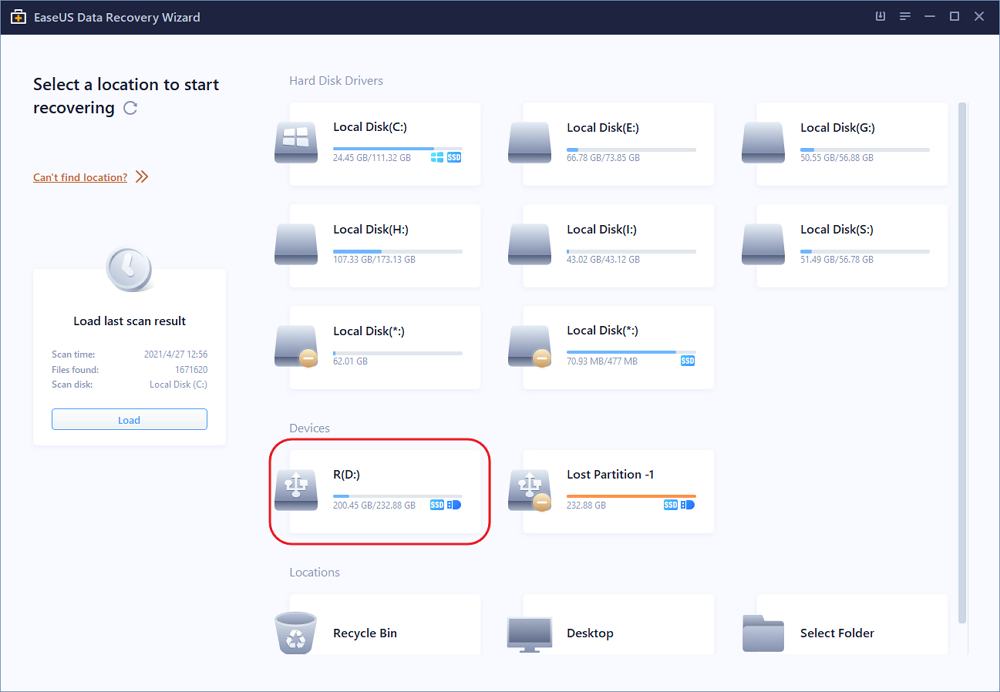
Step 1.В Run USB data recovery software.
Connect the USB flash drive to your computer and launchВ EaseUS USB data recovery software on your PC. Select your USB drive which marks as a removable disk, and click «Scan» to start finding your lost files.
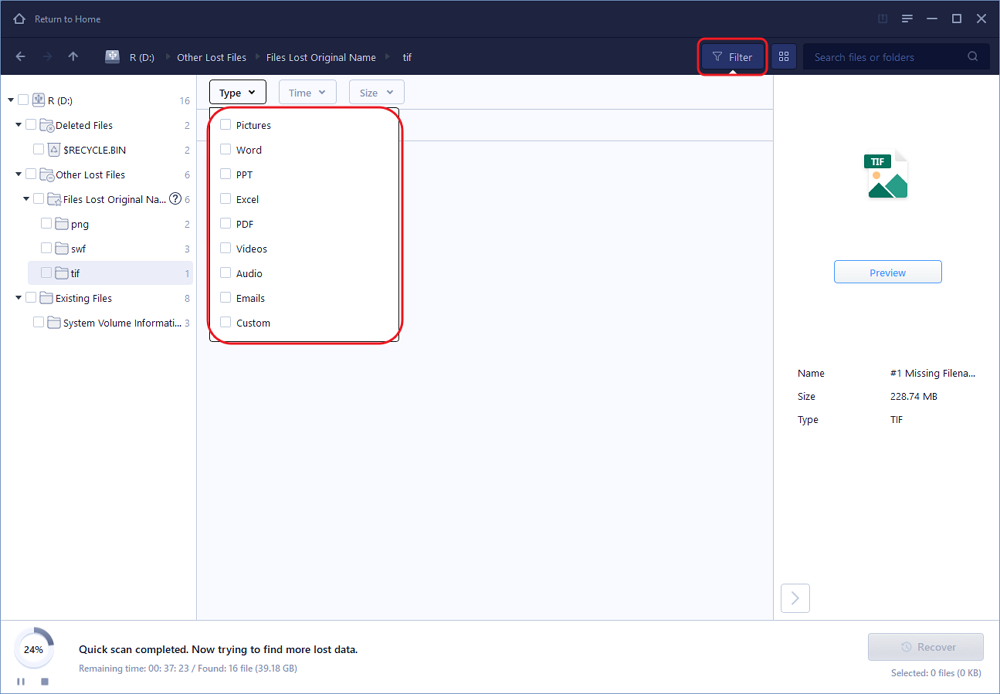
Step 2.В Scan all lost files from USB.
EaseUS Data Recovery Wizard will thoroughly scan your USB flash drive and find all your lost data on it. After the scanning process,В use the Filter feature to filter a specific file type. You can check and preview found USB files in this program.
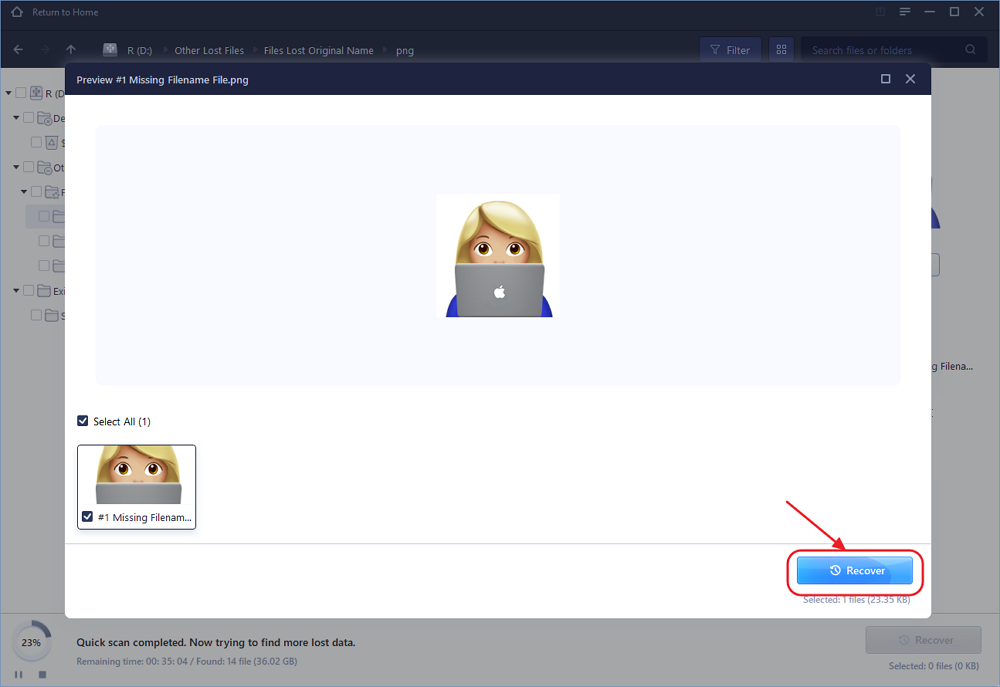
Step 3.В Restore all lost files from USB.
A double-click will allow you to preview the file results. Choose the target files and click «Recover» to save them to aВ secure location on your PC or other external storage devices.
#2. How to Format USB Drive to NTFS or FAT32:
To guarantee a secure circumstance on your USB, remember to formatВ your USB, SD card, internal or external HDD/SSD to NTFS or FAT32.
To format the USB, connect it to your computer and format it in Disk Management with steps below:
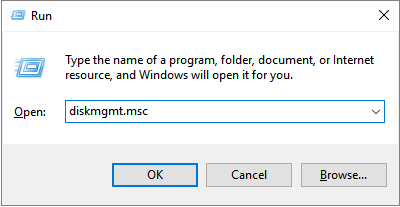
Step 1. Open the Run box and type diskmgmt.msc and hit Enter.
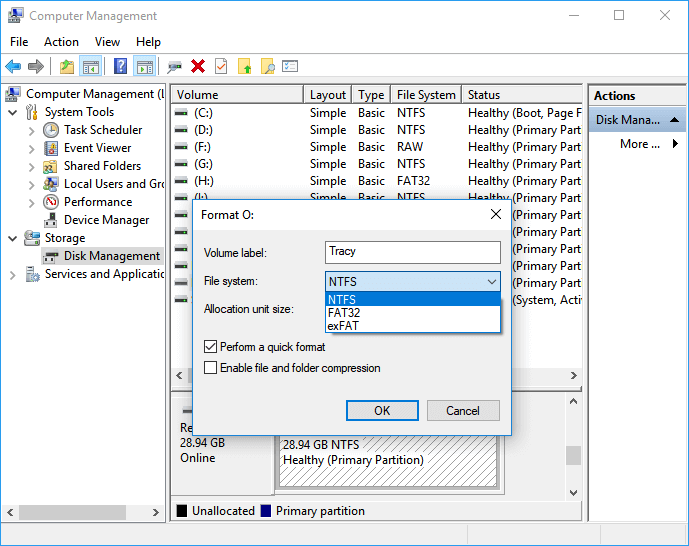
Step 2. Find theВ Disk Management,В right-click on the USB and choose «Format. «.
Step 3. Select the format of your USB drive asВ FAT32 or NTFSВ and click «OK» to confirm.В
(FAT32 for 32GB or smaller capacity; NTFS for 64GB or bigger capacity.)
What CausedВ Write Protection on USB
Sometimes, people add write protection toВ filesВ on a storage device from being modified or erased. However, storage devices like USB flash drive, SD card, internal or external hard disk may becomeВ write-protected due to the following reasons:
- The physical switch of the USB is on the Lockside.
- USB is set as Read-Only by mistake.
- BitLocker protection partition is turned on USB volume.
- Third-party encryption software or virus causedВ the disk isВ write-protected error on USB.
What does it mean when a USB is write protected?

Once your USB flash disk, SD card, internal or external hard drive is write-protected, it means that your deviceВ is unavailable for making any changes, such asВ add files,В removeВ saved data, orВ format the drive.В
The only way out is to removeВ write protection. By following the complete guide on this page, you’ll make your device viable for saving and transferring files again.
Conclusion
This page offers five methods to help you get rid of USB, SD or internal/external hard drive write protection issues, including:
- 1. Swapping USB or SD card physical switch to the «Off» state
- 2. Using Diskpart command to clear read only
- 3. Use USB write protection removal tool
- 4. Changing Registry DWORD value to 0
- 5. Turn off BitLocker partition
If you are having aВ question likeВ «How do I remove write protection on a USB drive?», «How can I remove write protection from a USB drive in Windows 10/7?», just follow the article to unlock your write-protected device right here now.
People Also Ask
In below, we have listed some frequently asked questions and answers to helpВ you remove write protection from your storage devices.
1. How to remove write protection from the Micro SD card?
To remove write protection from your SD card, you may follow the quick guide for help:
- 1. Run CMD as administrator.
- 2. Type diskpart.exe.
- 3. Type list disk.
- 4. Type select disk + number.
- 5. Type attributes disk clear readonly.
For a more detailed guide, follow How to Remove Write Protection and Format Write-Protected SD Card for help.
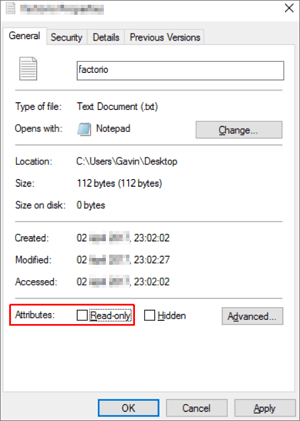
2. How can I remove the write protection from a single file?
If your file or folder is locked with a read-only state, you can unlock it from the write protection state with the following tips:
- Right-click on the folder, select «Properties».
- On the General tab, uncheck «Read-only» next to the Attributes section.
- Click «OK».
3. How do you add write protection to a flash drive?
There are three ways to can enable write protection on a USB flash drive:
- Use USB write-protection switch.
- Using diskpart to change read-only settings.
- Change security permission in USB properties.
4. How do I removeВ write protection from Seagate external hard drive?
Connect your Seagate external hard drive to your PC and remember its disk number. Open Command Prompt, type the following command one by one, and hit Enter each time:
- diskpart
- list disk
- select disk nВ (ReplaceВ nВ with the disk number of your write-protected Seagate external hardВ drive.)
- attributes disk clear readonly
After this, if you find files lost on the disk, use reliable USB data recovery software to scan and bring your lost valuableВ data back with ease.В В


