- Настройка рабочих папок (Work Folders) в Windows Server 2016
- Установка и настройка роли Work Folders в Windows Server 2016
- Настройка клиента Work Folders
- Настройка клиента Work Folders групповыми политиками Windows
- Ошибка синхронизации Work Folders 0x80c80317
- Заключение
- Configure Work Folders on Windows Server 2016
- How to Install and Configure Work Folders Role on Windows Server 2016
- Configuring the Work Folders Client on Windows 10
- Configure Work Folders Client Using Group Policy
- Work Folders Synchronization Error 0x80c80317
Настройка рабочих папок (Work Folders) в Windows Server 2016
Технология рабочих папок (Work Folders) позволяет организовать удаленный доступ пользователей к своим файлам на внутреннем файловом сервере компании и работать с ними в офлайн режиме с любого устройства (ноутбук, планшет или смартфон). При следующем подключения к сети все изменения в файлах на устройстве пользователя синхронизируются с корпоративным файловым сервером. В этой статье мы покажем, как установить и настроить функционал Work Folders на базе файлового сервера Windows Server 2016 и клиента с Windows 10 .
В качестве хранилища файлов может использоваться файловый сервер с Windows Server 2012 R2, в качестве клиентов все версии Windows, начиная с Windows 7, а также устройства с Android 4.4 или iOS 8 и выше (клиент Work Folders для этих устройств доступен в Google Play и App Store соответственно). С помощью политик безопасности можно потребовать от клиентов Work Folders обязательное хранение содержимого рабочих папок в зашифрованном виде, что гарантирует защиту данных даже в случае утери/кражи устройства.
Установка и настройка роли Work Folders в Windows Server 2016
Роль Work Folders в Windows Server 2016 можно установить из графического интерфейса Server Manager или с помощью PowerShell.
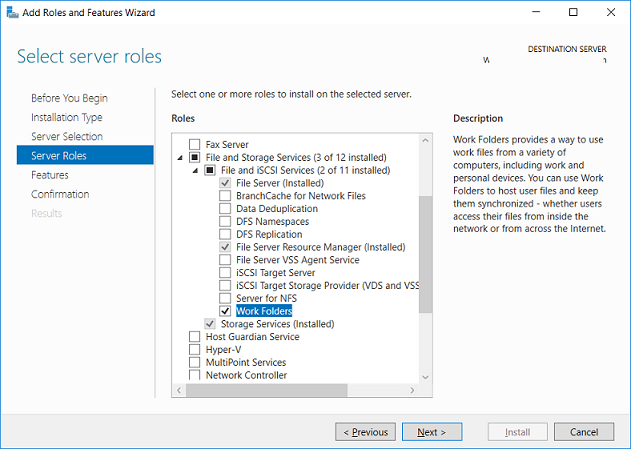
В первом случае нужно в Server Manager внутри роли File and Storage Services выбрать службу Work Folders (к установке будут автоматически добавлены требуемые компоненты IIS Hostable Web Core).
Установка роли Work Folders с помощью PowerShell выполняется такой командой:

Для предоставления доступа к рабочим папкам в Active Directory нужно создать группы безопасности, в которые нужно включить пользователей, которым будет разрешено синхронизировать свои устройства с рабочими папками на файловом сервере (для более быстрой работы службы Work Folders за счет уменьшения количества запросов к AD, Microsoft рекомендует помещать в данные группы только учетные записи пользователей, но не другие группы безопасности).
Следующий этап – создание на файловом сервере сетевых каталогов, с которыми будут синхронизироваться пользователи. Эти каталоги можно создать из консоли Server Manager или PowerShell.
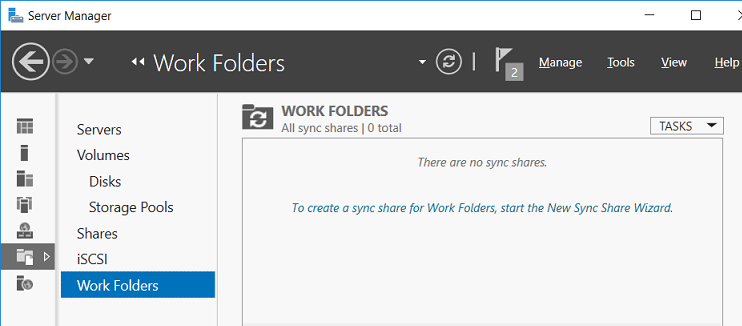
Откройте Server Manager, выберите роль File and Storage Services -> Work Folders. Выберите меню Tasks -> New Sync Share.
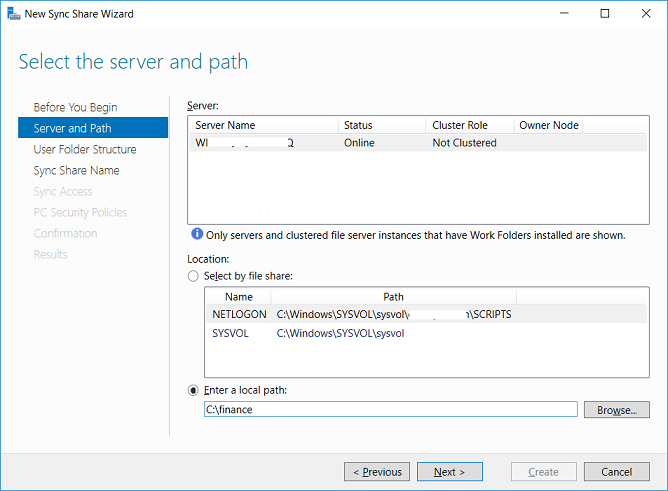
Далее нужно указать каталог, к которому будет предоставляться доступ. В нашем примере это папка C:\finance.
Далее нужно выбрать какая структура пользовательских папок будет использоваться. Папки могут называться по учетной записи пользователя (alias), либо в формате user@domain.
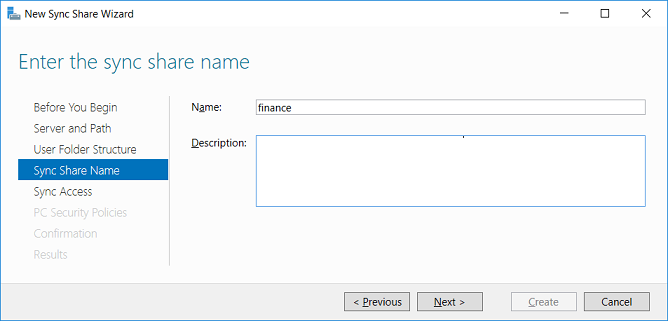
Затем указывается имя шары.
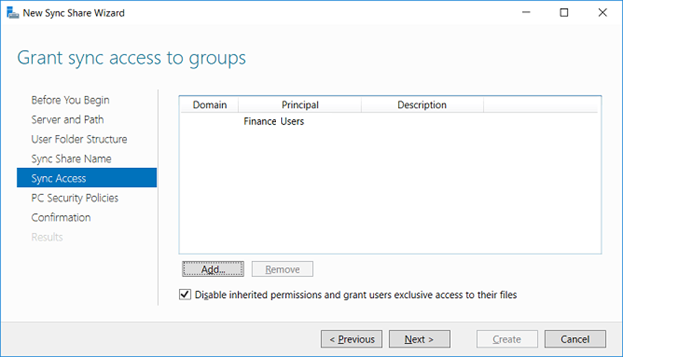
Далее нужно указать группы доступа, которым нужно предоставить доступ к данному каталогу.
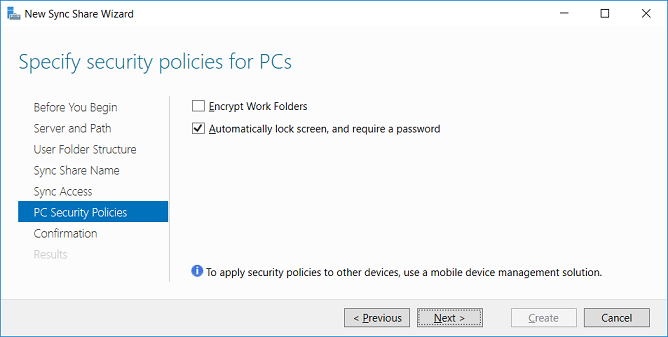
Далее указываются политики безопасности рабочих папок, которые должны применяться на клиенте. Имеются две политики:
- Encrypt Work Folders – обязательное шифрование данных в каталоге Work Folder на клиенте с помощью BitLocker
- Automatically lock screen and require a password– автоматическая блокировка экрана через 15 минут неактивности устройства и защита его паролем (не менее 6 символов)
На этом настройка новой рабочей папки закончена.
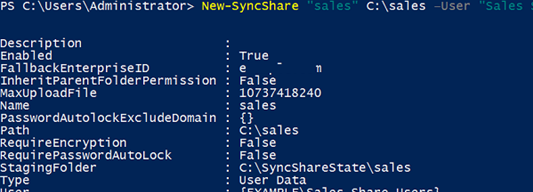
Те же самые действия по созданию новой папки синхронизации можно выполнить с помощью командлета New-SyncShare. К примеру, следующая команда создаст новую папку синхронизации и предоставит доступ к ней группе
New-SyncShare «Sales» C:\sales –User «Sales_Users_Remote_WorkFolder»
Для доступа к рабочим файлам по защищенному протоколу HTTPS, к веб сайту IIS, который обслуживает работу папок Work Folder нужно привязать валидный SSL сертификат.
Проще всего воспользоваться бесплатным SSL сертификатом от Let’s Encrypt. Процесс выпуска и привязки такого сертификата в IIS описан в статье Cертификат Let’s Encrypt для Windows(IIS).
Настройка клиента Work Folders
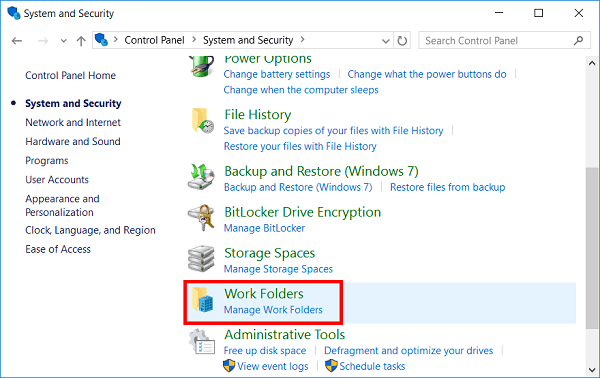
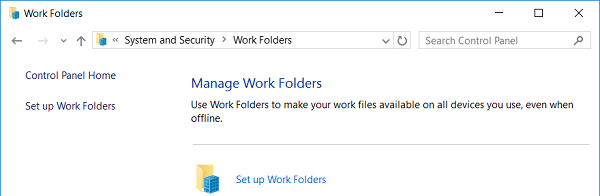
В данном примере в качестве клиента Work Folders используется устройство с Windows 10. Настройка производится через имеющийся апплет в панели управления Control Panel -> System and Security -> Work Folders (этот пункт отсутствует в серверных редакциях).
Чтобы приступить к настройке, нажмите кнопку Set up Work Folders.
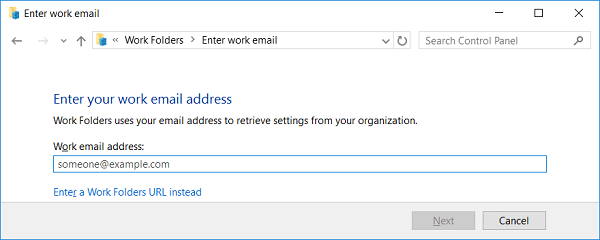
Далее нужно указать Email пользователя или URL адрес сервера Work Folders.
По умолчанию, клиент подключается к серверу по защищенному HTTPS протоколу. В тестовой среде это требование можно отменить, выполнив на клиенте команду:
Reg add HKLM\SOFTWARE\Microsoft\Windows\CurrentVersion\WorkFolders /v AllowUnsecureConnection /t REG_DWORD /d 1
Для доступа к данным нужно авторизоваться и подтвердить согласие с политиками безопасности, которые будут применены к клиенту.
На Windows клиентах рабочие файлы по умолчанию хранятся в профиле пользователя в каталоге %USERPROFILE%\Work Folders и их размер не может превышать 10 Гб.
После подключения клиента к серверу, создается каталог Work Folders. Если файлы в рабочих папках не изменились, клиент каждые 10 минут синхронизируется с файловым сервером. Синхронизация измененных файлов выполняет сразу. Кроме того, при наличии изменений сервер автоматически оповещает другие клиенты о необходимости обновить свои данные с центрального сервера (таким образом, изменения должны максимально быстро появиться на всех подключенных устройствах).
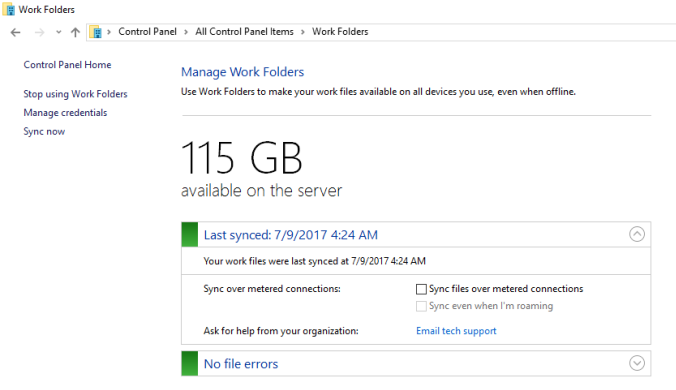
Статус синхронизации, наличие ошибок, размер свободного места на сервере можно посмотреть в том же элементе панели управления.
Чтобы проверить работу синхронизации создайте в папке Work Folders новый каталог, а затем в контекстном меню выберите пункт Sync now.
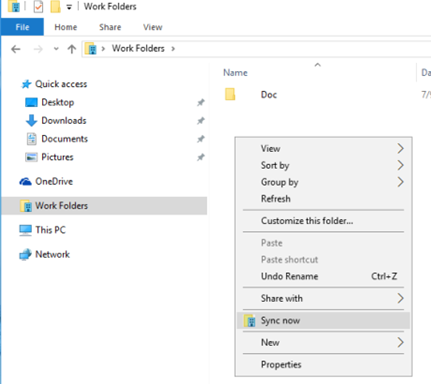
Через некоторое время данный каталог должен появится на сервере.
Настройка клиента Work Folders групповыми политиками Windows
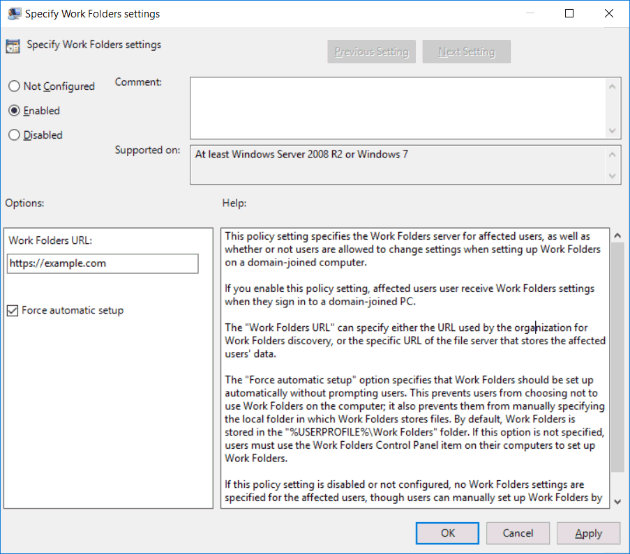
Для автоматической настройки Work Folders можно использовать две специализированные групповые политики в разделе User Configuration -> Policies -> Administrative Templates -> Windows Components -> WorkFolders:
- Specify Work Folders Settings – в ней можно указать URL адрес сервера Work Folders
- Force automatic setup for all users – инициирует автоматическую настройку клинета
Ошибка синхронизации Work Folders 0x80c80317
В тествой конфигурации столкулся с тем, что при синхронизации файлов на клиенте возникает ошибка:

В логе сервера при этом содержатся такие записи:
Данные ошибки свидетельствуют о наличии проблемы в механизме синхронизации. В этом случае для пользователя нужно выполнить команды
Repair-SyncShare -name Finance -user Domain\user1
Get-SyncUserStatus -syncshare Finance -user Domain\user1
Как правило, это решает проблему поломанной синхронизации.
Заключение
Итак, мы рассмотрели, как настроить и пользоваться функцией Work Folders в Windows Server 2016. Данная технология позволяет пользователям удаленно работать с корпоративными файлами практически на любом устройстве, причем можно обеспечить адекватный уровень защиты данных от компрометации с помощью шифрования на стороне клиентского устройства. Конечно, этому решению далеко до удобства и гибкости облачных хранилищ Dropbox или OneDrive, но тут главный аспект заключается в простоте настройки и хранении данные внутри компании, а не в стороннем облаке. Дополнительно с Work Folders можно использовать такие технологии, как возможность управления квотами и типами файлов с помощью FSRM, поддержка файловых кластеров, управление доступом к данным с помощью Dynamic Access Control и File Classification Infrastructure.
Configure Work Folders on Windows Server 2016
Work Folders technology allows users to remotely access their files on the internal corporate file server and allows to work with them offline on any device (laptop, tablet or smartphone). The next time you connect to the corporate network, all changes of these files on a user device will be synchronized with the internal Windows file server. In this article we’ll show how to install and configure Work Folders feature on a file server running Windows Server 2016 and a Windows 10 client.
You can use a file server running Windows Server 2012 R2 as a file storage, and all Windows versions starting from Windows 7, and devices running Android 4.4 or iOS 8 or higher as clients (Work Folders client for these devices is available in Google Play and App Store respectively). Using security policies, you can require Work Folders clients to keep the contents encrypted what guarantees data protection even if the device is lost or stolen
How to Install and Configure Work Folders Role on Windows Server 2016
You can install the Work Folders role in Windows Server 2016 using the Server Manager or PowerShell.
In the first case, select Work Folders option in the File and Storage Services role in the Server Manager. (The required IIS Hostable Web Core components will be automatically added to the installation.)

In PowerShell, the Work Folders role is installed using this command:

Create a new security group in the Active Directory and add to it user accounts that are allowed to synchronize their devices with Work Folders on the file server (for better performance of the Work Folders service by reducing the number of requests to AD, Microsoft recommends adding to this group only user accounts, instead of other security groups).
The next step is to create network shares on your file server that users will synchronize with. You can create the shared folders using Server Manager or PowerShell.
Open the Server Manager, and select File and Storage Services -> Work Folders. Then select Tasks -> New Sync Share.
Then you have to specify the directory to grant access to. In our example, it is C:\finance.

Then select the user folder structure. Folders can be named by a user account (alias) or have the following format: user@domain.

Then enter the name of your sync share.

After that you must specify the security groups that will be granted access to this share.

Specify the security policies of the Work Folders to be applied on a client. There are two policies:
- Encrypt Work Folders – mandatory data encryption on the cached Work Folders directory on a client using BitLocker.
- Automatically lock screen and require a password –automatic screen lock after 15 minutes of device inactivity and password protection (at least 6 characters).

So the configuration of a new Work Folder is finished.
The same actions to create a sync share may be performed using the New-SyncShare cmdlet. For example, the following command creates a new sync share and grants access to it for a group:
New-SyncShare «Sales» C:\sales –User «Sales_Users_WorkFolder»

To access your work files over protected HTTPS connection, you must bind the valid SSL certificate to the IIS website that serves the Work Folders.
The easiest way is to use a free SSL certificate from Let’s Encrypt. The process of issuing and binding the certificate to IIS is described in the article Let’s Encrypt Certificate for Windows (IIS).
Configuring the Work Folders Client on Windows 10
In this example, a device running Windows 10 is used as a Work Folders client. It is configured using the existing applet in the Control Panel: Control Panel -> System and Security -> Work Folders (this item is not available in Windows Server editions).

To start the configuration, click Set up Work Folders.

Then enter the user email or the Work Folders server address.

By default, a client connects to a server through a secure HTTPS protocol. In the test environment this requirement may be ignored by running the following command on the client:
Reg add HKLM\SOFTWARE\Microsoft\Windows\CurrentVersion\WorkFolders /v AllowUnsecureConnection /t REG_DWORD /d 1
To access the data, you have to authenticate and agree to the security policies that will be applied on the client.
By default, Work Folder files on the client are stored in “%USERPROFILE%\Work Folders” in the user profile and size of this folder cannot exceed 10 GB.
After the client is connected to the server, the Work Folders directory is created. If the files in the Work Folders have not changed, the client syncs with the file server every 10 minutes. The changed files are synchronized immediately. Also, if there are any changes, the server automatically notifies other clients and prompts them to update their data from the central server. (Thus, the changes should appear on all connected devices as soon as possible.)
You can see the sync status, errors, the amount of free space available on the server in the same element in the Control Panel.

To make sure if the synchronization works correctly, create a new directory in the Work Folders and then select Sync now in the context menu.

In some time this folder should appear on the server.
Configure Work Folders Client Using Group Policy
To set up Work Folders automatically, you can use two special group policies in User Configuration -> Policies -> Administrative Templates -> Windows Components -> WorkFolders:
- Specify Work Folders Settings where you can specify the URL of the Work Folders server.
- Force automatic setup for all users that initiates automatic client configuration.

Work Folders Synchronization Error 0x80c80317
In a test configuration I have faced an error when synchronizing files on a client:

The server log contains the following entries:
cThe Windows Sync Share service failed to setup a new sync partnership with a device. Database: \\?\C:\users\SyncShareState\WorkFolders\Metadata; User folder name: \\?\C:\Finance\WORKFOLDERS_ROOT\USER.TEST; Error code: (0x8e5e0408) Unable to read from or write to the database.[/alert]
These errors indicate a problem in the synchronization mechanism. In this case, a user must run these commands in the command prompt:
Repair-SyncShare -name Finance -user Domain\user1
Get-SyncUserStatus -syncshare Finance -user Domain\user1
As a rule, this will solve the sync failure problem.
So we looked at how to configure and use Work Folders in Windows Server 2016. This technology allows users to work with corporate files almost on any device at the same time providing adequate level of data protection against compromise due to client-side encryption. Of course, this solution is less comfortable and flexible that cloud-based Dropbox or OneDrive, but the main advantage is that it is easy to set up and the data are stored inside the company instead of a third-party cloud. Together with the Work Folders, you can use quota and file type management using FSRM, Windows failover clusters for file server, and data access management using Dynamic Access Control or File Classification Infrastructure.


