- Make a bootable flash drive from an ISO image
- Win32 Disk Imager
- Win32 Disk Imager Write ISO Image to USB Drive
- CREATE A BOOTABLE USB DRIVE USING WIN32 DISK IMAGER
- DOWNLOAD FILES
- FORMAT THE REMOVABLE DRIVE
- SELECT THE ISO IMAGE
- WRITING THE ISO IMAGE
- STEP – 1: Getting your ISO File.
- Step -2 Format your Flash Drive
- Step-3: Writing the ISO image on flash drive
- Write linux image from windows
- Basics
- Fedora Media Writer
- Etcher
- UNetbootin
- If all else fails: dd
- Test it all — raw USB boot
- Other distributions & tools
- Conclusion
Make a bootable flash drive from an ISO image

We all know that installing an operating system from a USB drive is much faster than installing from DVD. In this article we will look at several ways to create a bootable USB drive.
Before describing how to create a bootable USB drive read the article How to correctly format the USB stick in Linux Mint. In some cases described below, it is desirable to have already formatted the USB flash drive in FAT32 format.
1. LinuxLive USB Creator (only for Windows users)
If you are a user of the Windows operating system and want to make a bootable USB flash drive with a Linux distribution – this program is for you.
It is very simple, select the USB flash drive, please specify the iso image will be copied, turn on the option to format the USB stick and click on the lightning.
You can download the program on the official developer’s website http://www.linuxliveusb.com/en/download.

Rufus is a utility that helps format and create bootable Flash/Pen/Key drives, memory cards, etc.
Rufus will be especially useful in cases where:
-you need to create a bootable USB disk from a bootable ISO image (Windows, Linux, UEFI, and others)
-need to work on systems that have no OS installed
-you need to flash a BIOS or other firmware from DOS
-you need to run a low-level utility
-Despite its small size, Rufus knows how to do everything!

3. UNetbootin (for Linux, Windows, Mac users)
A very common program. The principle of operation is the same as the previous program. Select the image, select the flash drive, and click OK. For details, see the screenshots below.
Installation latest version into Linux Mint 14/15/16/17/17.1:


4. LiveUSB MultiSystem (for Linux users) -To create a bootable USB flash drive with multiple operating systems (windows or linux) read article Create your LiveUSB MultiBoot very simple in Linux Mint.
5. Either – program to burn the iso image with the distro on a USB flash drive or micro SD card (Windows, MacOS and Linux) read article Either – program to record the iso image on a USB flash drive
6. YUMI – Multiboot USB Creator (for Linux, Windows users)
YUMI (Your Universal Multiboot Integrator), is the successor to our MultibootISOs. It can be used to create a Multiboot USB Flash Drive containing multiple operating systems, antivirus utilities, disc cloning, diagnostic tools, and more. Contrary to MultiBootISOs which used grub to boot ISO files directly from USB, YUMI uses syslinux to boot extracted distributions stored on the USB device, and reverts to using grub toBoot Multiple ISO files from USB, if necessary.
Important Note : YUMI was intended to be used to try to run various “LIVE Linux” Operating Systems from USB. Installing Linux from the YUMI created USB Drive to a Hard Drive is not officially supported. If the installer portion of any Live Linux distro does work, consider it a bonus.
Installation latest version into Linux Mint 14/15/16/17/17.1:
Download DEB package “YUMI for Ubuntu Linux” from website

7. USB image writer (for Linux users)
Linux Mint have default utility USB image writer. One time I used this program, but personally I have not always made a bootable USB flash drive.
Locate menu, the program will run. Select the image, select the USB drive and click Write.


Multiboot USB flash drive designed for loading and installing operating systems Windows/Linux and restoration-resuscitation tools directly from the USB drive.
9. WinUSB – Create Windows Usb stick
is a simple tool that allows you to create your own Windows installation on USB stick from an ISO image or DVD disk in Linux Mint.
10. Using the terminal (in my opinion the best 100% of the way)
As is known, the terminal is installed in any Linux distribution by default, so install additional software is not required.
The terminal command to write the iso image, the distribution is as follows:
Where instead of /home/USER/linuxmint.iso you need to specify the path to the iso file. sdb in the end, it’s a stick on which is written the way.
To determine your flash drive, run in terminal:

And if you stick decided differently, change in the command.
To be entered correctly in the command path to the file, open the folder with the file, open next to the terminal and drag the file into the terminal:

Now we are ready to start. I got the command:
The cursor of the terminal is blinking and it seems that nothing happens, but actually being recorded. Wait for the image capture and at the end you should see in the terminal like this:
Источник
Win32 Disk Imager
Win32 Disk Imager
Write ISO Image to USB Drive
Win32 Disk Imager is a program which write a raw disk image to a removable device. Download it and follow step by step file to write ISO File to your USB Drive !
CREATE A BOOTABLE USB DRIVE USING WIN32 DISK IMAGER

DOWNLOAD FILES
To create a bootable drive all you need is ISO file (Which you wants to write) and Win32 Disk Imager (Which you can download from here)

FORMAT THE REMOVABLE DRIVE
Before you perform writing it is always a good practice to plug and format the removable drive / USB Stick. (You can skip this step as the tool will automatically perform this step)

SELECT THE ISO IMAGE
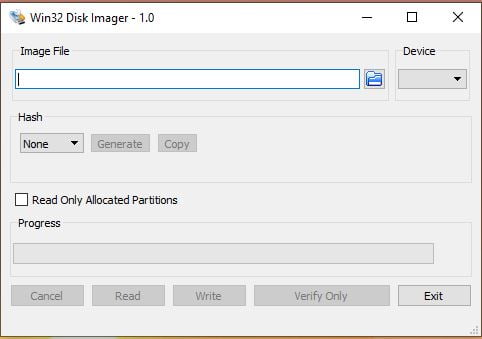
Now Open the Win32 Disk Imager and select the ISO file which you want to write also select the Drive (USB Stick) from the option.

WRITING THE ISO IMAGE
After selecting file path, click on the ‘Write’ button. A pop-up will appears simply click on ‘Yes’. After completing file transfer a Success pop up will appear and you will able to remove the USB Stick, Done!
STEP – 1: Getting your ISO File.
This is a very first and important step. In order to write any ISO Image file you have get a copy of it first. basically we require to write any OS like windows XP or Windows 10 so all you need is an ISO image of that OS. You must be take care that it should not be corrupted.
Getting a copy of windows in ISO file is very is as its available on internet. However if you don’t know where you can get Windows 10 ISO image to make it bootable i will help you here!
Simply follow these steps to get a fresh copy of any OS like Windows 10:
Before you download the tool make sure you have:
- An internet connection (internet service provider fees may apply).
- Sufficient data storage available on a computer, USB or external drive for the download.
- A blank USB flash drive with at least 8GB of space or blank DVD (and DVD burner) if you want to create media. We recommend using a blank USB or blank DVD, because any content on it will be deleted.
- When burning a DVD from an ISO file, if you are told the disc image file is too large you will need to use Dual Layer (DL) DVD Media.
Check a few things on the PC where you want to install Windows 10:
- 64-bit or 32-bit processor (CPU). You’ll create either a 64-bit or 32-bit version of Windows 10. To check this on your PC, go to PC info in PC settings or System in Control Panel, and look for System type.
- System requirements. Make sure the PC meets the system requirements for Windows 10. We also recommend going to the PC manufacturer’s website for additional info about updated drivers and hardware compatibility.
- Language in Windows. You’ll need to choose the same language when you install Windows 10. To see what language you’re currently using, go to Time and language in PC settings or Region in Control Panel.
- Edition of Windows. You should also choose the same edition of Windows. To check what edition you’re currently running, go to PC info in PC settings or System in Control Panel, and look for Windows edition.
Step -2 Format your Flash Drive
In this step you need to make your pendrive/ flash drive writable you need to format it first. To perform a quick format Insert your Flash drive in USB Port then go to my computer and right click on Flash drive and click on format
Now click on start and it will be formatted!
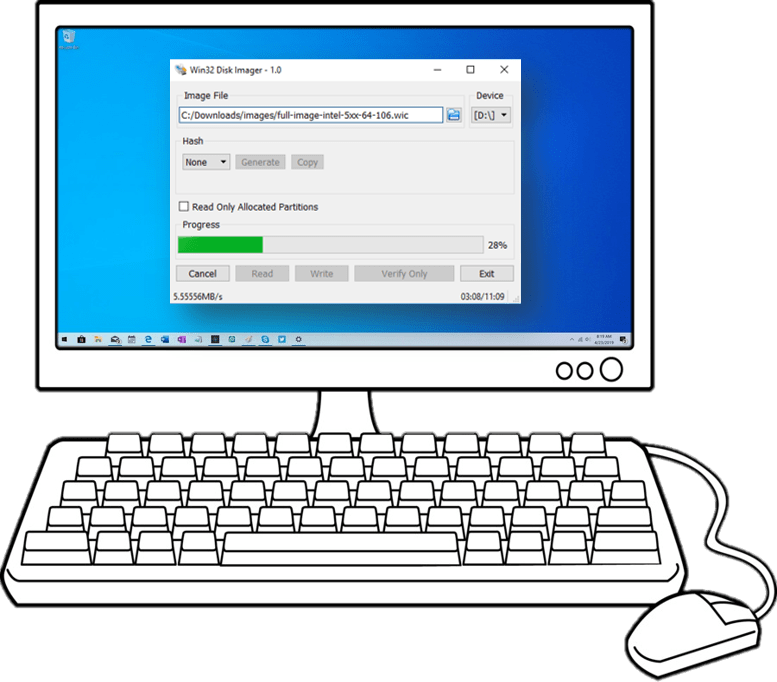
Step-3: Writing the ISO image on flash drive
Now the most important step! First of all Open the Win32 Disk Imager and click on folder icon and navigate the folder where you have downloaded the ISO image; in most of the time it will check for download folder and by default it will pick only ISO file type. So you easily select it.
The simple interface of Win32 Disk Imager ISO allow you to easily understand and simplify the file transfer process. After selecting the ISO Image which you want to write and USB Drive all you need to hit the ‘Write’ button.
Just after clicking on Write button a pop-up will display, for confirmation to continue. After selecting ‘Yes’, a progress bar will show, along with the transfer speed, so that you can monitor the progress until completion. On the Completion of transfer, A Success massage will display which means it perfectly Written the ISO File to USB Drive!
After successful writing the ISO Image file to pendrive you will be able to remove it!
Источник
Write linux image from windows
Updated: October 4, 2017
Captain Obvious to the rescue. This sounds like a trivial topic. You’ve downloaded an ISO file of a Linux distribution, and you want it written to a USB drive so that you can boot and test it. This should pose no problems. Alas, it’s a tricky topic.
There are dozens of different filesystem formats, packaging methods and other fine nuances used in live distributions, leading to some rather unexpected results. The issue is further compounded by the existence of multiple USB image writing tools, each one ever so slightly different from the other, usually serving a particular distro or subset thereof. In this guide, I’d like to impose some order and clarity. Let’s briefly discuss the tools and methods to foolproof USB image writing. After me.
Basics
Image files may come in different formats. For the sake of simplicity, let’s focus on ISO files, even though the principle and commands listed before are fully applicable across a wider pool of formats. Furthermore, we will focus on the Linux side of things only.
In Windows, some if not most of the tools mentioned below also exist and can be used to create bootable media. Again, the mileage may vary, but you should be good to go in about 90% of cases with either theUniversal USB Installer or UNetbootin. That covered, let’s gingerly move on into the Linux territory and crack this nut open like the gentlest of sledgehammers.
Fedora Media Writer
Fedora comes with a very neat image writing tool. It will check for updates, it can download and install new Fedora images for you, including the upcoming betas and whatnot, and it can reset the USB device (basically a single FAT32 partition). The tool is also fairly reliable, and it works with the majority of distributions, including some rather hard to crack nuts. If you’re wondering, what about Ubuntu, well, it doesn’t have any flashy tools of its own. Noticed the pun? I sure did. If you’re wondering about other distributions, we will mention them, too. Relax.
Etcher
This is a relatively new, modern USB writing tool. It’s simple, portable, designed to work across a wide range of Linux distributions without any specific dependencies, thanks to the AppImage format. Elegant, fast and efficient, and it should handle the bulk of your writing. There are some isolated cases where it may not work, but it’s a great start. In fact, I liked it enough to write an entire article on how to use it.
UNetbootin
We come back to UNetbootin. This is a cross-platform USB creation tool, and it works fairly well. It’s simple to use, and it can even download distributions for you, if you want. Now, you may encounter some startup and usage problems, but this is why I’ve written a nice little tutorial to help you work around them.
UNetbootin should be your fallback for those distributions that do not cooperate well with Etcher or Fedora Media Writer. For instance, Nitrux, which comes with the new, interesting Nomad desktop, refused all writing efforts except UNetbootin. This is a big philosophical issue, which touches the fundamentals of Linux fragmentation and standards, but we won’t solve it today, and it’s not the purpose of this guide.
If all else fails: dd
Now, we’re well familiar with dd. It’s no stranger. What it does is simple — it copies, byte for byte, from input to output. It asks no questions, and discriminates against none. To that end, it’s slightly dangerous but brutally efficient. You can use it to write your ISO files directly to external media (be very careful selecting target devices) without having to resort to any GUI tools or wondering too much about the packaging and formatting. Now, in some cases, even this may not work, but it’s as good as it gets.
ddВ if= .iso of=/dev/ bs=4M && sync
Replace /dev/* with relevant target, e.g. sdb, sdc, etc.
Test it all — raw USB boot
Now, what if you want to test the USB before you test it? In other words, how about making sure your image is sane, and it works as it should, and you can actually boot from the external media before you reboot your laptop or whatever?
Indeed, you can use virtualization software to test your USB drives. And we will do it by booting from the raw USB device. We will use the QEMU/KVM software for this purpose. VirtualBox can also do this, but you will actually need to convert the contents of the USB drive to a virtual hard disk.
There are several options here, all of which are valid. Some of the commands are symbolic links to others, but if you stumble upon a problem or there’s something missing, make sure you change them accordingly. Either one:
qemu-kvm -drive file=disk.qcow -usb -usbdevice host: -boot menu=on
Specifically for the second command, for example:
qemu-kvm -m 1024 -smp 1 -drive file=/home/roger/Downloads/disk.qcow -usb -usbdevice host:0781:5572 -boot menu=on
You can detect which USB device ID you need to use with the lsusb command:
lsusb
Bus 001 Device 002: ID 8087:8000 Intel Corp.
Bus 001 Device 001: ID 1d6b:0002 Linux Foundation 2.0 root hub
Bus 003 Device 001: ID 1d6b:0003 Linux Foundation 3.0 root hub
Bus 002 Device 005: ID 0bda:b728 Realtek Semiconductor Corp.
Bus 002 Device 004: ID 5986:0652 Acer, Inc
Bus 002 Device 003: ID 0bda:0129 Realtek Semiconductor Corp. RTS5129 Card Reader Controller
Bus 002 Device 010: ID 0781:5572 SanDisk Corp.
Bus 002 Device 002: ID 045e:0083 Microsoft Corp. Basic Optical Mouse
Bus 002 Device 001: ID 1d6b:0002 Linux Foundation 2.0 root hub
And you may need to create a disk file for this exercise:
qemu-img create -f qcow disk.qcow M
Formatting ‘disk.qcow’, fmt=qcow size=1073741824 encryption=off
If you have multiple virtualization products, you may not immediately succeed. Remember my article on KVM & VirtualBox on the same host? It is still applicable, so you need to make sure the latter is not running during the KVM test.
qemu-kvm -m 1024 -smp 1 -drive file=/home/roger/Downloads/disk.qcow -usb -usbdevice host:0781:5572 -boot menu=on
ioctl(KVM_CREATE_VM) failed: 16 Device or resource busy
failed to initialize KVM: Device or resource busy
And then, it shouldВ all be swell:
Other distributions & tools
Of course, it never ends. OpenSUSE, Manjaro, they all have their own unique features and options. But I think, in general, that Etcher and UNetbootin should satisfy most needs, and on the distro-specific front, Fedora Media Writer is ever so slightly more advanced and error-proof than others, hence its presence in the shortlist.
However, if you’re already using other Linux operating systems and their custom applications, do not let my guide deter you. After all, in this fragmented ecospace, there can be no perfection, only a rough asymptote, which we cover with the tools above. Etcher is probably the most convenient and friendly of the lot, UNetbootin is rugged but can be finnicky to operate, and Fedora has a great utility, but it mandates the use of the distro. Anyway, the world is your writer.
Conclusion
Like everything else in Linux, be it software, desktop environment, the choice of a distro, or any other aspect of the desktop usage, the methodology behind writing ISO images to a USB drive has many paths. Of course, you want the most successful one, to minimize time loss and frustration. There are no absolutes, but we can get near perfect.
Etcher and UNetbootin, in that order, are distro-agnostic tools with great value, and they will handle the bulk of tasks for you. Fedora is another great contender. You can always resort to dd, when things get tough, and wash it all down with KVM, with some funky raw USB boots, to make sure you really have nailed it. Not only do you get a bunch of tools and their reviews, but also workarounds around usage, virtualization hacks, and other neat tips and tricks. Not bad for a humble little tutorial. We’re done.
Источник


