- HOW-TO: Ubuntu ISO и USB флешка
- Установка полноценной Ubuntu на USB-накопитель
- Содержание
- Подготовка к установке
- Запись образа
- Загрузка
- Подготовка USB-накопителя
- Установка
- Ubuntu Documentation
- Outline
- Introduction
- Prerequisites
- Dummy headlines
- Notes about speed
- Notes about size
- Notes about bootability
- The flash hardware
- Creating a bootable Ubuntu USB flash drive from Windows
- Rufus
- balenaEtcher
- Pendrivelinux’s Universal USB Installer
- UNetbootin
- Win32 Disk Imager
- Creating a bootable Ubuntu USB flash drive from Ubuntu
- Install and run Startup Disk Creator alias usb-creator
- UNetbootin
- mkusb — dd image of iso file to USB device safely
- Creating a bootable Ubuntu USB flash drive from Mac OSX
- Test if running in UEFI mode
HOW-TO: Ubuntu ISO и USB флешка
Автор: Ронни Такер (Ronnie Tucker)
Создание загрузочного USB диска не очень сложно, но приходится очень кстати, не только для того, чтобы показать кому-нибудь, как Ubuntu запускается с USB флешки, но и для устранения неполадок и тестирования оборудования. Представьте, вы пришли в компьютерный магазин, и хотите проверить, запустится ли на этой дорогой машине Ubuntu или нет, прежде чем покупать. Спросите, можете ли вы воткнуть USB-брелок в неё. Если вам сказали «нет», то они потеряли покупателя, а вы сохранили деньги.
GParted будет установлен в System > Administration > Partition Editor.

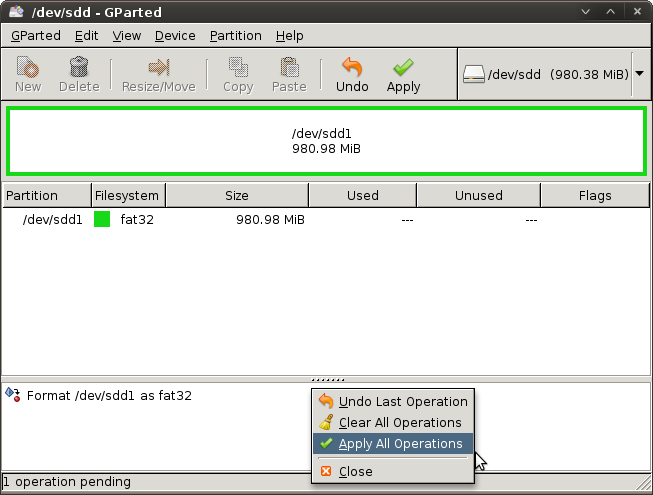
GParted показывает мой список дисков. Теперь, всё что нам нужно — это отформатировать флешку и сделать её загрузочной. Это очень важная часть.
Вставьте USB-брелок и выберите пункт меню GParted > Обновить устройства. В этом списке теперь отображается моя флешка на 1Gb как устройство /dev/sdd ёмкостью 980,33 Mib.

На изображении сверху видно, что на ней занято 480MB. Поэтому её нужно отформатировать. Но перед этим устройство нужно отсоединить. Правой кнопкой мыши нажмите на имени устройства, затем «отсоединить».

Теперь мы отформатируем флешку, опять же, нажав правой кнопкой на имени и выбрав Форматировать в > Fat32. Для большей совместимости, можно выбрать FAT16.

Теперь в нижней части окна GParted появилась новая панель. Здесь вы можете поставить в очередь задания, а потом их последовательно выполнить. Нам нужно только отформатировать, поэтому нажмите правой кнопкой и затем «Применить все операции». Вас спросят, уверены ли вы, нажмите «Применить».
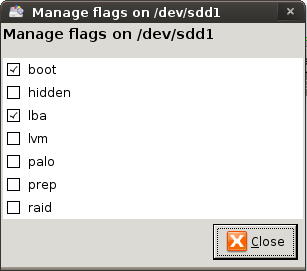
Теперь ваш USB-брелок очищен, но загрузочный ли он? Давайте посмотрим. Правый клик на имени диска в GParted, выберите из меню пункт ‘Manage Flags’.
В моём случае USB является загрузочным, он отмечен галочкой рядом с меткой `boot`. Само собой, если галочка отсутствует, самое время её поставить, и кликнуть на ‘Close’. Теперь USB-брелок готов для Ubuntu. Выдерните USB-брелок, и вставьте заново для его перемонтирования, это понадобится нам в дальнейшем.
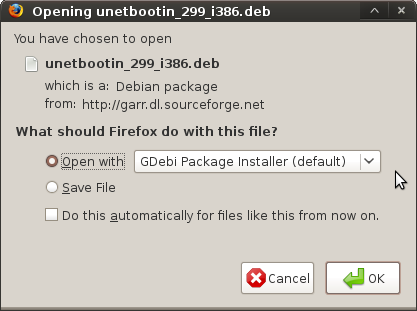
Браузеры, такие как Firefox, спрашивают вас, хотите ли вы сохранить .deb файл на ваш компьютер или открыть загружаемый файл непосредственно в Gdebi для инсталляции. Для удобства я выбираю открыть в Gdebi.
Когда файл будет загружен, появится окно Gdebi и установит Unetbootin для вас. После успешной инсталляции закройте Gdebi.
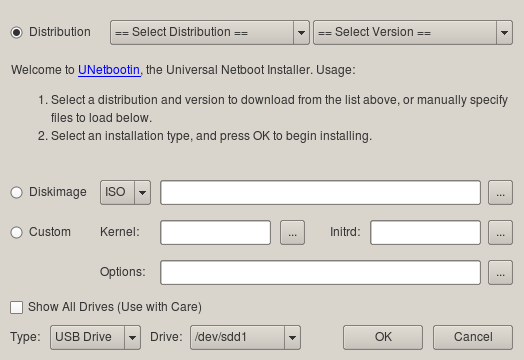
Unetbootin установлен в категорию Приложения > Системные. Запустите Unetbootin и вы увидите экран по умолчанию:

На моей довольно быстрой системе Unetbootin замер на несколько минут в районе 4%. Не беспокойтесь, если это случилось. Помните, вашей системе нужно скопировать около 1 Гигабайта файлов на USB диск.
Вы можете щёлкнуть «Reboot Now» (Перезагрузить сейчас) для проверки загрузочного USB-брелка на своём компьютере или щёлкнуть «Exit» (Выход) для закрытия Unetbootin. Помните, что стоит проверить, правильно ли USB-брелок отмонтирован, прежде чем отсоединить его от компьютера.
Наиболее часто для вывода настроек BIOS используется клавиша Del (на дополнительной клавиатуре), также могут использоваться клавишы F1 или F2. Эти клавиши должны быть нажаты через несколько секунд после запуска компьютера. Если нет необходимости в загрузке с USB-брелка, то верните жесткий диск обратно в качестве первого загрузочного устройства.
Установка полноценной Ubuntu на USB-накопитель
Содержание
Очень часто у людей возникает желание или необходимость поставить Ubuntu на USB-накопитель и получить возможность пользоваться своей ОС на любом компьютере (лишь бы была возможность загрузится с USB).
В этой статье описывается процесс установки Ubuntu на USB-накопители.
Подготовка к установке
Скачайте образ системы отсюда. Если не планируете запускать систему на машинах с более 4 Гб оперативной памяти предпочтительней выбирать 32-х разрядную.
Запись образа
После того, как образ загрузился, его надо записать на CD или USB-накопитель.
На USB носитель образ проще всего записать при помощи UNetbootin. Эта программа существует под большинство популярных ОС (Windows, Linux, Mac) и достаточно проста в обращении. Все что потребуется – указать путь к скачанному образу и выбрать диск, на который будет записан образ.
Загрузка
Перед тем как загрузится, убедитесь, что в BIOS первым загрузочным устройством выбран USB или CD-ROM, в зависимости от того, с чего вы производите загрузку. В BIOS можно попасть нажав клавишу Del для стационарных компьютеров и F2 или F12 для ноутбуков. О том, как выбрать устройство для загрузки смотрите в интернете или читайте инструкцию к вашему компьютеру.
Если все правильно сделано, вы увидите перед собой загруженную с Live CD систему.
Подготовка USB-накопителя
Запустите программу GParted. 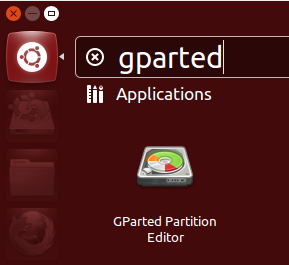
Выберите устройство, на которое вы собираетесь установить Ubuntu. 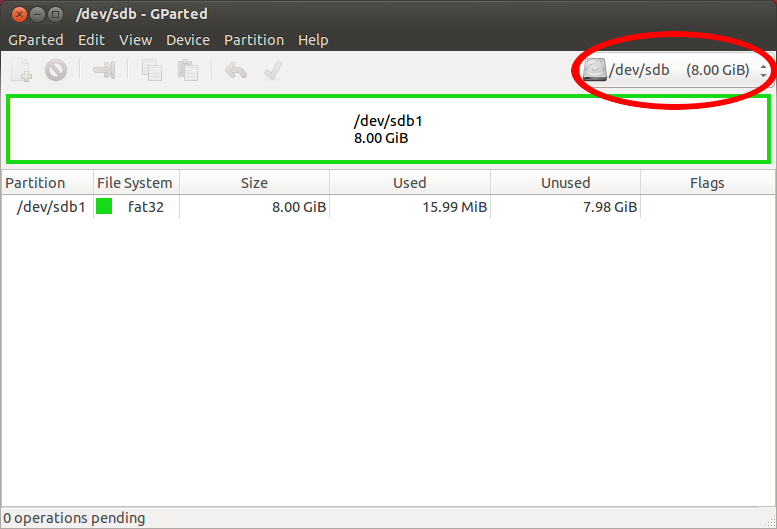
Отформатируйте его в файловую систему Ext2 или Ext4. Так-же можно разделить USB-диск на 2 раздела для того, чтоб его можно было использовать по прямому назначению (перенос файлов с одного компьютера на другой). Для этого первый раздел раздел отформатируйте в FAT32 (для того, чтобы раздел был виден в Windows), вторым разделом выберите файловую систему Ext2 или Ext4 под Ubuntu. На второй раздел желательно выделить минимум 6 Гб, чтобы можно было не переживать за нехватку места для установки дополнительных программ. 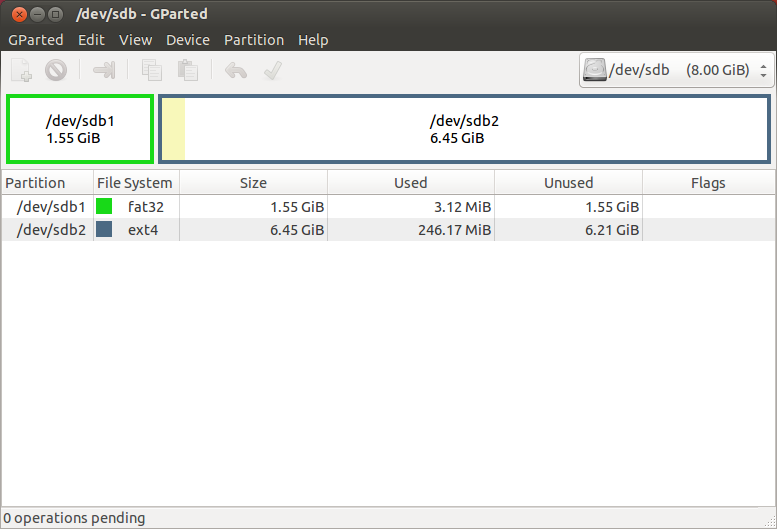
Установка
Дальнейшая установка Ubuntu ничем не отличается от установки на жесткий диск.
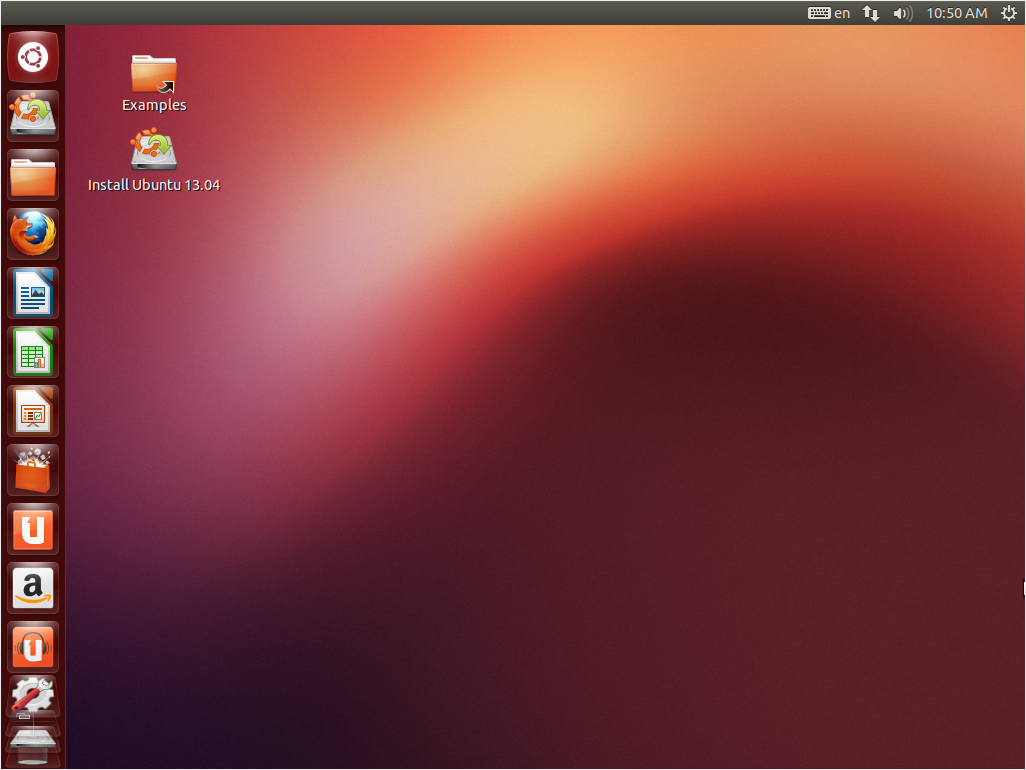
Выберите на рабочем столе Install Ubuntu и выполните установку по скриншотам:
Ubuntu Documentation
Outline
The general procedure to install Ubuntu (or Ubuntu flavour, Kubuntu, Lubuntu, Xubuntu, . ) from a USB flash drive is:
Get the correct Ubuntu installation file, ‘the iso file’, via this link or Ubuntu flavour via this link. Download the iso file into your running computer (for example into the directory Downloads in the internal drive, not into the USB flash drive that you want to make into a USB boot drive).
Check with md5sum (or another checksum tool) that the download was good.
Try Ubuntu (Kubuntu, Lubuntu, Xubuntu, . ) before installing it.
See also: Installation/FromUSBStickQuick for beginners starting from Windows.
Introduction
Ubuntu can be installed from a USB flash drive. This may be necessary for most new portable computers without DVD drives and is handy for others because a USB flash drive is so convenient. Also, you can configure Ubuntu on the USB flash drive to save changes you make, unlike a read-only CD/DVD disk.
Booting from a USB flash drive created with usb-creator alias Startup Disk Creator and mkusb will behave just as if you had booted from the install CD. It will show the language selection and then the install menu, from which you can install Ubuntu onto the computer’s hard drive or launch the LiveCD environment. Other utilities, e.g. UNetbootin, may create slightly different boot drives or if on UEFI might not work at all with Debian iso files due to a bug
Note: This article uses the term «USB flash drive» alongside USB stick, USB drive, USB device, USB pendrive and thumb drive.
Prerequisites
To create a USB installation device, you will need:
a 4 GB USB flash device/drive/stick. If the iso file is smaller than 2 GB, it is possible to use a 2 GB USB device, at least with some of the methods. Files on this USB device will be erased, so backup the files you want to keep before making the device bootable. Some of the tools require that this USB device is properly formatted and mounted while other tools will overwrite whatever is on the target device. Please follow the instructions for each tool.
an Ubuntu flavour ISO file downloaded from an official web page, ubuntu.com/download or http://releases.ubuntu.com, stored in your running computer (for example in the directory Downloads in the internal drive, not in the USB flash drive that you want to make into a USB boot drive).
Check with md5sum (or another checksum tool) that the download was good. In Linux there is the tool ‘md5sum’. In Windows you can do it with Rufus: click on the circle with a tick mark (more about Rufus here.)
Dummy headlines
After a major remake of this help page the following headlines are kept here because they may be linked to from other web sites. Several other headlines further down in the page are also kept for this reason.
Notes about speed
Notes about size
Notes about bootability
The flash hardware
There is a detailed description at the sub-page /pre
Creating a bootable Ubuntu USB flash drive from Windows
There are various methods available for Windows to create a bootable Ubuntu USB flash drive.
NEVER try to use one of your hard disk drives or partitions in this process unless you really know what you are doing, as data will get erased.
Rufus
Rufus is the tool in Windows that is recommended officially by Ubuntu. A tutorial is available from here.
balenaEtcher
Pendrivelinux’s Universal USB Installer
UNetbootin
Win32 Disk Imager
There is a detailed description at /fromWindows including Rufus, balena Etcher, Universal USB Installer, Unetbootin and Win32 Disk Imager.
Creating a bootable Ubuntu USB flash drive from Ubuntu
Install and run Startup Disk Creator alias usb-creator
The Ubuntu Startup Disk Creator is dedicated to creating USB boot drives for Ubuntu and Ubuntu family flavours (Kubuntu, Lubuntu . Xubuntu).
You can find usb-creator-gtk by typing «Startup Disk Creator» (Ubuntu Desktop) or usb-creator-kde in K-Menu—>Applications—>System—>Startup Disk Creator (Kubuntu). If it is not there, then you can install it using the Ubuntu Software Center.
- Insert and mount the USB drive. Inserting the USB drive should auto-mount it.
- Start the Startup Disk Creator
- In the top pane of the Startup Disk Creator, pick the .iso file that you downloaded.
- If the .iso file isn’t listed, click «Other» to locate and select the .iso file that you downloaded.
- In the bottom pane of the Startup Disk Creator, pick the target device, the USB flash drive. If more than one choice, please check carefully, until you are sure that you will be writing to the correct device.
- After checking that you are pointing to the correct target device, the USB flash drive, you can start the action.
You must enter a password because this is a risky operation. Use the password of the current user ID (the same as for login and running tasks with 'sudo'. Password is not required when installing from a ‘live’ system (booted from a DVD disk or another USB flash drive).
The Startup Disk Creator clones the iso file, which means that you need neither erase nor format the target drive. It will be completely overwritten anyway by the cloning process. The Startup Disk Creator looks like this in Ubuntu 18.04 LTS:
Notes
NEVER try to use one of your hard disk drives or SSDs or partitions in this process unless you really know what you are doing, as data will get erased.
There are bugs that affect the Ubuntu Startup Disk Creator, when you run it in old Ubuntu versions in BIOS mode and try to create USB boot drives with other versions. In the Ubuntu Startup Disk Creator version 0.3.2 in Ubuntu 16.04 LTS, these bugs are no longer a problem, so you can install any version of the Ubuntu flavours from 16.04 LTS and newer versions.
UNetbootin
Download UNetbootin
mkusb — dd image of iso file to USB device safely
If you want to clone from a general image file to a drive, you can use mkusb. It lets you clone to any drive that is not busy, also an internal drive, and there are very obvious warnings to prevent mistakes.
- run in Debian and many linux distros that are similar to Ubuntu and Debian,
- clone from iso files of most Linux distros to create USB boot drives,
- create persistent live drives of the Ubuntu family and Debian, using all available drive space for persistence and/or data storage,
- restore a USB boot drive to a standard storage device.
There is a detailed description at /fromUbuntu including the Startup Disk Creator, UNetbootin and mkusb.
Creating a bootable Ubuntu USB flash drive from Mac OSX
There is a good wiki page about booting with UEFI, and a good tutorial thread, UEFI Installing — Tips.
Test if running in UEFI mode
You may want to test if your Ubuntu flavour is running in [U]EFI mode. An installed system and a live system too is using the directory /sys/firmware/efi, so you can run the following command line,
The following command line is more robust and also easier to understand, so you may prefer it (if you copy & paste and are not bothered by typing a long command line),


