- How to Create a Bootable Windows 10 USB in Linux
- Creating a Bootable Windows 10 USB in Linux
- Prerequisite: Get Microsoft Windows 10 ISO and a USB of at least 8 GB in size
- Step 2: Properly format the USB for creating bootable Windows USB
- Step 3: Copy the content of the ISO to USB
- Alternate Method: Creating Windows 10 bootable USB in Linux using WoeUSB
- Step 1: Install WoeUSB application
- Step 2: Format USB drive
- Step 3: Using WoeUSB to create bootable Windows 10
- Step 4: Using Windows 10 bootable USB
- Программы для записи образа на флешку Linux
- 2. Unetbootin
- 3. Etcher
- 4. Ventoy
- 5. Multisystem
- 6. Gnome MultiWriter
- Выводы
- How to Write ISO Image to USB Drive in Ubuntu
- Write ISO Image in Ubuntu – Using gnome-disk-utility
How to Create a Bootable Windows 10 USB in Linux
Last updated October 29, 2020 By Abhishek Prakash 419 Comments
Brief: This tutorial shows you how to create a bootable Windows 10 USB in Linux with and without a GUI tool called WoeUSB.
I have talked a lot about creating bootable USB of Linux in Windows. How about the other way round? How about creating a bootable Windows 10 USB in Linux?
If you are uninstalling Linux from dual boot or if you want to reinstall Windows completely or you simply want to have a Windows installation disk ready, you’ll need a bootable Windows 10 USB or DVD.
In this tutorial, I am going to show you how to create a Windows 10 bootable USB in Linux. I am using Ubuntu for this tutorial but the steps should be valid for other Linux distributions as well.
If you want to use WoeUSB graphical tool for creating Windows bootable USB, you can jump to that section directly. Personally, I don’t recommend WoeUSB.
Creating a Bootable Windows 10 USB in Linux

Prerequisite: Get Microsoft Windows 10 ISO and a USB of at least 8 GB in size
You can download Windows 10 ISO from Microsoft’s website. You have to specify the Windows 10 version, language and then you should see the link to download Windows 10.
Note that the Windows 10 ISO download link is valid for 24 hours only. So use a download manager in Linux to download the
5.6 GB file and finish it within 24 hours only.
Since the ISO and its content are more than 4 GB in size, I recommend a USB of at least 8 GB in size.
I have also made a video of this tutorial so that you can see the steps in action.
Step 2: Properly format the USB for creating bootable Windows USB
Insert your USB. You have to format it so make sure that you don’t have important data on the USB key.
In Ubuntu, press Super key (Windows key) and search for ‘Disks’. You have to use this tool to format the USB key.
In the Disks tool, make sure to select your USB drive and hit format.
It will ask to choose a partitioning scheme. It could be either MBR or GPT. Select one of them and hit Format.
It will show you a warning that you data will be erased.
 Format the USB
The formatting of USB is not over yet. Now, you need to create a partition on the newly formatted USB.
Select the entire USB disk as the partition size.
Give a name to your USB and hit Create button.
Once done, your USB should be automatically mounted. It is now ready for creating bootable Windows 10 USB disk.
Files larger than 4 GB?
Newer Windows 10 ISO might have files larger than 4GB. In that case, FAT filesystem won’t work as it doesn’t allow a single file of size greater than 4 GB.
You should then format the USB in ExFAT format. This newer format allows files bigger than 4 GB.
Step 3: Copy the content of the ISO to USB
Now it’s time to copy the content of the Windows 10 ISO to the newly formatted USB.
You may ask, Abhishek, there is only one file and that is the ISO file itself. What are you talking about?
ISO is basically an archive format and you can see it’s content like any zip file in Linux. But to do that, you need to use ‘Disk Image Mounter’ tool that is installed by default in Ubuntu.
Go to your Windows 10 ISO, select it and right click on it. Now select ‘Open with other application’.
In the applications list, select Disk Image Mounter:
The ISO will be mounted. You may not see it in the left sidebar but if you click on the Other Locations, you should see it. Click on it to enter this mounted ISO folder.
You’ll see its content. All you need to do is to select all the files (Ctrl+A), copy it (Ctrl+C) and paste it in the USB drive (Ctrl+V).
Wait for the copying process to finish as it may take some time in copying 4-5 GB of data. Once it’s done, you have a bootable Windows 10 USB in your hand. Take out the USB and use it to any system you want, restart the system and change the boot settings to boot from the USB.
Alternate Method: Creating Windows 10 bootable USB in Linux using WoeUSB
You can also use a Graphical tool called WoeUSB for creating a bootable Windows USB in Linux. However, this tool might not work perfectly all the time. This is why I prefer the first method of mounting the Windows 10 ISO and copying its content to the USB.
If you are interesting in using WoeUSB, you can click on the next section to expand it and follow the steps.
You can also watch a video of creating Windows 10 bootable USB. Do subscribe to our YouTube channel for more Linux videos:
Let’s see how to create a bootable Windows 10 USB in Ubuntu and other Linux distribution.
Step 1: Install WoeUSB application
WoeUSB is a free and open source application for creating Windows 10 bootable USB. It is actually a fork of WinUSB tool that has been discontinued now.
Ubuntu and other Ubuntu-based Linux distributions such as Linux Mint, elementary OS etc have a PPA available. You can use the command below to install WoeUSB:
For other Linux distributions, you can check out the source code from the GitHub repository:
Step 2: Format USB drive
Now, plug in your USB key. You’ll have to format it first. I presume you know how to format a USB key in your Linux distribution.
Ubuntu users can simply right click on the USB and click format.

The important part here is that you should format it in NTFS:

Note: If you use Fat 32 file system for formatting, you may encounter the error below later on:

Step 3: Using WoeUSB to create bootable Windows 10
We have everything ready for us now. Start WoeUSB program.
Browse to the downloaded Windows 10 ISO file and select the USB drive on which you want to install it. Just click on Install to begin the process.

Note that it may take up to 15 minutes in creating the Windows 10 USB. Don’t get fooled by the ‘done’ on the screen.

That’s it. You should see a success message.

Step 4: Using Windows 10 bootable USB
Once the bootable USB is ready, restart your system. At boot time, press F2 or F10 or F12 repeatedly to go to the boot settings. In here, select to boot from USB.

You’ll see that Windows 10 is being booted and it gives you the option to install or repair your system. You know what to do now from here.

I hope you find this tutorial useful for creating bootable USB of Windows 10 in Linux . If you have questions or suggestions, please feel free leave a comment.
Like what you read? Please share it with others.
Программы для записи образа на флешку Linux
Запись образа на флешку — очень частая задача для тех, кто ещё пытаете выбрать дистрибутив или тестирует новые версии Linux. В Windows мы привыкли к Rufus — это одна из самых лучших, интуитивно понятных и наиболее популярных утилит для записи образов дисков на USB-флешку. Она по праву считается лучшей и используется довольно часто. Но, к сожалению, нет версии этой программы для Linux; если вы новичок и хотите записать образ на флешку, то можете столкнуться с проблемой, чем это можно сделать.
На самом деле в операционной системе Linux есть свои программы для записи образа на флешку Linux, и их достаточно много. В этой статье мы рассмотрим лучшие аналоги Rufus для Linux, а также как ими пользоваться для решения своих задач. Сразу перейдём к списку.
Если вы уже пытались спрашивать на форумах, как записать образ на флешку в Ubuntu, то, наверное, уже слышали совет использовать утилиту dd. Это простая консольная утилита, которая позволяет побайтово переносить данные из одного места в другое, например из файла на флешку.
Несмотря на свою простоту она очень популярна среди опытных пользователей Linux, поскольку может правильно записать данные в большинстве случаев. Использовать эту утилиту очень просто. Нужно указать файл образа откуда будут скопированы данные и раздел на вашей флешке, например:
/ваш_образ.iso of=/dev/sdc bs=5M
Обратите внимание, что есть два возможных способа записи образа на флешку с помощью dd. Это непосредственно на флешку /dev/sdc или на раздел флешки — /dev/sdc1. Обычно работает первый вариант, но вы можете попробовать и второй. Запись образа на флешку займет определённое время, так что вам придется подождать.
После завершения копирования флешка будет готовка к работе. Но это далеко не все способы записи образа на диск, есть программы с графическим интерфейсом, полноценные аналоги Rufus Linux.
2. Unetbootin
Unetbootin — это графическая утилита с открытым исходным кодом для записи образа на USB-флешку. Работает она совсем по-другому. В отличие от dd, здесь флешка должна быть примонтирована к системе и отформатирована в правильную файловую систему. Утилита распакует содержимое образа на флешку, а затем добавит необходимые флаги раздела и установит загрузчик, чтобы всё работало так, как нужно.
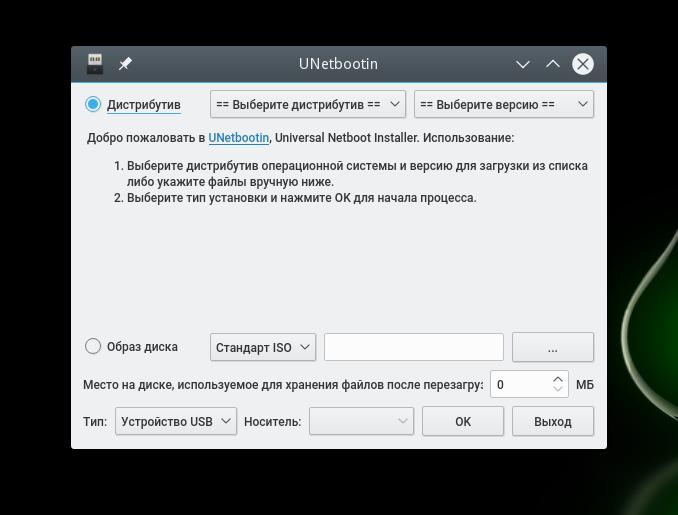
Вы можете выбрать образ из файловой системы или скачать систему автоматически через интернет. Кроме того, вы можете записывать образы дискеты, а также жестких дисков. Еще можно оставить свободное место на флешке, чтобы в будущем записать туда файлы. Это отличная альтернатива Rufus Linux и используется она настолько же часто, как и Rufus в Windows.
Установить программу можно из официальных репозиториев. В Ubuntu для установки наберите:
sudo apt install unetbootin
3. Etcher
Это следующее поколение программ для записи образа на флешку Linux. Etcher — утилита с открытым исходным кодом, которая может работать в Windows, Linux и Mac OS. Но её выгодно отличает ещё одна особенность — это современный графический интерфейс.
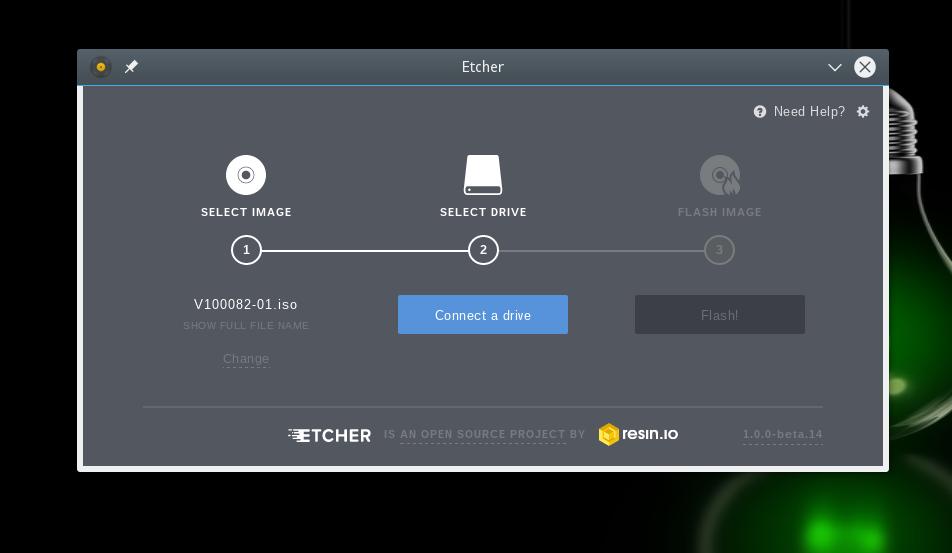
Утилита работает очень просто. Сначала вы выбираете образ диска, который нужно записать, потом флешку, а затем просто нажимаете кнопку Записать (Flash!). Программа сделает всё сама. Она новая, поэтому её ещё нет в официальных репозиториях, но вы можете найти портативный образ AppImage на официальном сайте.
4. Ventoy
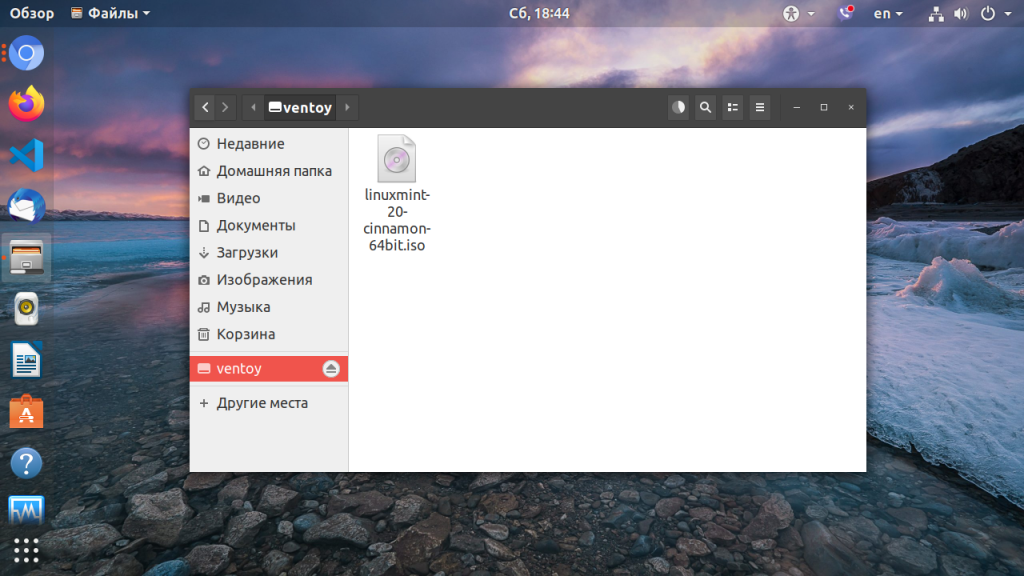
Это утилита, которая позволяет записать образ на флешку не очень стандартным образом. Вам достаточно просто установить программу на флешку, а затем скопировать туда же образ с нужным дистрибутивом. Программа сама разберется как его запустить и какие параметры передать чтобы все работало. Очень удобно. Графического интерфейса у программы нет, но он и не нужен, установку можно выполнить с помощью терминала, а затем копировать нужные образы в файловом менеджере. Более подробно об этой и следующей программе можно прочитать в этой статье.
5. Multisystem
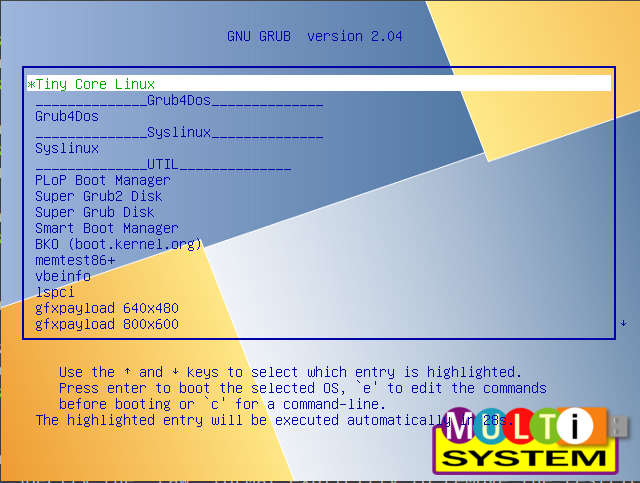
Еще одна утилита с открытым исходным кодом. Она тоже позволяет записывать несколько образов операционных систем на флешку. Всё выполняется быстро и просто. Берёте флешку, выбираете её в программе, далее выбираете несколько образов и записываете их.
Перед тем, как будут добавлены образы, программа установит загрузчик Grub2 на флешку, так что будьте аккуратны при выборе флешки, иначе можно и повредить жёсткий диск.
После этого нам остаётся записать образы и можно пользоваться. Кроме этого, в утилите есть множество настроек загрузчика Grub и Brug, резервное копирование и восстановление флешки, а также поддержка загрузки нужных вам образов из интернета.
6. Gnome MultiWriter
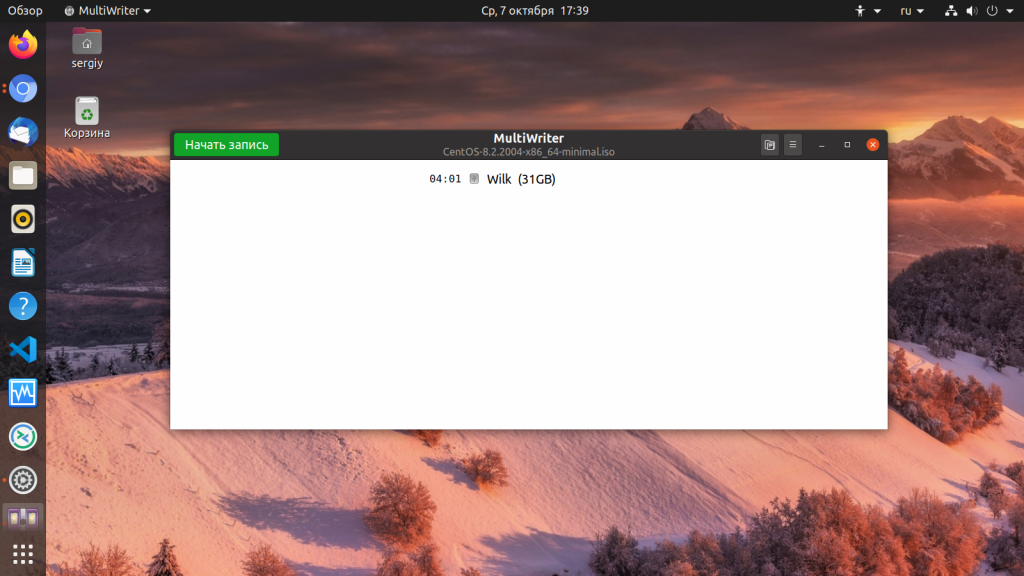
Утилита Gnome MultiWriter — это небольшая программа, разработанная в рамках проекта Gnome. Она позволяет записывать один ISO образ сразу на несколько носителей. Интерфейс программы предельно простой, но свою функцию она отлично выполняет. Для её установки в Ubuntu выполните:
sudo apt install gnome-multi-writer
Выводы
Вот и всё. Мы рассмотрели лучшие аналоги Rufus Linux, с помощью каждой из этих программ вы сможете записать свой образ на USB-флешку. В большинстве случаев всё работает достаточно хорошо. Я для своих целей использую либо dd, либо Unetbootin. А какие программы для записи ISO на флешку Linux используете вы? Напишите в комментариях!
На десерт видео о том, как пользоваться одной из самых популярных программ — Unetbootin:
How to Write ISO Image to USB Drive in Ubuntu
Tutorial on how to write iso image to a USB stick in Ubuntu, Linux Mint.
There are many ways you can write a .iso image directly to a USB stick in Ubuntu and other Linux. In this guide, I use GNOME’s built-in utility ‘Disk’ to write .iso images.
Write ISO Image in Ubuntu – Using gnome-disk-utility
Writing ISO image to a USB stick is a very simple process in Ubuntu. It is applicable for all versions of Ubuntu using the GNOME desktop environment. So, follow the below steps:
- Plugin the USB stick to your desktop/laptop. USB would be auto detected.

- Go to the place where you have kept the disk image iso files. Right-click the image and choose Open With -> Disk Image Writer.

- In the next window, choose the destination which is your USB drive from the dropdown. Click start restoring and provide root password when asked for.

- Wait till the restoring image process is complete.

Thats it. You have succesfully restored an iso image to USB stick using GNOME’s Disk tool.
Drop a comment, if you are facing problem while restoring images.

We bring the latest happenings in the Linux universe, app reviews, tutorials, easy to understand guides for you. Stay in touch via Telegram, Twitter, YouTube, and Facebook and never miss an update!


