Установка XAMPP под Linux Mint 17
May 29, 2014
В этой статье будет рассмотрен вопрос установки локального сервера XAMPP под операционной системой Linux Mint 17.
Почему этот локальный сервер и, тем более, почему именно Linux? Ответы просты — для меня лично сервер XAMPP является наиболее интуитивно понятным. А Linux — потому что в ней мне более удобно кодить на HTML&CSS, нежели под Windows.
Хотя бы взять удобный и полноценный терминал Linux, который всегда под рукой. Также, локальный сервер под Linux, по моим субъективным оценкам, работает гораздо быстрее, нежели под Windows.
С преимуществами работы кодера под Linux разобрались — осталось установить и настроить локальный сервер под эту операционную систему. В этом вопросе нет ничего сложного и есть даже локализованная версия инструкции на официальном сайте Apache Friends -FAQ Linux. В этой статье я постараюсь дать более подробное описание этого процесса, с картинками.
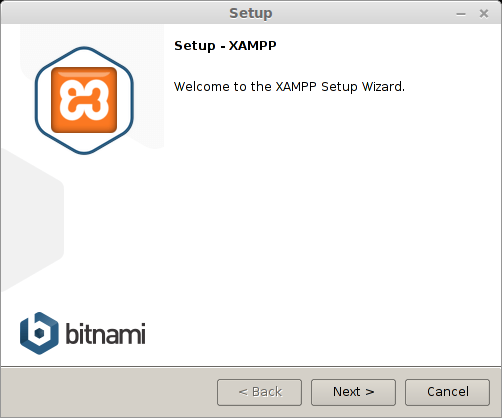
Локальный сервер под Linux выполнен в виде пошагового графического инсталлятора наподобие того, как это делается под Windows. С одной стороны это несколько непривычно для Linux; но с другой стороны так можно быстро и легко установить пакет для новичков в этой операционной системе.
Пакет инсталляции XAMPP под Linux Mint
Скачиваем пакет инсталлятора по ссылке Download официального сайта “Apache Friends”. При этом определяемся, под 32 или 64-битную систему необходим пакет — такой и выбираем. Помимо этого есть две версии пакета — стабильный 1.8.2/PHP 5.4.27 и более новый 1.8.3/PHP 5.5.11.
Мною был выбран пакет 1.8.2/PHP 5.4.27 (именно из-за его стабильности) версии 64-бита, под операционную систему Linux Mint 17 “Qiana” Cinnamon 64-bit.
После скачивания пакета открываю директорию “Downloads” (туда попадают все скачиваемые под Linux файлы) в терминале. Команда ls показывает мне содержимое этой директории — и файл xampp-linux-x64-1.8.2-5-installer.run в частности.
В этом же терминале делаю этот файл исполняемым:
… затем запускаю файл xampp-linux-x64-1.8.2-5-installer.run на выполнение командой:
Инсталляция XAMPP под Linux Mint
Запуститься пошаговый графический инсталлятор локального сервера. Пользователи Windows могут почувствовать себя здесь немного в своей стихии. Ниже приведу скриншоты все шагов установки сервера с кратким их описанием, где это необходимо.
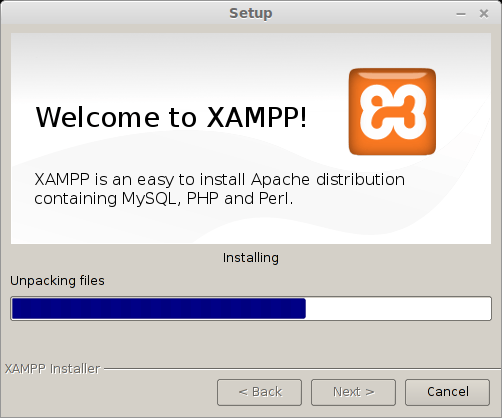
Сервер будет установлен в директорию /opt/lampp :


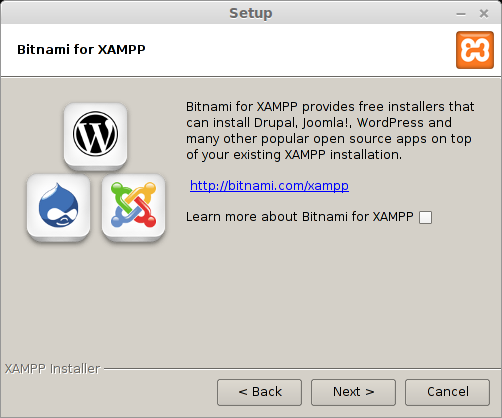
В этом шаге необходимо убрать галочку в строке “Learn more about Bitnami for XAMPP”:
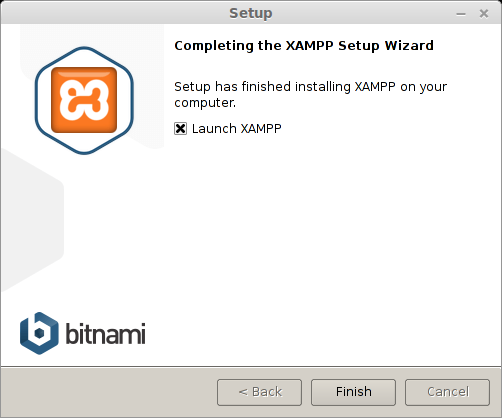
В этом шаге оставляем галочку в строке “Launch XAMPP”, чтобы локальный сервер автоматически запустился после установки:
Запуск и остановка XAMPP под Linux Mint
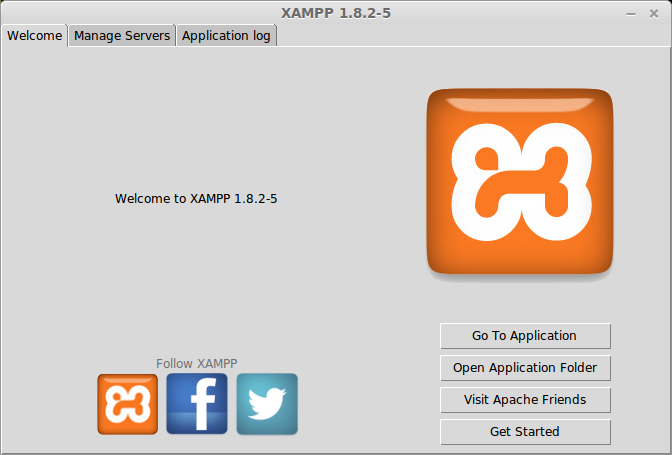
Помимо самого локального сервера будет установлено графическое приложение, задача которого — облегчить управление локальным сервером. Это приложение также запуститься автоматически, но его можно при необходимости запустить и вручную командой:
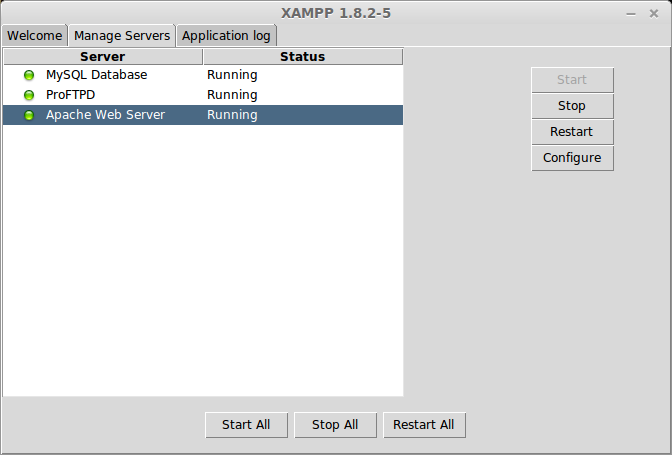
Переходим в этом приложении на вкладку “Manage Servers” и видим список служб локального сервера. Напротив каждой службы в виде лампочки показан ее статус — запущена она (Running) или остановлена (Stopped).

Первоначально запущен только локальный сервер Apache; база данных “MySQL Database” и FTP-сервер “ProFTPD” остановлены. Их можно запустить из данного приложения, просто нажав кнопку “Start”, но я поступлю более Linux-way и воспользуюсь терминалом. Для этого я введу в нем всего одну комадну:
Если все пройдет успешно, то в терминале будет следующий вывод:
… что можно проверить и в приложении:
Остановить локальный сервер можно также из терминала командой:
Установка WordPress под XAMPP в Linux Mint
С установкой локального сервера под Linux Mint разобрались. Стоит еще раз оговориться, что по моим субъективным оценкам он работает гораздо шустрее под Linux, нежели под Windows.
Переходим к заключительной части данной статьи и рассмотрим вопрос установки CMS WordPress под XAMPP в Linux Mint. Все виртуальные сервера располагаются в директории /opt/lampp/htdocs/ .
То есть, если необходимо создать отдельный экземпляр какой-либо CMS (Joomla, WordPress, Drupal и так далее), то нужно просто создать поддиректорию в директории htdocs и распаковать туда нужную CMS. В моем случае такой CMS будет WordPress-3.9.1.
Создаю поддиректорию travel командой:
… и распаковываю в нее скачанный архив WordPress с помощью незаменимой консольной программы mc (не забудьте запустить ее через sudo , иначе получите ошибку прав доступа):

После распаковки WordPress приступим к его установке. Создадим вручную конфигурационный файл wp-config.php чтобы избежать ошибки прав доступа при обычной пошаговой инсталляции WordPress (не забываем, что мы находимся под Linux!). Для этого скопируем файл-шаблон wp-config-sample.php в ту же директорию под именем wp-config.php :
… и отредактируем его через редактор nano:
Затем в адресной строке браузера введем (XAMPP у нас все еще запущен, не забываем об этом!):
… и в приложении phpMyAdmin создаем базу данных под наш будущий локальный сайт, на котором будет “крутиться” WordPress. Перезапускаем локальный сервер, чтобы он “подхватил” изменения в базе данных MySQL и создание виртульного сервера travel в директории htdocs :
В браузере в адресной строке запускаем установку WordPress:
… далее проходим оставшиеся стандартные шаги инсталляции WordPress и получаем готовый локальный сайт — переходим на него по адресу:
На этом установка CMS WordPress под локальный сервер успешно завершена. А также успешно выполнена рассмотренная выше инсталляция локального сервера под операционной системой Linux Mint 17 “Qiana” Cinnamon 64-bit.
Заключение
Итог выполненных выше шагов — возможность иметь всегда “под рукой” готовый к работе локальный сервер. Еще один плюс к удобству кодинга под Linux. А кодинг под Linux субъективно для меня удобнее кодинга под Windows.
Стоит также сказать, что при установке и настройке могут возникнуть проблемы. В частности, автором данной статьи первоначально производилась установка “чистого” LAMPP, которая потом была удалена. И, хотя деинсталляция была произведена правильно, последующая установка XAMPP привела к тому, что данный сервер не запускался на компьютере.
TypeScript — размеченные объединения
> Пользовательское объединение типов — что это и как можно использоватьПомимо объединения **примитивных** типов данных (например):<% high. … Continue reading
Источник
Linux Frequently Asked Questions
Choose your flavor for your linux OS, the 32-bit or 64-bit version.
Change the permissions to the installer
chmod 755 xampp-linux-*-installer.run
Run the installer
That’s all. XAMPP is now installed below the /opt/lampp directory.
Does XAMPP include MySQL or MariaDB?
Since XAMPP 5.5.30 and 5.6.14, XAMPP ships MariaDB instead of MySQL. The commands and tools are the same for both.
How do I start XAMPP?
To start XAMPP simply call this command:
sudo /opt/lampp/lampp start
You should now see something like this on your screen:
Starting XAMPP 1.8.2.
LAMPP: Starting Apache.
LAMPP: Starting MySQL.
LAMPP started.
Ready. Apache and MySQL are running.
If you get any error messages visit our community pages for help.
Also, note that there is a graphical tool that you can use to manage your servers easily. You can start this tool with the following commands:
cd /opt/lampp
sudo ./manager-linux.run (or manager-linux-x64.run)
How do I stop XAMPP?
To stop XAMPP simply call this command:
sudo /opt/lampp/lampp stop
You should now see something like this on your screen:
Stopping XAMPP 1.8.2.
LAMPP: Stopping Apache.
LAMPP: Stopping MySQL.
LAMPP stopped.
If you get any error messages visit our community pages for help.
Also, note that there is a graphical tool that you can use to start/stop your servers easily. You can start this tool with the following commands:
cd /opt/lampp
sudo ./manager-linux.run (or manager-linux-x64.run)
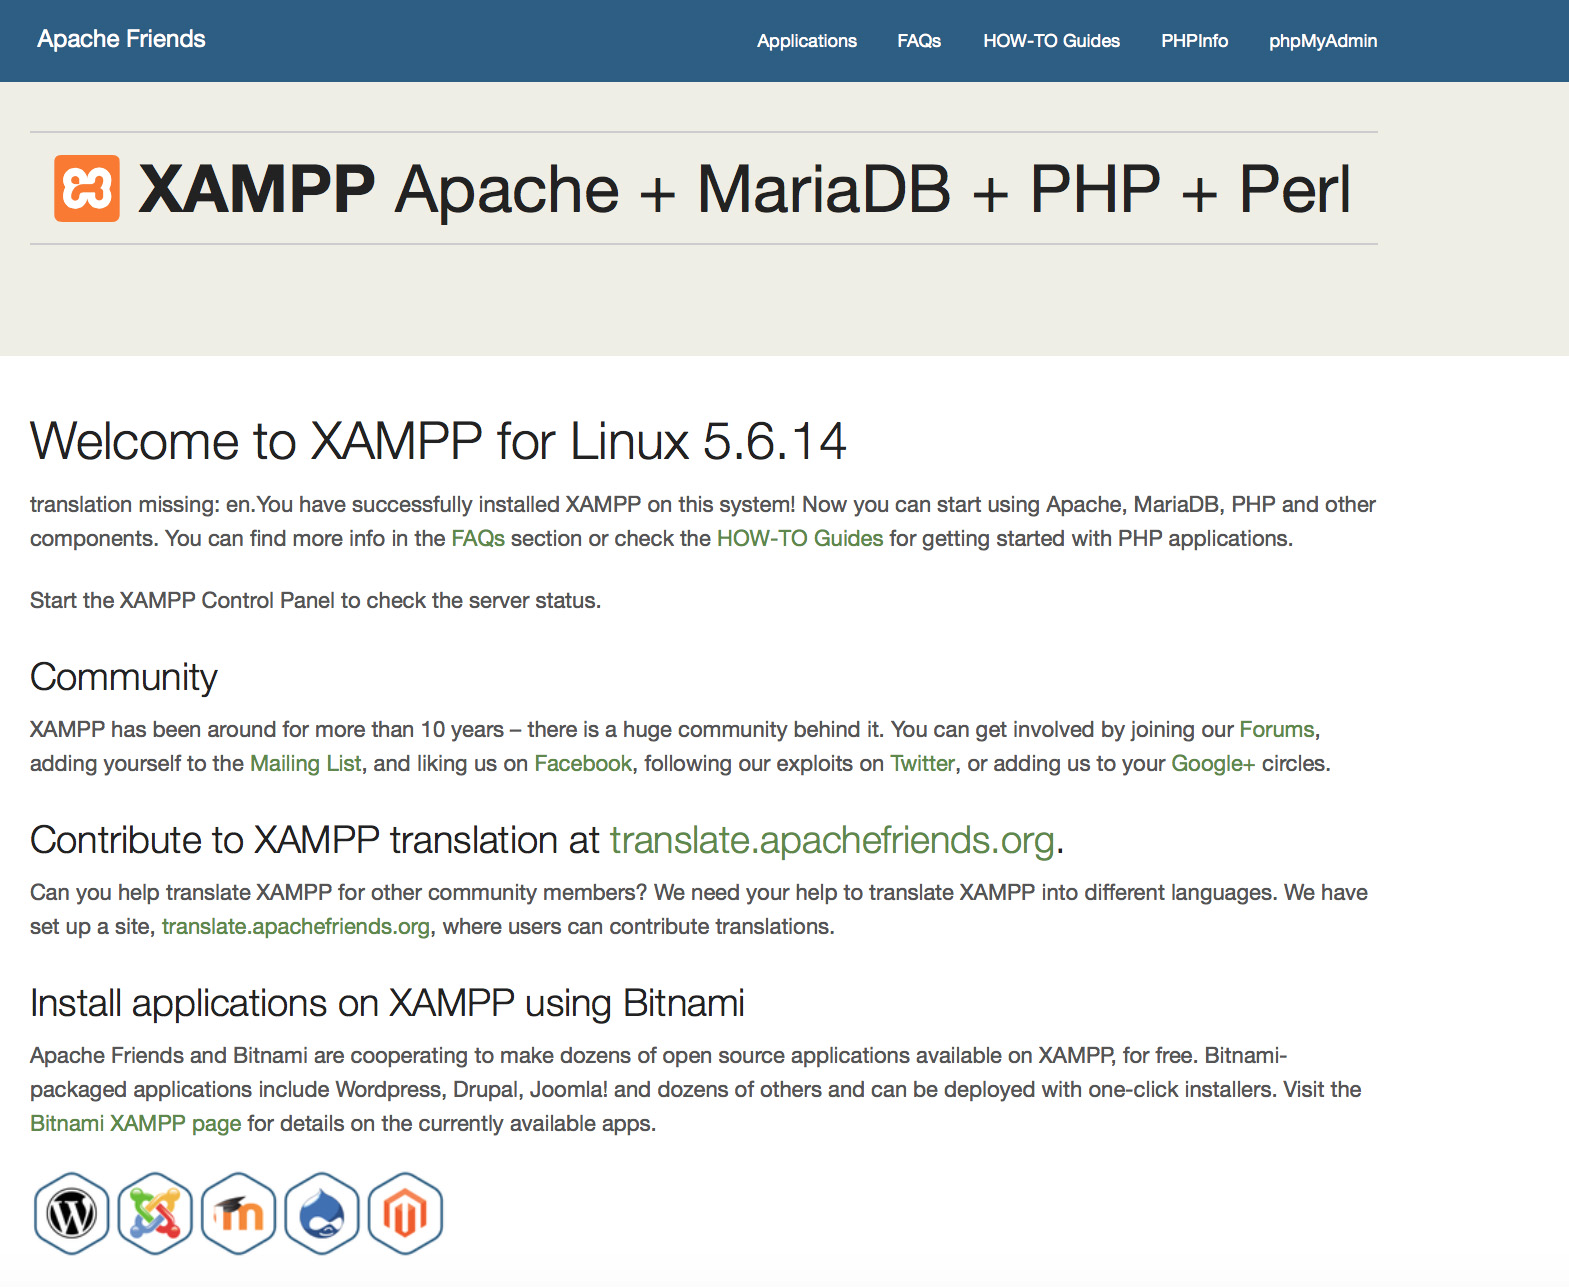
How can I test that everything worked?
Type in the following URL at your favourite web browser:
You should see the XAMPP start page, as shown below.
 Is XAMPP production ready?
XAMPP is not meant for production use but only for development environments. XAMPP is configured to be open as possible to allow the developer anything he/she wants. For development environments, this is great but in a production environment, it could be fatal.
Here a list of missing security in XAMPP:
- The MySQL administrator (root) has no password.
- The MySQL daemon is accessible via network.
- ProFTPD uses the password «lampp» for user «daemon».
To fix most of the security weaknesses simply call the following command:
sudo /opt/lampp/lampp security
It starts a small security check and makes your XAMPP installation secure. For example this protects the XAMPP demo pages by a username (‘lampp’) and password combination.
What is the meaning of the error messages I see when starting XAMPP?
You may get several error messages while starting XAMPP:
LAMPP-Apache is already running.
An Apache daemon is already running.
The LAMPP startup script did not start XAMPP-Apache because there is an Apache instance already running. To start XAMPP properly, first you have to stop this daemon.
LAMPP-MySQL is already running.
A MySQL daemon is already running.
Mostly due to the same reasons as the above error, the LAMPP startup script found a MySQL daemon already running on your system. To start LAMPP properly, you have to stop this daemon first.
Apache doesn’t seem to start. What can I do?
This error can exist for multiple reasons. Apache displays this error under several circumstances. To find the exact reason, you have to do some research:
tail -2 /opt/lampp/logs/error_log
If you get any error messages visit our community pages for help.
What do I do if the error message is «Cannot restore segment prot after reloc: Permission denied?»
Some Linux distributions have SELinux activated by default and this is preventing the successful start of XAMPP. You should disable it in order to start the XAMPP servers:
sudo /usr/sbin/setenforce 0
Now XAMPP should work fine again.
After I rebooted my Linux box XAMPP stopped running! How can I fix this?
Correct. That’s normal Linux behaviour (which applies to any other Unix-like system). It’s the admin’s job to make sure a particular application is started at bootup.
There is no real standard way to configure the boot process of a Linux system, but most of them should allow you to start XAMPP at boot time using the following steps.
Debian, Ubuntu.
sudo ln -s /opt/lampp/lampp /etc/init.d/lampp sudo update-rc.d lampp start 80 2 3 4 5 . stop 30 0 1 6 .
RedHat, Fedora, CentOS. If your Linux distro uses «chkconfig» tool to install the services you can run the following commands:
sudo ln -s /opt/lampp/lampp /etc/init.d/lampp
sudo chkconfig —add lampp
SUSE
sudo ln -s /opt/lampp/lampp /etc/init.d/lampp sudo chkconfig lampp 2345
How can I make my XAMPP installation more secure?
By default, XAMPP has no passwords set and it is not recommended to run XAMPP with this configuration as it is accessible to others.
Simply type the following command (as root) to start a simple security check:
sudo /opt/lampp/lampp security
Now you should see the following dialog on your screen:
XAMPP: Quick security check. XAMPP: MySQL is accessable via network. XAMPP: Normaly that’s not recommended. Do you want me to turn it off? [yes] yes XAMPP: Turned off. XAMPP: Stopping MySQL. XAMPP: Starting MySQL. XAMPP: The MySQL/phpMyAdmin user pma has no password set. XAMPP: Do you want to set a password? [yes] yes XAMPP: Password: ****** XAMPP: Password (again): ****** XAMPP: Setting new MySQL pma password. XAMPP: Setting phpMyAdmin’s pma password to the new one. XAMPP: MySQL has no root passwort set. XAMPP: Do you want to set a password? [yes] yes XAMPP: Write the passworde somewhere down to make sure you won’t forget it. XAMPP: Password: ****** XAMPP: Password (again): ****** XAMPP: Setting new MySQL root password. XAMPP: Setting phpMyAdmin’s root password to the new one. XAMPP: The FTP password for user ‘nobody’ is still set to ‘lampp’. XAMPP: Do you want to change the password? [yes] yes XAMPP: Password: ****** XAMPP: Password (again): ****** XAMPP: Reload ProFTPD. XAMPP: Done.
(1) Setting a password will protect the XAMPP demo pages (http://localhost/xampp/) using this password. The user name is ‘lampp’!
After running this command, your XAMPP installation should be more secure.
How do I activate eAccelerator?
To activate eAccelerator simply find the following lines in your /opt/lampp/etc/php.ini:
;extension=»eaccelerator.so» ;eaccelerator.shm_size=»16″ ;eaccelerator.cache_dir=»/opt/lampp/tmp/eaccelerator» ;eaccelerator.enable=»1″ ;eaccelerator.optimizer=»1″ ;eaccelerator.check_mtime=»1″ ;eaccelerator.debug=»0″ ;eaccelerator.filter=»» ;eaccelerator.shm_max=»0″ ;eaccelerator.shm_ttl=»0″ ;eaccelerator.shm_prune_period=»0″ ;eaccelerator.shm_only=»0″ ;eaccelerator.compress=»1″ ;eaccelerator.compress_level=»9″
Remove the semicolon at the beginning of each line and restart XAMPP. eAccelerator is now active. For more information about eAccelerator, check the eAccelerator home page: http://eaccelerator.net.
How do I activate the OCI8/Oracle extension for PHP?
To activate the OCI8/Oracle extension for PHP please execute the following command:
sudo /opt/lampp/lampp oci8
The following dialog will start:
Please enter the path to your Oracle or Instant Client installation: [/opt/lampp/lib/instantclient-11.2.0.3.0] installing symlinks. patching php.ini. OCI8 add-on activation likely successful. LAMPP: Stopping Apache with SSL. LAMPP: Starting Apache with SSL.
The extension should now be active.
XAMPP runs, but why are none of the images being displayed?
That’s a special problem with some Linux systems. Please open your /opt/lampp/etc/httpd.conf and look for these two lines:
#EnableMMAP off #EnableSendfile off
Remove the # in both lines and restart your Apache. Your images should be back.
How do I enable access to phpMyAdmin from the outside?
In the basic configuration of XAMPP, phpMyAdmin is accessible only from the same host that XAMPP is running on, at http://127.0.0.1 or http://localhost.
IMPORTANT: Enabling external access for phpMyAdmin in production environments is a significant security risk. You are strongly advised to only allow access from localhost. A remote attacker could take advantage of any existing vulnerability for executing code or for modifying your data.
To enable remote access to phpMyAdmin, follow these steps:
- Edit the etc/extra/httpd-xampp.conf file in your XAMPP installation directory.
- Within this file, find the lines below.
Alias /phpmyadmin «/opt/lampp/phpmyadmin/» AllowOverride AuthConfig Require local
Then replace ‘Require local’ with ‘Require all granted’.
Alias /phpmyadmin «/opt/lampp/phpmyadmin/» AllowOverride AuthConfig Require all granted
Where are the main XAMPP configuration files?
The main XAMPP configuration files are located as follows:
- Apache configuration file: /opt/lampp/etc/httpd.conf, /opt/lampp/etc/extra/httpd-xampp.conf
- PHP configuration file: /opt/lampp/etc/php.ini
- MySQL configuration file: /opt/lampp/etc/my.cnf
- ProFTPD configuration file: /opt/lampp/etc/proftpd.conf
How do I send email with XAMPP?
To send email with XAMPP, use the PEAR Mail and Net_SMTP packages, which allow you to send email using an external SMTP account (such as a Gmail account). Follow these steps:
- Install the Mail and Net_SMTP PEAR modules: pear install Net_SMTP Mail Note that if these packages are already installed in your system you see the messages below when executing that command: Ignoring installed package pear/Net_SMTP Ignoring installed package pear/Mail Nothing to install
- Create the following example script in your «htdocs» directory to send an email: $from, ‘To’ => $to,’Subject’ => $subject); $smtp = Mail::factory(‘smtp’, array (‘host’ => $host, ‘port’ => $port, ‘auth’ => true, ‘username’ => $username, ‘password’ => $password)); $mail = $smtp->send($to, $headers, $body); if (PEAR::isError($mail)) < echo($mail->getMessage()); > else < echo("Message successfully sent!\n"); >?>
Remember to replace the dummy values shown with your actual Gmail address and account password. If you don’t plan to use Gmail’s SMTP server, replace the SMTP host details with appropriate values for your organization or ISP’s SMTP server.
How do I backup/restore my XAMPP system?
WARNING: The backup and restore functionality is still under development and may not work correctly.
You can create the backup by calling:
sudo /opt/lampp/lampp backup
sudo /opt/lampp/lampp backup secret
Where «secret» is your MySQL root password. This command will create the following output:
Backing up databases. Backing up configuration, log and htdocs files. Calculating checksums. Building final backup file. Backup finished. Take care of /opt/lampp/backup/xampp-backup-22-01-14.sh
The file /opt/lampp/backup/xampp-backup-22-01-14.sh (in the example above) contains your backup. Store this file in a safe place.
On the new machine you need the same version of XAMPP as on your original/source machine.
sudo sh xampp-backup-22-01-14.sh
You should see something like this:
Checking integrity of files. Restoring configuration, log and htdocs files. Checking versions. Installed: XAMPP 1.4.2 Backup from: XAMPP 1.4.2 Restoring MySQL databases. Restoring MySQL user databases. Backup complete. Have fun! You may need to restart XAMPP to complete the restore.
That’s all. Keep in mind that it’s a beta feature.
Support
Visit our our community pages for additional help.
Источник


