- Xcode install (on MacOS)
- About Xcode
- Overlapping installers
- What Has Been Installed?
- Delete first
- More version information
- Xcode Version
- Swift version
- UnInstall Command Line Tools
- Install Command Line Utilities only
- Xcode IDE install from Terminal
- A) Initial install from Terminal CLI
- After starting again
- B) Initial IDE install using web App Store
- Xcode size
- Xcode IDE Upgrade
- Xcode FileMerge tool
- Xcode 13
- Easy setup
- Team comments inline
- Quick compare
- Cloud signing
- Bottom bar
- Vim mode
- CarPlay simulator
- Instant crash reports and feedback
- Custom documentation
- Xcode Cloud beta
- Get started.
- How to Install Xcode Command Line Tools on a Mac
- What are Xcode Command Line Tools?
- How to Install Xcode Command Line Tools from a Command Prompt
- How to Use Homebrew to Install Xcode Command Line Tools
- More information
- Your development environment
Xcode install (on MacOS)
Xcode IDE contain Command-Line utilities. But separate Command-Line installer cause errors for use by Homebrew, Python, and other development tools
This tutorial describes the installation and usage of Apple’s Xcode set of utilities for macOS developers.
Xcode is Apple’s free app for developing custom programs for all Apple devices (macOS, iPhone, iPad, Apple Watch). Increasingly, Machine Learning developers are using the Swift language.
Since the Apple Store only handles individual .app files, other mechanisms are needed to install additional programs needed as a pre-requisite by Homebrew, Python, and other development programs.
BTW Xcode only works on macOS. There is no Windows PC version.
About Xcode
Otherwise, read on for a run-around.
Use an internet browser to view Apple’s Xcode marketing page at:
Xcode “includes everything you need to create amazing apps for all Apple platforms. Now Xcode and Instruments look great in the new Dark Mode on macOS Mojave. The source code editor lets you transform or refactor code more easily, see source control changes alongside the related line, and quickly get details on upstream code differences. You can build your own instrument with custom visualization and data analysis. Swift compiles software more quickly, helps you deliver faster apps, and generates even smaller binaries. Test suites complete many times faster, working with a team is simpler and more secure, and much more.”.
BTW the “Apple platforms” include MacOS, iPhone, iPad, Apple TV, and Apple Watch.
Xcode does not come with macOS because of its large size and because many users of macOS don’t need it to do software development.
Developers who use another IDE (such as Visual Studio, Eclipse, etc.) would only need to install Xcode’s command line utilities for the GCC compiler Python needs to build code.
PROTIP: Newer versions of Xcode installer also installs a Git client.
Overlapping installers
Imagine a Venn diagram of overlapping circles:
The Xcode IDE, which can be installed on a Terminal command line interface (CLI) or
Either way, Xcode contains:
- Command Line Utilities which can be installed separately on a Terminal command line session.
PROTIP: Xcode IDE cannot be installed if Command Utilities has already been installed.
However, you can switch:
So choose which one you want installed.
What Has Been Installed?
In a Terminal window, find out what has been installed:
That’s the same command as:
If the Xcode-select command is not found, choose to either install Command Line Tools or install the full Xcode IDE.
You have Command Line Tools installed and not the full Xcode if you see the path where CommandLineTools are installed:
If all you need is Command Line Tools, you’re good to go.
Alternately, if the full Xcode was installed, you would instead see:
Get a list of its folders if Xcode IDE was installed:
The response would be:
Delete first
PROTIP: If you want the full Xcode IDE when you have the Command Line Tools installed, first uninstall Command Line Tools, then install the full Xcode IDE.
More version information
Xcode Version
From within a Terminal, type:
If Command Line Tools was installed, you would see:
If Xcode is installed, you would get a version code that should match up with the Build Number on the Apple web page:
For a more precise version number and other info (macOS Mavericks version and up):
A sample response, at time of writing:
The previous command was constructed based on a search of tools package names:
Get the version of GCC installed:
If Xcode was installed, you would see (at time of writing):
Previously, it was instead:
If Command Line Utilities is installed, you would see (at time of writing):
Identify the path where the make utility Java uses:
a. If Xcode is installed, the response is:
b. If Command Line Utilities is installed, the response is:
c. If no Xcode is installed:
Swift version
Get the version of the Swift program used to develop iOS mobile apps:
Sample response at time of this writing:
If jamf installed Xcode, you’ll also see:
The above appears regardless of whether Command Line Utilities or Xcode is installed.
From here, uninstall and install Command Line Tools or install the full Xcode IDE.
UnInstall Command Line Tools
PROTIP: This is also how you upgrade Command Line Tools.
Go to the parent folder where Command Line Tools is installed:
Get a list of its folders:
If Command Line Tools were installed, the response would be :
Remove all files in that folder, which requires a password for elevated permissions to get all the files:
The response is a lot of files removed (to the Trash).
Now you can choose to either install Command Line Tools or install the full Xcode IDE.
Install Command Line Utilities only
To install the whole Xcode IDE:
You should see this pop up:

Manually click “Install”, “Agree”, then “Install” to the “Updates Available” pop-up.
NOTE: The xGB download takes 13 minutes on a 10mbps line.
When you see “The software was installed.”, click “Done” to dismiss the pop-up.
Xcode IDE install from Terminal
Make sure you have at least 13GB free on your hard-drive before attempting installation.
- Click the Apple icon to select “About this Mac”.
- Click “Storage” tab.
In an internet browser, get to the “Mac App Store Preview” for Xcode at
https://apps.apple.com/us/app/Xcode/id497799835?mt=12

Click View in Mac App Store, then “Open App Store.app” in the pop-up.
Provide your Apple ID and password. Get one if you don’t already have one.
PROTIP: DO NOT install a beta version of Xcode.
The blue “OPEN” icon appears at the upper-right when the app is installed. But don’t click it because we are done.
In Finder, look for Xcode.app in the /Applications folder.
Alternately, on the Touchpad pinch 4 fingers together to click the App Store. Type enough of “Xcode” to filter out others.
To view the version, cursor to the top of the screen and click the program name next to the Apple icon to select “About Xcode”:

A) Initial install from Terminal CLI
Open a Terminal.app console window at any directory to install -all the latest Xcode from Apple:
The response on Catalina version of macOS:
Click the Apple icon at the upper-right corner and select “Shut Down…”.
After starting again
Set Apple’s licensing agreement bit:
Manually agree to the terms.
Get the version number of the new version.
B) Initial IDE install using web App Store
Sign in to Apple Developer with your email address then click the arrow icon. Enter your password, then click the arrow icon.
Below is the “Software Update” approach:
You’ll need to establish an Apple ID if you haven’t already.
Click the cloud icon Download and provide your Apple ID.
Go through Apple’s location verification if prompted.

Confirm your account.
Click “Allow” to the pop-up “Do you want to download?”.
Xcode size
CAUTION: Make sure that your machine has enough free space available.
These are massive files that may take a while to download if you don’t have a fast internet connection.
NOTE: Each version of Xcode is related to a specific version of the Apple OS Mac operating system.
| File | Date | Download | Unpacked |
|---|---|---|---|
| Xcode_12.1 | 2020-10-01 | 10.5 GB | 11.5 GB |
| Xcode_11.5 | 2020-06-01 | 7.5 GB | ? GB |
| Xcode_10.2.1 | 2019-04-17 | ? GB | 6.1 GB |
| Xcode_9.0 | 2017-09-19 | . ? GB | ? GB |
| Xcode_8.2.1 8C1002 | 2016-12-19 | ? GB | ? GB |
| Xcode_8_beta_2.xip | 2016-07-05 | 5.9 GB | 12.32 GB |
| Xcode_7.31 | 2016-05-03 | 3.8 GB | ? |
| Xcode_4.1 | 2014- | 2.9 GB | ? |
| Xcode_3.2.4 | 2014- | 2.? GB | ? |
Switch to Finder Downloads folder to watch progress on the file name ending with “Download”. The one with a clock icon which signifies downloading.
Return to the versions instructions above to view the updated version.
Delete the installer after you’re done, to reclaim disk space.
Xcode IDE Upgrade
Over time, Apple updates Xcode and its command line utilities.
Click the Apple icon, then click System Preferences. Here is an example notification:

Xcode FileMerge tool
Xcode graphically compares files and directories.
Open Xcode. This takes a few seconds.
Right-click on Xcode icon. Select “Open Developer Tool”. Select “FileMerge”.
Источник
Xcode 13
Xcode 13 adds powerful new team development features, perfect for working with Xcode Cloud as well as with GitHub, Bitbucket, and GitLab collaboration features. Initiate, review, comment, and merge pull requests directly within Xcode. See your teammates’ comments right inside your code. And quickly compare any two versions of your code files.
Easy setup
Take advantage of a complete workflow to manage pull requests directly within Xcode. Create new requests, see a queue of pull requests ready for your review, and quickly view, build, and test results generated locally or by Xcode Cloud.
Team comments inline
Comments that your teammates make on code during review display inline within the code editor, along with the name and avatar of the reviewer.
Quick compare
Jump into a comparison view of any two versions of your source code, in any editor, while retaining your current editing context.
Cloud signing
Apps are code-signed using an Apple-hosted service that manages all of your certificates, making App Store submission easier and more reliable. Just sign in to Xcode using your Apple ID, and your Mac is configured for development and deployment based on your membership roles and permissions.
Bottom bar
The always-visible bottom bar shows useful information, such as line and column, and offers direct access to quickly compare different versions of code.
Vim mode
Many common key combinations and editing modes familiar to Vim users are supported directly within the code editor, using the new bottom bar to show mode indicators.
CarPlay simulator
This new simulator for Mac offers complete control over screen size, resolution, and variable input methods, so you can test your CarPlay experience across many different car platforms.
Instant crash reports and feedback
Crash reports from your TestFlight users appear in Xcode Organizer within just a few minutes, complete with user feedback so your testers can tell you exactly what was happening when they experienced the crash. The crash log displays inline and you can jump to the related code with just a click.
Custom documentation
Build documentation for your Swift framework or package directly from your source code’s documentation comments, then view it in Xcode’s Quick Help and dedicated documentation viewer. Extend those comments by adding extension files, articles, and tutorials — all written in Markdown — and choose to share the compiled DocC Archive with other developers or host it on your website.
Xcode Cloud beta
Xcode Cloud is a continuous integration and delivery service built into Xcode and designed expressly for Apple developers. Submit your request to access the beta and we’ll email you when your account can be enabled.
Get started.
Download Xcode 13 and use these resources to build apps for all Apple platforms.
Xcode Documentation
Find details and step-by-step instructions on how to use Xcode.
Documentation
Browse the latest documentation, including tutorials, sample code, articles, and API reference.
Session videos
See the latest in Apple technologies presented at WWDC and other events.
Forums
Ask questions and discuss development topics with Apple engineers and other developers.
Источник
How to Install Xcode Command Line Tools on a Mac

Developers need to install Xcode Command Line Tools before they can develop software on a Mac.
Apple provides a complete development environment for programmers named Xcode. If you are developing software for macOS, iOS, tvOS, and watchOS, you must install the full Xcode application.
It’s not pre-installed, but you can install it from the Apple developer website or the App Store on your Mac.
What are Xcode Command Line Tools?
If you’re not developing software for an Apple device, you won’t need the full Xcode application (it requires over 40GB of disk space!).
Instead, you’ll install Xcode Command Line Tools. It’s a smaller package for software developers with tools that run on the command line, that is, in the Terminal application.
Programmers have used these tools on Unix operating systems since computing’s beginnings, and they serve as the foundation of almost all software development.
Luckily, the Xcode Command Line Tools package only requires 1.2GB of space on your disk.
You have three choices to install Xcode Command Line Tools on a Mac:
- install the full Xcode package
- install Xcode Command Line Tools when triggered by a command
- install Xcode Command Line Tools as part of a Homebrew installation.
I don’t recommend installing the full Xcode package unless you’re developing software for an Apple device. The download will take too long and it will consume unnecessary disk space. Instead, try either of two faster methods.
How to Install Xcode Command Line Tools from a Command Prompt
Apple has made it easy to install Xcode Command Line Tools because certain commands will prompt you to begin installation.
Here are examples of commands that will trigger a prompt to install Xcode Command Line Tools:
- clang – a compiler that turns source code into an executable program
- gcc – the GNU compiler
- git – the save-as-you-go version control system
Running any of these commands in the terminal will bring up a prompt to install Xcode Command Line Tools. I’ve written elsewhere about How to Open Terminal on MacOS – just click the Spotlight icon in the menu bar and type “terminal.”
You can also enter the command xcode-select —install in the terminal to begin the installation process. You’ll see a panel that asks you to install Xcode Command Line Tools.
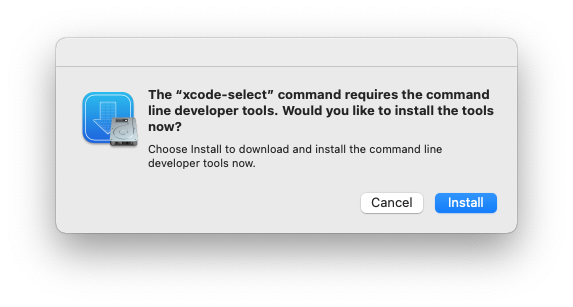
Click ‘Install’ to begin the download and installation process.
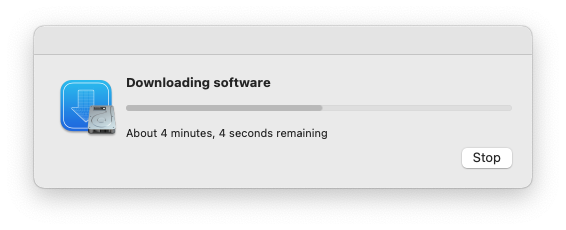
Installation takes 8 minutes on a 2021 Mac M1 Mini, with a 100Mbps Internet connection. It’s significantly slower on Mac Intel over a slow Internet connection.
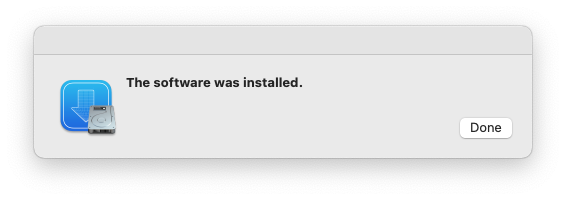
You’ll see a confirmation message when installation is complete.
Verify that you’ve successfully installed Xcode Command Line Tools:
You should see the following:
How to Use Homebrew to Install Xcode Command Line Tools
As easy as it is to use the command prompt to install Xcode Command Line Tools, I recommend an even easier method: using Homebrew.
This option was only recently added to Homebrew, so many developers are not aware of it.
Homebrew is the popular Mac package manager. Most developers need programming languages and utilities that don’t come installed on macOS and are not included in the Xcode Command Line Tools package. Homebrew can install almost any open-source tool for developers.
Since you’ll probably need Homebrew, you might as well let Homebrew install Xcode Command Line Tools for you.
First, check if Homebrew is already installed.
If Homebrew is not installed, you will see:
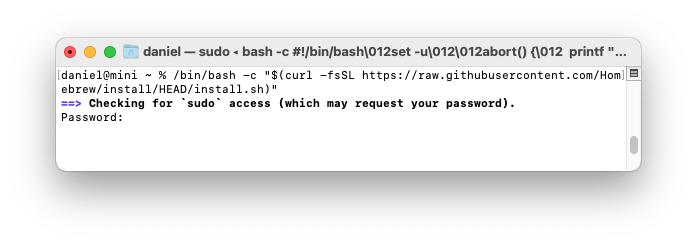
Homebrew provides an installation script you can run with a single command (check that it hasn’t changed at the Homebrew site).
The Homebrew installation script will ask you to enter your Mac user password. This is the password you use to sign in to your Mac.
You won’t see the characters as you type. Press enter when you are done.
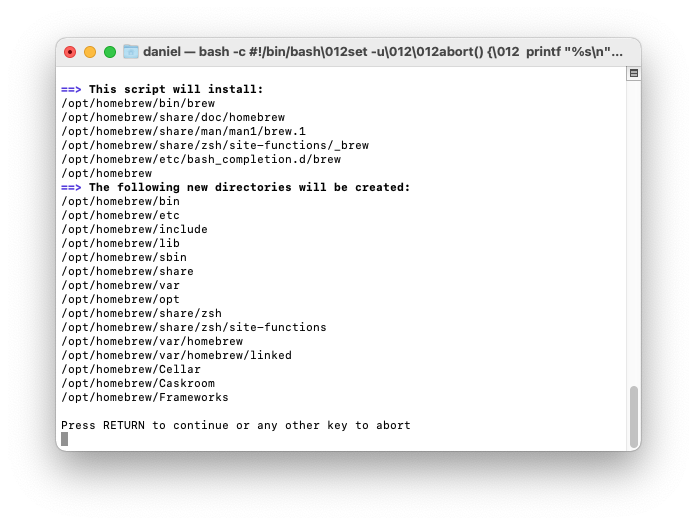
If you haven’t already installed Xcode Command Line Tools, you’ll see a message that «The Xcode Command Line Tools will be installed.» Press return to continue when prompted by the Homebrew installation script.
You’ll see diagnostic and progress messages. Homebrew installation takes 2 to 15 minutes on a 2021 Mac M1 Mini, with a 100Mbps Internet connection. It’s significantly slower on Mac Intel over a slow Internet connection.
On Mac Intel machines, that’s all you need to do – Homebrew is ready to use. On Mac Intel, Homebrew installs itself into the /usr/local/bin directory, which is already configured for access by the shell with the macOS default $PATH .
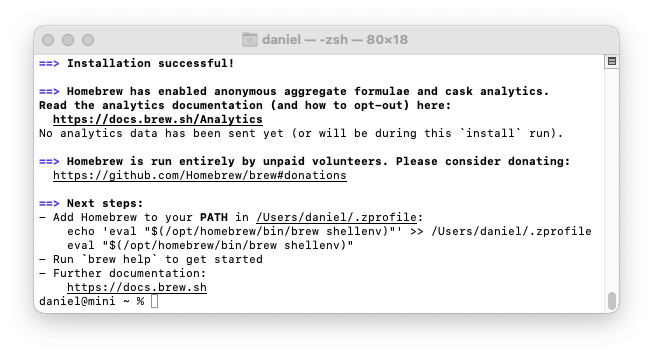
On Apple Silicon machines, there’s one more step. Homebrew files are installed into the /opt/homebrew folder. But the folder is not part of the default $PATH . Follow Homebrew’s advice and create a
/.zprofile file that contains a command which sets up Homebrew. Homebrew shows instructions at the end of the installation process:
After you’ve installed Homebrew, check that Homebrew is installed properly.
You should see this:
If Homebrew is successfully installed, there will be Homebrew files in /usr/local (for macOS Intel) or /opt/homebrew (for Apple Silicon).
Now you have both Xcode Command Line Tools and Homebrew installed. If you want to learn more about adding Homebrew packages to set up your development environment, see Install a Homebrew Package.
More information
I’ve written an in-depth guide to Install Xcode Command Line Tools that goes beyond these basics.
There’s also a complete guide to Install Homebrew for Mac that explains how to Update Homebrew, Uninstall Homebrew, and keep up with other Housekeeping for Homebrew.
Your development environment
MacOS is the most popular platform for software development because the operating system is based on Unix, the longtime standard for software development.
With Xcode Command Line Tools installed, you’ll have a solid foundation for adding almost any open source development tool.
Add Homebrew and you have a package manager that can install version managers, programming languages, and almost any other tool you may need.
Combined with a text editor and terminal application, you’ll be prepared for any tutorial you’ll find on freeCodeCamp.
Author of the book «Learn Ruby on Rails.” Now at Yax.com, building websites without frameworks or build tools. Past founder of the RailsApps open source project.
If you read this far, tweet to the author to show them you care. Tweet a thanks
Learn to code for free. freeCodeCamp’s open source curriculum has helped more than 40,000 people get jobs as developers. Get started
freeCodeCamp is a donor-supported tax-exempt 501(c)(3) nonprofit organization (United States Federal Tax Identification Number: 82-0779546)
Our mission: to help people learn to code for free. We accomplish this by creating thousands of videos, articles, and interactive coding lessons — all freely available to the public. We also have thousands of freeCodeCamp study groups around the world.
Donations to freeCodeCamp go toward our education initiatives and help pay for servers, services, and staff.
Источник


