- Xcp ng center linux
- # XCP-ng system requirements
- # Disk space
- # Network
- # Supported guest OS
- # Pool requirements
- # Other requirements
- # Homogeneous pools
- # Heterogeneous pools
- Turnkey Open Source Hypervisor
- Turnkey Server Virtualization
- Modern Web UI
- Live migration
- Scale
- Secure
- Join our fast growing community
- Easy To Install
- No physical access to the XenServer host?
- XCP-ng is a Xen Project incubation project
- Success Story: From Kickstarter to Datacenter
- Commercial Support
- Our Platinum Sponsors
- # Managing pools and hosts
- # XCP-ng Center
- # Xen Orchestra
- # XOA vs XO from GitHub?
- # Web UI
- # XO CLI
- # XO API
- # XO Lite
- # Installation
- # ISO installation
- # Download and create media
- # Start the host
- # Follow instructions
- # 1. UEFI vs BIOS
- # 2. Language selection
- # 3. Welcome
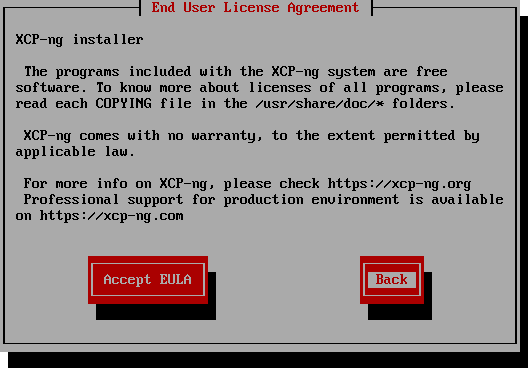
- # 4. EULA/license
- # 5. Disk selection
- # 6. VM storage selection
- # 7. Installation source
- # 8. Host password
- # 9. Networking
- # 10. Hostname and DNS
- # 11. Timezone and time
- # 12. Installation
- # 13. Supplemental packs and end of install
- # 14. Reboot
- # Netinstall
- # PXE boot install
- # Requirements
- # TFTP server configuration
- # UEFI boot
- # On the host
- # iPXE over HTTP install
- # Requirements
- # Automated install
- # Via PXE
- # With UEFI
- # Example with VirtualBox
- # Software RAID
- # Troubleshooting
- # Install on a USB stick
Xcp ng center linux
An XCP-ng computer is dedicated entirely to the task of running XCP-ng and hosting VMs, and is not used for other applications.
Installing third-party software directly in the control domain of XCP-ng is not supported. The exception is for software supplied in the current repositories. If you want to add an extra package inside XCP-ng please ask here
# XCP-ng system requirements
Although XCP-ng is usually deployed on server-class hardware, XCP-ng is also compatible with many models of workstations and laptops. For more information, see the Hardware Compatibility List (HCL).
The following section describes the recommended XCP-ng hardware specifications.
XCP-ng must be a 64-bit x86 server-class machine devoted to hosting VMs. XCP-ng creates an optimized and hardened Linux partition with a Xen-enabled kernel. This kernel controls the interaction between the virtualized devices seen by VMs and the physical hardware.
- Up to 5 TB of RAM
- Up to 16 physical NICs
- Up to 288 logical processors per host.
Note The maximum number of logical processors supported differs by CPU. For more information, see the Hardware Compatibility List (HCL).
The system requirements for XCP-ng are:
One or more 64-bit x86 CPUs, 1.5 GHz minimum, 2 GHz or faster multicore CPU recommended.
To support VMs running Windows or more recent versions of Linux, you require an Intel VT or AMD-V 64-bit x86-based system with one or more CPUs.
Note: To run Windows VMs or more recent versions of Linux, enable hardware support for virtualization on XCP-ng. Virtualization support is an option in the BIOS. It is possible that your BIOS might have virtualization support disabled. For more information, see your BIOS documentation.
To support VMs running supported paravirtualized Linux, you require a standard 64-bit x86-based system with one or more CPUs.
2 GB minimum, 4 GB or more recommended.
A fixed amount of RAM is allocated to the control domain (dom0). The optimal amount of RAM for the control domain depends on the workload.
# Disk space
- Locally attached storage (PATA, SATA, SCSI) with 46 GB of disk space minimum, 70 GB of disk space recommended.
- SAN via HBA (not through software) when installing with multipath boot from SAN.
For a detailed list of compatible storage solutions, see the Hardware Compatibility List (HCL).
# Network
100 Mbit/s or faster NIC. One or more Gb, or 10 Gb NICs is recommended for faster P2V and export/import data transfers and VM live migration.
We recommend that you use multiple NICs for redundancy. The configuration of NICs differs depending on the storage type. For more information, see the vendor documentation.
XCP-ng requires an IPv4 network for management and storage traffic.
Ensure that the time setting in the BIOS of your server is set to the current time in UTC. In some support cases, serial console access is required for debug purposes. When setting up XCP-ng configuration, we recommend that you configure serial console access. For hosts that do not have physical serial port or where suitable physical infrastructure is not available, investigate whether you can configure an embedded management device. For example, Dell DRAC or HP iLO. For more information about setting up serial console access, see CTX228930 — How to Configure Serial Console Access on XenServer 7.0 and later
# Supported guest OS
# Pool requirements
A resource pool is a homogeneous or heterogeneous aggregate of one or more servers, up to a maximum of 64. Before you create a pool or join a server to an existing pool, ensure that all servers in the pool meet the following requirements. Hardware requirements
All of the servers in a XCP-ng resource pool must have broadly compatible CPUs, that is:
- The CPU vendor (Intel, AMD) must be the same on all CPUs on all servers.
- To run HVM virtual machines, all CPUs must have virtualization enabled.
# Other requirements
In addition to the hardware prerequisites identified previously, there are some other configuration prerequisites for a server joining a pool:
- It must have a consistent IP address (a static IP address on the server or a static DHCP lease). This requirement also applies to the servers providing shared NFS or iSCSI storage.
- Its system clock must be synchronized to the pool master (for example, through NTP).
- It cannot be a member of an existing resource pool.
- It cannot have any running or suspended VMs or any active operations in progress on its VMs, such as shutting down or exporting. Shut down all VMs on the server before adding it to a pool.
- It cannot have any shared storage already configured.
- It cannot have a bonded management interface. Reconfigure the management interface and move it on to a physical NIC before adding the server to the pool. After the server has joined the pool, you can reconfigure the management interface again.
- It must be running the same version of XCP-ng, at the same update level, as servers already in the pool.
XCP-ng hosts in resource pools can contain different numbers of physical network interfaces and have local storage repositories of varying size. In practice, it is often difficult to obtain multiple servers with the exact same CPUs, and so minor variations are permitted. If you want your environment to have hosts with varying CPUs in the same resource pool, you can force join a pool together using the CLI. For information about forcing the joining operation, see Hosts and resource pools.
Note: Servers providing shared NFS or iSCSI storage for the pool must have a static IP address or be DNS addressable.
# Homogeneous pools
A homogeneous resource pool is an aggregate of servers with identical CPUs. CPUs on a server joining a homogeneous resource pool must have the same vendor, model, and features as the CPUs on servers already in the pool.
# Heterogeneous pools
Heterogeneous pool creation is made possible by using technologies in Intel (FlexMigration) and AMD (Extended Migration) CPUs that provide CPU masking or levelling. These features allow a CPU to be configured to appear as providing a different make, model, or feature set than it actually does. These capabilities enable you to create pools of hosts with different CPUs but still safely support live migrations.
For information about creating heterogeneous pools, see Hosts and resource pools.
Источник
Turnkey Open Source Hypervisor
Based on XenServer, XCP-ng is the result of massive cooperation between individuals and companies, to deliver a product without limits. No restrictions on features and every bit available on GitHub!
Turnkey Server Virtualization
Modern Web UI
Live migration
Scale
Secure
Use the powerful, web based, Xen Orchestra to manage your hosts
Live migrate your VMs all around the world, without interruption
Grow your own Cloud with more hosts when needed
Control your VMs on your own baremetal, no neighbors
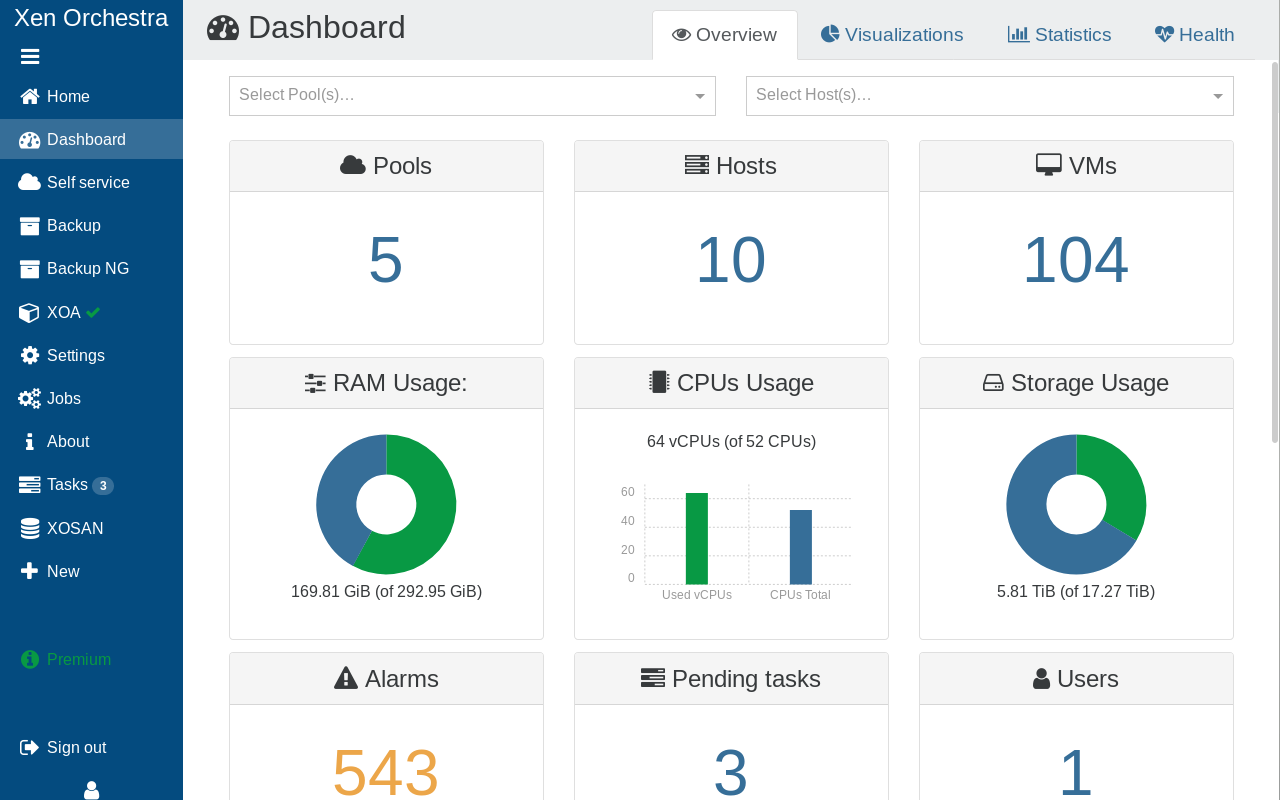
With Xen Orchestra Web UI
A glance on your whole XCP-ng infrastructure on a dashboard page!
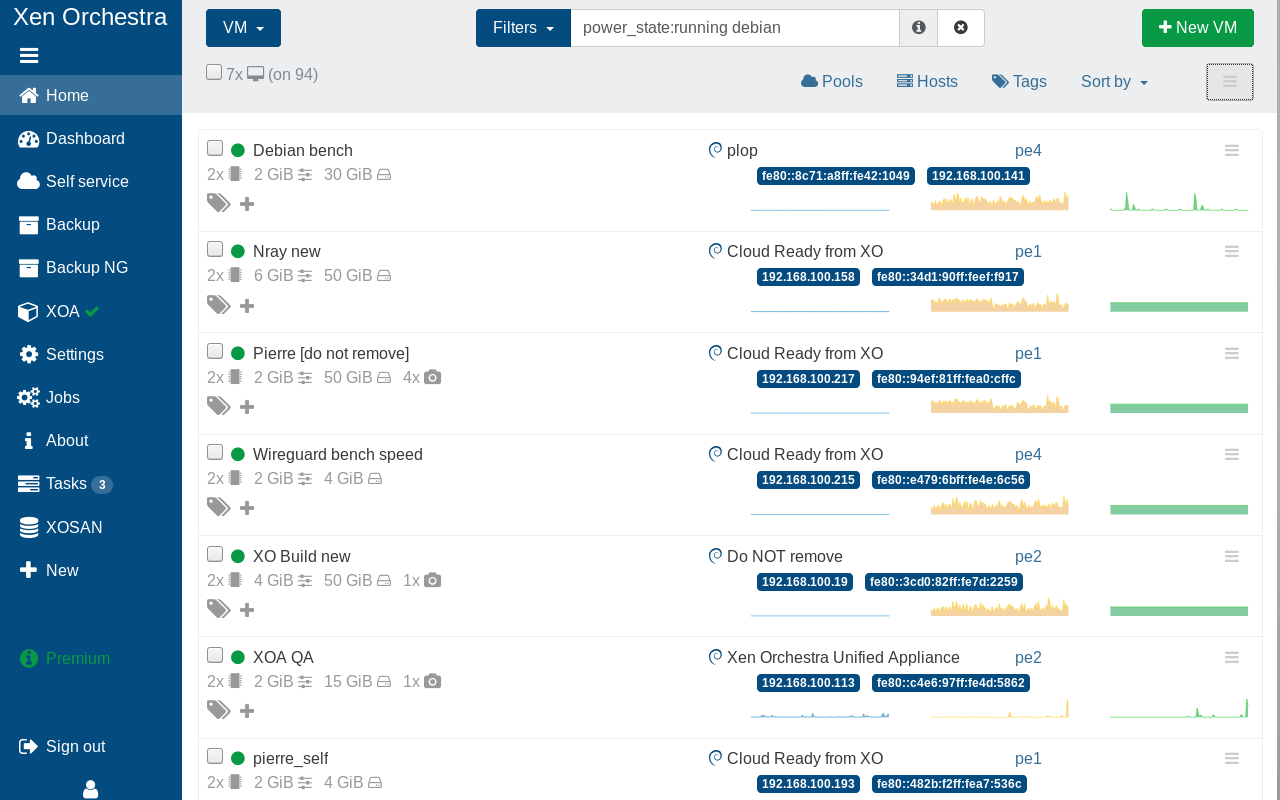
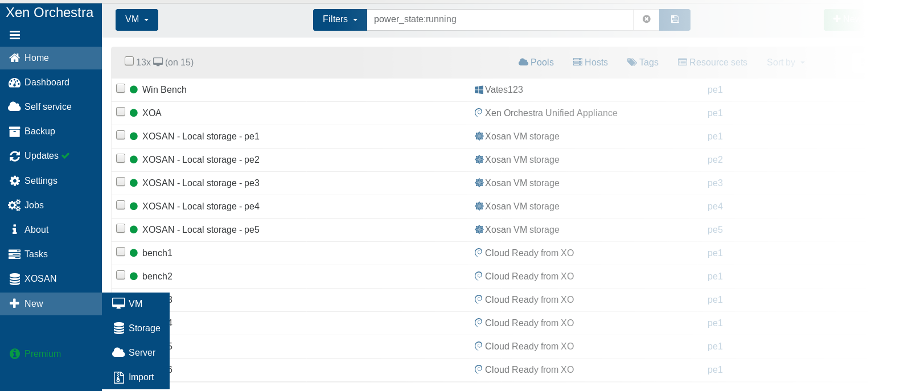
With Xen Orchestra Web UI
List your VMs with statistics, IP addresses, CPU/RAM count…
Join our fast growing community
Where the community is the most active! Tons of good advice, use cases and people to help you.
GitHub is the place to report issues and contribute to the project. PRs are very welcome!
Spread the word by checking our store for XCP-ng swag: shirts, stickers, mugs and so on.
Easy To Install
Grab the 8.2 ISO here, then create your bootable USB key with:
Then just boot on it!
On Windows, you can use Rufus to create the bootable USB stick.
Download the Net install ISO (150MiB), then create your bootable USB key:
Then just boot on it!
On Windows, you can use Rufus to create the bootable USB stick.
Just insert the ISO and follow instructions. You’ll have an upgrade panel, just select it and that’s it!
After a reboot, you’ll be on XCP-ng while keeping all your previous settings (Storage, VMs…)

No physical access to the XenServer host?
Please check our documentation for advanced upgrade cases.
Security matters: all our repositories, ISOs and packages are signed with a GPG key. This key is available here:
Then, you can follow our guide on how to check authenticity of our ISO, and even any XCP-ng RPM repository or mirror.
Found a security problem in XCP-ng? Please email us on security at xcp-ng dot org
We strongly suggest to download only the current release. This is only for historical purpose.
You can find all previous XCP-ng releases here:
Just go on this web page and follow instructions:
This will deploy a small VM doing all the management and backup for your XCP-ng. Follow instructions given on the screen, and you’re up and running!
If you want to learn more about Xen Orchestra, please visit the official website.
XCP-ng is a Xen Project incubation project

XCP-ng virtualization platform is a Xen Project incubation project hosted in the Linux Foundation.XCP-ng aims to be the bridge between the users community and the developers and is the default entry point for any user.
Success Story: From Kickstarter to Datacenter
Initially a fork of XenServer, XCP-ng made something some people thought would be impossible: gathering a large community around a new virtualization platform in those modern days.
Commercial Support
Vates is the main company that supports the development of XCP-ng. They provide professional service to assure that businesses get the most out of the solution.
Our Platinum Sponsors


XCP-ng is a Xen Project incubation project hosted by the Linux Foundation
Copyright© The Linux Foundation®. All rights reserved.
The Linux Foundation has registered trademarks and uses trademarks.
For a list of trademarks of The Linux Foundation, please see our Trademark Usage page.
Linux is a registered trademark of Linus Torvalds.
Privacy Policy and Terms of Use
Источник
# Managing pools and hosts
You have multiple ways to manage your hosts and your pool: all of those are called clients.
- xe CLI (talking to a host XAPI directly)
- XCP-ng Center (Windows client, only community supported)
- Xen Orchestra web UI (need an XO virtual appliance running)
- Xen Orchestra CLI ( xo-cli , same requirement)
- Xen Orchestra API (same requirement)
- XO Lite (future embedded lightweight client)
As soon you start to work with multiple pools, or if you want to have advanced features, you’ll need more advanced clients. For example, xe , XO Lite and XCP-ng Center are considered «basic», and Xen Orchestra web UI, CLI or API is so far the only one considered «advanced».
The xe command line interface is installed by default on all XCP-ng hosts. A stand-alone remote CLI is also available for Linux.
xe however, works within a pool. If you want a cross-pool CLI (i.e. your whole infrastructure), please take a look at Xen Orchestra CLI!
# XCP-ng Center
XCP-ng Center is only community maintained, and right now, by one person. It fills a gap between xe and Xen Orchestra, until XO Lite is available. Use it with caution.
This is the heavy client working on Windows only. You can download here
(opens new window) on the GitHub project page.
# Xen Orchestra
Xen Orchestra is the officially supported client for XCP-ng. It’s currently developed by the same team as the XCP-ng project (Vates
It’s also far more than just a client: because it runs 24/7 in a daemon, a lot of extra cool stuff is possible:
- reports
- ACLs
- Self Service
- load balancing
- SDN controller
- backup
- delta backup
- Disaster Recovery
- Continuous Replication
- backup with RAM etc…
(opens new window) to take a tour on what’s possible.
Xen Orchestra is fully Open Source, and it comes in 2 «flavors»:
- the turnkey/preinstalled virtual appliance, called XOA that you can deploy in a minute
We advise to start using XOA by deploying it really easily in few clicks on this page
(opens new window) . You can always decide later to build it yourself from GitHub.
# XOA vs XO from GitHub?
XOA is meant to be used as the easiest way to test it, but also to use it in production: this is the version professionally supported. If you are an individual, feel free to enjoy version from GitHub directly!
# Web UI
You have access to all XCP-ng possibilities (and more!) from a web UI:

# XO CLI
This is another client of xo-server (like XO Web) — this time in command line form.
Thanks to introspection, xo-cli will detect all the available features exposed in the xo-server API.
Unlike xe which is only connected to one pool, xo-cli has access to all pools connected via Xen Orchestra. This is the preferred way to manage your infrastructure, using XO as a central point.
# XO API
You can also build your own application or automation on top of XO API. It’s a JSON-RPC API, using the same function calls that xo-cli .
# XO Lite
XO Lite is not there yet, but it will be embed in each host in a reasonable future
Источник
# Installation
This guide will help you to set up XCP-ng.
# ISO installation
If you want to use the netinstall ISO, see the Netinstall section.
# Download and create media
SHA256 checksums, GPG signatures and net-install ISO are available here
Then, create the install media (e.g. a USB key 1GB or larger should work):
Finally, boot on that media and go to the next section.
On Windows, you can use Rufus to create the bootable USB stick.
# Start the host
Start the host and boot on the USB media.
# Follow instructions
# 1. UEFI vs BIOS
Boot screens are just slightly different on start between BIOS and UEFI mode:
BIOS splash screen:
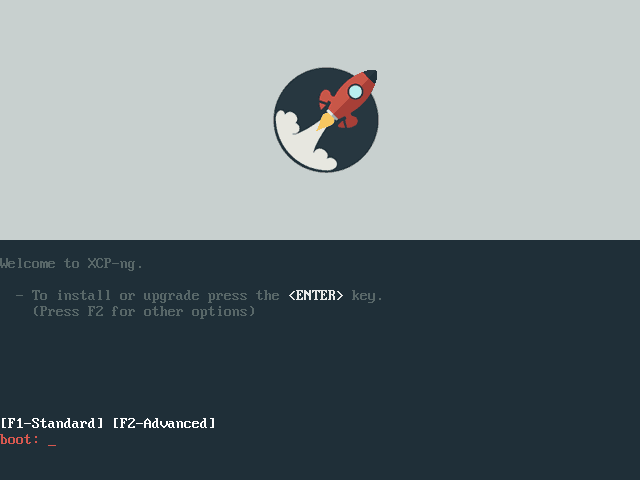
UEFI splash screen:
NEVER switch from UEFI to BIOS (or vice-versa) after you installed XCP-ng. Stick to the mode that you chose during the install.
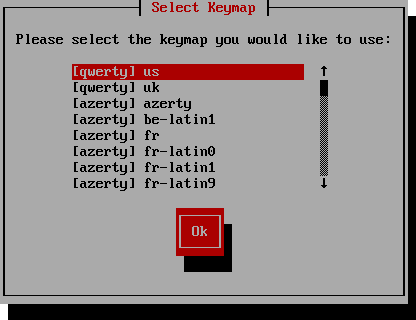
# 2. Language selection
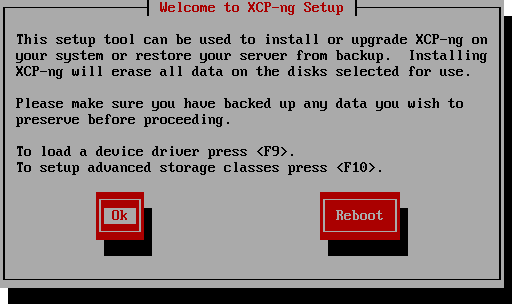
# 3. Welcome
# 4. EULA/license
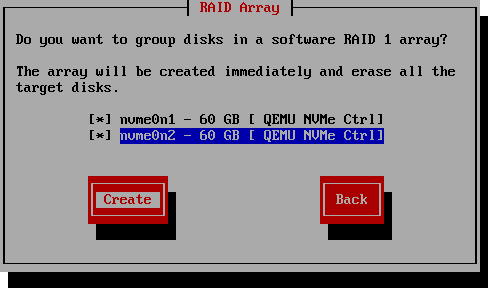
# 5. Disk selection
This is the screen where you’ll select where XCP-ng system will be installed. XCP-ng is a specialized Linux distribution, so you need to dedicate a physical disk to it. Partitioning is done automatically.
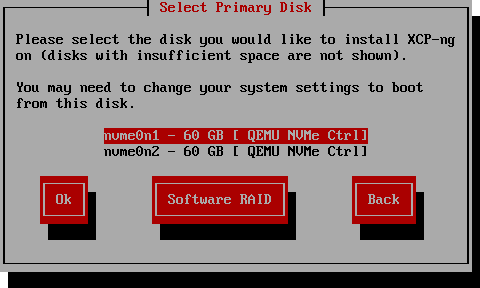
Alternatively, if you have two identical disks, you can use Software RAID ( mdadm ) :
If only one disk is found suitable for the installation, this step is skipped. The name of the device will be displayed to you in the «Confirm Installation» step, later in the process.
# 6. VM storage selection
This is the place where your VM disks will be stored. It’s called a Storage Repository (SR). It can use the same disk you installed the system on. It will automatically use the free space after system partitions.
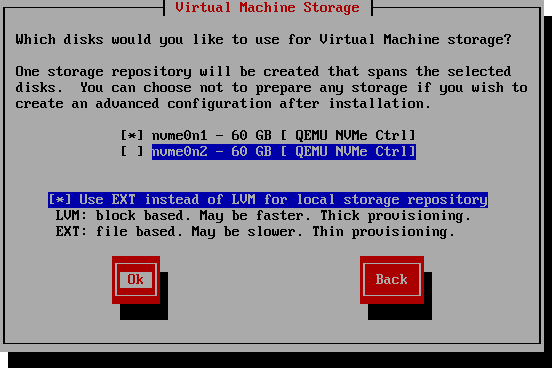
EXT instead of LVM? We advise to use EXT to benefit from thin provisioning!
When the installer skips step 5 automatically, users sometimes mistake this step with the selection of the system disk.
# 7. Installation source
If you use the default ISO, just select «Local media»:
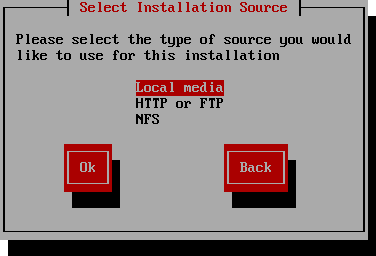
Then, you can verify your media or not:

# 8. Host password
This will be the root password, used to connect to the host with SSH and XAPI.

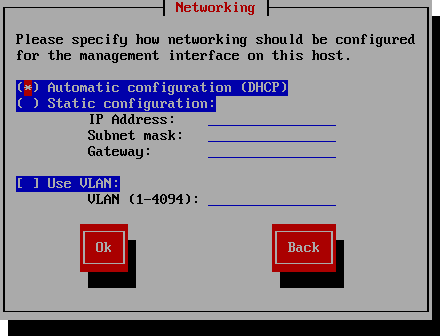
# 9. Networking
Here you can select between DHCP and static network, even using a VLAN:
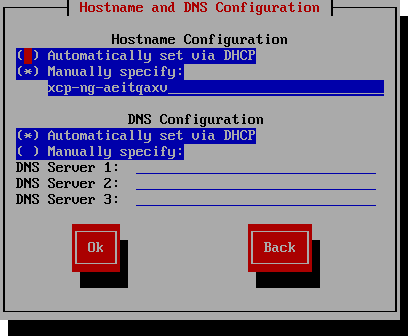
# 10. Hostname and DNS
Configure the hostname of your server and the DNS resolvers.
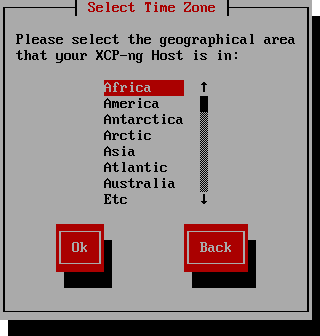
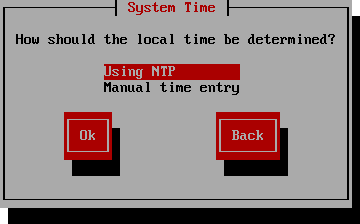
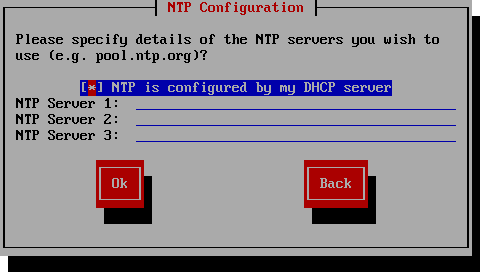
# 11. Timezone and time
ALWAYS use a NTP server. It’s a critical component to manage your host(s). If you don’t know any NTP server, you can use pool.ntp.org .
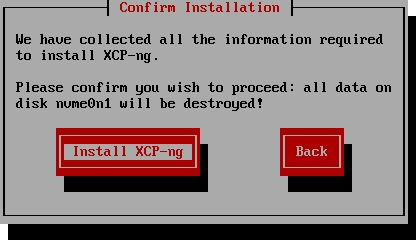
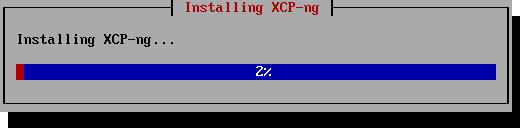
# 12. Installation
After this step, data will be written on the disk(s)! Check the listed device(s) one last time.
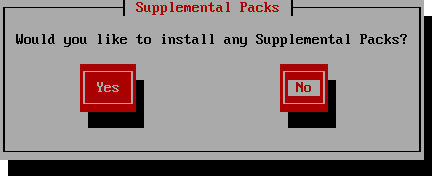
# 13. Supplemental packs and end of install
Not relevant in almost all cases. Skip it:
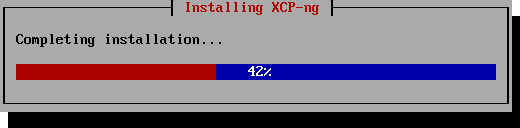
«Completing installation» is in fact installing the bootloader and building the initramfs. It can take time.
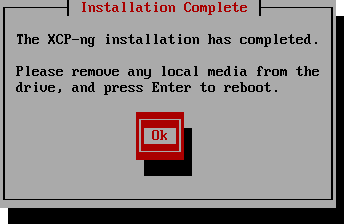
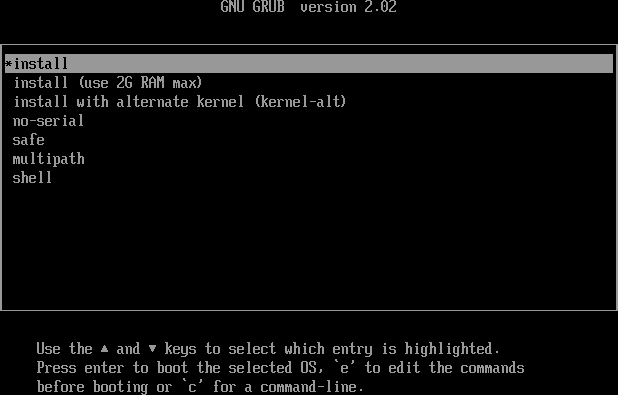
# 14. Reboot
After a reboot, you should see the GRUB menu:
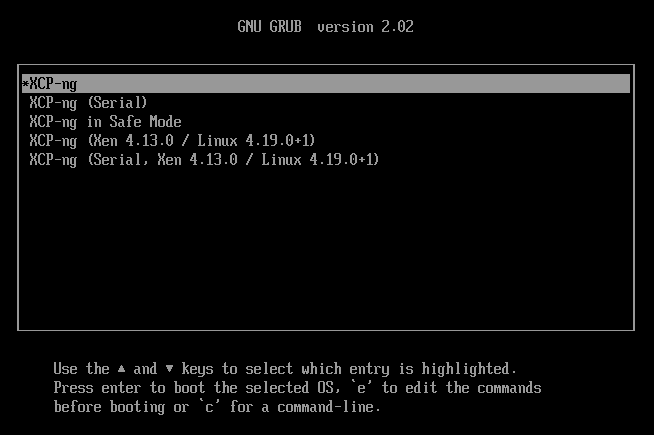
It means the system is correctly installed! Enjoy XCP-ng рџљЂ
# Netinstall
The netinstall image is a lightweight ISO (around 150MiB) that will only contain the installer, but no actual RPM packages. Sometimes, it’s more convenient/faster when your ISO is on a slow connection (e.g. a virtual media using a server IPMI).
As with the regular installation ISO, write it on an USB media:
Everything else is like the regular install, except that it will not offer to install from local media, only from distant ones.
# PXE boot install
# Requirements
To get XCP-ng installed from PXE, you need:
- DHCP and TFTP configured servers
- Any NFS, FTP or HTTP server (your choice) to host XCP-ng installation files
- A PXE-boot compatible network card on your host
PXE boot doesn’t support tagged VLAN networks! Be sure to boot on a untagged network!
# TFTP server configuration
- In your TFTP root directory (eg /tftp ), create a folder named xcp-ng .
- Copy the mboot.c32 and pxelinux.0 files from the installation media to the TFTP root directory.
- From the XCP-ng installation media, copy the files install.img (from the root directory), vmlinuz , and xen.gz (from the /boot directory) to the new xcp-ng directory on the TFTP server.
- In the TFTP root directory, create a folder called pxelinux.cfg
- In the pxelinux.cfg directory, create your configuration file called default .
The file itself will contain the way to install XCP-ng: manually (with answer to provide on the host console/screen) or fully automated (see Automated install below).
Here is an example of a manual installation:
# UEFI boot
If you want to make an installation in UEFI mode, you need to have a slightly different TFTP server configuration:
- In your TFTP root folder, create a directory called EFI/xcp-ng
- Configure your DHCP serveur to provide /EFI/xcp-ng/grubx64.efi as the boot file
- Create a grub.cfg as follow:
- Copy this grub.cfg file to EFI/xcp-ng folder on the TFTP server
- Get the following files from XCP-ng ISO: grubx64.efi , install.img (from the root directory), vmlinuz , and xen.gz (from the /boot directory) to the new EFI/xcp-ng directory on the TFTP server.
On the FTP, NFS or HTTP serveur, get all the installation media content in there.
When you do copy the installation files, DO NOT FORGET the .treeinfo file. Double check your webserver isn’t blocking it (like Microsoft IIS does).
# On the host
- Start your host
- Enter the boot menu (usually F12)
- Select boot from the Ethernet card
- You should see the PXE menu you created before!
# iPXE over HTTP install
This guide is for UEFI boot, using iPXE over an HTTP server to serve files needed for installation.
# Requirements
To get XCP-ng installed from iPXE over HTTP, you need:
- An HTTP server to host XCP-ng installation files
- A iPXE compatible network card and iPXE firmware on your host
- In your HTTP root directory copy the contents of the net install ISO.
The top-level should look like this:
- Boot the target machine.
- Press Ctrl-B to catch the iPXE menu. Use the chainload command to load grub.
Sometimes grub takes a very long time to load after displaying «Welcome to Grub». This can be fixed by compiling a new version of Grub with grub-mkstandalone .
- Once the grub prompt loads, set the root to http and load the config file.
- Select the «install» menu entry.
- Wait for grub to load the necessary binaries. This may take a minute. If you look at your http server log you should see something like:
- Continue with installation as normal.
# Automated install
# Via PXE
Follow the previous section on Network boot (PXE) and get a configuration file that will fetch an answer file:
Any SYSLINUX configuration style file will be valid. Find more on the syslinux website
# With UEFI
To have an automated install with UEFI, you need the following Grub configuration:
Your XML answer file can look like this:
The full answerfile schema is available in our Annex.
# Example with VirtualBox
To test the PXE in a VirtualBox environment you’ll need to populate the PXE special folder
(opens new window) . Most of the content comes from the ISO image:
The configuration file pxelinux.cfg/default is as follow:
The rest is the same as the normal PXE configuration.
# Software RAID
For an automated install using an answer file (PXE or similar required), software raid can be enabled as follows:
As an improvement and to delay the md resync (increasing install speed by about 500% on certain drives), we can use the following in the answer file:
The noresync.sh script would do something like this:
Upon server reboot, normal md resync will take place.
# Troubleshooting
# Install on a USB stick
We strongly advise against installing on USB stick. XCP-ng writes a lot into local files and this writing will wear out your USB-Stick in a short amount of time:
- XAPI: the XenServer API database is changing a lot. Hence writing a lot, and believe me, USB sticks aren’t really happy with that on the long run. Note: XAPI DB is what keep tracks on all XCP-ng’s «state», and it’s replicated on each host (from the slave).
- Logs: XCP-ng keeps a LOT of debug logs. However, there is a workaround: use a remote syslog.
Источник


