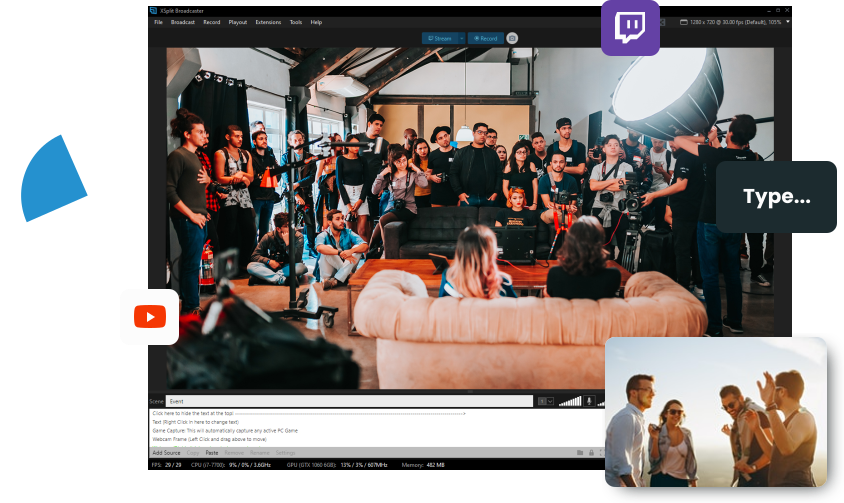
- Broadcaster
- Powerful Live streaming and recording studio that offers limitless customization.
- A powerful user interface offering limitless customization.
- Support for all your favorite platforms.
- Perfect for Online Events and Professionals
- Flexible and Powerful Plugins and Extensions
- Compatible with leading industry platforms and hardware.
- Powerful Production Features
- Scene Presets
- Chroma Key Threshold
- Noise Suppression
- Custom Transitions
- Projector Output
- Source Masking
- Media Slideshow
- NVENC Encoding
- Per Scene Audio
- Split Mode
- Recording Features — Going live is just the start.
- Dozens of Plugins & Extensions Store
- Powerful framework offering unlimited customization
- 24/7 Support and Lifetime Updates
- Video tools built with your business ideas passion knowledge product content stories gameplay in mind
- XSplit’s Suite of Video Tools Work With
- The Best Virtual Background Webcam Tool
- Broadcaster
- Live Stream or Record a Virtual Event
- Connect: Webcam
- Use Your Phone as a Wireless Webcam
- Presenter BETA
- Create Beautiful and Professional Presentations
- Capture BETA
- Share What’s On Your Screen Instantly
- What you can do with XSplit
- XSplit Broadcaster for Mac
- XSplit Broadcaster for Mac OS X: Best alternatives Our editors hand-picked the best Mac alternatives to XSplit Broadcaster, go ahead and check them out, rate them, or add new ones you find fitting.
- OBS Free
- Wirecast Free
- CamTwist Free
- Ustream Producer Free
- BoinxTV Free
- Last comment
- Know of any alternatives we haven’t found yet?
- XSplit Broadcaster ⇒ The ultimate guide 2021!
- 1 Introduction
- 2 How to install XSplit Broadcaster
- What operating systems are compatible with XSplit Broadcaster?
- 3 XSplit Broadcaster – Overview
- 4 Basic streaming configuration for XSplit Broadcaster
- 4.1 Configure the resolution and add sources
- 4.2 Connect your Twitch account to XSplit Broadcaster and start your stream
- 5 Adding & adjusting overlays, alerts and transitions
- 5.1 Add and customize your overlay
- 5.2 Adding & customizing stinger transitions
- 5.3 How to add alerts to XSplit Broadcast
- 5.3.1 How to configure Streamlabs alerts
- 5.3.2 Streamlabs — Widget URL
- 5.3.3 General Settings
- 5.3.4 Followers, donations, subscribers
- 5.3.5 Add Streamlabs alerts to XSplit Broadcast
- 6 Xsplit vs OBS
- 7 Conclusion
Broadcaster
Powerful Live streaming and recording studio that offers limitless customization.
XSplit Broadcaster, the best all-in-one streaming and recording application for content creation, powers the biggest events in gaming, esports and more.
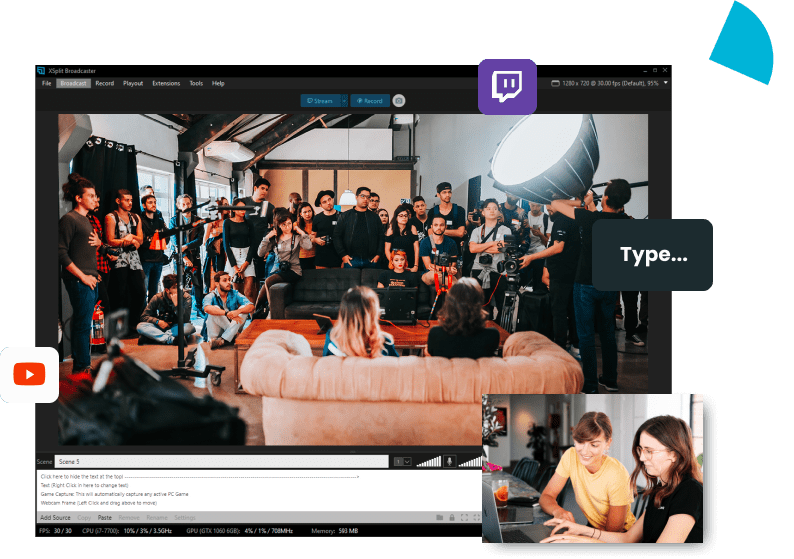
A powerful user interface offering limitless customization.
- Simply drag, drop and resize a multitude of media sources like images, videos, GIFs and web pages! Add Skype calls with just a click or screen capture your Zoom, Teams, or Discord calls!
- XSplit Broadcaster is more than just a screen recorder. Manage everything from a single monitor with the In-Game HUD or use multiple displays with our projector mode. Using OBS? Use our OBS Importer to get you started.
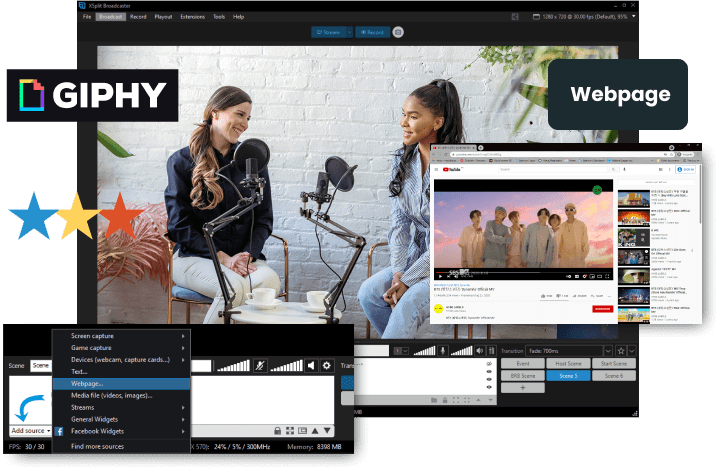
Support for all your favorite platforms.
- Start streaming to any of the top broadcast platforms with our native plugins or use Custom RTMP to stream to any platform. You can stream and record multiple outputs at once as well as use our built-in Chat plugins as well as using browser source to add web pages designed for live streaming alerts.

Perfect for Online Events and Professionals
Flexible and Powerful Plugins and Extensions
Compatible with leading industry platforms and hardware.
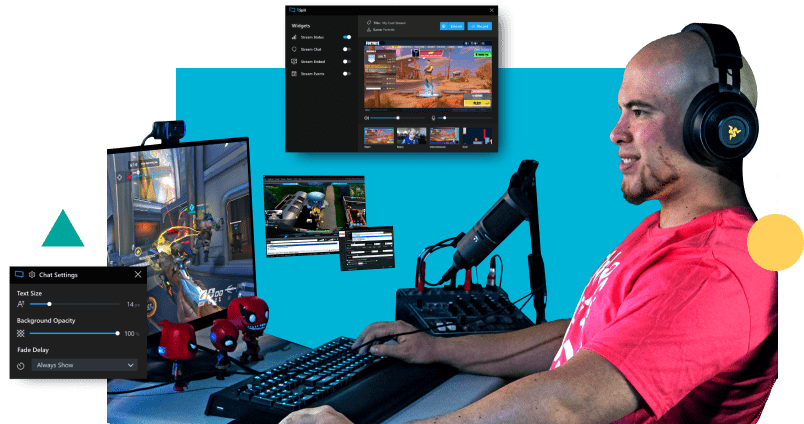
Powerful Production Features
Scene Presets
Add multiple animations and broadcast effects to your scenes.
Chroma Key Threshold
Get crystal clear Chroma Key sensitivity for webcams, capture source and media files.
Noise Suppression
Reduce unwanted background noise in app.
Custom Transitions
Projector Output
Project any scene, including your active scene to another monitor or display.
Source Masking
Change the shape of any camera or media source in-app.
Media Slideshow
Loop multiple images or videos to decorate your BRB screen or show your appreciation to sponsors and supporters.
NVENC Encoding
Borrow your powerful GPU’s resources to fully enhance your streaming experience while taking it easy on your CPU.
Per Scene Audio
Adjust the audio levels for each individual scene.
Split Mode
Enable Scene Preview and Program Views for professional scene switching.
There is even more to be found in XSplit Broadcaster, find out more here.
Recording Features — Going live is just the start.
- XSplit Broadcaster enables you to record your broadcast as it happens with powerful features such as multiple audio tracks. Add Queue points for easy editing during post production. With multiple recording profiles you can stream and record different scenes at the same time! Meaning you could record raw gameplay footage while you stream with your camera and overlays enabled!
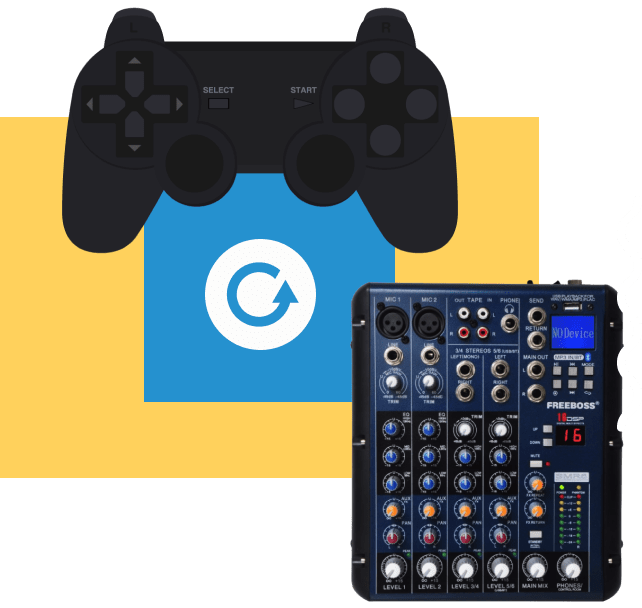
Dozens of Plugins & Extensions Store
- New plugins and extensions are always being added to XSplit Broadcaster via our Plugin and Extension store, expanding your capabilities and further customizing your broadcast experience.
-
- Gamepad Visualizer
- Whiteboard
- Audio Mixer and DSP Effects
- Replay Source
- And many more!
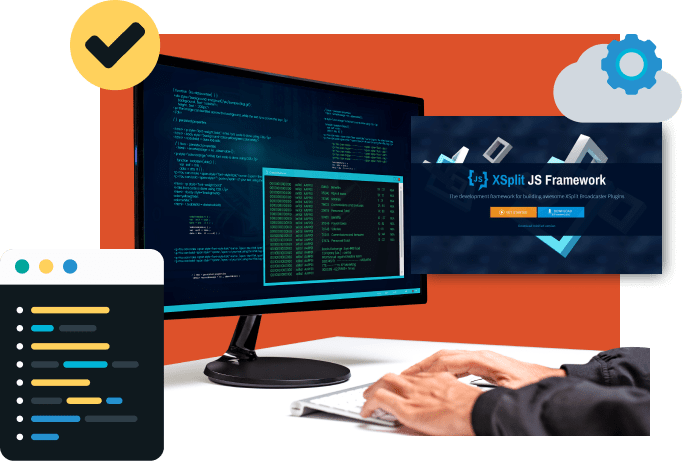
Powerful framework offering unlimited customization
- You can add your own Macros, Custom Scripts, XJS Framework and API with more being made available all the time by a dedicated and growing community of developers!
24/7 Support and Lifetime Updates
It goes without saying that high-end software deserves high-end support too! We’ll help you along every step of your journey.
Источник
Video tools built with your business ideas passion knowledge product content stories gameplay in mind

XSplit’s Suite of Video Tools Work With
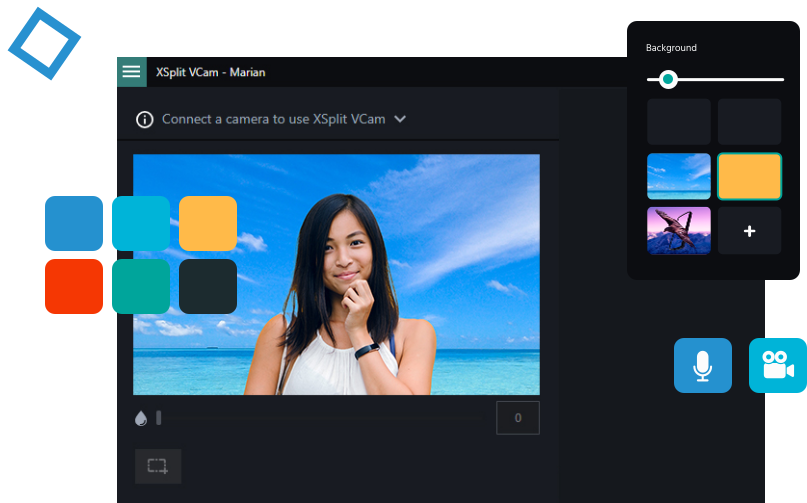
The Best Virtual Background Webcam Tool
Broadcaster
Live Stream or Record a Virtual Event

Connect: Webcam
Use Your Phone as a Wireless Webcam
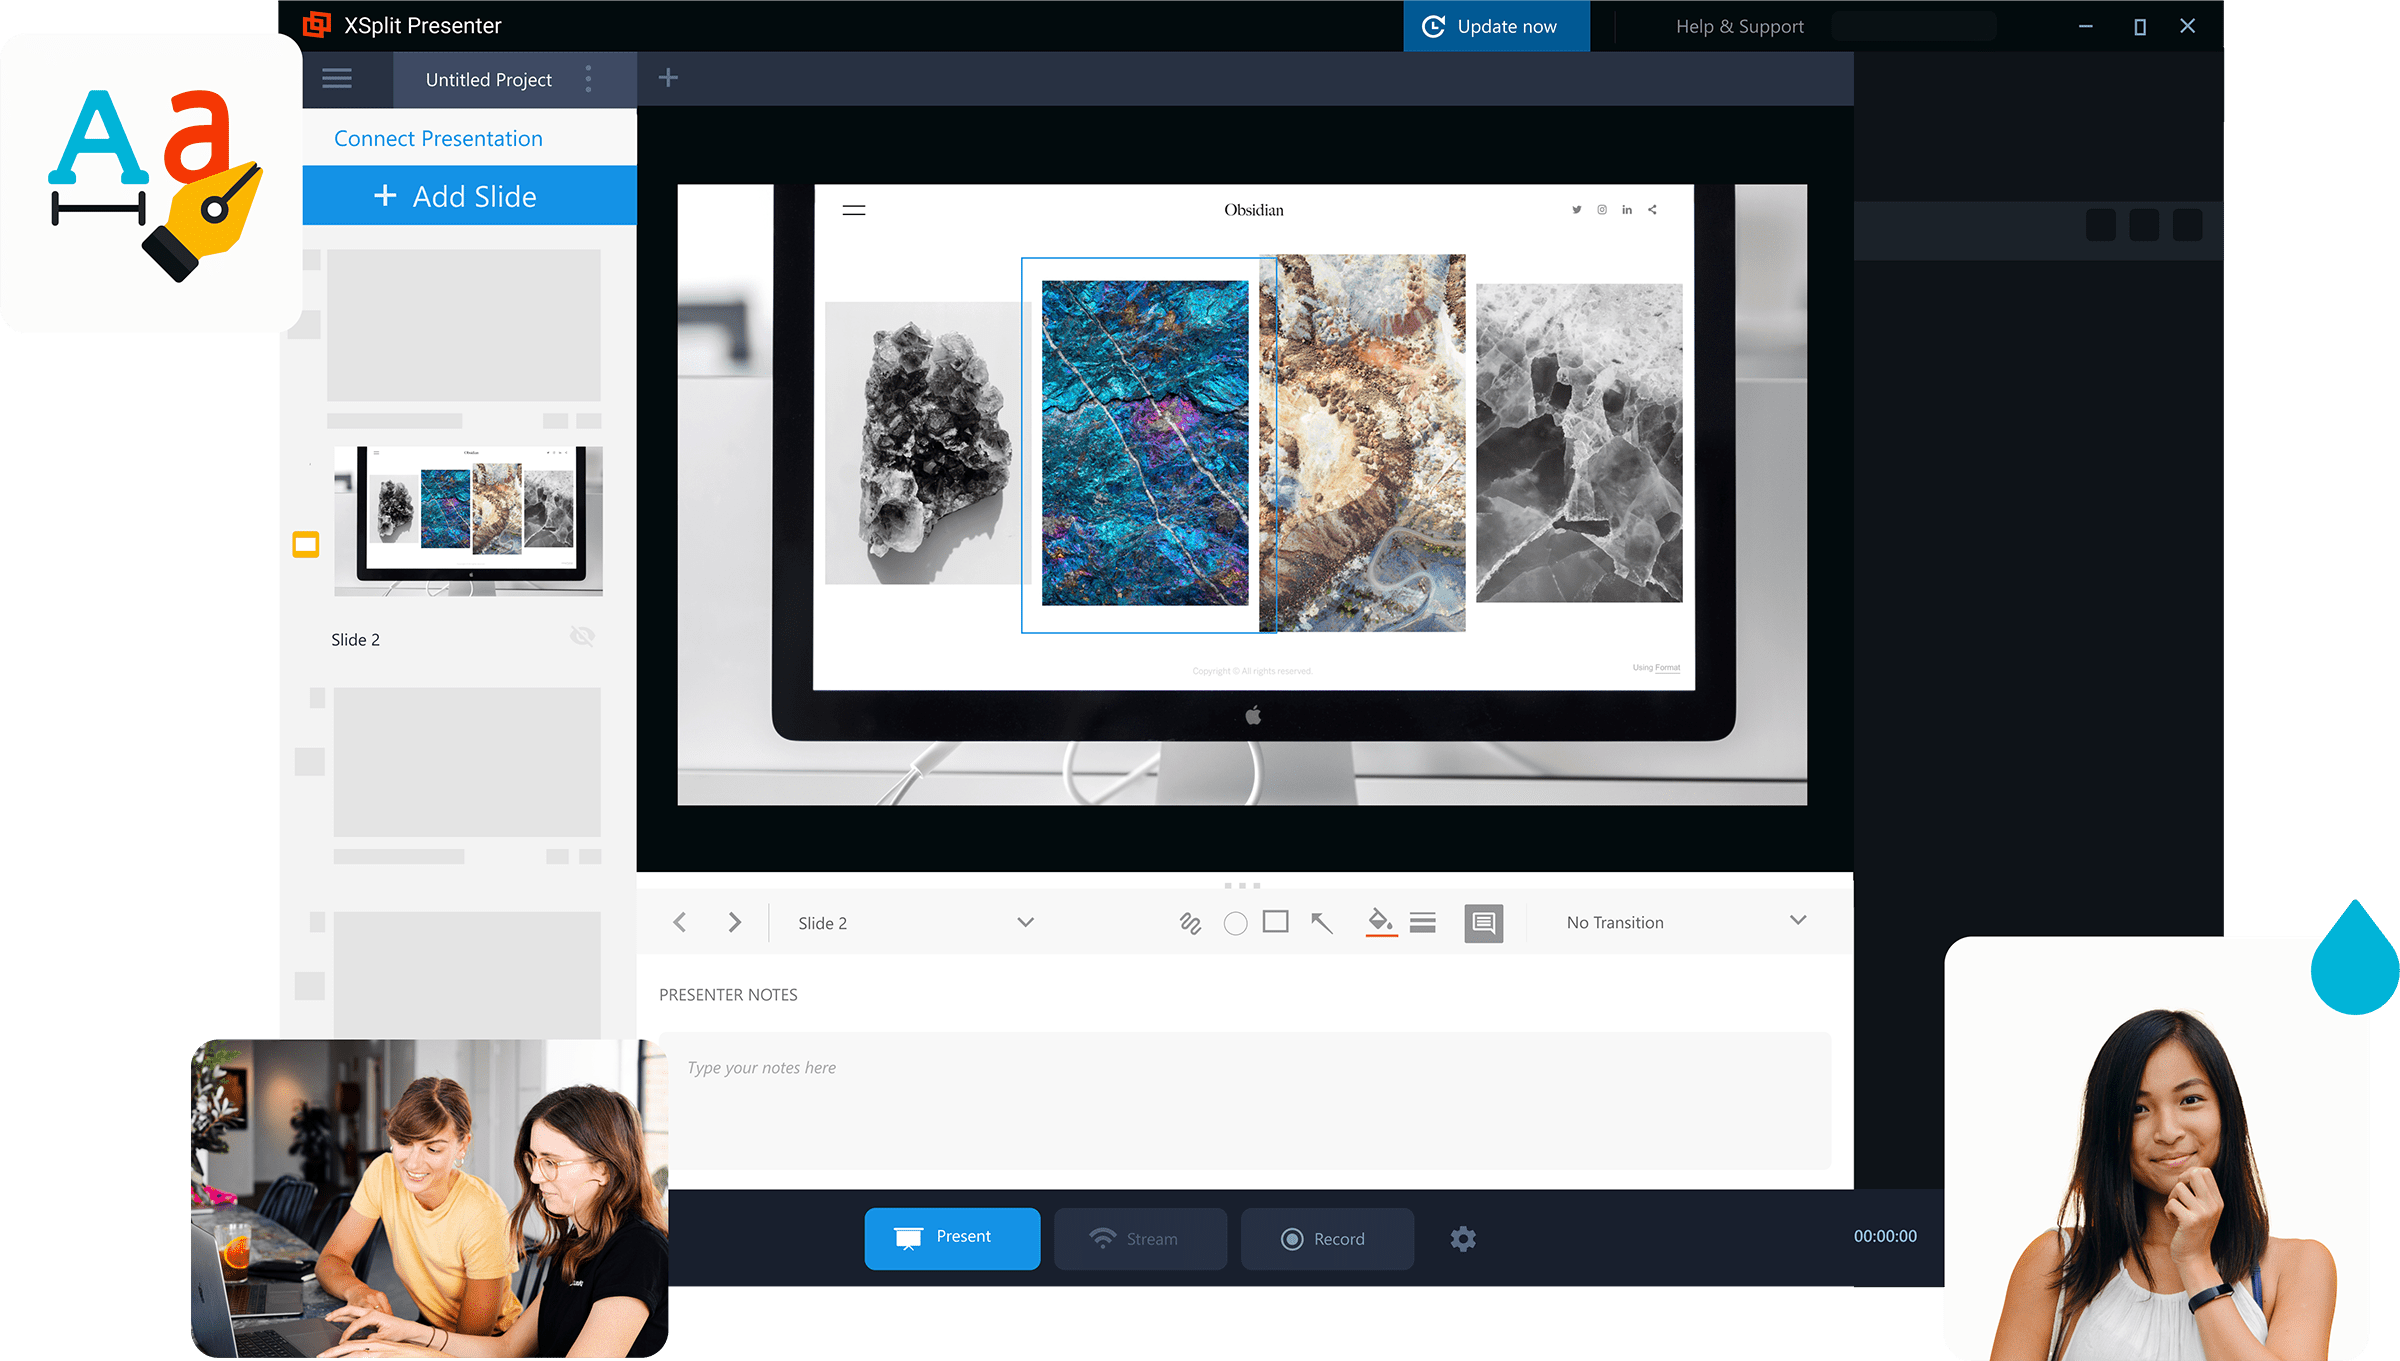
Presenter BETA
Create Beautiful and Professional Presentations
Capture BETA
Share What’s On Your Screen Instantly

XSplit Presenter is extremely impressive and represents a much needed step forward in presentation technology that has remained static for well over a decade
Eoghan McCabe (Founder, Intercom)

XSplit is an intuitive and quick tool for putting on a professional broadcast, every time. It’s user-friendly and integrates with multiple platforms and apps. I adore its layout and accessibility, and am a fan for life!
We use XSplit to help power some of the biggest events and gaming tours. We need a robust software that understands our needs and scale things from a casual stream to the biggest gaming production. That’s the power of XSplit and why events like Evo continue to evolve with this product.
Markman

I use XSplit broadcaster for my streams because it’s easy to use and reliable. Its seamless integration with NDI and plugins like the gamepad visualizer have been invaluable for my Youtube videos as well. And if I have any questions, I know there’s a dedicated support team that can help me.
We use XSplit to simultaneously stream our 24-hour charity fundraising event to our site, YouTube and Twitch and it handles the entire workload with no problem! The interface is simple to learn and it’s easy to keep an eye on key information like CPU/GPU loads, view numbers, up time, drop frames, and bitrates.Adding extensions is super simple and new features are constantly added for an even better experience.
Michael Lindblad (Control Ops Director, Rooster Teeth Broadcast)

I have used XSplit for many years now and this is because their service is unmatched. I have never had program issues and their simple user interface makes streaming effortless even for beginners. Their staff is on standby to help with any questions or assist with stream settings. These people work hard to ensure that you get the best performance out of their product.
Messica

I find XSplit extremely user-friendly and simple to use. The setup wizard makes determining stream settings a breeze and I can easily incorporate stream add-ons like notifications, custom layouts etc. through the interface. I have used XSplit, OBS and SLOBS over the years, but for my everyday streaming purposes, I fire up XSplit.
Trisha Hershberger

For the all the years I have been streaming on PC, XSplit Broadcaster has been my go-to software to get the stream going quickly, smoothly and easily. It’s one of many reasons that XSplit will always be my software of choice to go live.
What you can do with XSplit
Pitching and Presentations
Give professional quality and highly polished presentations.
Online Classes & Webinars
Easily create professional webinars and online classes.
Stream interactive demonstrations of your product or app.
Interviews and Workshops
Host or produce interviews and Q&A sessions remotely with guests.
Virtual Events & Conferences
Transition your physical event presence to a digital one and increase your viewership.
Video Interviews and Calls
Take your job interviews or professional calls to the next level.
Источник
XSplit Broadcaster for Mac
XSplit Broadcaster by SplitMediaLabs is a powerful audio/video mixing application that enables you to create professional quality live broadcasts and video recordings. XSplit Broadcaster for Mac is not yet available, but you can try some of the similar apps listed here. The apps on the list work perfectly well on Mac, so if you were looking for XSplit Broadcaster for Mac, you can try these ones instead.
XSplit Broadcaster for Mac OS X: Best alternatives Our editors hand-picked the best Mac alternatives to XSplit Broadcaster, go ahead and check them out, rate them, or add new ones you find fitting.
OBS Free
OBS (Open Broadcaster Software) is intended for video recording and broadcasting. It supports capturing from the screen as well as from any camera connected to your computer.
Wirecast Free
Wirecast lets you capture an unlimited number of input devices from live camera feeds, iOS cameras (coming soon), computer desktop, Web feeds, and more.
CamTwist Free
CamTwist is a software package that lets you add special effects to your video chats. It’s also possible to stream your desktop and still images. With CamTwist, you can also use multiple video chat programs at the same time.
Ustream Producer Free
Ustream Producer is a desktop application allowing broadcasters to stream in high quality, just like they would from Ustream’s website. Additional features include the ability to: — Easily manage video and audio sources
BoinxTV Free
Turn your Mac into a TV studio! BoinxTV is a pioneering live production software for creating Live to Disk, Live to Internet and Live to Stage video.
Last comment
dont fall for this. its fake
SAM Broadcaster by Spacial Audio Solutions, LLC is a piece of software that can help you easily.
WebcamMax by CoolwareMax is a piece of software that allows users to add videos.
Yawcam (short for Yet Another WebCAM) by Yawcam.com is a free application that was created to help.
ZaraRadio by ZaraSoft is a piece of software that gives users the possibility to broadcast.
Simple.TV by Really Simple Software is a free to use app that was designed to allow users to watch.
Know of any alternatives we haven’t found yet?
Feel free to add any alternative to XSplit Broadcaster for Mac that you know of.
Источник
XSplit Broadcaster ⇒ The ultimate guide 2021!
1 Introduction
If you want to start streaming and you still don’t know which program you should use, one of the easiest softwares to install and start is XSplit Broadcaster. This software stands out for its robustness, ease of use and will allows you to stream, within minutes, on nearly every streaming platform. XSplit Broadcaster is only compatible with Windows and it is a great option for live streaming on Twitch, Facebook and YouTube.
2 How to install XSplit Broadcaster
To use XSplit Broadcaster the first thing you have to do is download the software from the official website: https://www.xsplit.com
Once inside, click on the blue «Download Broadcaster» button and, within a few seconds, the download will automatically start. If the download doesn’t start, you can download it directly from here.
Once in your computer, double click on the .exe file, that you’ve just downloaded, and start the installation.
As soon as you open it, it will start downloading. You only have to wait until it takes you to the classic installation process.
Once you get to this screen, you will start the installation by clicking «Next».
Then you have to choose the folder where the program should be installed. And then click «Next».
After choosing the installation folder, you can start the installation by clicking on the «Install» button.
When the installation is finished, you can close the installation and start the program by clicking on «Finish».
What operating systems are compatible with XSplit Broadcaster?
You can install XSplit Broadcaster on your Windows PC. It is compatible from Windows 7 x64 or higher.
MAC OS or Linux are unfortunately not compatible with the streaming software.
The very first time when you open the software, XSplit Broadcaster invites you to choose an account which you want to connect to it. You can choose to use and create an XSplit account, your Twitch account, Facebook or YouTube, among others.
For this guide, we are going to choose Twitch, since it is the streaming platform par excellence and also allows us to use animated overlays, panels and banners.
Once you have clicked on the service you like, in our case Twitch, a new window will open in the browser. Here you will have to «Authorize» XSplit Broadcaster to get information about our channel and interact with it. Just click on the purple «Authorize» button at the bottom of the page.
After giving it access to your Twitch data, XSplit will send you to another window to accept an agreement by clicking the blue «Continue» button.
Optional: At the bottom of this screen, it will allow you to link your Twitch account, with your XSplit account, by clicking the blue «Here» button.
When you accept the message, XSplit Broadcaster will launch and you will see a window where you can choose whether you want to upgrade your account for $4.99 per month or continue with the free account.
The Premium version of XSplit allows you, among other things, to use the Virtual Camera, access to 24/7 Premium support, unlimited scenes and preview your changes before they go live.
After choosing the mode you want to use, you will go directly to the Control Panel, or main screen of XSplit Broadcaster. Next, we will explain in detail the most interesting menus and options to start your stream.
3 XSplit Broadcaster – Overview
The first time you launch XSplit, the application will ask you for what you are going to use it. Depending on your choice you will get helpful tips to setup XSplit for your needs. We are going to choose PC Gaming, as this will help us to explain some of the parts of the interface a little better.
On the left, you can also see a link to the user manual and you are invited to watch several tutorials on YouTube.
When you choose any of the options, XSplit will automatically create several test scenes and add some elements such as a webcam, a camera overlay, texts and a game capture source.
At the top you can find a few menus which we will explain in the follow a little deeper:
File – In this section you can create new scenes, load old ones, duplicate them, access your recordings and close the program.
Broadcast – Here you can choose where you want to stream, in our case Twitch. When you click on Twitch, you will have to enter your credentials and give it access to your account.
Record – In this menu you will be able to configure all the details of the recording, from which scene you want to record to which video and audio encoder you want to use. You will also able to determine the quality together with its quality and the output format.
Playout – With this option you can stream your video over the network to another device compatible with NDI technology.
Extensions – Extensions are a key part of XSplit. From here you can configure the audio mixer, separate the audio for each scene, configure presentations, scene changes and create transitions. In addition, you can add and remove other installed extensions.
Tools – In the tools menu you will find the program’s options, along with the options for sharing the stream, the plugin store, audio effects and permissions.
Help – Do you need any help? This is your place. You will find video tutorials, user manual, updates, patch notes; you can also change the software language from here, and even chat with the support.
Upgrade – This blue button allows you to upgrade your free account to premium for a monthly payment of $4.99.
Stream y Record — In addition, at the top you will also find the two most important buttons of the program: Stream and Record, and even one for capturing.
On the other hand, in the lower part of the application, you find the scene panels, the controls to activate and deactivate the microphone and speakers, the transitions configurator, and everything you need, to add sources to your scenes.
4 Basic streaming configuration for XSplit Broadcaster
Next, we will teach you how to configure XSplit Broadcaster to start streaming as soon as possible, with no extras, simply open it, configure the essentials and start streaming.
4.1 Configure the resolution and add sources
First of all, you are going to create a new scene. To do this, go to «File» at the top left, and click on «New presentation».
Next, you are gonna choose the resolution and the FPS at which you are going to stream. Go to the top right, and click on the small white arrow.
Now, you have to create a new source to capture your screen. Go to the bottom left, «Add Source» button and choose what you want to share.
If it is a game, start the game, Add Source -> Game Capture. In our example, we have opened the game «Path of Exile» and as you can see, it already appears in the list. This will create a window where you can see the game in your XSplit Broadcaster.
Afterwards, the window of your game will appear in small size and you will be able, from a corner, to adjust it so that it occupies the whole screen.
If you want to share your screen, you have to click on Add Source -> Screen Capture — and choose which monitor you want to capture. If you don’t want to choose the whole monitor, and you only want a specific window, Add Source -> Window Capture — and choose the window you want from the list.
For this example, we are choosing to share our Edge browser window, something very useful if you want that your viewers watch a YouTube video with you.
As is the case with streaming a game, you can enlarge the window to fill the entire surface so that your viewers can see everything clearly.
Now that you know how to display your game or screen, how about if we have a webcam and we want to be displayed? Simply add a new source, Add Source -> Devices -> Video — and select your webcam. Very easy! In our case, I have chosen the Logitech HD Pro Webcam C920.
Once selected, you can place your webcam wherever you want. But in the list below, it is very important that your webcam is above the screen or the game you are sharing.
4.2 Connect your Twitch account to XSplit Broadcaster and start your stream
Once you have on screen what you want to broadcast, it’s time to stream it to your Twitch channel. How can you do it? It is very simple!
The first thing is to make sure that your sources are ready and you are ready to start your live stream. Once this verification is made, you must press the blue button, called «Stream», which you can locate at the top in the middle.
When you click on it for the very first time, a window will appear asking you in which platform you want to start the stream. In our case, we select Twitch.
Next, you have to authorize XSplit Broadcaster to use your Twitch account. Click on «Authorize XSplit to use Twitch» and choose your account.
Once picked, simply click «Next» so that the system chooses the best Twitch server, in our case Spain, Madrid, and click «Finish».
Finally, a screen appears for setting the video codec, the bitrate, and the audio encoding. To start streaming, click OK and you will be asked for your Stream Key.
To obtain your Stream Key, you have to access www.twitch.tv and click on your profile picture. Choose «Settings», «Channel and videos» tab, and right at the top you will find your Stream Key. You must copy and paste it into XSplit Broadcaster, to the right of where your username appears.
Once it is ready, you only have to click the blue «Stream» button again and, if everything is OK, it will change its color to red and let you know that you are already streaming!
5 Adding & adjusting overlays, alerts and transitions
Now that you know how to stream, it’s time to start streaming like a pro. Some basic and common elements used by all professional streamers are overlays, alerts and transitions. Many of them do not have time or desire to learn how to design these materials or images, and therefore, they rely on services like OWN3D. In OWN3D we have a wide variety of Overlays, Alerts and Transitions ready to be introduced in your stream.
5.1 Add and customize your overlay
If you want to add a more professional look to your stream, as we have already mentioned, the best thing to do is to add an overlay. In XSplit you can add either a static overlay or an animated overlay.
The first thing to do is to unzip the package, if you have purchased one of our overlays, or locate the folder where the image of your overlay is.
Then, go to XSplit Broadcaster and click on Add Source -> Media File.
As soon as you click on it, a window pops up and you can select the desired image or overlay. If the overlay is static, your file will have a .jpg, .psd or .png extension. If it is an animated overlay from our store, the format will be .webm.
Once selected, click «Open» and the overlay will be added to XSplit, where you can adjust its size and place it wherever you want.
If you have added an animated overlay, it is important to right-click on the overlay, and set a couple of options. The first one is to choose «Play -> Forever» and the second one, «When Finished -> Rewind». This will make the animated effects of your overlay keep playing every few seconds.
In a similar way, you can also add a webcam overlay. You will simply have to repeat the previous operation, but selecting the camera overlay. If you did it right, the result will be something like this:
Note: In XSplit Broadcaster you can have up to 4 scenes with the free account. Think about having one scene for the beginning of the stream, one for Just Chatting, one for Gaming and one for ending, each with a different overlay!
5.2 Adding & customizing stinger transitions
When you have two or more scenes, you want to spice things up by switching from one to the other. That’s why transitions were invented.
In order to add your stinger transition, you must go to the bottom right, where it says «Transition» and click on the list of transitions. Here you will find several predefined transitions. To add our stinger Transition, go to «Stinger Transition -> Add Transition. «.
In the following dialog box, click on the three ellipses «. » and browse for your transition file. It can be a .png, .webm, .avi or .mov, almost any type of video file will work.
Then, click on «Accept» and it will appear in the «Stinger Transitions» list, where you can select it and it will appear every time you switch to a different scene.
5.3 How to add alerts to XSplit Broadcast
All the big Twitch channels use alerts to show their followers donations, latest subscribers or followers, or to signal incoming raids and hosts. To add alerts to XSplit Broadcast you will need to use a third-party site such as streamlabs.com. Streamlabs is our preferred site for setting up alerts and you can access it using your Twitch account.
5.3.1 How to configure Streamlabs alerts
Once inside, and logged in to your Twitch account, you have to go to the Streamlabs control panel, click on Widgets->Alertbox. There you will find all the options to configure your alerts.
5.3.2 Streamlabs — Widget URL
In order to add an alert to XSplit, we need the URL of the Streamlabs Widget. In Widgets -> Alertbox you will find the URL that you should copy and then paste into XSplit Broadcast. It is important not to share this address with anyone.
5.3.3 General Settings
Under the General Settings you can modify some of the default values, such as the image position, the alert text or the font color, and even set delays.
5.3.4 Followers, donations, subscribers
The remaining tabs are reserved for more detailed options for each of the alerts. You can enable or disable each alert individually, override the default options and add a custom message to each alert. You will be able to do it very easily, like this:
•
•
Here you can also add an image, sound or animation to the alert. If you have purchased one of our complete overlay packages or one of our animated alerts from OWN3D.TV, in each section you will be able to enter the Webm file indicated. You can configure an alert for subscribers, another for donations, raids, host, followers. Our packages include an alert for each situation.
5.3.5 Add Streamlabs alerts to XSplit Broadcast
Once all the alerts are configured in Streamlabs, it is very easy to add them into XSplit. To achieve this, copy the URL from Streamlabs widget and paste it in the XSplit source, in Add Source -> Webpage. as shown in the image below:
And that’s it! Now you only have to place your alerts above all the sources of your scene and place them in the place of the screen that you want. To do this, you select them in the source list and, using the arrows at the bottom right, or dragging, to put them in the first place.
6 Xsplit vs OBS
OBS and XSplit are very similar. Both have free and paid accounts, similar performance, since both programs can use Nvidia’s NVENC encoder, dozens of plugins to improve your stream and, in the case of XSplit, a plugin that will allow us to import our scenes already created in OBS.
For a new streamer, XSplit is probably an easier solution to use. Its interface, even being very similar to the one you found in OBS, is more modern and easier to use.
In XSplit, you should highlight how clear its settings are. From them, you can perform a lot of actions, such as configuring hotkeys, adjusting your audio or auto-scheduling messages on social networks every time you start a stream. The latter is a very important part for new streamers and XSplit manages it perfectly. In addition, XSplit has its own software to edit clips.
Of course, in both programs we will have to configure the alerts using third party sites. Both XSplit and OBS Studio are compatible with Streamlabs and streamelemnts. However, adding our new animated alerts will be an easy task.
One of the battles that XSplit has lost versus OBS Studio, is in the compatibility with operating systems. If you use MAC OS or Linux, you will not be able to use XSplit Broadcaster and you will have to use OBS Studio or another broadcasting software.
In addition, we must point out that the free XSplit account does not allow us to preview the changes in real time, create several scenes or add a small delays to avoid Stream Sniping, something that you can do with OBS Studio.
7 Conclusion
XSplit Broadcast is a very powerful yet robust tool for streaming. It has many different options and is compatible for streaming on Twitch, Facebook or YouTube. In addition, XSplit allows you both, stream and record your games and then edit and upload clips to YouTube or social networks.
Again, we emphasize its ease of use, its multitude of plugins and how little it fails. It is a very robust program that hardly gives errors and allows you to perform a lot of options.
Of course, there is still no version for those users who use MAC OS and Linux. And users of the free account may miss some features that Premium account users have, such as creating multiple scenes, adding delay to the live or previewing changes in real time. But if you don’t need any of the above features, XSplit Broadcast is a program to consider.
Источник


